Surfriding Krash Predator Build

Sanoman

thecolorpurple
Location
NE Tenn
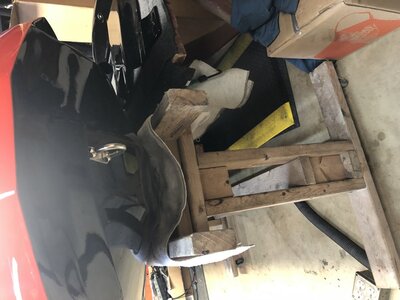
Bought this 2018 Krash Predator close out a few months back.l’m not much on the graphics and turf,so l got a stripped down one.lt did include padding on the tray bottom.l also purchased a pole kit from Krash along with the hull.Looks sturdy enough for me.l’ll report back later in the year,if there are any issues with it.
Last year l had a down payment on a T1 (thanks@TOBY),but decided that l just didn’t want to another full build this winter.After so many,l’m just burned out on builds! Spent more time building than riding.I had looked at some used hulls and decided on this one after having bought a foot rocket back a few years ago and also riding @ScottS predator.

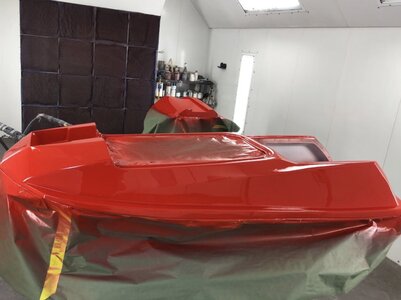
I had it at one body shop for 2 months collecting dust (friends and family come last),and decided to take it to another and got it back in one week.l let it sit for a few days,because the paint was still green.Paint wise,it got 3 coats sealer, 3 coats base,and 3 coats clear.Flex additive mixed in for insurance.
Yes,deja vu,all over again! No not purple,l’m on orange krush (top) and black bottom for a couple hulls now.2016 Challenger “Go Mango” orange to be exact.Pricy just for a pint! But the paint came out nice.

The build: I got started on it Friday and worked the weekend doing some changes.
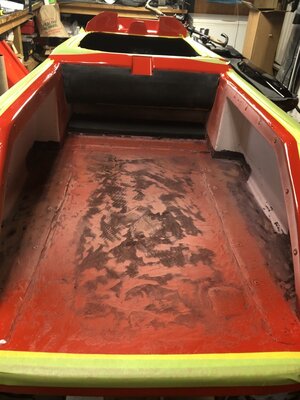
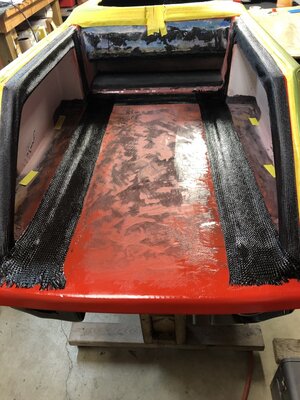
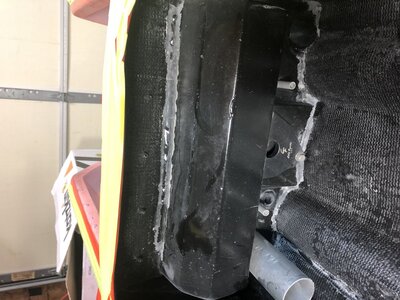
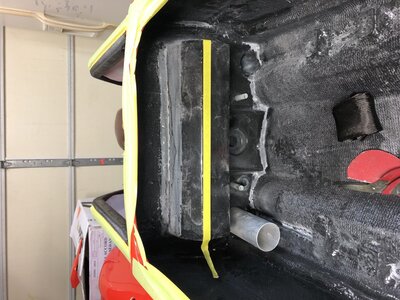
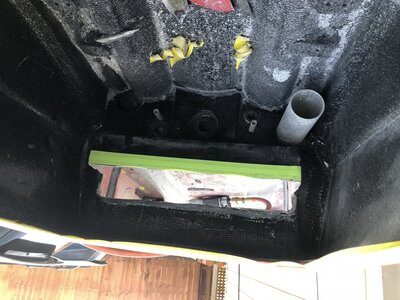
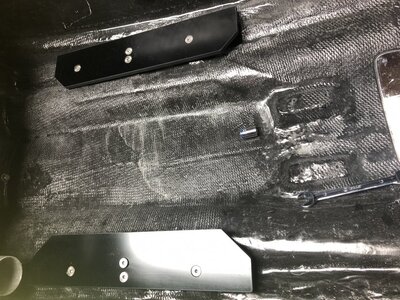
I decided to take the pad off the tray bottom cause it was a little hard. Guess I’m used to HT padding.This turned out to be a good thing.l discovered that all 3 footholds were just bonded with rivets and some sort of 5200 type sealant.So l sanded and cleaned all the areas where the edges of the holds made contact with the tray.Laid some carbon fiber 2” and 3” tape over all the joints.The pics will reflect what l did.l also laid some 2” carbon over the top of the midshaft per another owner telling me he had to repair a leak there.

Next up l had to figure out where on the front foothold l would attach my ebox. l don’t know why Krash makes such a tall front foothold.Must have some big feet in the land down under! My footy had basically the same front hold as the Predator.So decided to take about 2” off the top of it.Worked out great.

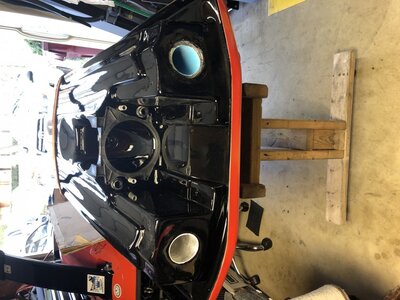
Today when l got home,l flipped her over and did some preliminary alignment on the pump.Not gonna take a lot to line it up.

*Note! Why the FOCK can’t someone figure out why the pics are sideways and fix the dam problem! Holy crap55FD6D5B-74D7-4C80-BC21-4426C54839D1.jpegF0B4CD36-73C2-4539-A91C-64D6AA57F97C.jpeg2C192AD4-D0BF-41AC-AF0A-7FF96985D419.jpegFC61A54E-852A-4E7F-9E0E-CDAEA3505654.jpeg9E26607B-AE87-41FE-880A-E8FA95039972.jpeg6223E011-DDB7-4740-BC3F-6250B3CBC770.jpegFE899F09-13A1-4838-95AF-E3E90700C144.jpegBA79F16C-8EE2-4B5F-A55C-053484F24266.jpeg8157910B-0486-4B79-9EB3-00D4327D26C3.jpeg
 

Sanoman

thecolorpurple
Location
NE Tenn
Nice!
Why did you cut out the front foothold?
The front foothold’s height is way too tall.I wear a size 10 shoe and don’t need much room.And l also wanted to install my ebox on the inside front of the tray (where they normally are put) above the FR hold.It will fit now
 
Beautiful build. I'm interested in what type of paint, like brand and "model" (line? I'm not sure what the right word is for paint)


Also did you lay the carbon tape reinforcing the footholds right over the paint?
 

Sanoman

thecolorpurple
Location
NE Tenn
Beautiful build. I'm interested in what type of paint, like brand and "model" (line? I'm not sure what the right word is for paint)


Also did you lay the carbon tape reinforcing the footholds right over the paint?
PPG Automotive paint and no,l sanded with 80 grit over all the areas that received the carbon tape.Only way to do it
 
I like the front hold mod! I considered a similar mod on mine prior to mounting the ebox but couldn't bring myself to hack up a new hull (when it was new). Excited to see how this turns out with your touch!
 

Sanoman

thecolorpurple
Location
NE Tenn
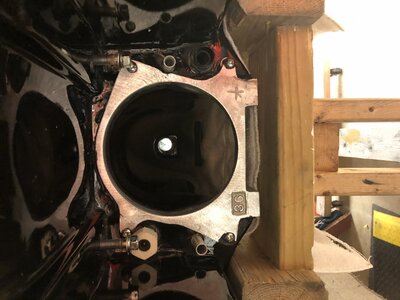
Some progress yesterday.Not had a lot of time this week to work on the hull.Also,l don’t get in much of a hurry for lining up a pump shoe.I had it close and ready to install Friday,but Saturday morning l took it apart and started over.Just felt like l could do better.Well it worked out.Moved the shoe about an 1/8” up (the ski is upside down so..) and that did it.
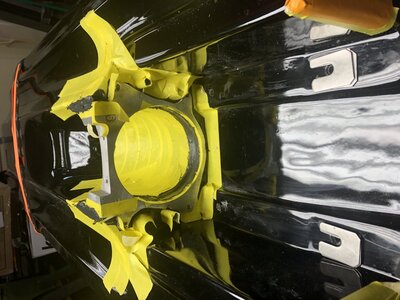
Massive tape job,cause l hate having to clean up.Then start applying the rtv silicone to the hull.At this point,some are wondering why not 5200.Mostly because removing a shoe with 5200,is a battle.Silicone does great. Anyone else feel this way?499B6FCE-F010-4CE7-B289-3B362A48FA3F.jpegBA60C258-FDD0-4C19-89C3-17471A034B30.jpeg
 

Sanoman

thecolorpurple
Location
NE Tenn
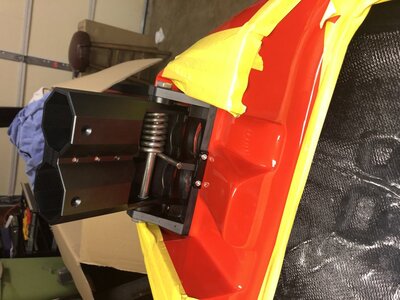
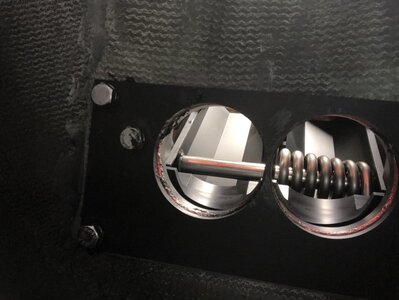
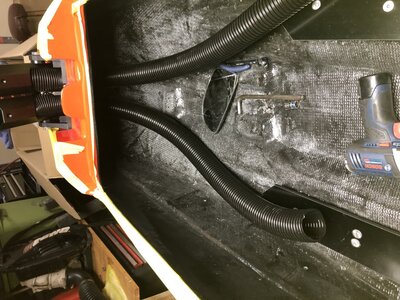
Had a productive day today.Got the front tow ring installed,the pole bracket,and crammed the 2.5” vac hoses thru the hull and into the bracket.Fun getting it around the pole spring.The hoses have a good tight seal
.l’m happy they included a plate to go on the inside of the hull to shore up the handle pole.There was no room side to side in the pole bucket for the pole to move around.So it was good that it was drilled correctly from Krash.Everything bolted down gets a dab of silicone.Also got the scupper installed.It will get a @PWCDOCTOR.COM versaplug.
Cleaned all the holes up in the engine bay with a tap.Then installed the bed plates in order to align the engine and drill and tap the holes for the motor mounts.l still need to take everything out of the SF.
6C55EDBD-BC3C-46A1-8826-B165B41F8197.jpegAB2DF786-DC5C-4822-AE37-DCE19133B49E.jpegABB04370-2BE5-46DA-8535-F9F348B6461C.jpeg8822EF1F-8F65-4091-82A9-BF2A91C8C0ED.jpeg36ACEFDF-1879-4B44-AB3D-F438B26B41DB.jpeg37F06075-B019-4B94-AC3F-C56E72F381D2.jpeg7FB0E22F-99B6-4A02-9C20-DE140933E1AC.jpeg.l’AB2DF786-DC5C-4822-AE37-DCE19133B49E.jpeg
 

Sanoman

thecolorpurple
Location
NE Tenn
Got a question.
The pic above this post 2nd up from the bottom.The one with the long hoses (they will get cut way shorter).How long can those hoses actually be? Has anyone ever tried running them long (well,maybe not that long:rolleyes:) to see what would happen? BK and l were talking about this earlier and he felt like it would restrict the air flow.l have to agree

Somebody else chime in!
 

Big Kahuna

Administrator
Location
Tuscaloosa, AL
Got a question.
The pic above this post 2nd up from the bottom.The one with the long hoses (they will get cut way shorter).How long can those hoses actually be? Has anyone ever tried running them long (well,maybe not that long:rolleyes:) to see what would happen? BK and l were talking about this earlier and he felt like it would restrict the air flow.l have to agree

Somebody else chime in!
Imagine trying to breathe thru a garden hose then taking a 12" section and breathing thru it.
 
Location
Stockton
Got a question.
The pic above this post 2nd up from the bottom.The one with the long hoses (they will get cut way shorter).How long can those hoses actually be? Has anyone ever tried running them long (well,maybe not that long:rolleyes:) to see what would happen? BK and l were talking about this earlier and he felt like it would restrict the air flow.l have to agree

Somebody else chime in!

Looks good man. But I’d have to agree as well, like trying to breath thru a Long hose.. really no advantage I can think of and it would cramp your cable lay out even more than normal. Mine lay along bottom but only a normal amount..

Might Water test your poll bracket to tube seal with a cup of water.. mine leak a lot.. might be a good time to seal them from below at this stage
 
Build looks great. Just running the hose to the bottom of the bilge with a few extra inches to anchor it down seems like plenty. What pump shoe is that? Mine has that same star and just curious.
 

Sanoman

thecolorpurple
Location
NE Tenn
Build looks great. Just running the hose to the bottom of the bilge with a few extra inches to anchor it down seems like plenty. What pump shoe is that? Mine has that same star and just curious.
Jet dynamics.Seriously an expensive hunk of junk.l spent 2 hours just getting it ground down enough to fit.Super thin on the ring itself.Like it had been opened up way too much. And it’s just a 144 shoe.
I had also bought a OEM shoe that slid right in to the channel.
 
Got a question.
The pic above this post 2nd up from the bottom.The one with the long hoses (they will get cut way shorter).How long can those hoses actually be? Has anyone ever tried running them long (well,maybe not that long:rolleyes:) to see what would happen? BK and l were talking about this earlier and he felt like it would restrict the air flow.l have to agree

Somebody else chime in!
The longer hoses would definitely have more friction loss. My 2 cents on the hoses is get em as close to the bottom so the water has “higher” to go when the boat is upside down. If you’re thinking of leaving them long as chafe guards just use individual small dia split loom on each wire/cable shoved into the 2.5’s a few inches.
 
Top Bottom