Custom/Hybrid Thrust Ez Drain Install-2015 Rickter XFS

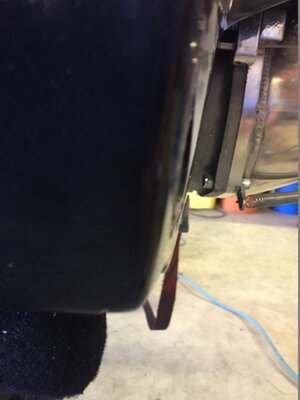
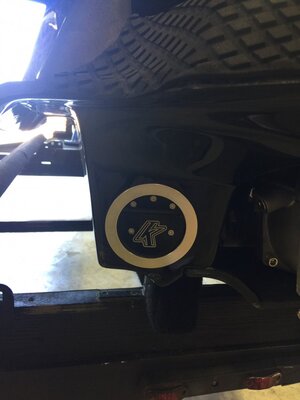
2015 xfs glass Rickter scupper started either sticking shut or would stay open and about sank a few times on the lake. decided to purchase Thrust Innovations EZ drain 2-3/4".
274055-d6f8d09183d76a9ecd91bf3000404b82.jpg


first step is to remove the old scupper
274054-e7a0d2c58f6bd0debc8fe636999a1d14.jpg


remove the three allen bolts
274056-8ff38fb39b3c169c642b682b86fb95f7.jpg


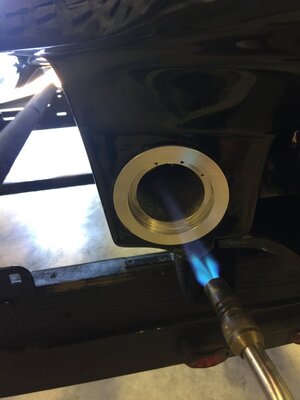
I applied some heat to the scupper ring to loosen the factory glue.
274057-3a74fb1486cdc5b174816abd69104a12.jpg


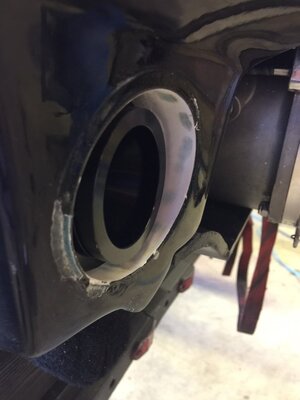
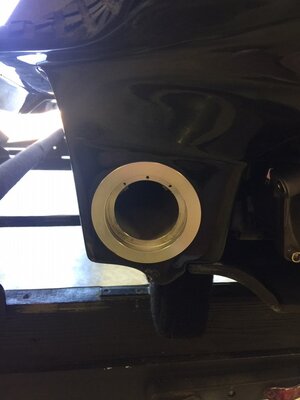
work/pry the scupper ring off using a 1" putty knife and a large screwdriver
274058-931763fbc59d398c35f55a620d37b12b.jpg


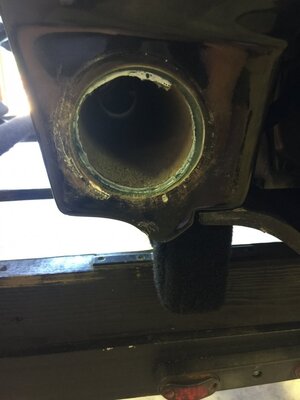
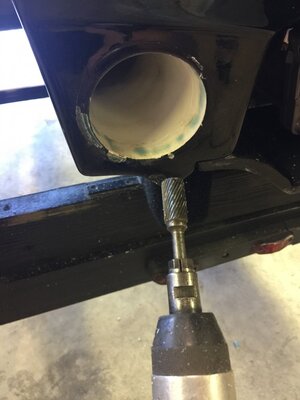
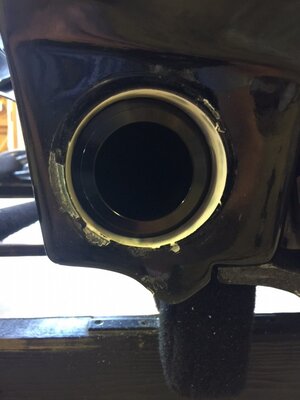
clean the glue up inside the tube and rough about 1" of the tube using 80 grit sandpaper for epoxy later on.
274059-e3640861902987b2c8bc5bd54e34b1ea.jpg


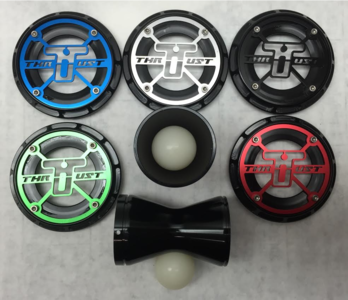
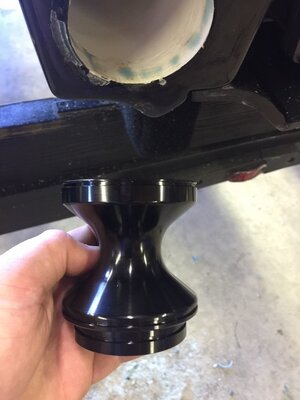
your ready to install what i call the hourglass
274060-b43c4f0a0b1608311b8302029d6b4ab1.jpg


this end goes towards the engine compartment
hg end towrads engine.jpg

using a rubber mallet, tap the hourglass into the tube, it is a press fit. Do not hit it in all the way.
hg just the tip.jpg
 

Attachments

  • scupper.jpg
    scupper.jpg
    71.9 KB · Views: 92
  • 2018_07_31_17_57_22_Greenshot.png
    2018_07_31_17_57_22_Greenshot.png
    890.5 KB · Views: 95
  • scup flap removed.JPG
    scup flap removed.JPG
    70.1 KB · Views: 97
  • scup heat.jpg
    scup heat.jpg
    72.1 KB · Views: 97
  • scup ring off.jpg
    scup ring off.jpg
    77.1 KB · Views: 97
  • scup glue removed.jpg
    scup glue removed.jpg
    81.8 KB · Views: 103
  • hourglass.jpg
    hourglass.jpg
    82.8 KB · Views: 105
  • hg installed.jpg
    hg installed.jpg
    80.3 KB · Views: 114
Last edited:
check repeatedly with the end cap and tap the hourglass in until the cap sits flush to the hull. there will be noticeable gap on the pump side.
274068-be72e3e83e193cd8b6221a1aaa4d423e.jpg
274069-6548619377d41358c6974ad56cd219f0.jpg
hg and cap flush to hull.jpg
with the end cap sitting flush to the hull you can now mix up your epoxy to permanently install the end cap. I used G-flex 2 part epoxy with a little black pigment added. after mixing the epoxy i put it into a ziplock bag and nipped the end off so i could get the epoxy into the tube easier. fill the area around the hourglass and also apply some to the end cap as it has groves for the epoxy to bite against.
gflex epoxy.jpg

apply the end cap to the hull, note- leave the 4 Allen screws in the end cap so epoxy doesn't fill the threads. I used a piece of tape to give some pressure to the end cap.
glued in and taped.jpg

after a day to cure, i filled in the remaining void with black silicone. install the ball and thrust grate and your finished.
finished scupper 2.jpgfinished scupper.jpg
 

Attachments

  • hg gap.jpg
    hg gap.jpg
    73.3 KB · Views: 121
  • hg almost flush to hull.jpg
    hg almost flush to hull.jpg
    66.8 KB · Views: 111
Location
SW FL
@stonge219 hey, I will be installing one this coming weekend. When you say it is press fit, do not hit it in all the way, how far are you actually tapping it in? the end cap does NOT snap onto the end of the hourglass, correct?
in other words the end cap wont touch the hourglass when epoxied in? thanks

Might be a lil late but the one way tube is at an awkward angle. i tapped the hourglass in to where the bottom left edge was flush with the back of the hull. the end cap does not snap into the hourglass (must be epoxied in), it does however touch one small area of the hour glass (bottom left area). easiest way is probably tapping the hourglass in a smidge at a time and checking with the end cap by holding it up to the hourglass/hull, until the end cap is flush to the hull.
274068-be72e3e83e193cd8b6221a1aaa4d423e.jpg
274069-6548619377d41358c6974ad56cd219f0.jpg
 
Location
SW FL
Might be a lil late but the one way tube is at an awkward angle. i tapped the hourglass in to where the bottom left edge was flush with the back of the hull. the end cap does not snap into the hourglass (must be epoxied in), it does however touch one small area of the hour glass (bottom left area). easiest way is probably tapping the hourglass in a smidge at a time and checking with the end cap by holding it up to the hourglass/hull, until the end cap is flush to the hull.
274068-be72e3e83e193cd8b6221a1aaa4d423e.jpg
274069-6548619377d41358c6974ad56cd219f0.jpg

LOL that's crazy, I just looked at the time you wrote back.. I was literally installing it at that time... all in all, it went well, ran into a few little issues here and there.
1-I made sure the hood was off and fully vented while i used heat bc the ski is a complete ski, and i was having bad thoughts of the open flame and fumes traveling up the tube.. sure enough, there was this little quick "puff" and then it blew the torch out itself, but that was enough heat anyway and I was able to get it out.

2- I had to grind a little more of an opening just to get the hourglass started while tapping (this was on a 2013 fs2, not sure if that had to do with anything)

3- i know it was press fit, so i thought it would be a straight shot, but even with the rubber mallet, I had to whack it pretty hard at some points, and it actually started going in on an angle, and i thought i was screwed bc i thought it was literally eating through the blue scupper tube.. i was able to straighten the angle out a little bit and get it in.

4 - once it was all the way in, I did think it was in wrong bc like you said, it didnt sit in there perfectly symetrical.. then i took another look into the tube and realized the tube angle is different than the opening at the end of the ski, so it was fine.

5- after I installed it, before I epoxied it, i dumped a full bottle of water in to see if id get a full bottle of water out, telling me if that edge did eat into the tube at all, and to make sure the hourglass was perfectly sealed. i got ALMOST the same amount of water back out, but there was a TINY TINY few slow drips that dripped from the bottom edge of the scupper and tube, indicating it wasnt a PERFECT seal, but not enough to matter. I sealed the edge up all the way around the hourglass, and then sealed the end cap to the hourglass flush against the hull. Like you said, wasnt a perfect angle, so the edge of the cap touched the bottom portion, but not the top, so i filled the void with epoxy to prevent any potential leak or the cap falling off.

Other than that, it was a SUCCESS!
 
Location
SW FL
Might be a lil late but the one way tube is at an awkward angle. i tapped the hourglass in to where the bottom left edge was flush with the back of the hull. the end cap does not snap into the hourglass (must be epoxied in), it does however touch one small area of the hour glass (bottom left area). easiest way is probably tapping the hourglass in a smidge at a time and checking with the end cap by holding it up to the hourglass/hull, until the end cap is flush to the hull.
274068-be72e3e83e193cd8b6221a1aaa4d423e.jpg
274069-6548619377d41358c6974ad56cd219f0.jpg

also, i took the ski out for the first time saturday, loved it.. I'm just hoping that i truly didnt puncture that blue tube while tapping that hourglass in.. there were only a small amount of blue skin shards inside the tube that i cleaned out.
Im just hoping theres not a puncture that is slowly filling that empty tray area with water...
Do you know approximately how thick the blue scupper tubes are on rickters? like are they at least the same thickness as standard PVC?
 
Top Bottom