Dude, Don't panic yet. It's really simple...ready? In 10 steps or less....
1- Prep the sides (if it's a Square Nose- Grind Those Freakin Ribs!...Classic words from Yamaslut). Make it real CLEAN in there. Use Epoxy if it's a SMC hull. I like Epoxy. It doesn't stink too much.
2- Fill in the bond line with a epoxy blend of 404 , microballoons, and cabosil mix (or equivalent) , apply,then Sand smooth when cured.
3- Use some 2" wide blue painters tape, and make a "pattern" of the area you want to glass (re-enforce). Just tape all over (overlapping) that spot a couple times, and using a razor knife, trim the edges and corners nice (of the tape). It will look like a big blue Patch. Peel it off carefully...in 1 big piece.
4- Take that "big azz piece" of tape and carefully sprinkle a little baby powder on the sticky side (rub it around and shake off any excess). Not too much, you just want to reduce the stickiness as not to pull the strands of fiber when you lay it down on the carbon (you could use carbon powder if you have it...that's black).
5- Carefully, lay the pattern (the big azz blue patch) on top of the fabric. Take some temporary hold fabric adhesive, and spray around (and under) the edge of the pattern (cut line). Use just a light coating of spray. Get the spray at a fabric store...Fabric stores are fun to browse.
6- With scissors, cut out the piece of carbon. On the cut line just under the edge of tape "pattern". (the fabric spray prevents fraying, and making you pull out your hair, because you just ruined $50.00 worth of carbon)...You can also get good scissors while your at the fabric store,Ask the nice old lady that works there.
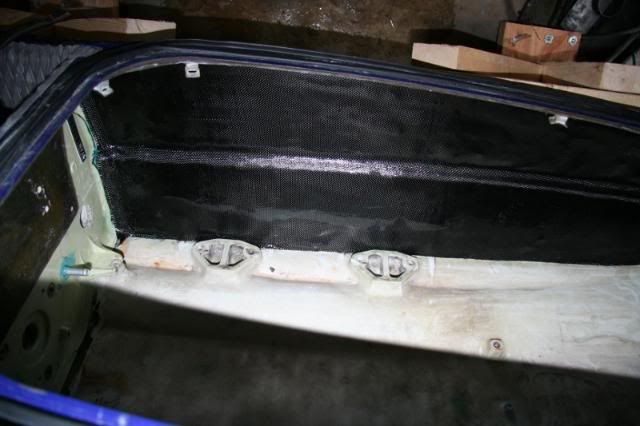
7- Position the piece of carbon over where you want it on the side of the ski. (now comes the fun part) Mix up some Epoxy resin, and brush it on, wet out the material. At this point you're done with the one side. Roll the ski over and re-peat the process.
8- If you want to get real trick, when you buy the carbon (5.7 oz 2x2 twill looks good) also buy some peel ply to lay over the wet layup. Use a squeegee and work out any bubbles and high spots. The peel ply allows you to "work" over the glass/carbon without disturbing the weave, That would look real ugly. After the resin cures, peel off the peel ply layer and brush on a nice fresh coat of resin to dress it up. (use that same pattern to cut out the peel ply too).
9- Put it back together and go riding. :headbang:
10- Post lots of cool pictures of your awesome job.