The Circus

Sanoman

thecolorpurple
Location
NE Tenn
Decided to finally post up a build l have been working for a while now.A new old stock garage find SuperFreak Circus.l've had this hull and deck for over a year now and have just really started working on it since last fall.Then l had shoulder surgery and couldn't lift a piece of carbon.Don't look for a quick build before summer hits,l can't ride probably till Sept or Oct.

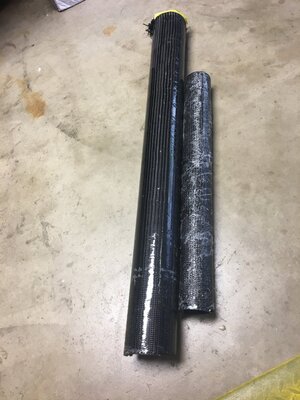
l finished building @sportfish258 Circus last year and had all the components to work on mine.l lacked a 155 mag pump which l ended up buying last year,so this ski should be strong once completed.l am making and installing Tem's signature big exhaust pipe under the tray to keep it original.

A few pics to get started.When l got it home:image.jpeg

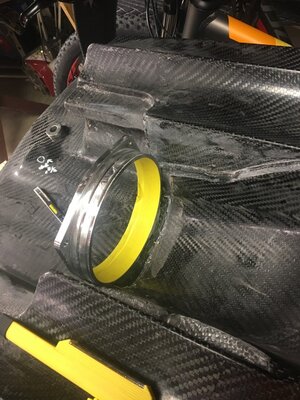
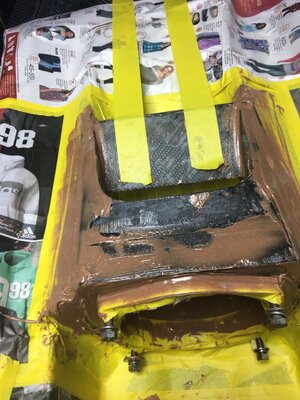
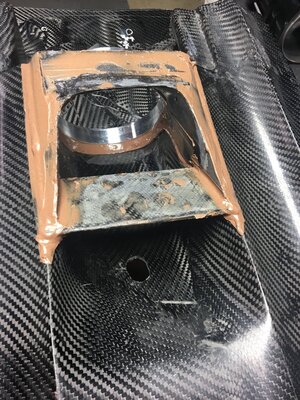
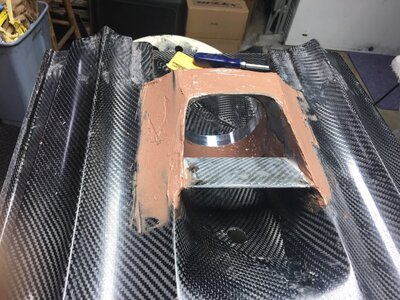
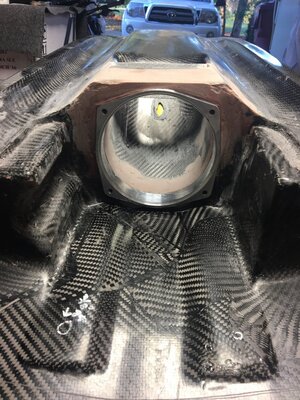
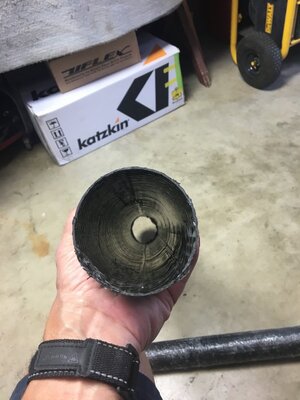
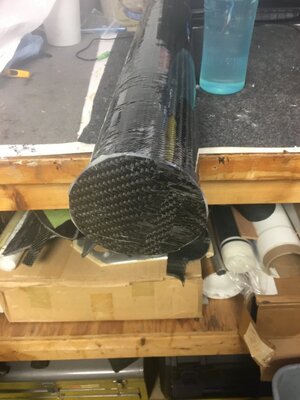
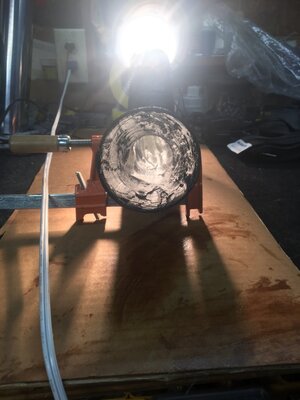
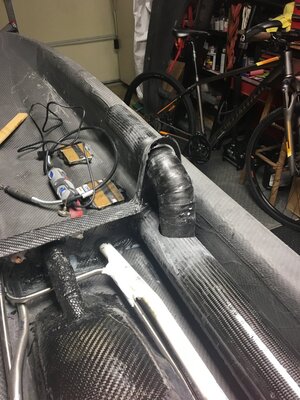
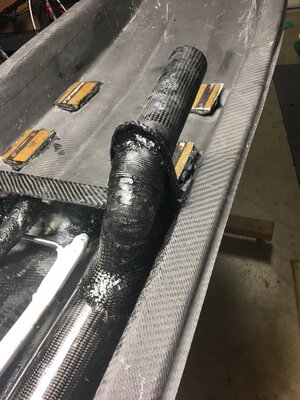
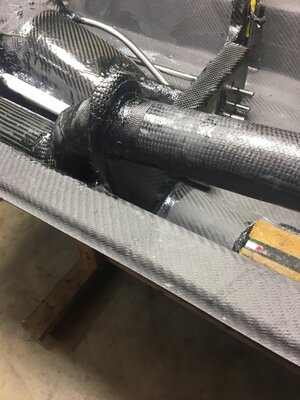
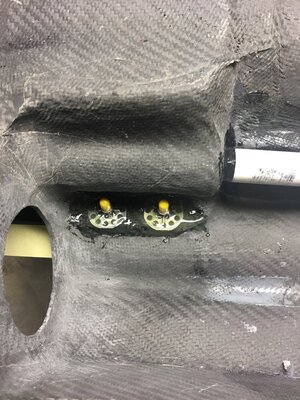
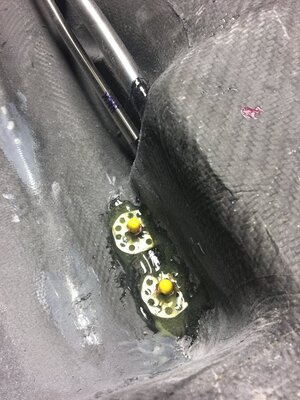
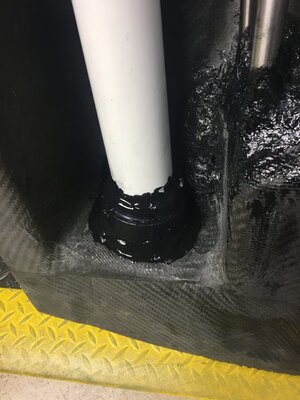
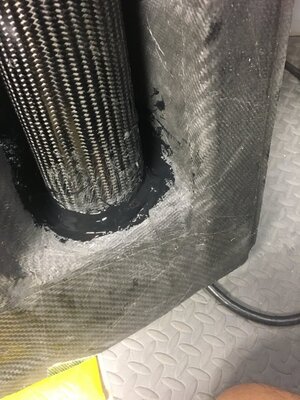
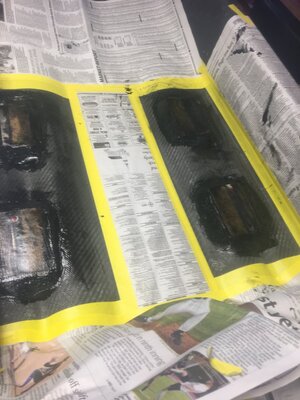
How a Circus starts,a pump ring that has to be bonded the the pump housing area.This has to be Perfect.More so on these hulls because there is no adjustments after installed..The carbon scoop you see at the top of the pic is to force water into the pump,that has to be bonded to the ring.There is also a wing that has to be made that serves as a"top loader"
image.jpeg

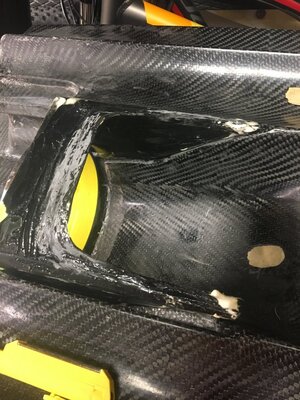
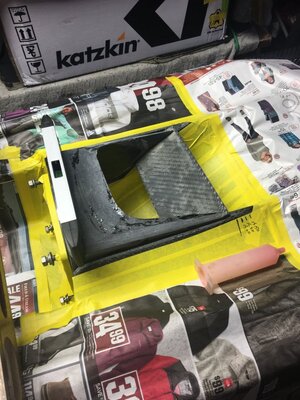
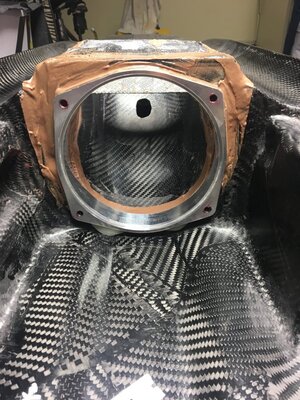
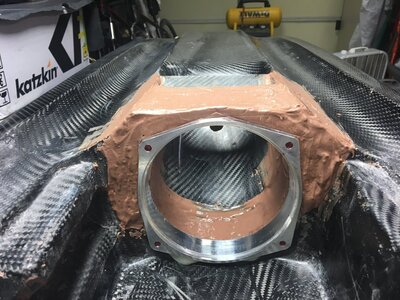
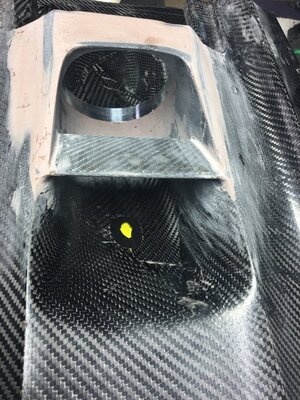
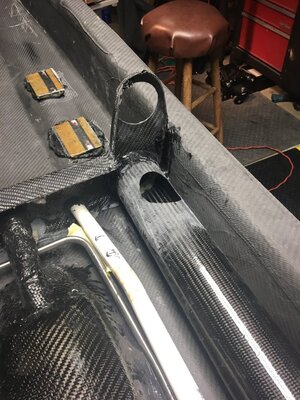
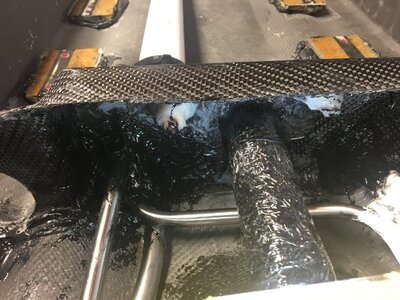
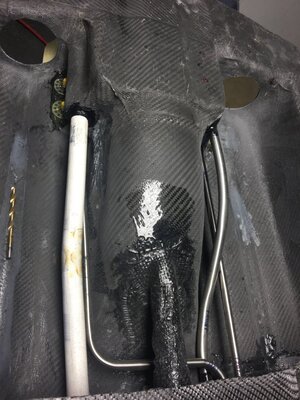
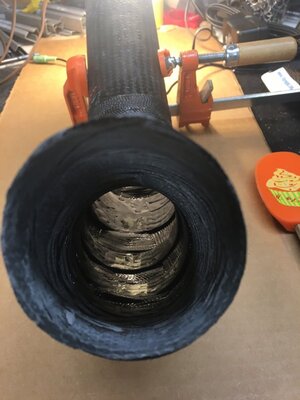
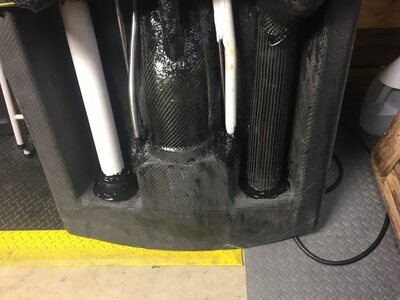
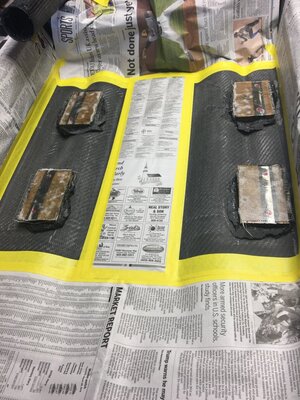
Just a mock up of things to come
image.jpeg

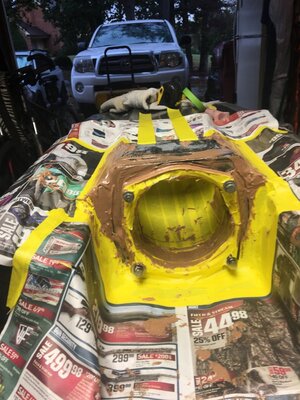
So it's a start and so far so good!
 

Sanoman

thecolorpurple
Location
NE Tenn
These pictures show what you have to put together to install the pump ring.The first pic is where l just put a couple spots of epoxy to tack in the ring after aligning it(already dry).l think Tem epoxies all the pieces in at once.Figured l would make it easier since this was my first one.Next pic is part of the shoe and scoop mocked up.The last one is the wing which l cut out of a larger curved piece,and sanded it down in the shape of an airplane wing.Leading edge tapering down thinner.Fitting to the pump tunnel.
Sometimes l don't explain things very well,so just ask if you have a question:)
 

Attachments

  • image.jpeg
    image.jpeg
    168 KB · Views: 392
  • image.jpeg
    image.jpeg
    176.7 KB · Views: 401
  • image.jpeg
    image.jpeg
    162.2 KB · Views: 387

Sanoman

thecolorpurple
Location
NE Tenn
These pics represent muddling it all in,dried and then sanded for the first coat of epoxy.l ended up coating it 3 times which l think is pretty normal.The pump tunnel took a lot of work trying to keep it even with the ring and not scratching it up in the process.
 

Attachments

  • image.jpeg
    image.jpeg
    163.8 KB · Views: 376
  • image.jpeg
    image.jpeg
    165.4 KB · Views: 365
  • image.jpeg
    image.jpeg
    243.5 KB · Views: 364
  • image.jpeg
    image.jpeg
    212.2 KB · Views: 371
  • image.jpeg
    image.jpeg
    187.6 KB · Views: 368
  • image.jpeg
    image.jpeg
    212.1 KB · Views: 362
  • image.jpeg
    image.jpeg
    201.2 KB · Views: 375
  • image.jpeg
    image.jpeg
    216.7 KB · Views: 378

Sanoman

thecolorpurple
Location
NE Tenn
As l said earlier l'm making the circus in its original form.So l made the exhaust pipes for under the tray.One is a 3"+ o/d carbon tube and the other a 2.5" carbon tube.I put a cap on one end of the big tube (overkill) so it could be bonded to the back side of the bulkhead.
 

Attachments

  • image.jpeg
    image.jpeg
    143.2 KB · Views: 376
  • image.jpeg
    image.jpeg
    102.5 KB · Views: 366
  • image.jpeg
    image.jpeg
    109.8 KB · Views: 387

Sanoman

thecolorpurple
Location
NE Tenn
Now to make these pipes work.I bonded the end with the cap to the bulkhead (duh!).This is,as are all builds takes thinking 5 steps ahead,so you don't screw yourself later.l had the pipe where l thought it would work the best,except that when l set the deck down on the hull for a fit,the pipe had only .25" clearance.So after several fittings l got it finally epoxied down.Thickner and glass strands for a good bond.The small tube took a lot more work (remember "love to hate").l had to cut slices 3/4 quarters thru in it to be able to bend it into the curve l needed to fit between the large tube and bulkhead.l forgot to get pics for that but basically l cut the slices and then wedged them with pieces of wood to get my bend.Epoxied a couple of thin layers of mat on the sides to keep the shape.Then wrapped it with carbon tape.l needed about a 30° bend to keep the flow of the exhaust correct.l ended up a couple degrees more,but it will be fine.Now all that is left (sigh!) was to bond the small tube in.That took some planning because of the flashpoint of the epoxy.Lot to do in a short period of time.
Mixed up resin,split that into two parts.Added Cabisil and glass strands to one part to fill around the two openings (bulkhead and large tube),then wrapped it with some 3" carbon 12oz. tape on both ends.The left over thickened epoxy l used to go over the 5200 l bonded all the other lines in with.Not my idea (Mcdog) but l think that is a good combination.
All l have left now under the tray is bonding in the scupper tube.Then l can move on to setting up the engine bay.
 

Attachments

  • image.jpeg
    image.jpeg
    130.7 KB · Views: 355
  • image.jpeg
    image.jpeg
    124.3 KB · Views: 359
  • image.jpeg
    image.jpeg
    188 KB · Views: 367
  • image.jpeg
    image.jpeg
    95.6 KB · Views: 355
  • image.jpeg
    image.jpeg
    185.2 KB · Views: 356
  • image.jpeg
    image.jpeg
    171.7 KB · Views: 352
  • image.jpeg
    image.jpeg
    150.2 KB · Views: 343
  • image.jpeg
    image.jpeg
    207.6 KB · Views: 346
  • image.jpeg
    image.jpeg
    172.6 KB · Views: 361

Sanoman

thecolorpurple
Location
NE Tenn
Also in the process l used gflex to bond the ride plate inserts in,then covered them in thickened epoxy with glass
 

Attachments

  • image.jpeg
    image.jpeg
    177.7 KB · Views: 359
  • image.jpeg
    image.jpeg
    170 KB · Views: 349
  • image.jpeg
    image.jpeg
    164.4 KB · Views: 343
  • image.jpeg
    image.jpeg
    160.8 KB · Views: 345

Sanoman

thecolorpurple
Location
NE Tenn
*Side note
The inside of the small tube was uneven,so l sanded it down and applied epoxy and thickener then used a couple different flap sanders to smooth it out (thanks @Jr. )
 

Attachments

  • image.jpeg
    image.jpeg
    98.7 KB · Views: 337
  • image.jpeg
    image.jpeg
    95.6 KB · Views: 342

Sanoman

thecolorpurple
Location
NE Tenn
Got the scupper tube and Epic scupper bonded in now (5200,one week drying time).And the exit side of the exhaust tube done too.Going to epoxy over (using the @McDog technique) those areas when the 5200 cures.l have the ski setting up on its stern (ass end for those who don't know the term) to keep the glue where l want it.

So essentially other then some minor stuff to do,l can move on to the engine area this week.Seems like that always goes quickly.l have already laid some 5 oz. glass cloth over the motor mounts.Now it will get a covering of carbon to make it look clean.Then drop the midshaft,engine and other components in to figure insert locations.Lot of stuff in such a small area.
 

Attachments

  • image.jpeg
    image.jpeg
    126.8 KB · Views: 304
  • image.jpeg
    image.jpeg
    161.5 KB · Views: 293
  • image.jpeg
    image.jpeg
    98.8 KB · Views: 287
  • image.jpeg
    image.jpeg
    132.1 KB · Views: 323

hydrostyler

X-
Site Supporter
Location
Central Illinois
You're doing a great job on the build. All that work almost makes me dread building another hull. o_O I always wondered how the intake scoop went together. I'm sure you'll have that thing looking like a million bucks when its done, but they sure don't do you any favors with that lay up. Hope to see you at the SFF this fall.
 
  • Like
Reactions: DAG

Sanoman

thecolorpurple
Location
NE Tenn
You're doing a great job on the build. All that work almost makes me dread building another hull. o_O I always wondered how the intake scoop went together. I'm sure you'll have that thing looking like a million bucks when its done, but they sure don't do you any favors with that lay up. Hope to see you at the SFF this fall.
l hope to make it look good inside and out.The layup is 100% better than my first one.Not much sanding on this one (so far!)
Thank you
 

Sanoman

thecolorpurple
Location
NE Tenn
I didn't get a whole lot done this weekend.Started working on the motor mount blocks.Got most of the rough edges ground,and sanded the area around them to the tape edge.l put some epoxy (with Cabisil) around and will sand later.
 

Attachments

  • image.jpeg
    image.jpeg
    207 KB · Views: 305
  • image.jpeg
    image.jpeg
    130.8 KB · Views: 302
Last edited:
Top Bottom