Super Jet Another freestyle SN build 'Wet Dreams'

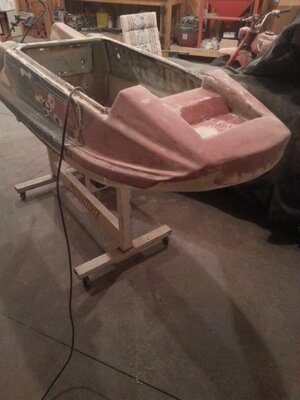
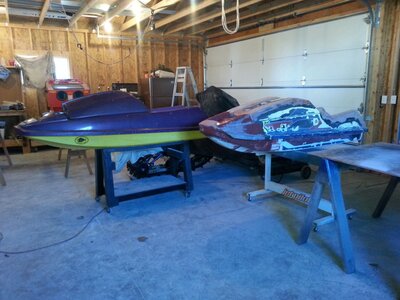
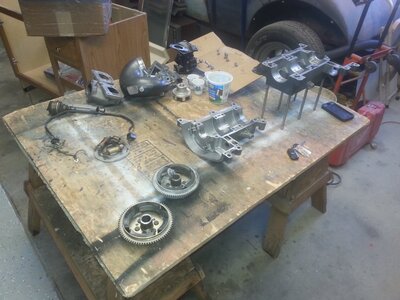
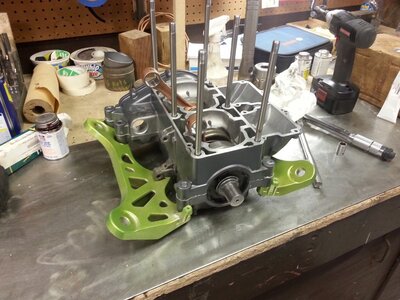
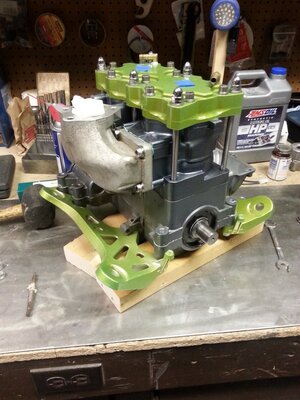
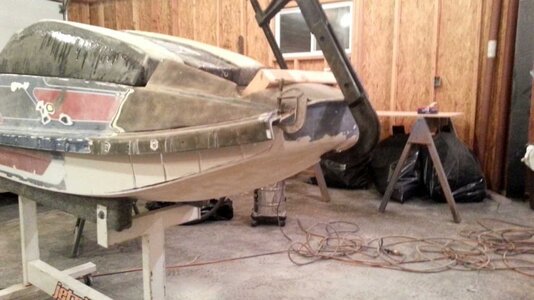
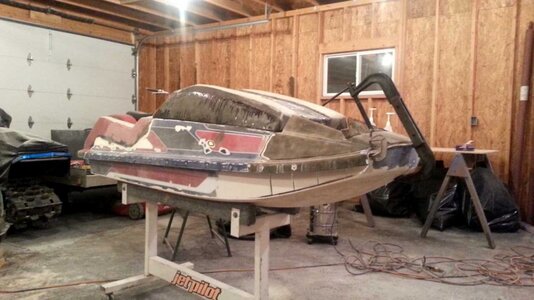
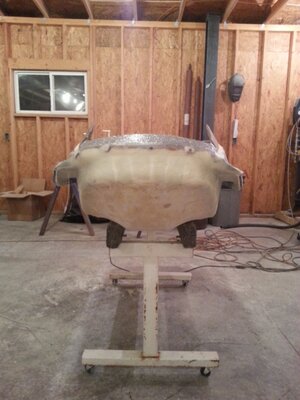
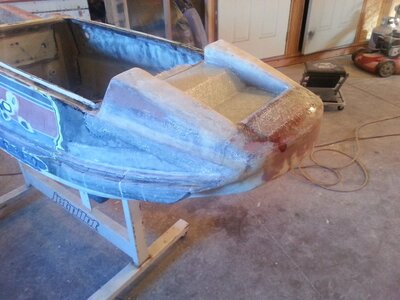
Now that I've been building this ski for a couple of months now I've decided to post some pictures and comments on the build. First off the first is a picture of some ski's that Jakobi86 and myself built last spring when we first got into this sport. Just a couple of SN's that got stripped, cleaned, painted and turfed. All work done by us. Then later last summer I picked this ski up from a member on the x with unsure plans for its future but I mostly bought it for the parts list. It was a 90 SN with 701, b pipe, ada head, 9/15 hooker, msd enhancer, AC aluminum pole, jetworks flow control valve, and footholds. After getting it home and digging into it a little the hull was in pretty rough shape and at one point almost threw the whole thing in the trash and was just going to swap all the parts into the my blue ski. Well before that happened I figured i try one of these SN builds as I love building things/working in the garage yada yada. So my intentions were to shortened, refoam, reinforce, rocker, and lower the hood. I am going to start by posting pics of the progress in progression with little description because I don't want to spent a ton of time putting this thread together. Before I start that I need to give a big thanks to Jakobi86 for letting me do the entirety of this build in his garage!

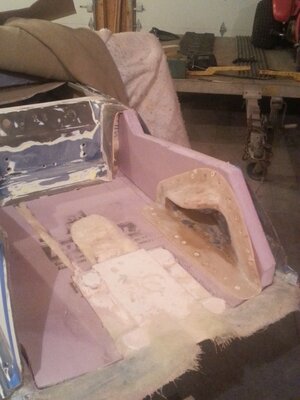
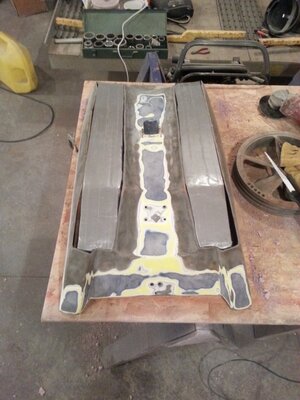
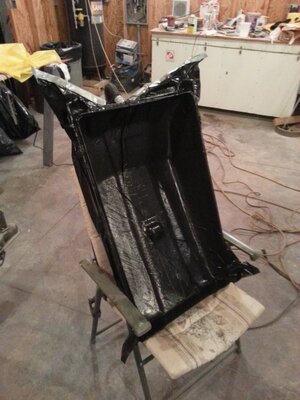
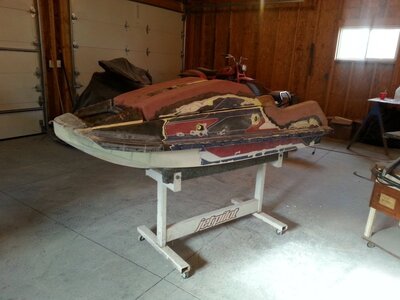
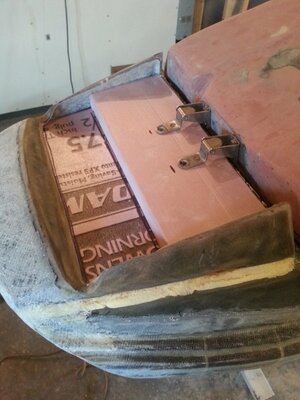
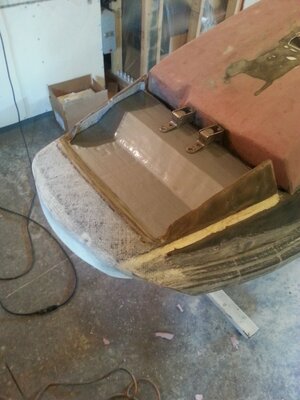
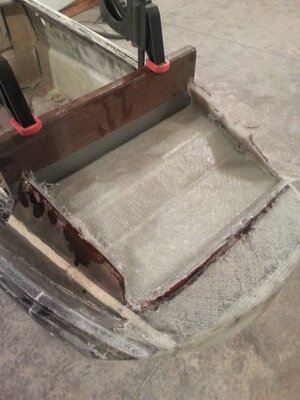
First pics in this post include the original ski, and cutting up the tray. Mind you I am no professional fiberglasser. At that this project was the first time I laid fiber glass in my life!
 

Attachments

  • SN1.jpg
    SN1.jpg
    55.5 KB · Views: 490
  • SN2.png
    SN2.png
    470.1 KB · Views: 481
  • SN3.jpg
    SN3.jpg
    111.4 KB · Views: 470
  • SN4.jpg
    SN4.jpg
    119.1 KB · Views: 474
  • SN5.jpg
    SN5.jpg
    115.6 KB · Views: 484
pictures of rebuilding the tray/ installing foot holds. To be cheap I reused the tom21 holds that I pulled out of the tray when it was defoamed. Foam used for the tray was the pink stuff from home depot and US composites 4lb 2-part expanding foam. Then for some of the little fill in stuff I just used great stuff for shaping. Tray has 4 layers of 1708 biax from US composites and 8 layers of 7.5 oz e glass on all of the seams. I didn't like trying to lay the 1708 over the tight corner radius's. This tray is solid! probably used way to much glass and resin cause yes it is heavy.
 

Attachments

  • SN6.jpg
    SN6.jpg
    101.7 KB · Views: 468
  • SN7.jpg
    SN7.jpg
    128.1 KB · Views: 459
  • SN8.jpg
    SN8.jpg
    118.4 KB · Views: 470
  • SN9.jpg
    SN9.jpg
    119.6 KB · Views: 463
pictures of lowering the hood. Cut out the liner and planned on making it flush across the top. Made some molds out of foam and layered them with duct tape to lay the glass over. Layed 2 layers of 1708 on the open holes where the hood was lowered then layed 2 layers of 1708 over the whole inside and vacuum bagged with a make shift vacuum bagging system using a shop vac and contractor trash bags.
 

Attachments

  • Hood1.jpg
    Hood1.jpg
    127.4 KB · Views: 460
  • Hood2.jpg
    Hood2.jpg
    123.4 KB · Views: 465
  • Hood3.jpg
    Hood3.jpg
    125.9 KB · Views: 459
  • Hood4.jpg
    Hood4.jpg
    127.6 KB · Views: 471
Then I moved onto the nose. Here I wanted to rocker and move the pole forward about 5". I cut the bottom of the deck from the sides and then cut some slits in the sides to pull the bottom of the nose up. I also put two relief cuts in the bottom of the hull to make it bend up easier. Then I laid a few thin layers of glass on the outside and did all of the reinforcing from the inside. I also filled the bond line with resin and cabosil and then laid one layer of 1708 along the entire inside of each side of the hull.
 

Attachments

  • Nose1.jpg
    Nose1.jpg
    132.9 KB · Views: 477
  • Nose2.jpg
    Nose2.jpg
    97.6 KB · Views: 469
  • Nose3.jpg
    Nose3.jpg
    102.8 KB · Views: 477
  • Nose4.jpg
    Nose4.jpg
    101.5 KB · Views: 479
More pictures of the nose and reinforcing
 

Attachments

  • Nose5.jpg
    Nose5.jpg
    86.7 KB · Views: 466
  • Nose6.jpg
    Nose6.jpg
    100.4 KB · Views: 455
  • Nose7.jpg
    Nose7.jpg
    117.9 KB · Views: 457
  • Nose8.jpg
    Nose8.jpg
    102.8 KB · Views: 459
  • Nose9.jpg
    Nose9.jpg
    108.9 KB · Views: 479
Then I built a little mold out of styro foam and duct tape to form the pole area of the nose. I thought this turned out really well. I also decided to go with a RN pole instead of the AC aluminum one that came on it because I thought I was going to be shortening it but once I moved the bracket location forward I may end up leaving it. The last picture with the pink foam and great stuff expanding foam is the current state of the hull. I haven't had a ton of time lately to work on it with working full time and taking 2 night classes this winter. Plus it has been bitter cold up here in Wisconsin lately. I have been able to tear into the motor though. My initial plans were to only tear it down, replace the cases with new/used 61x cases because the existing ones had a starter bolt hole with a broken off bolt in it and re-ring/hone. Once I tore it down the cylinder walls were scored, one cylinder head gasket was melted, the piston sides were scuffed up, I found a bolt laying in one of the reed cages, and the stator/flywheel were rusted because water must have leaked through by the stator. Oh and the mag side crank bearing had water beading on it and it feels a little griddy. So now that the tax man has spoken I plan on rebuilding it with a jetmaniac ported top-end, SBT crank, and boyesen reed pedals. I think i also forgot to mention that some of the stock metal reed pedals were kinked and no longer sealing. Not really sure how this motor ran when I bought it lol

That's it for now. I probably will not be able to work on it for a couple weeks but I may try to get some of the motor parts ordered later this week.
 

Attachments

  • Pole1.jpg
    Pole1.jpg
    121.5 KB · Views: 464
  • Pole2.jpg
    Pole2.jpg
    131.7 KB · Views: 465
  • Pole3.jpg
    Pole3.jpg
    113.6 KB · Views: 459
  • Pole4.jpg
    Pole4.jpg
    123.4 KB · Views: 451
  • Pole5.jpg
    Pole5.jpg
    82 KB · Views: 447
  • Pole6.jpg
    Pole6.jpg
    128.9 KB · Views: 457
Couple things that I could probably add as I went through this pretty quick. I cut about 5 inches off the back and ~4 inches off the front. I weighed the hull and hood before I started the nose work and it was ~110 lbs. I guess it will be in the 130 lb range by the time i'm finished. Yeah its heavy but oh well.

All of the fiberglass I got from US composites. My first gallon of resin was 3 to 1 epoxy from US. Being so cold in wisconsin this time of year it wasn't really ideal. I had to use a heater to get the resin to set and sometimes it took a couple of days before it wasn't tacky anymore. So when I ran out of that I switched too KWIK KICK epoxy resin by resin research and I will say that stuff is awesome! I can lay up a section of glass and leave the heater on it for 45 minutes and its already setup. Not hard enough to sand but dry to the touch. Usually takes 1-2 days before it will sand without gumming up the pads. It also feels stronger than the US comp epoxy. It is a little more expensive but worth it for my situation.
 
Got a little more work done last weekend. Sanded the foam around the pole area and layed glass over that. Layed microballoons and resin on some portions of the tray, around the nose, and hood. The nose is now ready for complete microballons and finish shaping before paint. I got some engine parts sand blasted and ready for powder. Also ordered my engine build parts from @JetManiac and Shipped my cylinder down for porting. Think summer!
 

Attachments

  • 20150222_152207.jpg
    20150222_152207.jpg
    130.2 KB · Views: 433
  • 20150222_152338.jpg
    20150222_152338.jpg
    119.6 KB · Views: 441
  • 20150222_152141.jpg
    20150222_152141.jpg
    104.7 KB · Views: 424
I love the name of your build ;) I think you need a "Wet Dreams" Decal to fit along your handle pole. Lucky for you, I have one. You can kind of see it on my ski in this pic. PM me if you want one. Keep up the good work.
 

Attachments

  • 10632702_486178914851329_8232371617123590655_n.jpg
    10632702_486178914851329_8232371617123590655_n.jpg
    128 KB · Views: 411
Thanks guys...id say in the 150-200 hours range not exactly sure been but been working on it pretty consistently since the end of September. Just hoping to have it ready once the water is warm enough to ride up here
 
Little more progress in the last week. I powder coated the engine witha llittle help from jakobi86 in illusion crab apple. The rest of the engine will still be the oem color metallic blue. Should be getting my cylinder and top end kit back from the maniac sometime next then I can build the motor. Also got a little sanding done on the nose.

Any tips on how to sand the filler so I don't end up with a bunch of waves or low spots? Not looking forward to this part
 

Attachments

  • 20150312_205158.jpg
    20150312_205158.jpg
    160.8 KB · Views: 348
  • 20150312_204125.jpg
    20150312_204125.jpg
    113.3 KB · Views: 350

Sanoman

thecolorpurple
Location
NE Tenn
Little more progress in the last week. I powder coated the engine witha llittle help from jakobi86 in illusion crab apple. The rest of the engine will still be the oem color metallic blue. Should be getting my cylinder and top end kit back from the maniac sometime next then I can build the motor. Also got a little sanding done on the nose.

Any tips on how to sand the filler so I don't end up with a bunch of waves or low spots? Not looking forward to this part

Go to the automotive paint store and buy a couple of sanding blocks.Maybe a long and short.Buy some rattle can gray primer and black paint too.Those blocks will keep you (start sanding!) from getting waves in it.After you have sanded on it and think it looks good,spray a couple coats of primer to cover the area you are sanding (more sanding here!).Then lightly spray black paint over the area.It should have a cloudy look to it (patchy).Now start sanding again.Where the high spots are the paint will sand off,which will leave paint in the low spots.Don't short cut either.More time sanding means smoother finish.Hope that will help
 
Thanks sanoman! I started using a sanding block last weekend and I think i am getting closer but I will definitely need to check it with the primer and paint.

Got my now 718 top end back from the maniac today and have all my parts for the engine build. Hoping to get that assembled next weekend.
 

Attachments

  • 20150318_202956.jpg
    20150318_202956.jpg
    123.2 KB · Views: 287
  • 20150318_204004.jpg
    20150318_204004.jpg
    127.3 KB · Views: 283
  • 20150318_203058.jpg
    20150318_203058.jpg
    106.6 KB · Views: 279
Thanks! A little motivation tonight weighed the hull and a sn hull that jakobi86 is looking to start modding. At this point its 36lbs lighter than the stock/potentially water logged hull which is pretty exciting to me! Hoping to do some sanding and start building the motor this weekend
 

Attachments

  • 20150327_163101.jpg
    20150327_163101.jpg
    142.5 KB · Views: 251
  • 20150327_163453.jpg
    20150327_163453.jpg
    137.1 KB · Views: 262
Didn't get a chance to work on the hull this weekend but did start assembling the motor. went a little slower than was hoping but I took my time to make sure everything was good and clean and went together right. Real happy with the colors! Looks sweet! Can't wait to get the green intake mani and fly wheel cover on. Should really make this thing pop! Big thanks to @JetManiac for some pointers during the build too!
 

Attachments

  • 20150328_144923.jpg
    20150328_144923.jpg
    130.9 KB · Views: 248
  • 20150329_124552.jpg
    20150329_124552.jpg
    149.9 KB · Views: 244
  • 20150329_181215.jpg
    20150329_181215.jpg
    147.3 KB · Views: 249
  • 20150329_174425.jpg
    20150329_174425.jpg
    144 KB · Views: 230
Top Bottom