Experimenting on my first ski

I'm not necessarily doing a full build, but I figured I'd document my work for fun and learning (though there's plenty more to learn from you other guys on here).
DISCLAIMER: I would be lost on a lot of this with my buddy and neighbor Craig (@superjet119). He has helped so much with time, parts, knowledge, and laughs. Also thanks to Kevin (@Rdkev84) and David (@DiagNuLL).

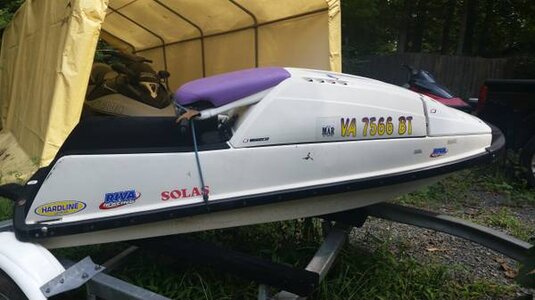
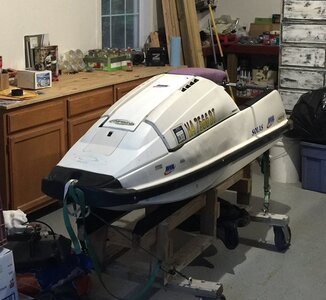
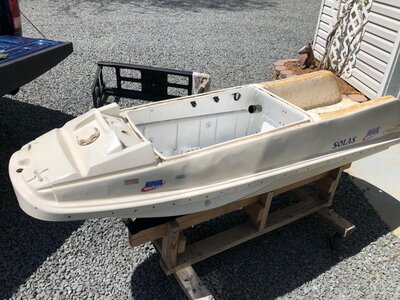
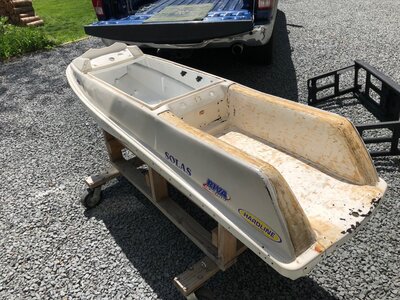
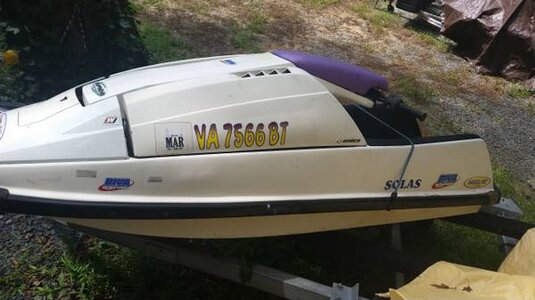
In late 2014 I picked up this '90 Superjet. Mods included:
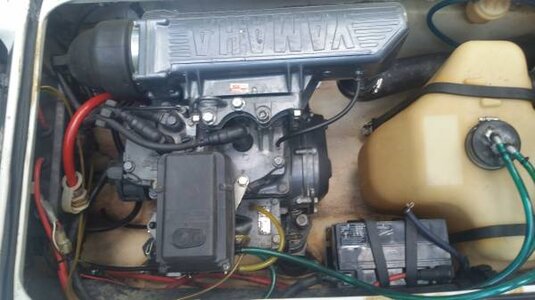
-'95 61x stock engine
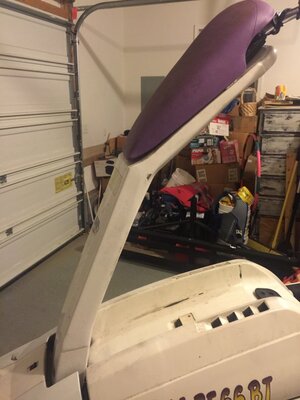
-Aluminum AC pole with upgraded spring
-R&D scoop intake grate
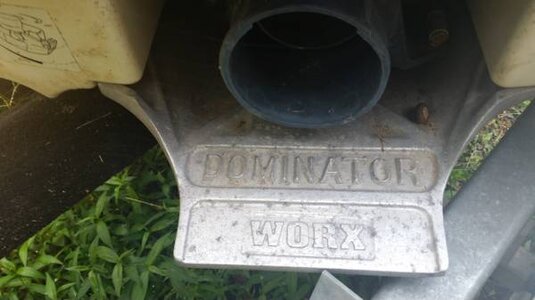
-Worx Dominator extended grate
-Solas impeller

This is being used for rec riding around the lake where I live. Bummer they stopped having ski races at our lake a few years before this. Maybe eventually I'll take it elsewhere and try it out.

CL left.JPG

CL right.JPG

CL engine.JPG

CL nozzle.jpg

Pole.jpg

Had a lot of fun the first year. Figured out how to ride fair enough, and control that damn porpoising! It's amazing with the slightest shimming on the plate makes such a big difference. Also learned about tank check valves, ignition coils, and various other lovely little bits.

Eventually got tired of my long and shimmed plate affecting my ability to jump waves. Swapped out for a Jet Dynamics plate (extended I think). Love how it stabilizes the ski, yet still feels nimble, and no shimming required! Also slapped on some Blowsion Destroyer sponsons Craig had. Too bad I was a moron and looked up everything but how to orient them, because I ended up putting them on backwards! :rolleyes: (http://x-h2o.com/index.php?threads/backwards-sponsons.175585) Oh well, it still handled much better in the corners and more stable straight at speed. Too bad I put so much 5200 on when I installed them.

SJ in garage 2.jpg

I wanted som more low end without getting into the engine much, so I threw on a Hooker 9/15 impeller. That baby has some pretty good bite to it! I also added some Blowsion 0-degree bars after I snapped the stock ones in a fall. Think these will hold up a little better down the line, and they feel SO much better to ride with! Next I upgraded to a Cold Fusion quick steer turn plate with the stock bushing. Once I learned just how much to tighten that nut down, I was pretty pleased. All this catches me up to the beginning of 2017 I think. She may not be pretty, but she sure is fun! Same goes for the ski!!
 
Last edited:

Sanoman

AbouttoKrash
Location
NE Tenn
Don't feel bad about putting the sponsons on backwards! l came close to doing the same thing on an old glass aftermarket hull.Had them all mocked up,posted a pic on the X and right off a member on here said "ya got them on backwards!" The one good thing about posting up here is what saved me!
So ask,bunch of good knowledgeable guys on here.
Yeah, can't believe I never looked up any pictures on here for my installation, especially since I do for a lot of other stuff. All I did was read up on some written instructions elsewhere, which worked well otherwise. Oh well, live and learn!
 
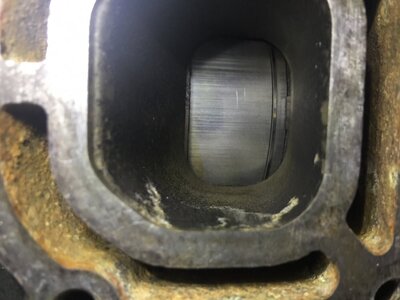
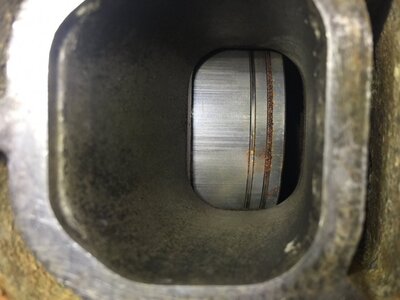
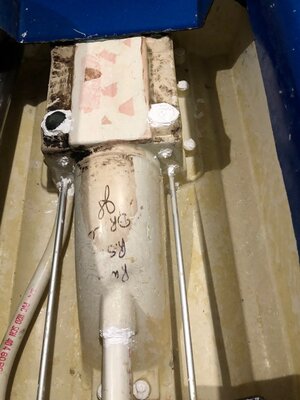
So 2017 was a little different. Started off having issues getting it to start and stay running reliably. Even had to get a mile tow from a buddy one day. :mad: Was also dealing with carb drool slowly siphoning out my tank when sitting. Craig mentioned it felt like there was a whole lot of vibration and I should check out the mounts, which probably was contributing to everything else. So when I pulled the engine on July 4 to get to the mounts, I pulled the exhaust off without realizing I didn't need to. But in the process I saw this:

Cylinder 2.JPG

Cylinder 1.JPG

So now I have more crap to deal with down the road. Seems like anytime you work on one thing on old equipment, it turns into more. Well, I slapped it back together for the time being until I felt like getting into the engine. Was thinking about possibly doing a complete or partial 62T upgrade in the near future. Definitely felt better with the new(er) mounts, but I was still having my....performance issues. Rebuilt the carb and finally got rid of the drooling. Took several tries to get it mostly dialed in after that, but was still running a hair off of it's previous self, plus was still having intermittent starting issues. Then eventually she decided she was tired of running at all in September. Did some checking and my spark was gone. Found the service manual on here and put my electrical background to use - CDI was bad and rectifier was questionable. (BTW, a cheap $10 analog meter on resistance setting is a great way to do a basic check on capacitors for those who don't know.) Well since I have lots of other work coming up then other plans this winter and I'm not planning to bust out the wetsuit this year, I'll get around to it later.....
 
Skip ahead to March since I'm such a procrastinator!

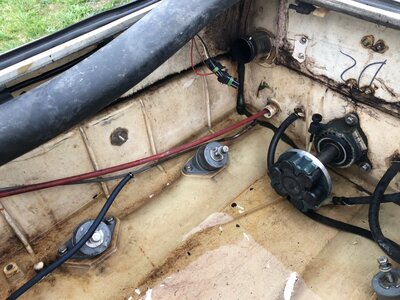
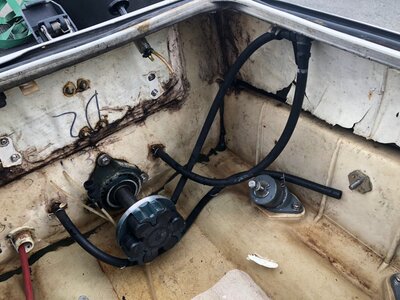
So I ordered some electronics, as well as a complete bilge kit, fuel lines, and more from @JetManiac to fix this girl up some. After Jeff (@Jeffym937) and I finished in the ebox, she fired right on up several times. Alright, finally checking stuff off my list! However it was then time to start disassembly for some bigger projects. Pulled the engine and everything else in order to do a full cleanout of the inside. One of my "new" mounts ripped apart in the process, add that back on the list. Got some good Rhaas mounts enroute now.

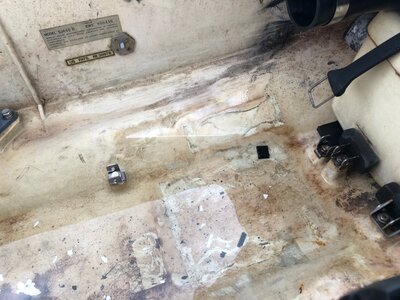
Old Bilge 1.jpg

Old Bilge 2.jpg

Old Bilge 3.jpg

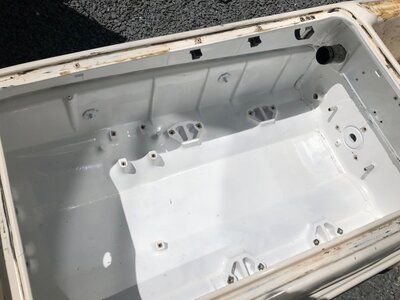
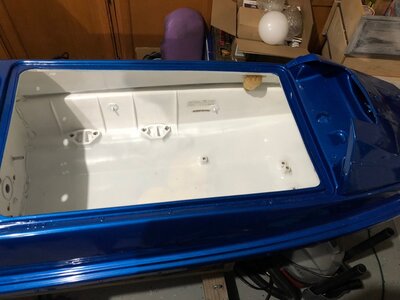
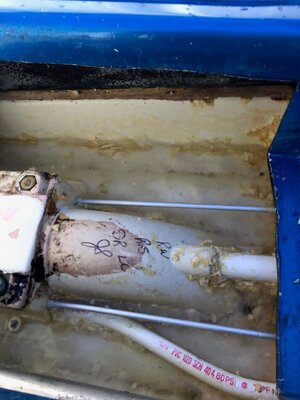
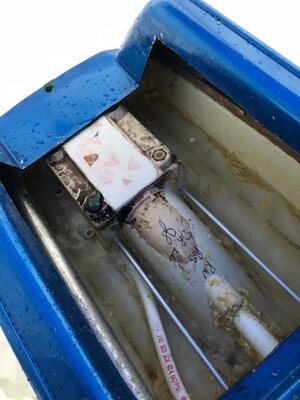
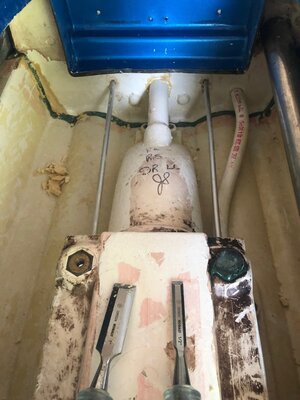
Definitely not the worst looking bay out there, but still could be better. After consideration, decided that simple cleaning up wasn't good enough. Time to strip all that loose paint above the bond line. Then my OCD self decided that the rest of paint up there had to come off as well. Thanks to Craig's oscillating tool with a toothless blade, it actually came off fairly easily. (This thing is also great for cutting out foam, peeling mats, cutting smoothly through fiberglass, and more.) Then after plenty of scrubbing and prepping, it time to grab some appliance epoxy and brighten this baby up!

Bilge painted.jpg

I really like how it turned out. (Again, never would've known about this stuff without Craig. Also learned a lot from helping him on his never ending ski projects.) On close look, you can tell I was in the woods on a windy day and suck with rattle cans in general, but it's just fine for a project like this. Next was the lovely task of trying to remove the mats and get this baby ready for a facelift. Again, love the oscillating tool!

Naked Ski 1.jpg

Naked Ski 2.jpg

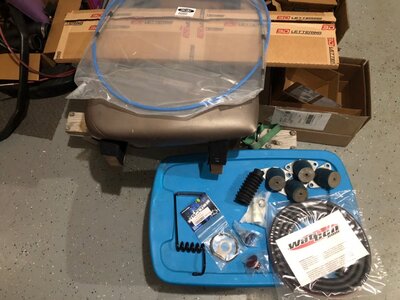
After scraping some stickers, everything but the pump shoe is off and it's time to send her to get painted while I'm out of town! Gonna be excited to move forward and get this thing back together. Got my mats picked out from JetTrim, plus many other parts that we discovered I needed:

-Steering cable was torn and near death
-Engine mounts, as mentioned
-Pole spring wasn't that strong anymore
-Hood seal was crap when I got the ski. Going with Watcon now.
-Chinpad brackets broke when I learned to sub. (Didn't feel like a "pad" when it came at my face!) Gonna replace that and keep this plastic welded one for spare.

What was that I mentioned about finding more stuff to do when you tear into an older project? Oh well, I'm having fun, learning a lot, and none of it's breaking my bank. In the end, it's gonna make her that much nicer, so hopefully she'll be less temperamental down the road.
 
Oh yeah, does anyone know what the weight of this hull should be, including the nose block? About how far back should the center of gravity be? I was told to expect around 70#, but it seemed a bit more than that, with plenty of weight in the rear. I really don't want to have to cut out foam, especially with the other stuff I'm also trying do get done soon.
 

Sanoman

AbouttoKrash
Location
NE Tenn
Drill a small hole in the tray (1/4").Not so much where but away from drilling thru exh,etc.Push or step on the area to see if you get any water coming out.lf you do then you should do a refoam.lts torn down this far,won't be much to redo.That ski is probably holding water because of it age
 
Weighed it yesterday before going to the body shop. Came in around 115-120#. Based on expected numbers I've read on here, seems like it isn't holding much water. Probably not gonna mess with it for what I use it for, but haven't decided for sure yet.
 
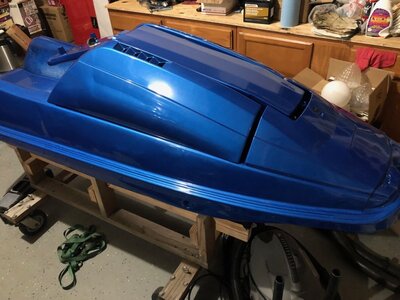
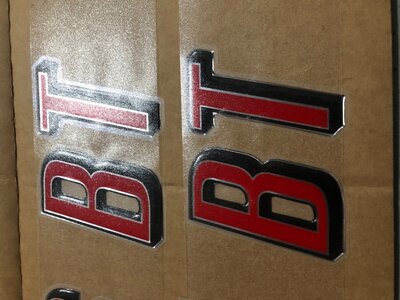
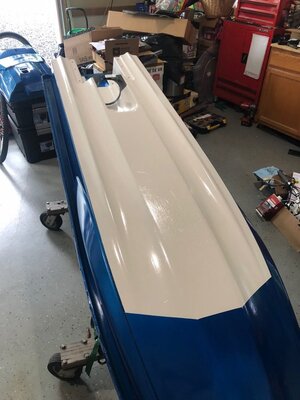
Well it's been a while since I updated this, but now I can catch things up finally. So in mid-May (last year) I got the ski painted. I got a deal from a guy on a one shot job using single phase paint. He said the mid-90's had some of the better single pahse choices, so I decided to go with '96 Viper GTS blue (paint code PBE if interested). I REALLY love how it turned out! It does show the delamination some on my hull, but decals will help fix that. It looks even better in the sunlight!

IMG_7952.jpg

IMG_7951.jpg

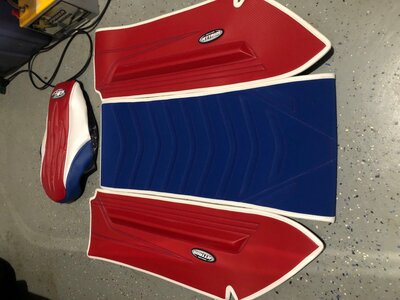
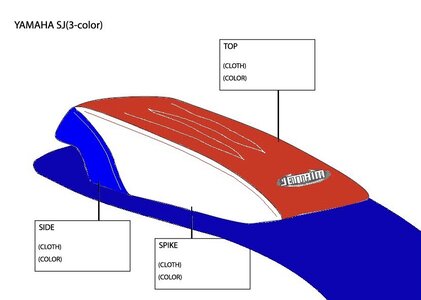
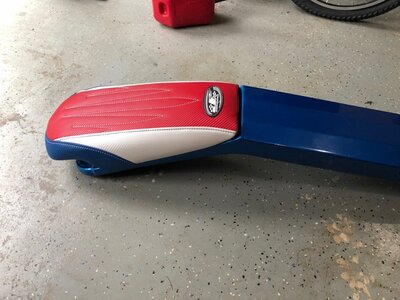
My mats also came in, and I'm happy with the result. When choosing colors, it was hard to get a good idea of what they had and how it would turn out by just looking at the sight, plus there were colors available that weren't shown in their gallery. I asked them to take pictures in daylight with a few combinations of colors and textures and email them to me. This combined with scouring various pattern and designs on Google images worked great, as I was able to see well how the different combinations worked together, plus the realistic look was notably different from their website images. I highly recommend taking this approach when picking mats, turf, decals, etc. You may even want to pay a few bucks and get some samples sent to you. Just avoid going strictly by what you see on the seller's site if you really care about the end result, just ask this guy: http://www.x-h2o.com/index.php?threads/neglected-96-rn-build.192538/post-2020199.

IMG_7959.jpg

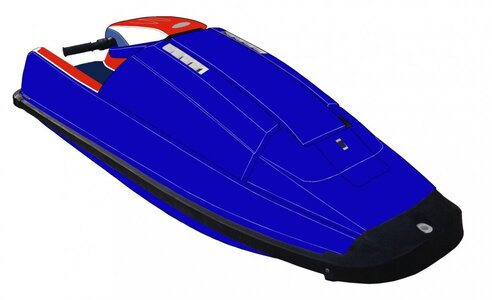
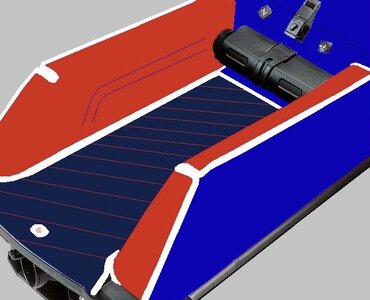
Here was my conceptual pictures before I made a couple tweaks before going to paint and ordering everything. You can see that I had images of the actual material color when I put this together. I think it's gonna come out pretty well.

IMG_7817.JPG

IMG_7805.jpg

IMG_7806.jpg
 
My dad came over for a day soon after and we had a good time messing with the engine. This was my first fuul 2-stroke breakdown, and he's done tons of work on everything from weed trimmers up to log trucks and trees skidders, so it was quite educational. Got everything torn down and cleaned up, then put in some new piston kits and seals. Crank was in very nice shape. slapped it all in some special 62T cases with a corresponding intake (thanks again to Craig). Just need to get a couple parts for the intake and cable brackets and that part's about set until tuning time.
 
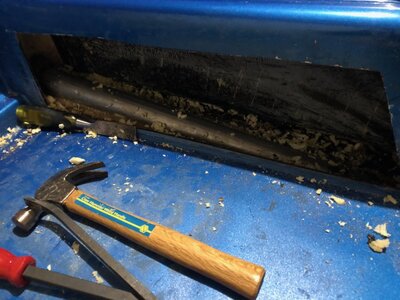
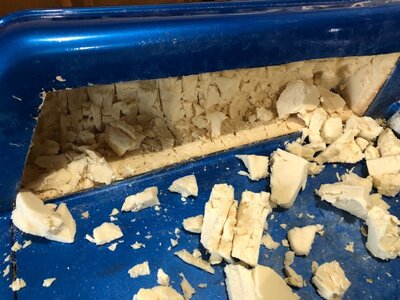
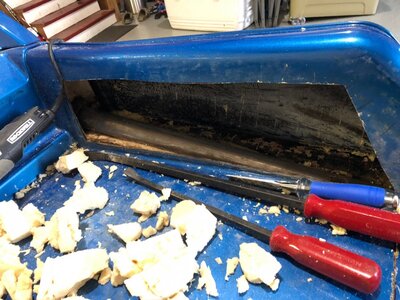
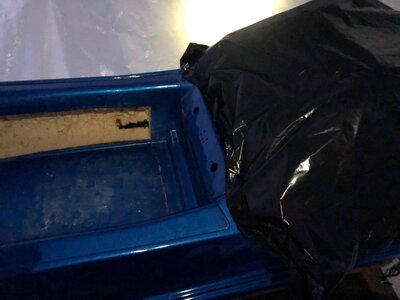
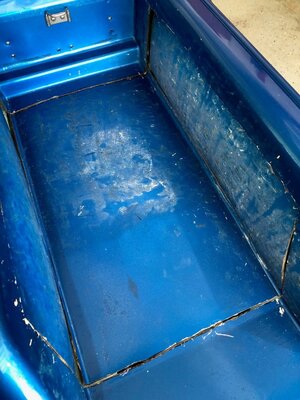
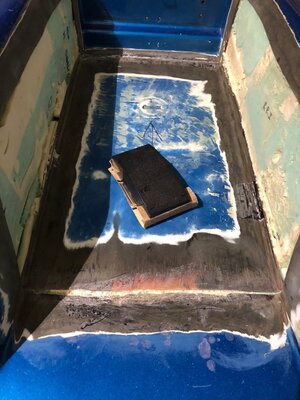
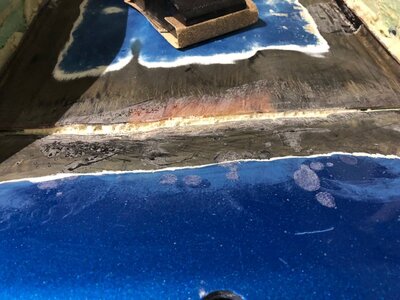
About a week later, we were going over the hull. After evaluating everything, we realize that there's more than a little water in the tray. :( If I don't do this right and take care of it now, I'll regret it later. Dammit, why couldn't we have have figure this all out before painting! :rolleyes: Oh well, time to get the oscillating tool again and get at it. How hard can glass work be? :confused: We'll just try to keep the surgical scars under the mats. Poor girl!

IMG_7954.jpg

IMG_8035.jpg

IMG_7955.jpg

IMG_8036.jpg

IMG_8037.jpg

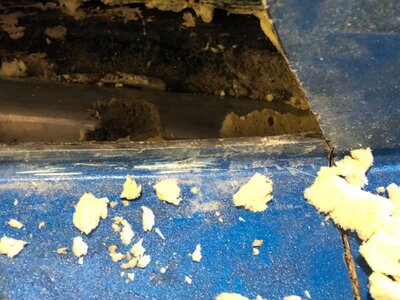
For reasons to be apparent later, I shouldn't have made my cuts so close to the tray side edge.
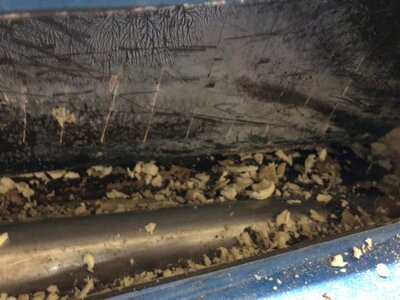
You might be able to see in the last couple pictures, but it was wet up to the tray bottom/bond line. Quite a smell in there too I might add! This is a lot of work, there's go to be a better way....
 
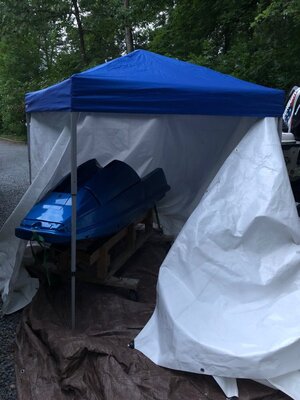
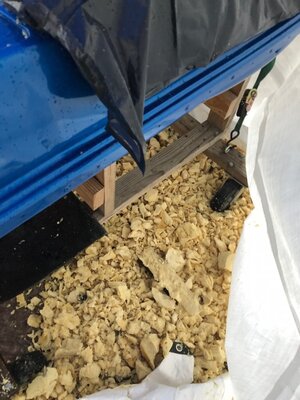
Early June 2018 by now. After reading around on here, I decided to save some effort and make a makeshift blasting booth. The pressure washer made easy work of the foam. It also made a HUGE mess, but I was ready for it and it cleaned up easy enough.

IMG_8039.jpg

IMG_8040.jpg

IMG_8044.jpg

IMG_8046.jpg

IMG_8047.jpg

Add a shop vac, towel, and some scraping on the last few bits, and it looks much better. Little did I know that the real work was just beginning on this damn tray!

IMG_8078.jpg
 
Last edited:
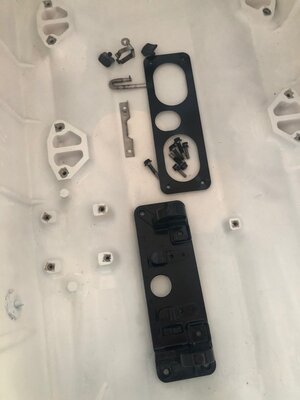
So while Craig was working on his own ski project at this time, he grabbed my pole mounting plate and did some bead blasting and put on a special paint (not powder coat). The amount I've helped him out doesn't come close to what he's done for me, but he doesn't care and we enjoy hanging out and working on each other's perpetually inoperable skis, though he always has one working in his collection that he lets me scratch the itch with.

IMG_8080.jpg
 
Next day (was making steady progress back then, wish I could say it stayed that way). Ripped out all the old sealant around the various penetrations, except the aft exhaust which looked good. Put a nice healthy layer of 5200 over every potential water source, including the bond line. A bright flashlight on one side in a dark garage didn't reveal any hull defects, so hopefully this will prevent future issues. That, and closed cell foam.

IMG_8083.jpg

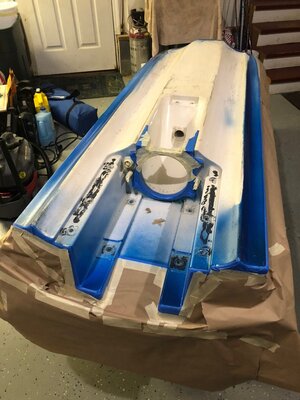
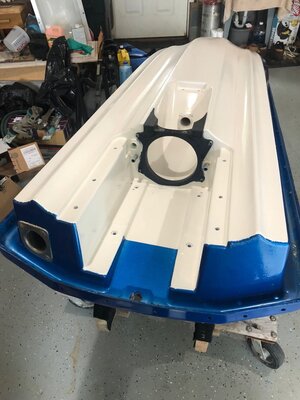
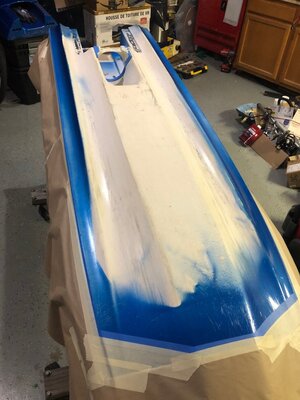
After that sat a while, I kept up my momentum and decided to paint the bottom. Since the paint guy gave me a deal on a single shot application, the bottom looked a little rough. I wasn't worried about too much prep beyond cleaning, as it'll get tore up anyway and the existing texture adds to the handling - right? I had been contemplating on what to use. Craig wanted to go with a good marine bottom paint. Since I'm not worried about anti-fouling and its other properties, I decided to skip that much more expensive option and carry on with my rattle cans of appliance epoxy. Turned out decent, but I put on extra coats and could've let it cure a little more, so a little texture was added when I later flipped it over onto the stand. I was still working faster at this point, as I wanted to finish everything before some friends came to visit so they could try it out.

You can see where my OCD and stubbornness showed up. I was determined to not paint up the pump shoe, but did not want to remove it. And damn if it didn't come out just right.

IMG_8086.jpg

IMG_8087.jpg

IMG_8088.jpg

IMG_8089.jpg

After looking at these, I'm wondering something. How many people put sealant on when they install their ride plate? Wonder if that may have been the culprit, at least partially, as I never did but the prior owner did. When I sealed the inside, I installed the plate and grate bolts in all but a couple threads, then sealed well over the holes. I think that should keep it tight there for quite a while.
 
Last edited:
While impatiently waiting on my paint to cure the next day, I put the cover on my "new" chin pad and stuck it on the pole. Damn looks nice! Feeling pleased with my color choices on everything. Bottom is painted, tray cavity is ready for foam, and now this. things are starting to finally come together! :cool: I hoped I would've been done a couple weeks ago though - stupid foam! :mad:

IMG_8090.jpg
 
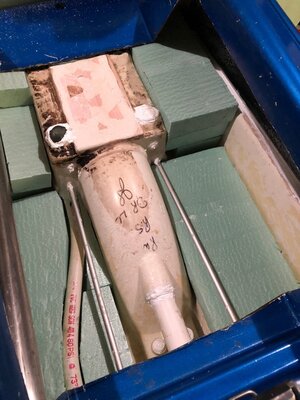
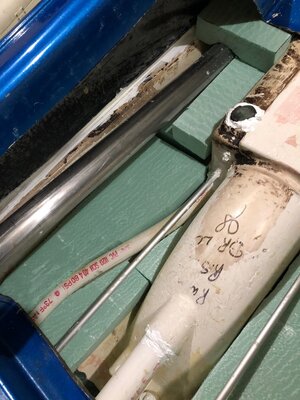
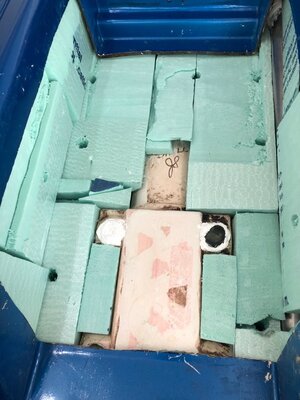
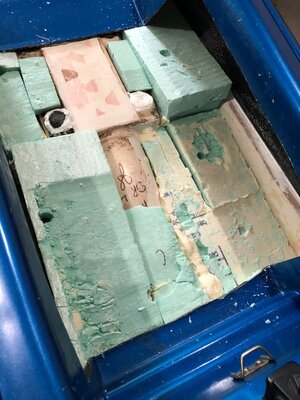
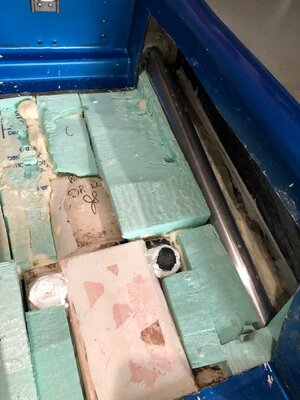
June 13-14: Foam time! So we (keep in mind Craig is going through much of the same things with one of his SN) got a closed cell foam insulation sheet and some 2-part expanding foam. The plan was to mainly fill the cavity with pieces of block, and fill it in fully with the expanding foam. I spent a good bit of time cutting up foam block to fill in this messy puzzle.

FYI - If you want the convenience of a reciprocating saw but don't want the 2-handed burden of a sawzall, check out something like this: https://www.milwaukeetool.com/Products/Power-Tools/SAWZALL-Reciprocating-Saws/HACKZALLS/2719-20. Was VERY nice having this to cut the foam like butter. The 1-handed design also made it easy to shave off corners and such to make everything fit snug in the gunwales. Good for quick pruning jobs too.
IMG_8097.jpg

IMG_8098.jpg

You can see where I drilled holes in various places to try and get the foam down into all the crevices. There are even more in the lower blocks you can't see. Several smaller pieces were stuck in every gap that could reasonably hold them. A lot of planning went into laying all this in there to use as much block as possible.
IMG_8103.jpg

IMG_8105.jpg

So the mixed foam was much thicker than anticipated. The 1/2" holes didn't pass it as well as expected, so remaining holes were widened more. The foam also starts thickening further and expanding VERY quickly. I realized that I was going to have to do more smaller pours between and around blocks to properly fill the gaps. Also instead of trying to fill spaces through the holes, I had to estimate the required amount, pour the foam, and place the blocks and pour more over/around them as needed. It felt like trying to build a brick wall with expanding mortar, but the wall can't go outside of certain dimensions. After a little waste and some cursing, I got it figured out. Jeff happened to witness much of this, and decided he would rather burn a ski than go through all this. I might agree with him at first, but I think I would be better able to knock this out in the future. Here's to hoping I never have to find out!

So some words on expanding foam:
1- Watch someone on Youtube first so you're not going in blind.
2- Read the can fully. Understand your available mixing/working time, temperature effects, etc.
3- Not much surface prep required
4- Wear gloves! I used some cheap latex or nitrile coated fabric gloves, and they worked well and cleaned off easy enough after it hardened. Disposable gloves could work too. It's messy and sticky stuff, and you will definitely get it on you.
4- It starts to expand and increase viscosity very quickly. IIRC you may have 20-30 seconds from the time the two parts first make contact before you can visibly see the difference. After 45-60 seconds, whatever's left in the container isn't pouring out. Pour the thicker fluid in the container first, then the thinner one when you're ready to start mixing, and mix quickly while adding it. You must get the ratios right and the parts fully mixed or the expansion won't be right. I highly recommend a power mixer, like for paint, and not mixing sticks. If you're trying to pour between and around parts vs. into a bigger void, then the quick change will affect you more. Expansion will continue for 5+ minutes, though slower over time, and it will be hard after 10-15 minutes.
5- Make sure you have everything laid out before mixing each batch. You don't have any time to fix it once you start mixing. You'll either have an undesirable pour, or a wasted batch. Helps to have a second person to help pour the 2 parts, place blocks, etc.
6- Make the first batch small. You'll mix it quicker and have more time to figure it out. If you goof it, it's less waste (stuff ain't cheap). You also get to see the expansion effect before continuing. It expands a considerable amount, so go easy at first. It also doesn't care what it's pushing against, it will build up a lot of pressure and lift or push things out of its way. Be ready with a lot of weight if needed for your application to try and minimize lifting.
7- To minimize time between batches, have a way to keep foam from hardening on your mixing tool, unless you're using a box of wooden mixing sticks (which I don't recommend due to the time that takes compared to the quantity you need to mix). I used a paint mixer on a drill, which worked well. I had a large glass jar with 1-2" of acetone in the bottom next to my mixing tub, spaced perfectly from the cabinet so the drill could lean against it and the tip rested in the acetone. After mixing, I immediately ran the mixer in the acetone 1-2 seconds to wash it off, and let it sit there while I got to pouring, as every second matters! Worked perfectly. Having someone else to help handle this while you pour may also be helpful.
8- Have more than one mixing container. I used 2 plastic pint tubs. After a pour, I could use the second one while the residue in the first hardened. It was then easily removed with a screwdriver or chisel and ready for more. Can't remember if the can said to avoid paper tubs or not. Pretty sure no to metal though.
9- Not having properly marked measuring devices to commit to this, I used two clear plastic cups. I made multiple marks on one that could be used for different sized batches, then carefully made matching marks on the other (mine was 1:1 mix). The material will remove any marks inside the cup, so no red Solo cups (for the foam)!
10- It changes a lot as it expands. It gets pretty hot, more than epoxy. A larger pour will make the hull feel pretty warm quickly. I don't believe batch size effects the expansion/cure rate near as much as with epoxy. At first it's quite liquidy, then quickly gets sticky as it expands. After a couple minutes it skins over, but is still sticky. At this point the expansion is pretty much done. It also cools quicker than epoxy. Once the skin is no longer sticky (though you can still press into the curing foam somewhat easily), expansion is definitely done. It should start feeling cooler at this point, and is fun to poke and play with. If you have any blobs sticking out that you want to remove, now is the time to easily pull or pry them off without messing up the whole job. If you wait, they will be fully hardened and have to be cut off or sanded down.
11- It sands very easily. 60-80 grit on an orbital sander will make very quick work of it, but a mess too. The block foam was a little slower, but still fairly simple. Larger chunks can also be removed with a handheld hack saw blade (gloves recommended).

In hindsight, I realized I spent way too long trying to get all the block foam in the way I did. This would've been good if only using block, but not also with expanding foam. I should've just got the larger spaces mostly filled with large block pieces, then just used a little more liquid foam to fill it in. This is what we did with Craig's ski eventually, and it went much smoother. If we were to do it again, both us us would use all expanding foam. If doing that, use lower density foam (2-4#) to save on weight and $$. If doing smaller areas (ie footholds) then definitely go with 2# foam. If I had to do this on a tighter budget, I would do more block, like I did, with a lighter foam as the filler. I think Craig got heavier (6#?) foam for us when I did mine first, then 4# when he got more to finish the second half of his. When done, the tray was a bit heavier than I was expecting. I'll try and get a weight later before reassembly.

EDIT: After discussing this with someone who deals with foam professionally, you definitely don't need heavier than 2# foam for something like this. They can lift buildings with 2# expanding foam, and only use 4# for tougher jobs. 6# would be way overkill!!
IMG_8106.jpg

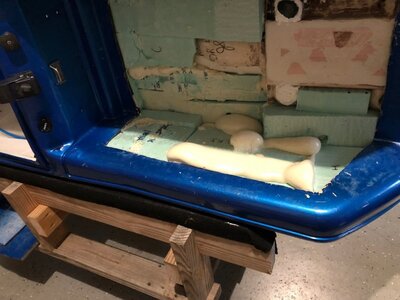
To do the gunwales, I simply flopped the ski onto its side on the stand. It stood stable enough and could be rolled around (rails 12" O.C.). You can see here some of the blobs I mentioned above. This is really neat stuff, but a pain to figure out when you first start to use it. I had to pour a little extra in around the top and rear part of this cavity, then jam the block in behind it and let it expand to fill the void. You know it expanded enough when you feel the heat through the hull in all areas. Don't want it to break when I'm riding around standing on the top rails! Speaking of which, anyone have a good idea of how much of the strength comes from the body when new, and how much comes from the foam?
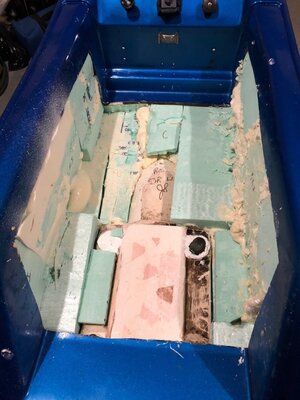
IMG_8108.jpg

IMG_8113.jpg

As you can see in several pictures, one of the original glue chunks between the tray layers on top of the pump bolts stayed in place. It was nice having that there as a reference point to how high I needed to build up my foam.
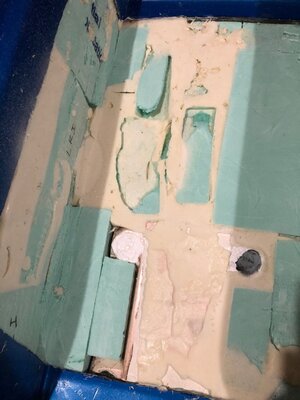
IMG_8115.jpg

IMG_8120.jpg

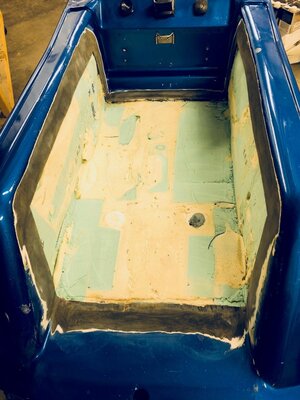
Pretty much done with foam, ready to get the tray back together. Just grab some glass and be done, right?
 
Last edited:
So my thought all along was to reuse the existing panels, and just glass them back in. Craig decided to go the other route when he cut his and made many cuts and trashed the scraps. Matter of preference really. I'm glad I kept the entire bottom intact to maximize strength, but that made it more awkward to pull that piece out, as the ends at the rear couldn't come straight up and the front end had to be lifted out first. This meant I had to get the panels installed in a specific order, whatever. I originally visioned getting the foam to shape, then putting the panels in and glassing them in. Now this picture was taken before all the foam was in to this point, but even then I could tell I might have a problem. The bottom panel hadn't really changed because of the thickness and edges, but the side panels had detensioned and the corners were all curved in noticeably. This also would make the center bulge out and leave a nice air gap. How was I going to get all this together reliably? Might have to do a full glass layup after all.
IMG_8104.jpg

There was still a small amount of foam to be poured to fully fill the tray and be ready for the panels. After thinking about how that was gonna go, we realized that this stuff acts like a glue also. Maybe a thin layer underneath the panel, and plenty of weight on top to keep it in place as it expanded, and I could do the final fill and secure the panel in all at once. If it wasn't working right, it would only be a small bit of waste and I could pry the center panel up and figure something else out.

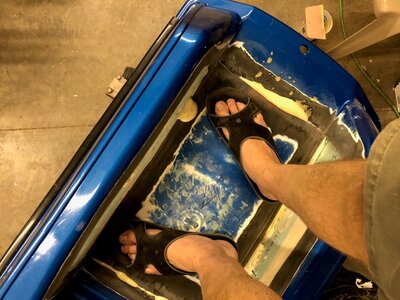
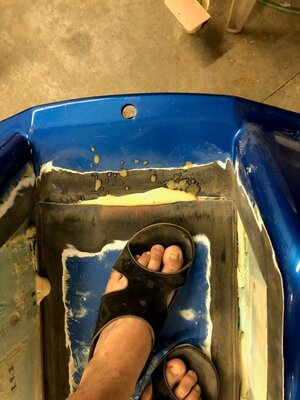
Well let's give it a shot. Back by myself at this point in the evening. I can mix a small batch, pour, and somewhat spread it even quick enough, and then quickly get the bottom in place. What about weight? There was a stack of about a dozen cinder blocks handy, but they'd take too long to stack in as it expanded, and might not be heavy enough. What would give me more weight, and spread over a larger area? How about 215# supported by size 13 Bozo feet? After a dry run to make sure I could do it quickly and safely, I decided to pour and stand on it (again, dry run everything the first time with this unforgiving stuff). Crappy part was not being exactly sure when the expansion was completely done, so I think I waited 8 min before getting down. Worked fairly well, but even more weight (or less foam) would've been good. Might've only generated a small psi worth of lift, but over enough area it still lifted me a little. Not horribly though, I think we can work with that. At least the front edge came out even. Now I'm very glad I beveled the edges when I thought I was just going to be glassing everything together before the foam idea.

IMG_8124.jpg

IMG_8123.jpg

IMG_8126.jpg

IMG_8127.jpg
 
Top Bottom