Power Factor Exhaust, Install

Hey yaw,

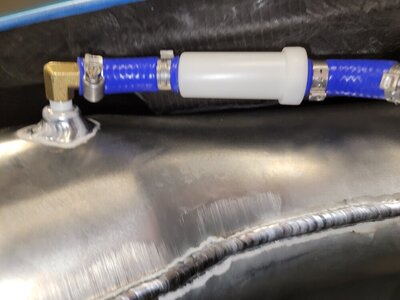
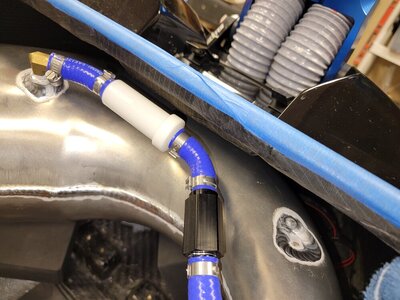
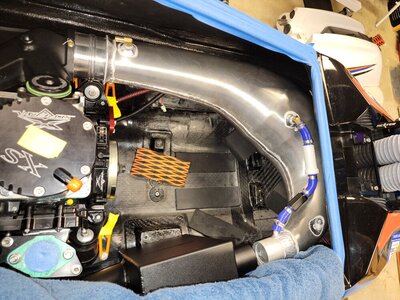
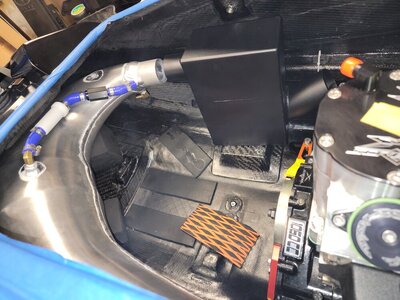
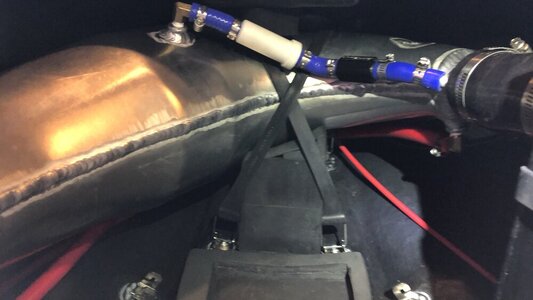
I just picked up my first Power Factor Exhaust and I am working on fitting it up in my Rickter XFR. It seems like the top of the pipe is going to need to sit extremely close to the top of the hull in order for everything to line up nicely and I'm just wondering what other people's experiences have been? I'm sure I can glue some turf or rubber up there so it's not rubbing right on the hull, but still. I just want to make sure I'm not missing something. Here are a couple pics of where I'm currently at.
 

Attachments

  • 20220410_183220.jpg
    20220410_183220.jpg
    92.4 KB · Views: 154
  • 20220410_183216.jpg
    20220410_183216.jpg
    137.6 KB · Views: 143
  • 20220410_183235.jpg
    20220410_183235.jpg
    196.3 KB · Views: 154
  • 20220410_183527.jpg
    20220410_183527.jpg
    154.1 KB · Views: 156

Yami-Rider

TigerCraft FV-PRO
Location
Texoma
Xscream makes 2 different pipes, one is angled down for the helium hulls, would potentially fit your application better, but if you have room for a layer of turf and it still not touching, you should be fine.
 
Xscream makes 2 different pipes, one is angled down for the helium hulls, would potentially fit your application better, but if you have room for a layer of turf and it still not touching, you should be fine.

Well that's the first I have heard about that! I'm not sure having the pipe angled down would help. If the waterbox inlet was maybe 1/2" lower i would have plenty of clearance. I could cut away the battery mount, but I really don't want to do that.
 
Put some turf above the pipe and get 2 tight straps on the pipe to keep it in place. It can get tight under that pole bracket area.

Okay. Cool! That makes me feel better. I just wanted to make sure I wasn't missing something. Do you recall if you used any midshaft coupler spacers on your XFR? I have one on the midshaft currently but I was trying to determine if having another on the crank would help.
 
I didn’t use any on my 16 xfr that I bought Brand new years ago, but I had the e box on the side. It wasn’t until I put a rear tank in it did I need to use them.
My 17 xfr now I had to use them because the ebox is mounted on the rear bulkhead and I needed the space.

I would generally use none to keep the engine weight towards the rear of the ski.

That was my thinking as well. I wanted to keep the weight as far back as possible so the spacer option is something I wanted to avoid. I will continue to mess around with the alignment this week and maybe I can get it a little better.

Can I ask how you secured your waterbox? It looks like I am going to have to angle mine some so the outlet and exhaust hose will clear the intake manifold. I was really hopping I could get away with using the old battery tray but I don't think that is going to work with the alignment.
 
Location
Stockton
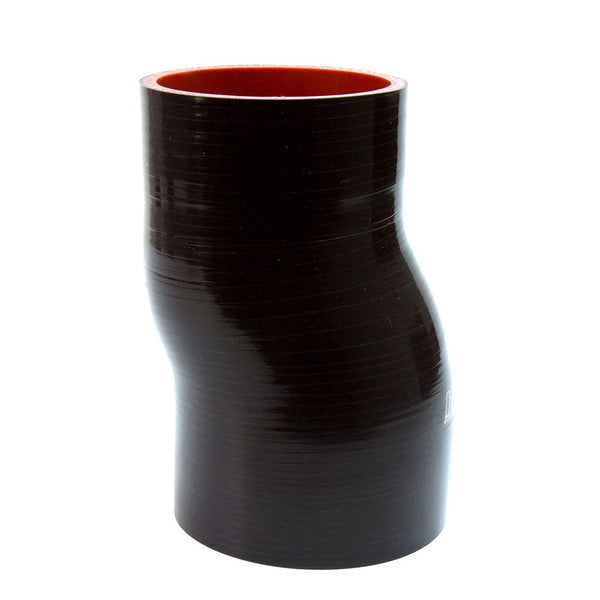
Your pipe figment looks normal, I had the same issue On a different hull.. I also bought an offset coupler for the pipe to water box in case I needed more room.. it’s like 1/2 inch offset hose from online silicone hose supply fir turbos..

This style hose in the correct size


Jetmanic sells a lay down pipe water box, wonder if it’s any shorter ?
 
Last edited:
2021 XFS Ninja Pro V2.
I have the same issue you do. And with how short our hull is the front hood hook receiver bolts sit directly overtop of the pipe. Even with short bolts and nylock jam nuts I have very little clearance, maybe an inch.

I bough these which has 3M adhesive on the back and cut like a 4-5" piece and stuck it to the top of the hull. You can barely see it in the first pic, but its behind the water filter.
IMG_8180.JPG
IMG_8088.jpg
 
One important tip for working with these chambers. Silicone the foam block down that's nearest waterbox VERY LAST, this will make it much easier to connect both couplers by allowing chamber needed wiggle room. Same for removing chamber too, just work a putty knife under block to separate it from hull first step.
 
One important tip for working with these chambers. Silicone the foam block down that's nearest waterbox VERY LAST, this will make it much easier to connect both couplers by allowing chamber needed wiggle room. Same for removing chamber too, just work a putty knife under block to separate it from hull first step.

I was told to use 3M Velco - It makes removal and re installation so much easier.
 
Location
Stockton
Tried nothing on the blocks thinking the pressure from the straps would hold ‘em.. fail, lol..

Did Velcro next, it worked, but getting the block in the right spot the first time was impossible, Velcro was thick and not much room to lift the pipe, adhesive to the foam block already separating..next time I needed to remove the block I was not comfortable reusing that Velcro due to it coming off the foam some… guess I could of replaced it, but seemed expensive.. and another store run..

Next I used silicone like freakrider mentioned.. that worked.. puddy knife to remove

Now on my second ski I use Weliwood contact cement on part of the block, no need to glue 100% of the surface… puddy knife to remove

Silicone is forgiving on the install as you can slide the block around if needed before it dries
 
Last edited:

clouse22

BDB Kustomz
Site Supporter
Location
Lake Orion, MI
@JKMike im running into the same issue on my new xfs. I am going to cut out that oem battery mount thats epoxied into the hull to drop the waterbox down. A buddy of mine cut and rewelded the waterbox, but I think im going to pass on that route.
 
@JKMike im running into the same issue on my new xfs. I am going to cut out that oem battery mount thats epoxied into the hull to drop the waterbox down. A buddy of mine cut and rewelded the waterbox, but I think im going to pass on that route.

I figured I would give one of the offset 2" couplers a try before I resorted to cutting. Here is the link to the one I ordered. It came out to be like $40.

 
It's tight. But fits fine. I didn't have to trim either block.

It does have to be disassembled and reassembled in a very specific way. And there was absolutely no way it was going to work with the pfp box.

Biggest gripe is Taylor Curtis doesn't know how to assemble a ski that can fit a ebox. Ive built 3 skis he has done and all 3 couldn't take any engine setup except the exact one he built it for. Legit this xfr can't fit a b pipe, pfp, or rrp pipe without the manifold hitting the ebox. I had to custom build a bracket. And it's still a nightmare.
49f3b7f6b27931c3012b35b9557235fe.jpg


Sent from my SM-G970U using Tapatalk
I haven’t seen any Rickter setup where it’s setup for both a lay down and a b pipe.
Although I did see Joel Barry mount his ebox to his motor.
Maybe there is a better method.
 
Top Bottom