RMBC Freeride's roundnose conversion

RMBC Freeride

Vintage
Site Supporter
Location
Pueblo, CO
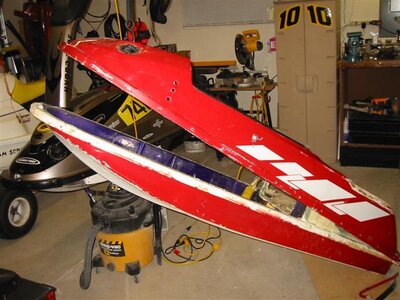
Yes, I said ROUNDNOSE...

I was inspired by Freestylegeeks project thread so I thought I'd put mine up against his...

Actually this project started a long time ago but I have not had time to work on it. I started a thread "way back when" (b4 the X) on that other site so I will copy and paste some of that to here... I hate typing, so here it is:

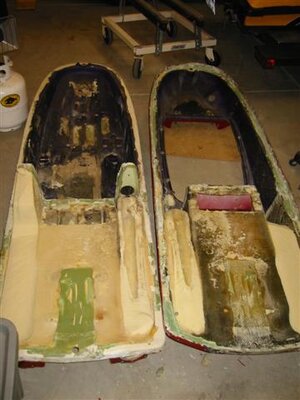
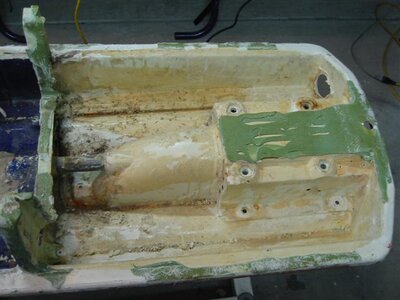
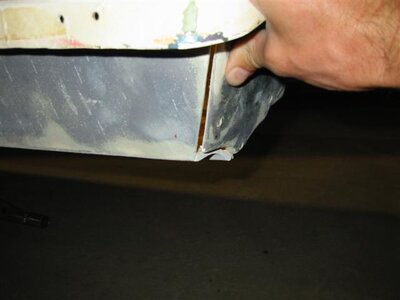
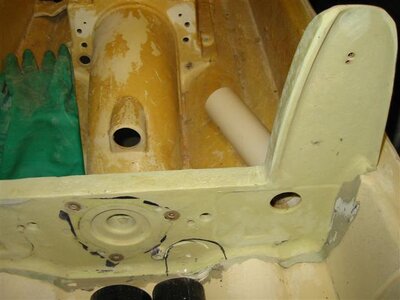
Thought you all would like to see a SJ split in two. It will will be getting a WCF top deck when I goes back together. Also a major weight loss program - anything non-essintial must go!

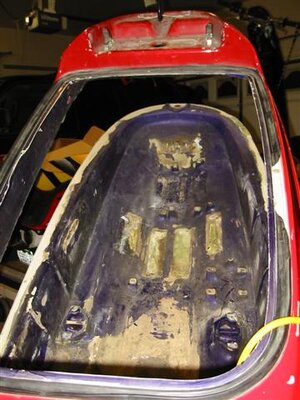
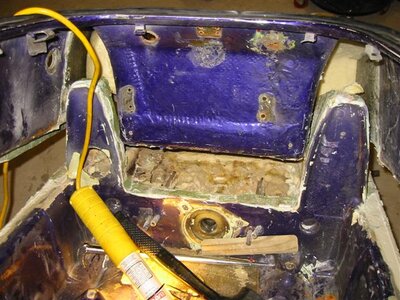
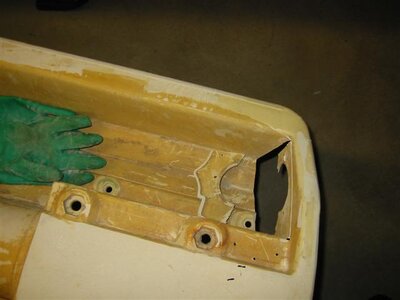
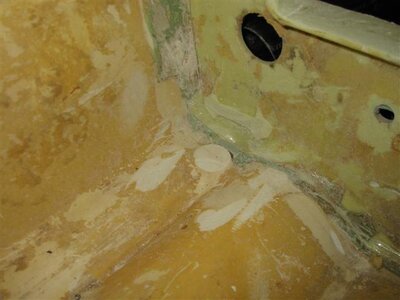
So far de-foaming has been a breeze, got half done in less than 30 min! How nice it is to have access... no bloody knuckles!!!

Also... the OEM top deck came off in one piece (although it took a beating). It is reuseable... would make a great roundnose conversion for a square. (wildman326 bought it from me).

<!-- / message --><!-- attachments -->
 

Attachments

  • split SJ 001 (Small).jpg
    split SJ 001 (Small).jpg
    61.5 KB · Views: 302
  • split SJ 002 (Small).jpg
    split SJ 002 (Small).jpg
    43.6 KB · Views: 173
  • split SJ 004 (Small).jpg
    split SJ 004 (Small).jpg
    74 KB · Views: 180
  • split SJ 006 (Small).jpg
    split SJ 006 (Small).jpg
    33.5 KB · Views: 253
  • split SJ - defoamed 001 (Small).jpg
    split SJ - defoamed 001 (Small).jpg
    46.5 KB · Views: 193

RMBC Freeride

Vintage
Site Supporter
Location
Pueblo, CO
The bottom is in relatively good shape compared to the top. SMC is some tuff shiz... and also very heavy!

Here are some pics of the current status. I have shortened the hull like Freestylegeek, but I did it by angling the transom similar to the WCF backflip hull (only not as much angle). Got a little aggressive on the exhaust side and it broke off... oh well more glassing to do :banghead: . the angle will work fine for my one-way valve as it will be further up the hull in the carbon fiber tube.

I have ground away the mounting bosses that the factory uses to locate and glue in the bulkhead (big chunks of molded SMC). And all the heavy green glue blobs have been removed - see "Gloober the Hut"

The entire inside and outside of the hull were sandblasted to remove multiple layers of paint. The surprise benefit of this was that it stripped away a very slight amount of SMC on the inside of the hull only... instant weight loss, albeit very little. But hey, my motto on this project is "every little bit counts"
 

Attachments

  • Gloober-the-Hut (Small).jpg
    Gloober-the-Hut (Small).jpg
    47.2 KB · Views: 171
  • 9-26-06 001 (Small).jpg
    9-26-06 001 (Small).jpg
    37.1 KB · Views: 154
  • 9-26-06 002 (Small).jpg
    9-26-06 002 (Small).jpg
    28.8 KB · Views: 613
  • 9-26-06 003 (Small).jpg
    9-26-06 003 (Small).jpg
    26.2 KB · Views: 140
  • 9-26-06 004 (Small).jpg
    9-26-06 004 (Small).jpg
    32.4 KB · Views: 143

RMBC Freeride

Vintage
Site Supporter
Location
Pueblo, CO
more pics: CF tubes, grinding, cutting, etc. Top of bulkhead trimmed to fit WCF top deck.
 

Attachments

  • 9-26-06 008 (Small).jpg
    9-26-06 008 (Small).jpg
    45.7 KB · Views: 183
  • 9-26-06 006 (Small).jpg
    9-26-06 006 (Small).jpg
    73.9 KB · Views: 172
  • 9-26-06 005 (Small).jpg
    9-26-06 005 (Small).jpg
    38.2 KB · Views: 96
  • 9-26-06 007 (Small).jpg
    9-26-06 007 (Small).jpg
    38.9 KB · Views: 133
  • 9-26-06 012.jpg
    9-26-06 012.jpg
    684.1 KB · Views: 137

RMBC Freeride

Vintage
Site Supporter
Location
Pueblo, CO
All of the sudden? Hell, I havent touched it in months! Just got inspired by Geek's build and took some new pics tonight. Now I might have to actually go work on it.
 
How did you manage to get the topdeck to separate so cleanly from the bottom? I thought the bonding adhesive was almost indesructable?? I have to separate one soon and was looking for tips on how to get it done.:headbang:
 

RMBC Freeride

Vintage
Site Supporter
Location
Pueblo, CO
It wasn't easy... Basically I used a heat gun to warm up the glue, then wedged a prybar in between the top and bottom flange and pryed away. Working only about a 12"-18" section at a time it wil eventually pop loose. The top deck will be worse for wear since the fiberglass flexes more as you are prying. That green glue is def. not indestructable... heat makes it come unstuck from the SMC!
 

freestylegeek

waiting...
Location
Grand Rapids, MI
Looks great Neil!
I'm sure 1.5" will still make a big difference.

I'm following your same motto of 'every little bit counts'.
So, I have to ask where you got the carbon tubes?
That will definitely make a difference!
 

RMBC Freeride

Vintage
Site Supporter
Location
Pueblo, CO
I will check when I get home tonight, I weighed everything and wrote it all down. The exhaust tube I think was 2~3lbs lighter. The scupper tube was alot as well, PVC is heavy and dense like SMC.

But remember... every little bit counts! If I can take off 1lb in ten places, I saved 10lbs! :arms: bad example, but you get the point...right?
 

freestylegeek

waiting...
Location
Grand Rapids, MI
I will check when I get home tonight, I weighed everything and wrote it all down. The exhaust tube I think was 2~3lbs lighter. The scupper tube was alot as well, PVC is heavy and dense like SMC.

But remember... every little bit counts! If I can take off 1lb in ten places, I saved 10lbs! :arms: bad example, but you get the point...right?

Oh, I got the point alright!
I'm all about adding up little things.
If I can avoid PVC and SMC, I'll do it.
 

RMBC Freeride

Vintage
Site Supporter
Location
Pueblo, CO
So the tubes are for light weight? How much weight savings is it over stock?

Well I looked at my notes last night, the Exh. tube is right at 2lbs lighter and the scupper tube is 1lb lighter.


Carbon fiber Chinese finger trap...who woulda' thunk?

It works great and was super easy to do. And the shrink tape was badass, it squeezed out all the excess resin... these tubes are incredibly light, not overly resin saturated!
 
Top Bottom