Short and sweet; before and after. OCD's first build!

OCD Solutions

Original, Clean and Dependable Solutions
Location
Rentz, GA
I'll keep this simple. Before and after pics. You all know the work that goes into the process, after all, you all walked me through it.

Thanks Guys for all your help and support.:brap:
 

Attachments

  • Squarenose Rebuild 040.jpg
    Squarenose Rebuild 040.jpg
    58.5 KB · Views: 290
  • 92 SJ 701@20%.JPG
    92 SJ 701@20%.JPG
    55.4 KB · Views: 267
Last edited:

OCD Solutions

Original, Clean and Dependable Solutions
Location
Rentz, GA
More pics, more details.
 

Attachments

  • Squarenose Rebuild 045.jpg
    Squarenose Rebuild 045.jpg
    48.5 KB · Views: 168
  • Squarenose Rebuild 042.jpg
    Squarenose Rebuild 042.jpg
    56.3 KB · Views: 164
  • Squarenose Rebuild 016 35%.jpg
    Squarenose Rebuild 016 35%.jpg
    109.8 KB · Views: 180
  • Squarenose Rebuild 059.jpg
    Squarenose Rebuild 059.jpg
    71.1 KB · Views: 169
  • Squarenose Rebuild 052.jpg
    Squarenose Rebuild 052.jpg
    48.1 KB · Views: 160

OCD Solutions

Original, Clean and Dependable Solutions
Location
Rentz, GA
My version of a Slutty Hood Mod
 

Attachments

  • Squarenose Rebuild 061.jpg
    Squarenose Rebuild 061.jpg
    42.8 KB · Views: 187
  • Squarenose Rebuild 064.jpg
    Squarenose Rebuild 064.jpg
    25.9 KB · Views: 223
  • Squarenose Rebuild 050.jpg
    Squarenose Rebuild 050.jpg
    42.7 KB · Views: 186
  • Squarenose Rebuild 051.jpg
    Squarenose Rebuild 051.jpg
    56.4 KB · Views: 182
  • Squarenose Rebuild 014.jpg
    Squarenose Rebuild 014.jpg
    43.4 KB · Views: 206
Last edited:

OCD Solutions

Original, Clean and Dependable Solutions
Location
Rentz, GA
:biggthumpup:Very clean hood mod

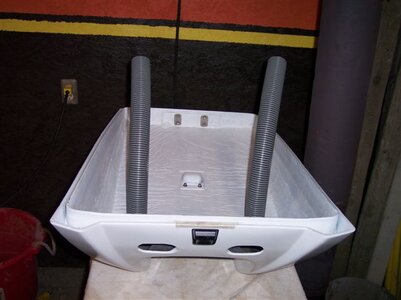
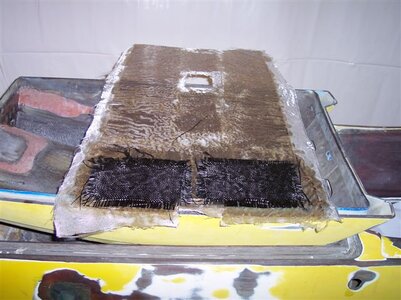
Thanks. I laid up a layer of cloth and a layer of matt and pressed it flat on my work bench to cure. I trimmed the cured piece to fit perfectly in the hood. Once trimmed, I laid another piece of cloth over top extending a few inches out in every direction, making sure to not get any resin on the extending parts.

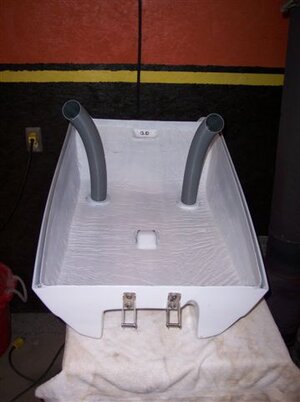
Once cured this gave me a perfect insert with a flexible "skirt" to extend up the sides of the hood for strength and resin application. A little resin and a few strips of cloth and you get what you see.

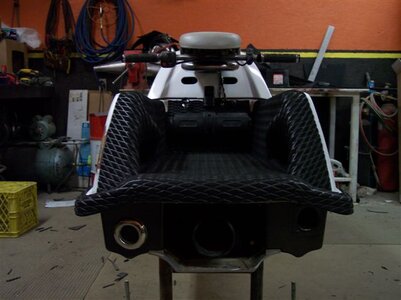
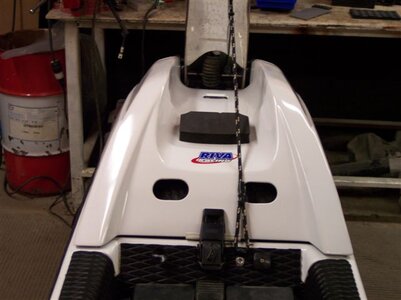
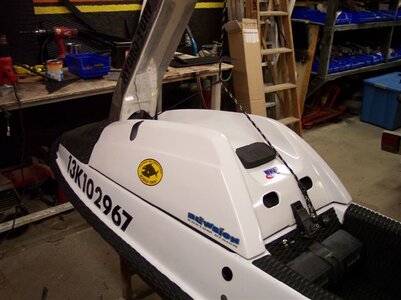
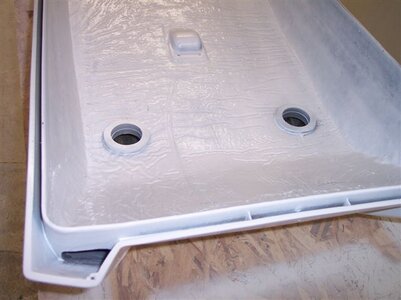
I also laid down some scraps of carbon fiber cloth in the areas visible through the new intake holes.
 

Attachments

  • Squarenose Rebuild 168.jpg
    Squarenose Rebuild 168.jpg
    65.2 KB · Views: 206

OCD Solutions

Original, Clean and Dependable Solutions
Location
Rentz, GA
I was thinking about this project this morning and dug up the old thread. It's funny how you can sum up a 200hr plus project in under 10 pics, lol.

I actually have a few hundred pics taken during the process.
 

OCD Solutions

Original, Clean and Dependable Solutions
Location
Rentz, GA
Here's the strip down process and some pics of the damage to the hull.

There are two massive cracks in the handpole mount area and the strakes on the bottom of the hull were completely worn through in multiple places.

Squarenose Rebuild 037.jpg Squarenose Rebuild 038.jpg Squarenose Rebuild 040.jpg Squarenose Rebuild 041.jpg Squarenose Rebuild 042.jpg Squarenose Rebuild 043.jpg Squarenose Rebuild 045.jpg Squarenose Rebuild 046.jpg Squarenose Rebuild 048.jpg Squarenose Rebuild 050.jpg
 

OCD Solutions

Original, Clean and Dependable Solutions
Location
Rentz, GA
Cut holes to strip out all the wet foam and fixed up a few cracks and old holes. Started prepping the handpole area for repair.

Squarenose Rebuild 051.jpg Squarenose Rebuild 052.jpg Squarenose Rebuild 054.jpg Squarenose Rebuild 057.jpg Squarenose Rebuild 058.jpg Squarenose Rebuild 059.jpg Squarenose Rebuild 060.jpg Squarenose Rebuild 064.jpg Squarenose Rebuild 065.jpg
 
Top Bottom