The battered SN restoration

Turf time

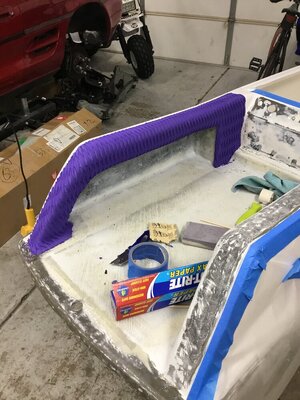
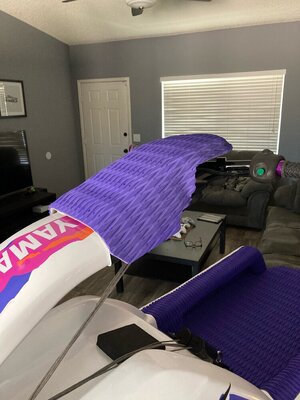
Spent more or less the past few days cutting my teeth on doing turf, I've had some experience with the 550s and that self-adhered Black Tip stuff, but never full on turf. After reading many threads and watching some videos, I jumped into it feet first. This stuff is actually not too bad to work with, kind of like thick decals. Of course, there were some mistakes and boo boos, but for the most part I am VERY pleased with how it all turned out.

Getting the sides done first
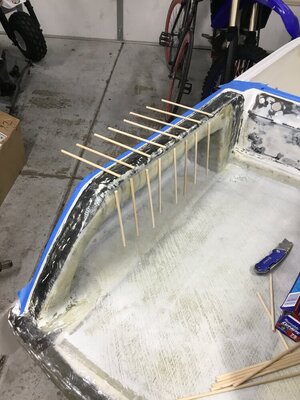
IMG_1645-1.JPG
Not too bad for the first try
72439318896__1FA68291-F1C7-48CB-93D9-B5A08977C570-3.JPG
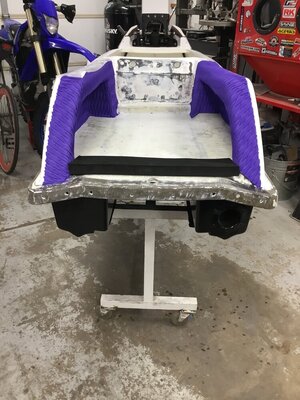
Building up the rear kicker
IMG_1648.JPG
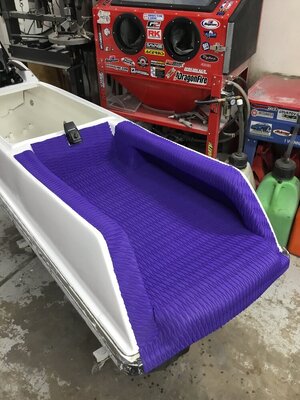
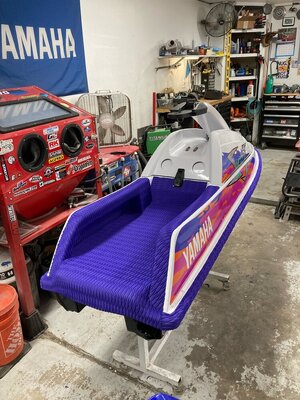
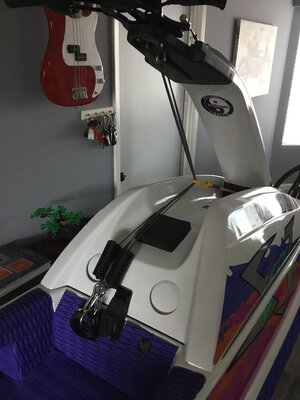
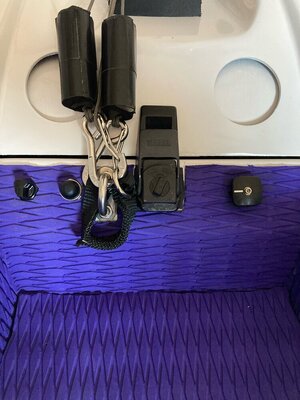
Bottom mat down and shaped, went the thickest I could for plush, and oh is it plush! I also built up a little transition up front to that little step the SNs have in the tray.
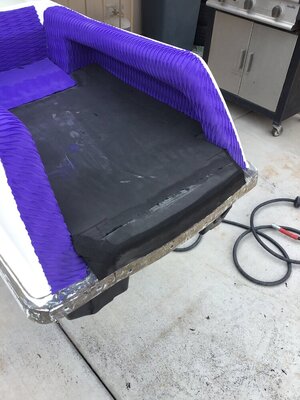
72444726052__6521C4AE-72C5-47D0-B213-D2E62A193E72-1.JPG
And finally, all done! I was going to run a rear bow eye, but decided to not mess with it, If I need to later I'll add one, all in all, it came out great! TONS of room!
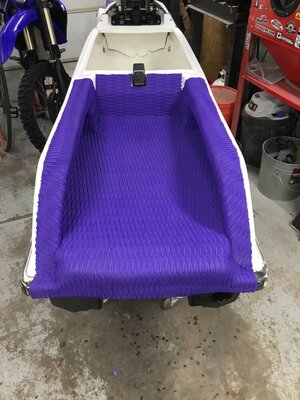
IMG_1655.JPG

IMG_1656.JPG

IMG_1657.JPG
 
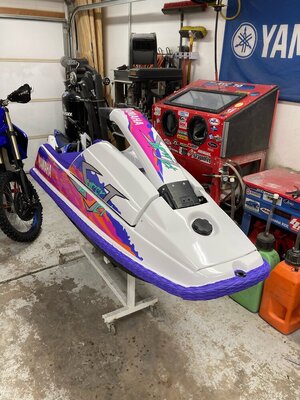
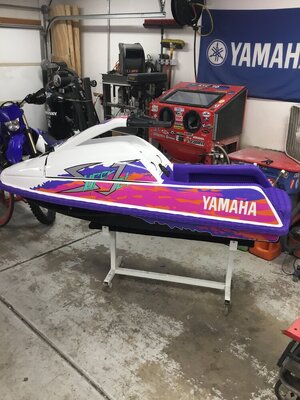
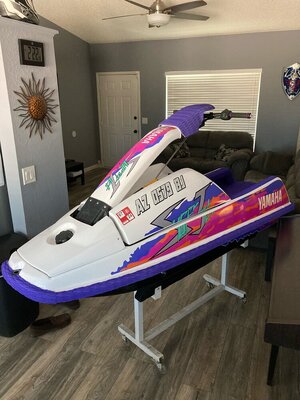
And finally, my favorite post of this thread, the graphics!

I've been waiting for this day, I knew as soon as I saw the 95 model year of this ski I HAD to have the same graphics. I love 90s neon, and Yamaha had a ton of cool colors back then, the 92 Banshee, the 93-95 YZs, and this Superjet, it looks AWESOME!!! These are my favorite decals I've put on a machine, and might be my favorite looking machine I've ever owned!

This is prob the best this thing will ever look, as I know it will get beat up, but for the moment, I'm enjoying the hell out of looking at it, I keep sneaking out to the garage to admire it lol. Big weight off my shoulders, now that the hull is mostly done, I can focus on the driveline, and thats easy peasy compared to all this body work.

Can't thank everyone enough for all the help I received to get to this point, especially from @smoofers, he pretty much guided me through this journey and answered my million questions, thanks again man!!! :cool:

IMG_1981.jpegIMG_1659.JPGIMG_1980.jpeg
 

smoofers

Rockin' the SQUARE!!!!
Site Supporter
Location
Granbury, TX
Absolutely amazing work. One of the best looking squares I've seen to date. Now you gotta slap a motor in her and ride the heck out of it.
 
I hope your under pad doesn’t shrink like mine did. I did the 1” stuff on my round nose and it totally shrunk and got hard. The 1/2” stuff I did on my square nose didn’t shrink. A few of us talked to hydro turf about it and they flat out didn’t care. One buddy ripped his out and double stacked the 1/2 and it’s held up.
 
I hope your under pad doesn’t shrink like mine did. I did the 1” stuff on my round nose and it totally shrunk and got hard. The 1/2” stuff I did on my square nose didn’t shrink. A few of us talked to hydro turf about it and they flat out didn’t care. One buddy ripped his out and double stacked the 1/2 and it’s held up.
Too late now, guess we'll find out
 
I'm still here!

Been a while since the last update, been slammed with other projects, restoring a golf cart and a ATC250R for a buddy, doing a K swap for another buddy in his Integra, all while trying to knock my own projects out.

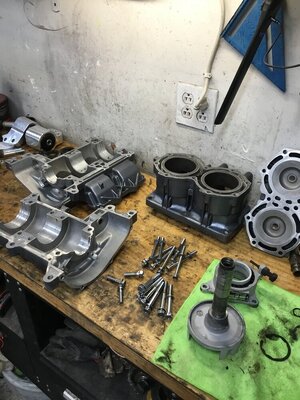
Finally tore into the donor 701 I picked up for her. Aside from some rust on the crank and low compression, its a pretty clean motor, all stock, spun over smooth no issues. I will be going completely through it, fresh top end bored over the next size up, fresh crank, all seals/gaskets, but it will remain stock for the time being. Ordered all my parts from @JetManiac, so tonight I tore it all down, cleaned and prepped everything for assembly.

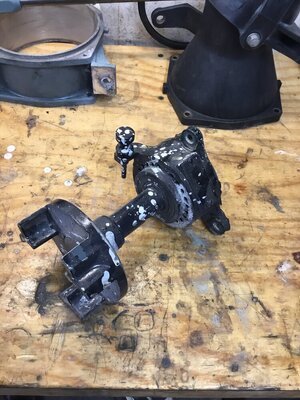
Also finally rebuilt my midshaft, I was questioning weather this one would have been salvageable, but aside from more of the same bilge coat crap all over it from the PO (seriously I think this dude just pulled the motor and then went to town with that crap, it was EVERYWHERE) Tore it down, blasted/stripped all the old paint off it, fresh bearings/seals, and a lick of paint, looks and feels like new!

The Superjet has essentially just been an art piece in my living room while I go through the driveline as I have zero room in my garage, but its a great thing to stare at!

IMG_1801-1.JPG
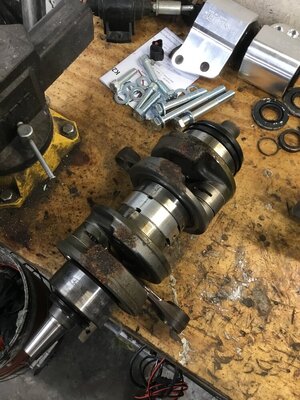
Crusty crank
IMG_1802-1.JPG
Had my doubts saving this thing, but I need to save money where I can and a bearing kit with some sweat equity is cheaper then a full midshaft assy.
IMG_1641.JPG
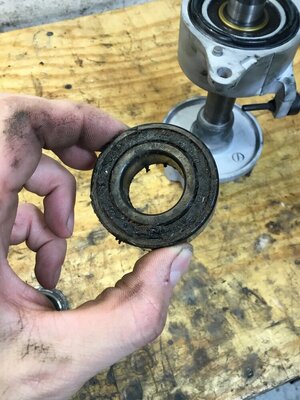
Crunchy bearings, I was told by the PO this ski was ready to be put back together and hit the water o_O
IMG_1803-1.JPG
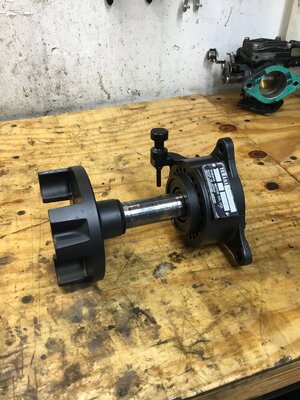
Just like new, nice little surprise was the OG Yamaha tag was still in good shape under all that bilge coat crap.
IMG_1807-1.JPG
And the conversation piece
IMG_2126.jpeg
 
Still plugging along

Nothing huge but still important, buttoned up the bottom end with the fresh crank, dropped off the top end to get bored over, got the pump and midshaft all shimmed and installed, blasted and painted the ride plate etc etc, getting closer! Very pleased with how it's coming along in the midst of all the other chaos going on in my shop. Goal is to have this and the 3 other machines (ATC250R, golf cart, K swap integra) all done before I leave for Alaska for work in about a month.

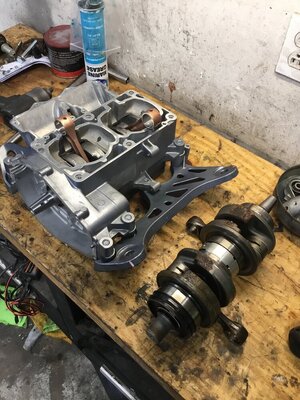
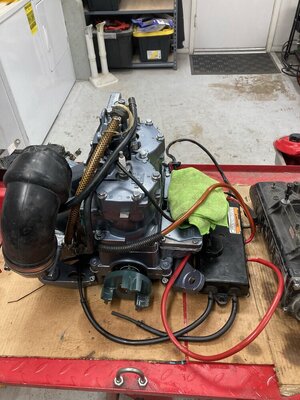
Fresh bottom end, I had thought about painting the motor a similar purple I did the ride plate on, but I kind of like the OEM teal/blue, and lord knows I don't need to add anymore to my workload at the moment. Shipped the crusty crank off to Jetmanic for the core deposit
IMG_1827.JPG
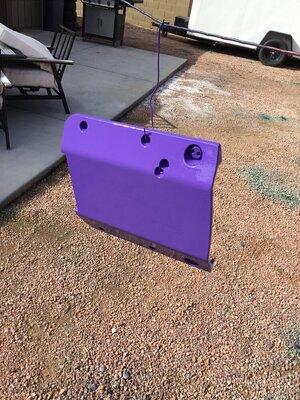
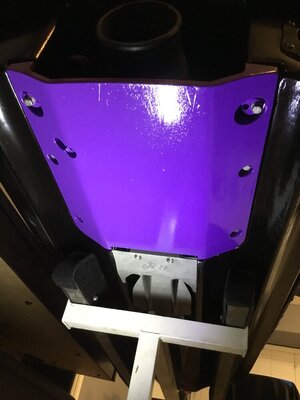
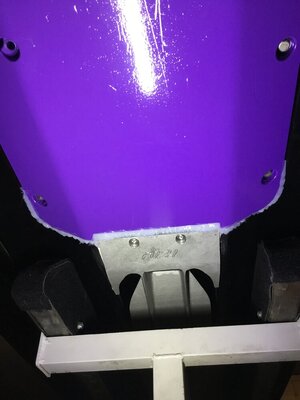
Painted the ride plate to match the rest of the ski, yea I know it'll end up getting scrapped clean but thats fine, i'll likely upgrade to something different later on.
IMG_1830.JPG
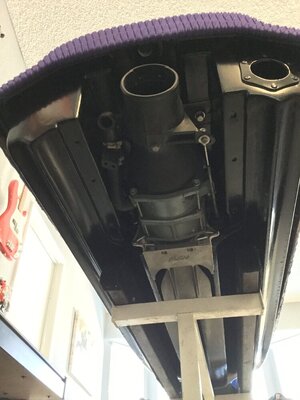
Pump and intake grate installed finally, took a thick and thin shim on each of the back bolts to get it aligned, not too bad.
IMG_1838.JPG
And midshaft in
IMG_1834.JPG
 
Still plugging away, I've got the motor all back together and for the most part ready to drop in, some little things I need to do first before I do but getting close, could easily fire it up in the next few days here which is exciting. I'm way ahead of my deadline to get this thing done which is fantastic. Aside from that just some little odds and ends I was able to complete.

Motor just about ready to go in, carb rebuild and some other little odds and ends and that will happen this week.
IMG_2345-1.jpeg
Pump area all tidied up and installed/shimmed/ completed.
IMG_1850.JPG
As per recommendation of @smoofers, laid some silicone in the gap between the ride plate and grate.
72888488338__BBC046A9-5581-4C56-9889-E6EBDFC6A76A.JPG
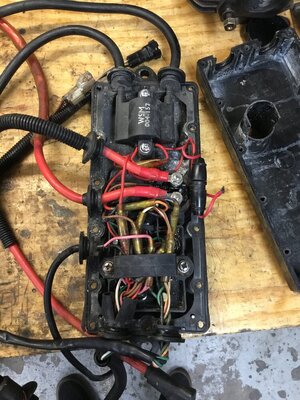
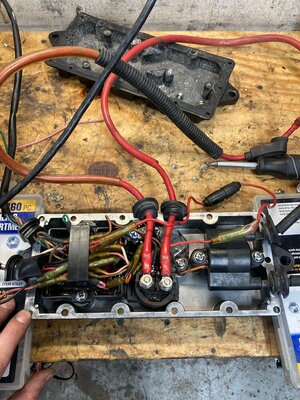
Was planning on running the Ebox as it were, but as per @JetManiac, there were somethings that needed addressing, mainly swapping out that WSM coil for my OEM 650 one and shortening/removing some un-needed wiring. I also swapped everything over to my cleaner 650 housing, mainly due to a bolt stripping out on the way out on the couch box.
IMG_1867-1.JPG
Fresh paint on the back and cleaned up, ready to go.
IMG_2344-1.jpeg
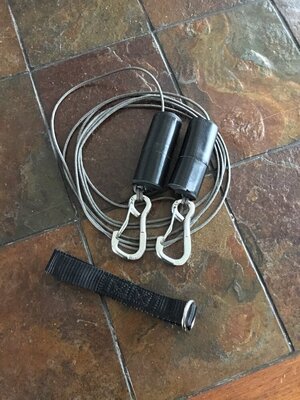
And finally, I needed to make a limiting rope. Since I love things that can do multiple jobs, I ordered up some Amsteel rope thats good for like 1600lbs, and made me a limiting rope that doubles as a tow rope, added some foam and tape as per @SteveC's tow rope thread to prevent sinking it, we'll see how it does, hopefully I'll never need it lol
IMG_1864-1.JPG
A shortened bungee cord, an eyelet, and some clever knots found off the web, I know have a limiting/tow rope combo. Essentially its 10 feet of rope that I run in a loop up through the bungee, then pole eyelet, then back down again through the bungee, and down clasped into one of the carabiners where I also clamp my little boweye tow strap, seems to do whats it's supposed to do!
IMG_1861-1.JPG

Next update I'm hoping to have a video of a running ski!
 
Small update, but it's the little things that matter

Finally figured out a chin pad. Was going to make one, but I'm on a time crunch and have a million other projects I'm trying to juggle, so I bit the bullet and just bought a used RN chin pad from @AAlamo (thanks man!). Since I'm running SN graphics and have an RN pole, part of the Yamaha logo was getting blocked by the chin pad, well we cant have that now can we? So trimmed the pad back a little bit, cleaned it up, turfed it, and threw it on, looks good to me!

Also got my dash squared away, I am a little concerned about breaking off the bilge switch knob or puncturing the primer bulb, but going to run it for now and see how it goes. Worst case I'll get a few Watt holes or a Blowsion dash insert.

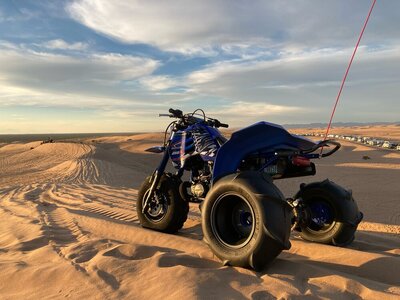
Hope to get the motor back in this week, wanted to last week but got tied up with a ATC 250R I restored for a friend, and ended up hitting the sand dunes this weekend to shake it down and go to the 250R meet up that was also happening at the same time, was a wild weekend! I'm usually on two wheels out there but it was killer to ride something that was the OG dune machine back in the day. Actually got to meet another member of the forum out at the meet up, although he isn't active on here any more, was still great to meet him and others!

Not perfect, but much better then it was!
IMG_2428.jpeg

IMG_2427.jpeg
Dash layout, everything seems to clear so should be good
IMG_2429.jpeg

And just for fun, the 250R I just restored, what a machine!
IMG_2373.jpeg
 

smoofers

Rockin' the SQUARE!!!!
Site Supporter
Location
Granbury, TX
Looks great! Excellent work! For normal lake riding I don't think you'll have an issue with the bilge switch or knob. If you were riding surf it could be an issue, but you have pleny of time to determine what works.
 
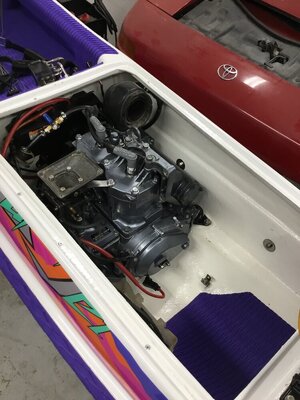
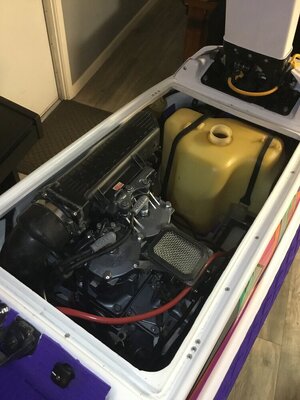
Well, still havent had time to get it running, but I have been working on it in between other things. Got the motor back in which is always a nice step forward, figured out an exhaust pipe from the chamber to the water box out of a few random exhaust pipes I got from @JetManiac, and some other odds and ends.

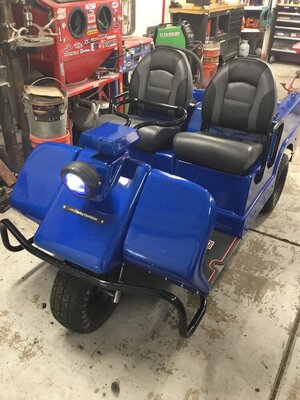
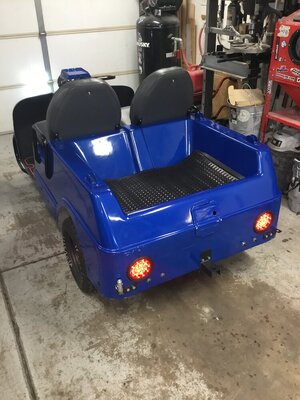
Good news is If I can get this last project out the door this weekend, a 79 Harley Davidson golf cart I've been going through for the same guy that owns the 250R, then I can really focus on my ski, although I still have two cars I have to put together as well o_O
IMG_1901.JPG
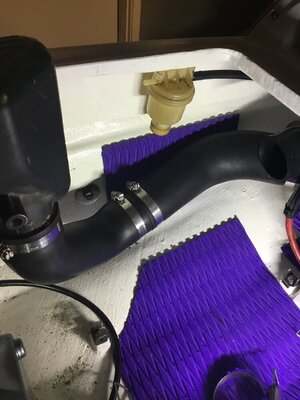
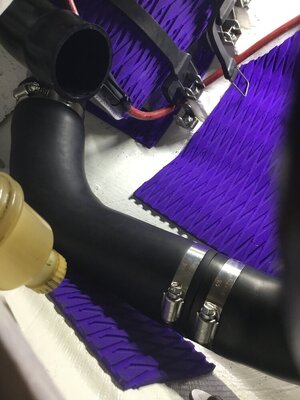
Pieced together exhaust pipe, should work until I'm ready for a B pipe.
IMG_1903-1.JPG

IMG_1904-1.JPG
As she sits for the moment.
IMG_1905-1.JPG
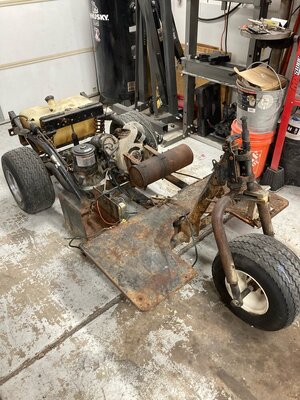
And that golf cart, pretty neat little machine but can't wait to get it out of here to free up space.
IMG_1931.JPGIMG_1932.JPG
How I got it
IMG_2136.jpeg
 

WFO Speedracer

A lifetime ban is like a lifetime warranty !
Location
Alabama
Harley Davidson golf cart , when you put it in reverse the engine fires up and runs in reverse .
 
Top Bottom