Freestyle 2013 Pro Series EME Micro Build

I have been told multiple times that it is time I start a build log, it will be me sorting through pictures and posting them to start with.

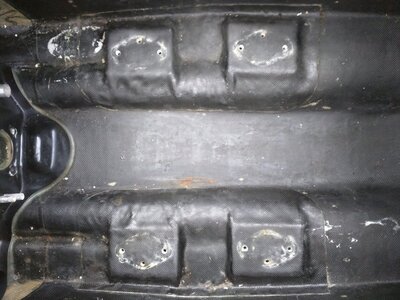
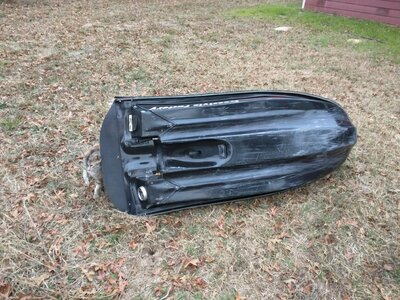
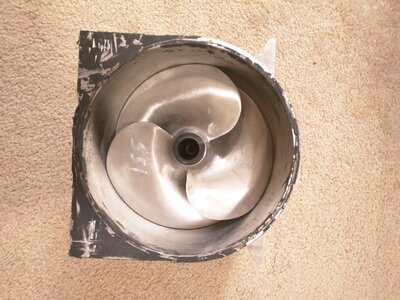
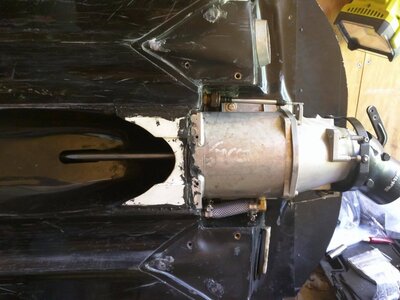
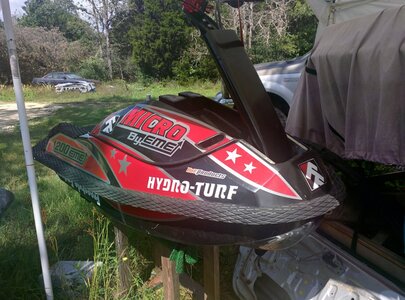
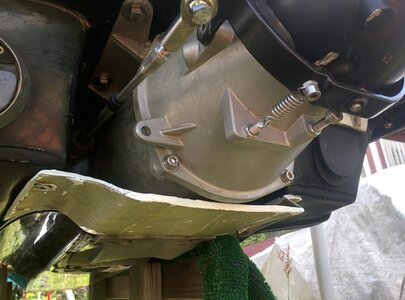
First up, I bought a 2013 "Pro Series" EME Micro hull, completely bare, other than the handlepole mount and turf, weighs just under 80 pounds with hood. A couple of months later I bought the entire pump setup that was originally on it. The pump Setup is a 155 made for an SXR, it also has a skat nozzle and steering, it was set up for an EME 1200 motor originally so I will need a new impeller. I also got the right length driveshaft for it with bearing and a coupler. I bought a limited slip tank for it as well that I will be mounting after I get the engine and driveline lined up, but I checked fit and it is great!
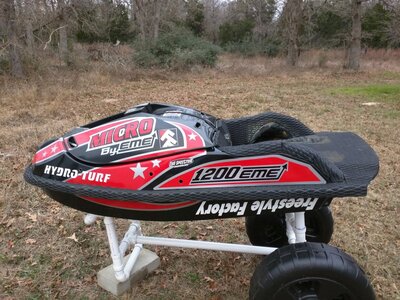
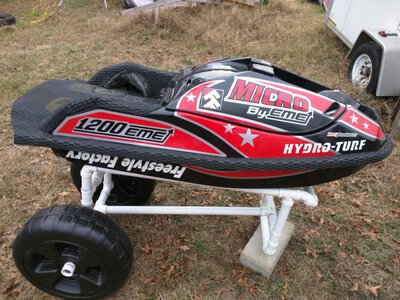
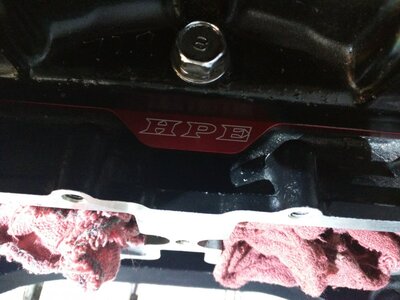
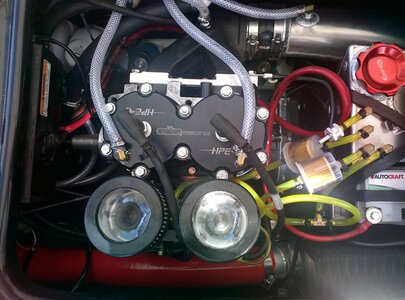
Micro Left Side.jpg Micro Right Side.jpg Micro Engine Compartment.jpg Micro Bottomjpg.jpg
IMG_20160811_224442.jpg

Future Mods/Parts that are either ordered or in progress:

4mm Stroker from HPE with 64x top end ported from some sweet templates I ordered and dual 44mm carbs
Xmetal pole, shortened by EME
PFP Pipe
Blowsion OVP steering
 
Finally got all of the motor parts in, the crank is in and the cylinders have been bored .25 over, should have the motor together tomorrow and will take and upload a few pictures. The steering cable is in the hull as well as the trim cable and I have mocked up the pump to make sure everything will line up. The rest of the parts should be here this week. I may be done in the next couple of weeks assuming there aren't any major snags.
 
Not yet, he said they should be here mid week, I may need to message him to see if he has a tracking number in case I need to sign for them.
 
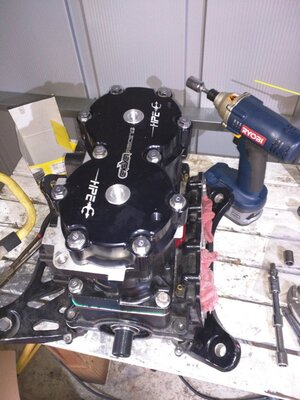
Got the motor most of the way together, want to rebuild the carbs before finishing everything up, still waiting on all of my hull parts and exhaust.

HPE.jpg motor.jpg
 
All of the parts came in, started working on alignment of the motor and found that I need some serious adapters to make it work... Hull was originally set up for an EME 1200 which seems to have very offset mounts compared to a superjet.
75YIMuMKLc004MUlJyb33_TbYDHqj-rFK5d8KihBQlj-5i8_U6qttsQZdHBSWvYI6PUdyY3qjIe3eCtTVziz3N8GJtAIxPRSPXSROuiFdzCL0cN6WOZQ28R9uZK6U_ZMyzUs9nNYsuG1WwUH1goP8m-gMlPLZjZ_bBV5Cuc9D_x8E34Fj3nJ2iN9JW9Ktt1Lx68iMQ4beuugpg3w6kBIxT6I0aKanoaHPRgY6CQR-xo_QRyJWDatkWPxkMasnXXpniEt7SfE67noulekw4buXZ1xtjRQN2Osa4iRG0NGzsZpG8OkumODk_Q_AIBwcu7Oje9z4X4d1LX7PXGaBs83XQALGCMJYs6Jla-0phyln_YGkFBNk_P5luCsAr_DxqMtkMPlL4bUhmCAMggzS_j5WqY0aPaWrvjJppGcMM8QdZXRDhUI-QJx-L2EiQtukPV6JzoVEiMXIppKOEOz2dpPZw1Phdo-uxB2KMu5Yhqw4aGW_HLvSM0Xy9vQYMus5ns6Vtv6GuZWF32hw2lFzqWCCiyJrfPADt1keZXd4gqFBahZd5b5Z7GJsh2KlFJL6bfAEeexDw_MjfL-6xeWI4WNq_etaVd5zXFxmRUgBXYd3SG--8rH7aDr=w838-h628-no
 
I will shoot him a text and see what the cost is to get them, I may just make something for it though as either way at this point I will need to get shorter engine mounts to get the driveshaft alignment right, with the mounts that are on there sitting how it is in the lowest possible position for the mounts the engine is at the right height...

I had looked at a few of those posts previously, and it looks like the EME adapters don't go back far enough either to fix my driveshaft alignment, I think my driveshaft is slightly shortened compared to the normal kawasaki ones that these seem to be meant for.
 
I am, I was thinking about adapting the pump setback kit below from rhaas to fit, but I am waiting to see how wide it is, the next option is just to buy some aluminum bar and do this myself, then figure out what height of mounts I need and order them from rhaas instead.

https://www.rhaasproducts.com/ProductDetails.asp?ProductCode=SUPERBACK

In your pictures for your white Q8 it looks like you were about as far back as you could go and ended up needing a coupler that was extended out a little, would you have been able to adjust the motor further back to fix that alignment or was it already too far back for electronics or something else to go in?
 
Last edited:

N3vrSat1sfied

Military Member
Location
Fort Worth, TX
Electronics and all still fit, but yes it was about at the end of the plate. I had to add a washer or two on the driveshaft between the coupler if I remember right.


Sent from my iPhone using Tapatalk
 
Alright, I shot Eric a message to get his thoughts, the adapter plates look like they would be easy enough to fab up in the size that I need, so I have a couple of options I think at this point.
 
So, I found that I do have the extension on the driveshaft already, and after speaking with Eric and Rhaas to see if pre-made products would work well it was suggested that I make my own adapter plates, so I will be buying some 5/16 aluminum bar in a 3 inch wide size and drilling and tapping it for my use. I will take some pictures as I go along as this is one of the larger modifications so far, most of the rest were just shaving down bushings or small mounts to fit with some mismatched parts (like xmetal pole with blowsion ovp steering).
 
I knew there would be alignment issues after buying it and going through all of the older eme build threads. I knew that after a certain date they were all a little more custom built and most were build for yamaha powerplants and kawasaki pumps. But it wasn't until I started putting things together that I found the engine alignment to be as far off as it is, it was not completely unexpected though as the hull was originally built with an EME motor and I knew they were not pwc based. I was told by the original builder that adapter plates may be needed but that they didn't need them when they put it together, so I guess I was more hopeful that they wouldn't be needed.

All of the smaller adjustments to make other parts fit are just par for the course, unless you buy all of your parts from the same person and they guarantee perfect fitment, there will always be grinding needed to make things fit.
 
Got my engine mount plates done, still need to take a picture of them and do final alignment, got some 5/16 shorter engine mounts from Rhaas that look like they will fit in perfectly with my 1/4 inch aluminum plate that I set up. Also got some UFO mounts from JetManiac for mounting down random things, should work perfectly. I got the shoe and pump sealed in and bolted down yesterday and got a picture of the final product. Next up is engine alignment and start test fitting and putting in all of the mounts I will need.
 

Attachments

  • pump and shoe.jpg
    pump and shoe.jpg
    115 KB · Views: 174
She lives! got everything together today and got it to start up, but it wouldn't shut off... new thing to troubleshoot now. Pulling the plug wires shut her down so I know it isn't a bad solenoid keeping the starter running, and it has a new start/stop switch so I assume it is good, but I will have to chase down the other possibilities and see what isn't working as expected. Will post up pics of everything complete tomorrow hopefully.
 
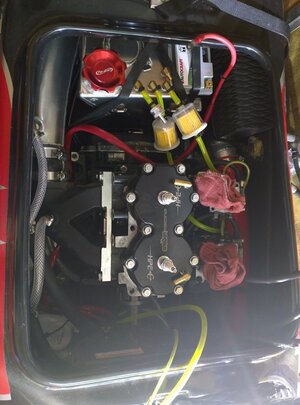
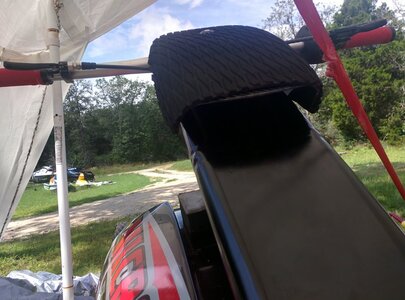
Got the electrical issue fixed for now, put in a dedicated ground from the engine to the ebox and it cuts off appropriately now... not sure where that would need to be fixed properly at but I am good with functional for now. Here are the completed pictures!

engine finished.jpgfinished front.jpg
 

Attachments

  • buttoning up engine.jpg
    buttoning up engine.jpg
    123.1 KB · Views: 129
  • handlepole pad.jpg
    handlepole pad.jpg
    130.8 KB · Views: 129
  • ride plate.jpg
    ride plate.jpg
    118.8 KB · Views: 124
Top Bottom