701 x2 build

Alright so I been working on this since October. Off and on working on the skis and always buying and accumulating parts. This is my first ski build, I have built race cars basically my whole adult life. If you got some advice on something you see me doing, keep it real, let me know. I'll post some older pics I got and then bring it up to date.

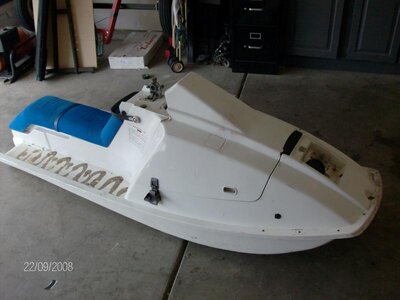
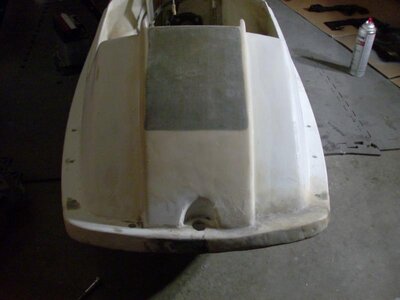
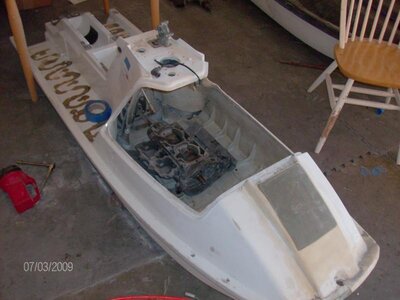
These are the day I started tearing into it. It is basically just as it was when I bought it, minus the great gray indoor outdoor carpet they had glued down for turf..LOL gotta love some people! The second pic is the previous owners super sano repair of the nose. I didn't think this was going to be a big deal but it turned into more of an issue when I ground this all off. The last pic is after I chopped the back.
 

Attachments

  • lots of pics 138.jpg
    lots of pics 138.jpg
    45.1 KB · Views: 62
  • lots of pics 139.jpg
    lots of pics 139.jpg
    43.5 KB · Views: 65
  • lots of pics 141.jpg
    lots of pics 141.jpg
    41.1 KB · Views: 55
So These are a couple pics of the nose. I can't find the ones I took after grinding off all the old resin, or should I say chipping off... it was poly resin I assume. The entire corner basically fell off. I used some west system epoxy rsin with some 404 and glued it back on. stuffing the gaps with micro ballons and a layer of more 404 and I layed a lil 8 oz over it. still a lot of work to go, but i am turfing the rail so perfection isn't a must. I have also decided this hull just has to make it till I can find a nice clean cherry hull, or drop the dough on a lightweight!! You can also see I am filling in the gas door and going to internal fill.
 

Attachments

  • HPIM0400.jpg
    HPIM0400.jpg
    51.3 KB · Views: 39
  • HPIM0421.jpg
    HPIM0421.jpg
    29.5 KB · Views: 48
  • HPIM0422.jpg
    HPIM0422.jpg
    36.8 KB · Views: 65
ok so these are of the re enforcement I did. I ground the small ribs on the top deck flush and also ground the smaller sections off the bottom decks ribs leaving just the large bottom sections. might not make since but if you look at your stock hull you will know exactly what I mean. I mixed up some more west and 404 to a peanut butter consistancy and filled the bond line. I used a 4 inch putty nkife to flaten everything out. This is the first 2 pics. after it dried I blocked it and cut out my glass. I made it so there is one sheet of 8.9 oz s glass from top to bottom. the glass sheet goes down between every rib on the bottom but it is not on any of the rib itself. the glass is all on flat sections so there was a lot less chance of getting air bubbles. These are the next 3, I was planning on doing 2 layers but for now I am waiting till I get the other glass work done first. The rest of the nose, inside the nose, the rear section where I chopped it... all this is higher on priority right now.... it was starting to get warm here, but then I woke up this mornign to snow!
 

Attachments

  • HPIM0413.jpg
    HPIM0413.jpg
    27.8 KB · Views: 60
  • HPIM0414.jpg
    HPIM0414.jpg
    37.4 KB · Views: 50
  • HPIM0409.jpg
    HPIM0409.jpg
    34.1 KB · Views: 54
  • HPIM0411.jpg
    HPIM0411.jpg
    27.8 KB · Views: 50
  • HPIM0420.jpg
    HPIM0420.jpg
    29.3 KB · Views: 48
Last edited:
so after the majority of the time I am able to slip away and work on the ski being consumed by fiber glass dust and resin fumes. It was time to take a break and get to something a lil more fun. I had originally intended to grind the inside of the hull flat and glass in new mounts for the 701. Along came a Crab! I decided I would make my life alot easier and picked up a set of crabs 701 x2 bed plates. Here are a couple pics of mock up. Crabs bedplates mount to the factory bedplate locations on the 701, no sandwiching of a bedplate with the case bolts. This makes things alot more solid. He had been using the tigershark coupler to match the kawi drive shaft but I had already got a set of ada billet couplers when I started planning this project. looks like they will work aswell!
 

Attachments

  • HPIM0415.jpg
    HPIM0415.jpg
    57.9 KB · Views: 141
  • HPIM0417.jpg
    HPIM0417.jpg
    52.5 KB · Views: 94
  • HPIM0416.jpg
    HPIM0416.jpg
    49.5 KB · Views: 73
so that brings me to where I am at now basically. Alot more time sitting and bs with buddies then actually working! I need to get off here and go out and get my tubbies to fit, get those foamed and mounted, paint the bedplates, glass the back of my hull..... and the list goes on.. why am I such a procrastinator?? <<NO idea if that right LOL!!!
 
So I got the tubbies shaved and fitting. Just got done foaming them. as soon as it sets up I can sand them back to fitting flush and screw/ epoxy them suckers on! I have the ski up side down right now, its easier duing the tubbies. So while I am in that position I also layed 2 layers of glass on the nose. I also have the bed plates cleaned and 2 coats of primer on them. once that dries I'll sand them a touch and throw another layer of primer on and to the top coat it goes. I am getting alot done today. on top of all that I am also working on glassing in my sj's tubbies and my buddies! lots of fiberglass dust in my world today!!!!
 
I can help with that, $210 shipped for the conversion plates.

Crab is a great seller! Fast shipment, great comunication, and always willing to help out if you got a question. If I figure I normally charge about 40 bucks an hour for side work on cars, he probably saved me hundreds in my time from my original idea of glassing them in.

I got a lil idea for the ebox too. I really want the inside of this boat to look like everything is supoose to be there, you know what I mean. Thats just how I roll, I like the clean sano look.

I think it was about 2 1/2 or 3 inches I cut off.. it has been so long since i cut it LOL I went right up to the rear ride plate bolts.
 
Last edited:
Keeps me off the street pimpin ya know......

:Banane35: thanks for all the help man... She has really came along now that I got my arse in gear. I got one of the foamed tubbies sanded down and attached to the ski... get the other one on tomorrow and get some pics up....
 
This is what I got planned. i still need to do a little more measuring but so far I think it will fit. I wanna use some superjet ebox mounts. they normally have two bolts going through the bulk head. I wanna epoxy them in and then glass over them placing the ebox in the same location the stock fuel pump and starter relay was. with the single carb 61x manifold I have plenty of room there. my only concern is it will be rather low in the hull, but then again if all is good it should be water tight in theroy right??
 

Crab

thanks darin...noswad!
Location
Seattle
This is what I got planned. i still need to do a little more measuring but so far I think it will fit. I wanna use some superjet ebox mounts. they normally have two bolts going through the bulk head. I wanna epoxy them in and then glass over them placing the ebox in the same location the stock fuel pump and starter relay was. with the single carb 61x manifold I have plenty of room there. my only concern is it will be rather low in the hull, but then again if all is good it should be water tight in theroy right??
Should be fine, mount as high as possible or strap to side of fuel tank. Use greas on the gasket and grommits.
 
yeah I got a new gasket for the ebox and was gonna seal it with some honda bond too or something. I just don't really like the look of it on the gas tank. I had a idea for a sweet braket to put it on the tank in place of the oil can so it would clean things up a lil, if it comes down to it.
 
Location
CO
I'll roll down and get some more 404 tomorrow.....If I wake up before they close LOL
 
Last edited:
Top Bottom