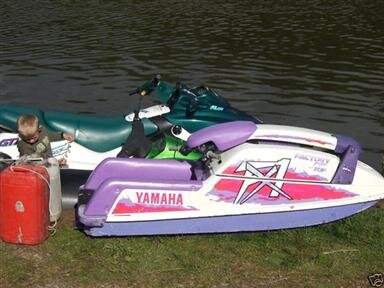
So... Here it was when I bought it:
You are using an out of date browser. It may not display this or other websites correctly.
You should upgrade or use an alternative browser.
You should upgrade or use an alternative browser.
FX-1 Another FX1 Build I Feel I Should Share With You All..!
- Thread starter GeordieBoyKel
- Start date


Some History...
When I went to buy this ski it was a runner and had just been on the water the weekend before. I got to the location to try it out before I bought it and was looking forward to getting wet. We went to start it up and it cracked into life. Sounded great! I got the lad to stop the engine so that I could have a good poke around in the bay. After that I asked him to start it up again. He did so and it sparked into life again... Then there was a crunch and the engine stopped. We looked at each other as he tried to start it again. It was locked solid! I removed the crank/flywheel casing so I could get a spanner on the end of the crank. When moving the crank I could feel something crunching and realized that there was at least one disintegrated piston. We still came to a deal which I thought was a good one at the time and off I went with my new toy...
She came with a Factory B Pipe, a water injection system, Performance filter, Solas re-pitched prop and some other bits and pieces you tend to find on a ski of this age.
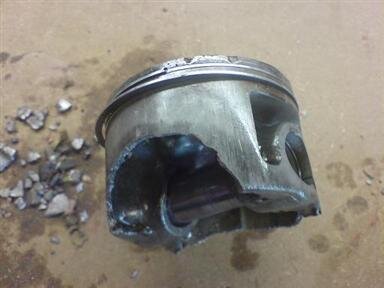
When pulling apart I found it went from bad to worse!
When I went to buy this ski it was a runner and had just been on the water the weekend before. I got to the location to try it out before I bought it and was looking forward to getting wet. We went to start it up and it cracked into life. Sounded great! I got the lad to stop the engine so that I could have a good poke around in the bay. After that I asked him to start it up again. He did so and it sparked into life again... Then there was a crunch and the engine stopped. We looked at each other as he tried to start it again. It was locked solid! I removed the crank/flywheel casing so I could get a spanner on the end of the crank. When moving the crank I could feel something crunching and realized that there was at least one disintegrated piston. We still came to a deal which I thought was a good one at the time and off I went with my new toy...
She came with a Factory B Pipe, a water injection system, Performance filter, Solas re-pitched prop and some other bits and pieces you tend to find on a ski of this age.
When pulling apart I found it went from bad to worse!
Last edited:
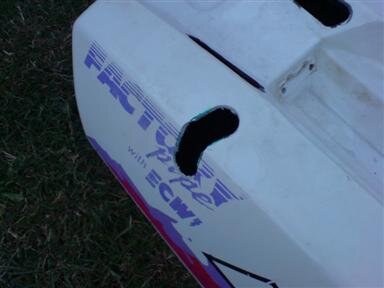
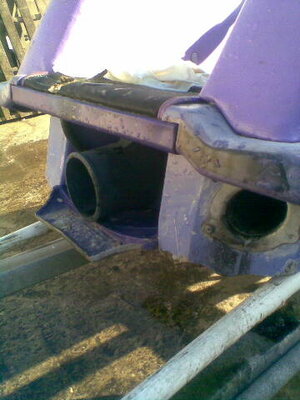
Completey stripped the rest of the ski to see what else is wrong with it.
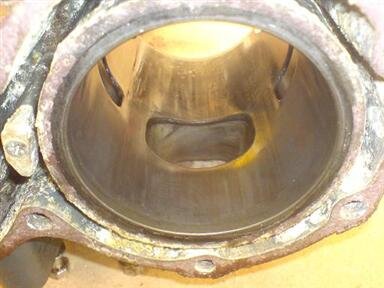
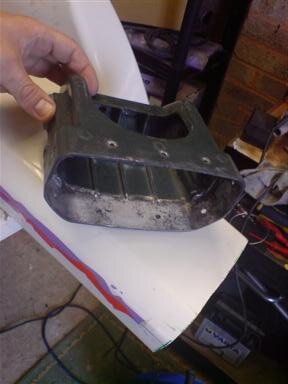
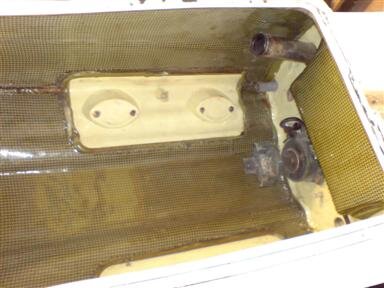
Noticed that the Water injection system was not even connected (never was by the looks of things) and the way the cooling system was routed was completely incorrect!
Here are some pictures of the bad bits:
Noticed that the Water injection system was not even connected (never was by the looks of things) and the way the cooling system was routed was completely incorrect!
Here are some pictures of the bad bits:
Attachments


Last edited:
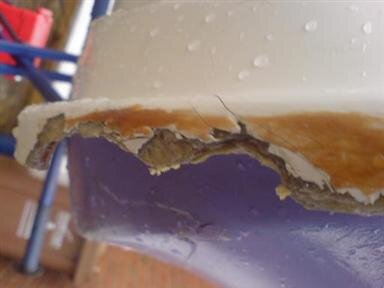
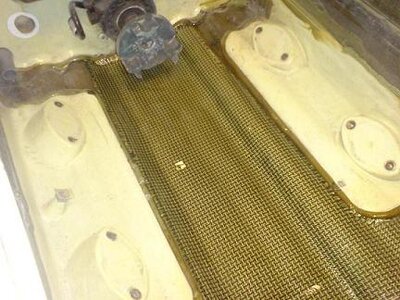
"Right... So... Lets start at the begining", I said to myself. So, I started on the crack on the hull.
This was the third layer of Carbon Kevlar over the crack. Each layer was rotated and cut larger then the other. Just incase you were wondering, I used epoxy resin from a marine store:
This was the third layer of Carbon Kevlar over the crack. Each layer was rotated and cut larger then the other. Just incase you were wondering, I used epoxy resin from a marine store:
Attachments


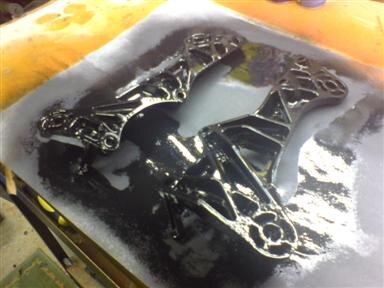
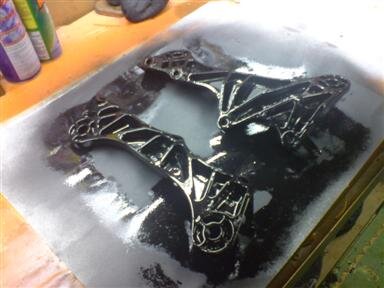
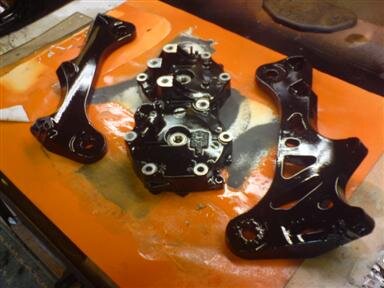
Stripped and cleaned all of the engine parts in my wife's dish washer. Masked off and painted over a period ready for the rebuild of the power unit:
Attachments


This guy (Sprocket) has got to be one of the most helpful guys that has blest the UK jetski scene. He said to me to bring my engine down to his workshop when I was going to build it and he would keep me right. He didn't want me to make a mess of it and offered his guideance. So, I went down on a Saturday past with all of my bits to build my engine. Sprocket and McScrew were both there early with hang-overs from the night before. I was a little jealous as it sounded like a night and a half.
Anyway, Sprocket got straight on the case and before I knew it my engine was assembled. I cannot take any credit for it as the master did his thing and I cleaned components. I must say I felt guilty as I did not expect Sprocket to build the engine but really I was over-joyed! Don't get me wrong, I wanted to build my engine but at least now I have peace of mind knowing that my engine has been built by a professional.
All I can say is that I am so greatful to Sprocket and would like to thank him once again for all his help... I hope one day I can return the favour...
Here are a couple of mid assembly pictures and the Guru at work:
Attachments


Last edited:
Decided to shorten my pole as I am a tall fella. I reduced it by an inch and a half which should be more then enough as the FX1 pole is a little short as standard:
Attachments


Can I just say that this has got to be one of the most easy mods that I have done so far (shortening a pole).
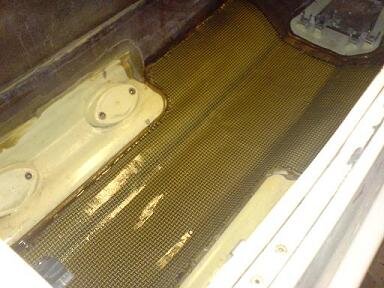
I seemed to of had an endless supply of carbon kevlar, so I figured what the hell and added some more strength to the sides of my ski. I also added some to the inside of my dash panel:
Attachments


brett
-------------
- Location
- Ventura,ca
love how the carbon kevlar looks. nice build so far.
oxnard111
Creative RE Purchasing
- Location
- so Cali, Ventura/Oxnard area
damn i wish i had an endless supply of carbon kevlar...
looking good man.
looking good man.
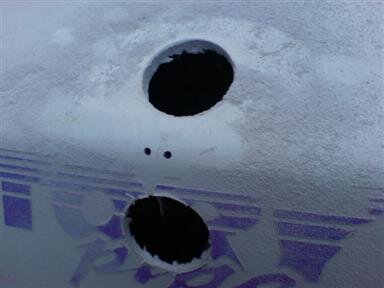
I also modded my hood with some home grown Hand Holds.
Here is a step by step 101:
Remove the liner (in one piece if possible):
Here is a step by step 101:
Remove the liner (in one piece if possible):
Attachments


Last edited:
Cheers for the comments Oxnard111 and Bret...
I must admit that I did not manage to get the hood liner out in one piece. I am going to have to make a new one from scratch, but I have got something different in mind.
Anyway... On with the Hand Holds:
Started off by marking out a center pilot hole on both sides and then two larger holes equally spaced out from the center. I then moved the first pilot hole forward a little and then cut another hole.
Anyway... On with the Hand Holds:
Started off by marking out a center pilot hole on both sides and then two larger holes equally spaced out from the center. I then moved the first pilot hole forward a little and then cut another hole.