Vumad
Super Hero, with a cape!
- Location
- St. Pete, FL
Hi guys, I have experience with anodizing. I do a lot of hobby machining and wanted to have lots of tiny parts I build done in multiple colors. I found it to be a very expensive process if you send them out to be done at a metal finishing shop. And you have no control over what dyes they use or how much of an anodizing layer is applied. I found some places use the cheapest dyes they can find. Most are not uv stable and will fade the colors quickly in bright sunlight. And if its not done right it will be very easy to scratch also. I think a lot of shops only do enough to make the part take color, not enough time in the bath to produce a nice thick coating. A mill spec type 2 anodize will actually build up a layer on and in the metal. So it is extremely durable. I started doing it at home with a kit I bought from a search on the net. To do it right its fairly expensive to set everything up. But when I first started out I used a battery charger and rit dye. Now I have most of the right stuff to do a good job on my parts. But for just a few parts a guy can do it cheap with a battery charger at home. For good results use a quality uv stable dye. To do it right and get great results there are many chemicals and processes involved to color a part. They dyes are cheap for a 2 gallon bath. I think the most I have paid for any color was 18 bucks. And the color selection is fantastic. The guy in the post above is doing titanium. That's a whole different process. Much safer with only one chemical. Baking soda water, works much better then any kind of soda. And it allows you to see the color change as it happens. But who has titanium parts on their ski anyway, so back to aluminum. I paid 250 for my kit that included all the chemicals needed except the acid which you can source locally. Mine is for a 2 gallon bath, Meaning all my stages of chemicals are in 2 gallon containers. The bigger you get the more you can do or bigger single parts. Then you need a nice dc power supply, 12 amps per sq ft. So get a 35 amp or bigger supply for a 2 gallon set up. And a way to heat some of the stages to a controlled temp. And ventilating systems for the nasty chemicals. Actually the worst one is battery acid and its very diluted. The fumes produced are the same as charging a battery. Its kind of a pain in the a$$ and a time consuming deal. But some good hobbies are like that. There's tons of articles that can explain it much better then I can on the net and some good vids on you tube also. But if anybody decides to try it I am happy to try to answer questions. I would post pics but I have no idea how.
Excellent post. The only color I'm interested in a rich blue like the Toyota tundra (and clear). Largest item I would be anodizing would be an x2 steering stem (mines faded) or an intake grate I want to make for my x2.
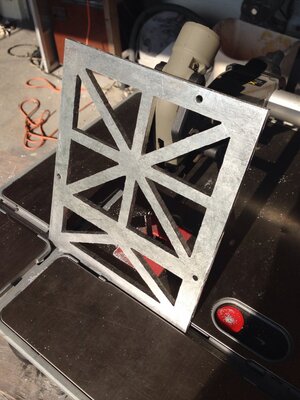
Attached is the part I just made. Its a backing plate to mount my ebox. Nothing fancy. First part I've made from metal. Took a long time I to make with my limited tools for the job. I'd like it to last.


