B Pipe Fit

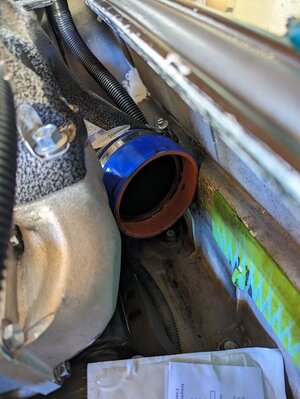
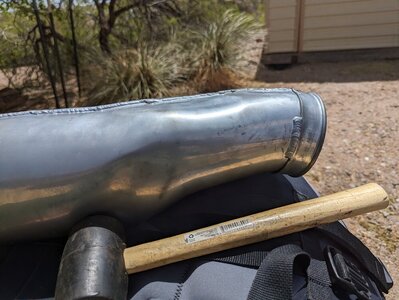
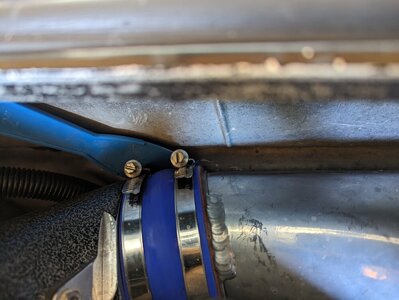
Got my B Pipe installed into my SN and the fit is still really tight against the sidewall. The chamber appears to even be absorbing some vibration from the engine which I would assume to be bad. I took a mallet to it but it really doesn't want to bend along the weld. I am a little nervous about trying to hit it right on the weld. Any tips for getting this puppy to fit better?

The first 8 inches or so right along the top weld appears to be my main pain point.
 

Attachments

  • PXL_20230419_193908331.jpg
    PXL_20230419_193908331.jpg
    131 KB · Views: 101
  • PXL_20230418_193205987.jpg
    PXL_20230418_193205987.jpg
    133.8 KB · Views: 93

Mike W

Infidel
Location
North Florida
It’s a tight fit, but shouldn’t be that tight. It’s ok to “massage” the chamber to fit but you shouldn’t have to. Definitely don’t on the weld.

Unbolt your engine, remove the shims and realign the motor. There is a good how-to video on YouTube by Wamilton on hot to do it correctly.
 

Big Kahuna

Administrator
Location
Tuscaloosa, AL
If you are trying to dent it some with rubber mallet, use lots of small fast hits, not big knock the crap out of it type hits..... Also a layer of turn between the chamber and hull can dampen the sound from hitting.
 
Location
West MI
The ridges on the inside of the hull are the biggest offense - grind them flush with the surrounding area, unless they are already done. It looks like they are visible in that first photo looking into the blue coupler. Grind those flush, add a thin layer of turf along the wall there (knowing that it's going to get hot... so proceed at your own risk), and it should be ok unless your motor is misaligned or just happens to sit too far that way when aligned.

FWIW: I've had this tough fit in more than one hull, and in one case actually had the engine side of the B pipe manifold thinned a few mm, which helped a lot. I used super thick washers on the manifold screws to compensate for the removed material.
Yeah the ridges are ground down. I went ahead and removed the turf I had at the tight spots because it was too tight and wouldn't even fit.
 
The Chamber must be rotated to find the sweet spot.

Be sure that the Chamber does not rub against the Motor Mount. Use a Post Card to check the gap between the Chamber and the Motor Mount.
I believe I found the sweet spot where it naturally wants to match the Manifold and the factory dent avoids the Motor mount that I ground down.
 
It’s a tight fit, but shouldn’t be that tight. It’s ok to “massage” the chamber to fit but you shouldn’t have to. Definitely don’t on the weld.

Unbolt your engine, remove the shims and realign the motor. There is a good how-to video on YouTube by Wamilton on hot to do it correct

It’s a tight fit, but shouldn’t be that tight. It’s ok to “massage” the chamber to fit but you shouldn’t have to. Definitely don’t on the weld.

Unbolt your engine, remove the shims and realign the motor. There is a good how-to video on YouTube by Wamilton on hot to do it correctly.
Yeah it has some room to move but it does not seem ideal. Is it possible a welder could heat up that weld and create more room?


Thanks for taking the time to reply.
 
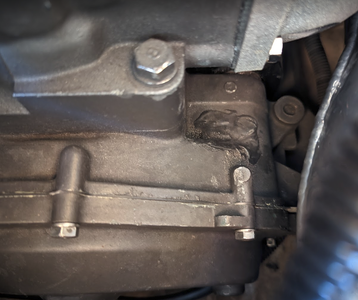
It's actually hitting right here as well... Pretty sure I can't do anything about this spot unless I can realign the whole engine to the left by at least a 1/4" lol.
 

Attachments

  • PXL_20230425_160458492.jpg
    PXL_20230425_160458492.jpg
    108.4 KB · Views: 84
fwiw, mine hits there as well. It actually wears down the leading edge of the coupler only creating some cosmetic damage and I think it somewhat self clearanced with braap time


Sent from my iPhone using Tapatalk
 

john zigler

Vendor Account
Location
wisconsin
Something is wrong, we build a LOT of SJ's with B pipes. Squares, 96-07, and 08's and up. You are way off on alignment. It shouldn't be nearly that close. I have never had to hit a pipe with a hammer. You need to strip the ski, start by aligning the pump and drive, then the engine to the mid shaft. I did have a blaster in once a while back, that was like this and we found the whole drive to be way off.
 
With the coupler off , put the chamber in there with no gap between the head pipe and chamber. If it still rubs that's all you're going to get. Not a good idea to beat up a chamber. You'll be sorry later down the road on resale.
Yeah it's sadly already dinged up heavily just from trying to finagle it in there. Hopefully I never have to sell it lol
 
Something is wrong, we build a LOT of SJ's with B pipes. Squares, 96-07, and 08's and up. You are way off on alignment. It shouldn't be nearly that close. I have never had to hit a pipe with a hammer. You need to strip the ski, start by aligning the pump and drive, then the engine to the mid shaft. I did have a blaster in once a while back, that was like this and we found the whole drive to be way off.
Thanks for commenting John! I threw a tape measure across the engine bay and with a very scientific visual eye inspection it looks to be 1/4" towards the b pipe side of the bay....
 
Thanks for all the help again, it looks like I may be pulling everything out and maybe rebuild the engine and carbs while i'm at it. I also noticed some JB weld on the engine housing is this kosher or could this be a problem down the line...
 

Attachments

  • jbweldengine.png
    jbweldengine.png
    925.3 KB · Views: 60
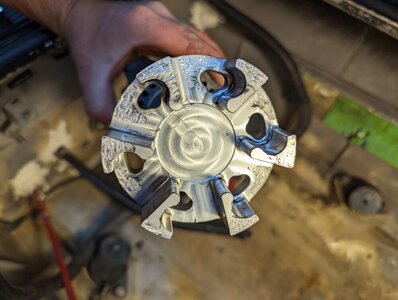
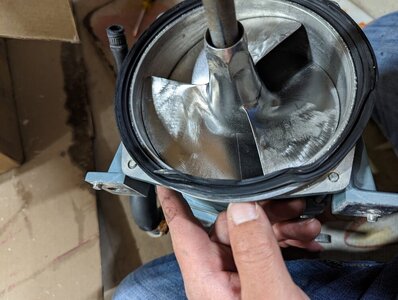
I had some significant propulsion loss when I went to test it the other day after installing the B-Pipe. I was riding along and just lost propulsion heavily and the engine wanted to rev up high and then would very slowly wind down. A local guy thought I just had something in my pump. I did a visual inspection and saw nothing. Was told to clear it out by running it so I took it out today to see if I could clear it before I begin pulling everything and realigning the engine and pump. It runs terribly with very little propulsion so I think there is something else going on with it.

It's supposedly a "0" hour engine but from what I have seen replacing parts that is far from the case. I'm thinking about just rebuilding the whole engine, carbs and maybe even reinforcing the hull since I am going to be pulling the engine.
 
If it's a Yamaha Pump, it self-tightens during operation due to the Yamaha Shaft Left-hand Threads....


Take Cylinder Compression readings and report back.
Shoot that's a really good idea lol. I just got the motor pulled but maybe I can jerry it rig it back together enough to get a compression check. I'll come back to this when I get more info.
 
If it's a Yamaha Pump, it self-tightens during operation due to the Yamaha Shaft Left-hand Threads....


Take Cylinder Compression readings and report back.
I agree, but I have seen first hand on 2 skis the prop back off the threads. Not sure exactly why. It’s just another item on the list to check, and is fairly easy to do with just the intake grate off.
 
If you still have the original stock prop, I’m sure it’s in bad shape. Along with a worn wear ring you’re probably getting tons of cavitation.

It was running fine from a propulsion standpoint (I think) until that last little test ride.

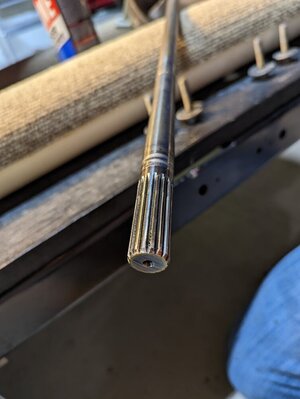
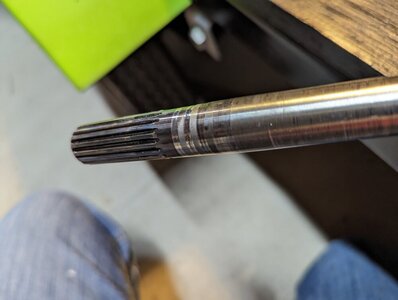
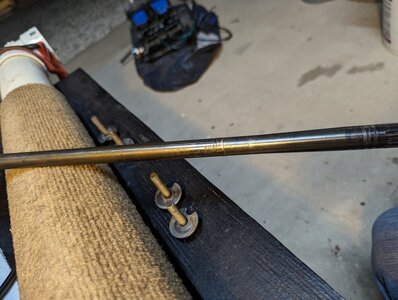
Alright, well she's fully stripped and here are the highlights:
 

Attachments

  • PXL_20230428_015850215.jpg
    PXL_20230428_015850215.jpg
    103.8 KB · Views: 59
  • PXL_20230428_020619361.jpg
    PXL_20230428_020619361.jpg
    130.9 KB · Views: 56
  • PXL_20230428_021603747.jpg
    PXL_20230428_021603747.jpg
    73.9 KB · Views: 54
  • PXL_20230428_021623022.jpg
    PXL_20230428_021623022.jpg
    66.6 KB · Views: 52
  • PXL_20230428_021647116.jpg
    PXL_20230428_021647116.jpg
    122 KB · Views: 62
Top Bottom