Bought my first RN Superjet in pieces. Advice/info needed!!

Well I bought my first roundnose superjet last year in pieces. Always rode 650s and decided to step it up finally. Since the lowest priced SJ I could find was over $4k I decided to jump on this 2001 that was in pieces for $1000. It was a freshwater ski and I saw it as a chance to build a ski I knew wasn't in salt or abused. Came with a perfectly clean, uncut and already sanded hull and hood, stock handlepole, 62t/62t motor, all electronics minus battery, pump, midshaft, two carbs, intake manifold, exhaust minus waterbox and tubing, and some other small stuff.

So far I've bought:
Footholds
Rad Dudes lowered stainless pole mount
Blowsion steering system
Blowsion Bars
New On/Off Switch
New Monkey Grip motor mounts
Solas scoop grate
82mm Pro x piston kit (getting cylinder bored +1mm)
Fuel/Cooling lines
Fuel Tank

Still need to buy:
Waterbox
Ride plate
Throttle and cable
Steering cable
Chinpad
I have the fuel selector petcock but it's missing the knob


Now that I've given you guys the story here's a few questions:

1) The ski came with a 62t cylinder, I know the preferred is the 61x, but it came with the 62t and I couldn't find a 61 anywhere for less than 400. I get the cylinder back from boring tomorrow. 1mm over. I noticed the exhaust that came with the ski says 61x, will this fit on my 62t?

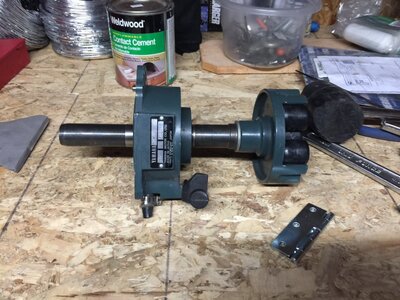
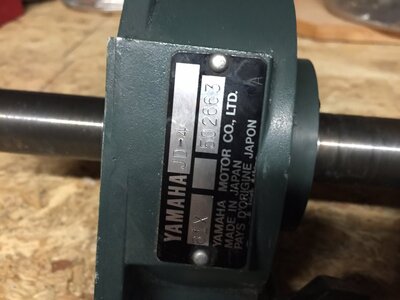
2) I also noticed the midshaft says 61x on it too, will this work? I'll post a pic of it.

3) I was able to get the pistons off the rods earlier with a C-clamp, socket and wood. The crank is still in great condition and spins perfectly. Anything I should do before I put the top end back on? Like preventative? Other than cleaning it.

All info is greatly appreciated. I know a decent amount about mechanics but I'm no pro and always looking to learn. Again, this is my first superjet and I'm looking forward to getting out in the water here in San DiegoIMG_5079.JPG IMG_5077.JPG IMG_5078.JPG IMG_5080.JPG IMG_5081.JPG
 

Attachments

  • IMG_5075.JPG
    IMG_5075.JPG
    162.1 KB · Views: 122
  • image1.JPG
    image1.JPG
    89.7 KB · Views: 111

eastcoastjumper

James
Site Supporter
Location
Long Island
You need a superjet mid shaft. That housing will work but the shaft itself is incorrect length. That looks like it's out of a sitdown.


Sent from my iPhone using Tapatalk
 

john zigler

Vendor Account
Location
wisconsin
the 62T engine / cylinder can run pretty good if properly set up.

The port timing on your 61x exhaust is different. To run a stock exhaust you will need to 1 - drill out the manifold mount holes to the larger 10mm bolt size. 2 - you will need to "raise" the exhaust port on the manifold to match your cyl. If you take a 62t exhaust gasket, and lay it on the manifold you will see the differences. Raise / blend the port as much as you can, being careful to leave enough for the water jacket to seal. You will also need to now run a 62T exhaust manifold gasket.

As stated above, your mid shaft is incorrect. You will need to press in a SJ Shaft into your housing.

If it were me, I would completely disassemble the bottom end, clean the bearings with Brake Cleaner, and feel/ listen to all to make sure they are smooth, and quiet. If it is good, oil all bearings, and reassemble with new crank seals.
 
Thanks for the info John and James! Of course now that I don't have access to a press I need to use one. I found a new shaft on eBay for $95 shipped. Good deal? I'm going to see if I can find a used one but I think I should probably go with a new one. The housing and bearing look and feel brand new so that's good. As far as the exhaust I'll have to check it out, just picked up a dremel so that should come in handy. Gasket kit just came in today and it looks like it has every gasket needed to pull the bottom end apart.
 
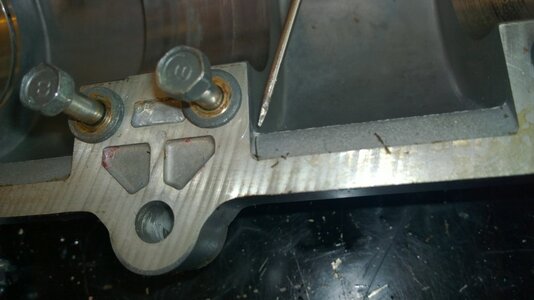
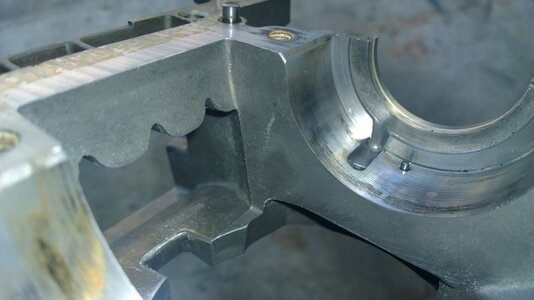
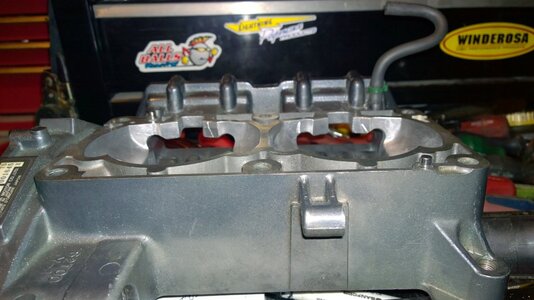
A fella would be very wise to replace the crank seals if the cases are to be split and the crank checked over. The crank seals could be on the edge of failure not knowing how many hours are on the engine or what octane rating of fuel has been run through the engine. If it was run primarily on 87 octane, then those crank seals will be getting soft and punky. It might not be noticeable right now, but once new fuel gets into contact with them and the friction of the crank, they will go to mush. If you decide to split the cases, this would also be the best time to blueprint everything you can. Blueprinting cases on the 62t platform is extremely easy, all you are doing is looking for imperfections within the intake tract and inside the cases in the casting. These imperfections are called casting flash, they are sharp little overhangs from where the molten aluminum seeped past the mould faces. I will get you a few pics to show you what I mean. Just a Dremel and take your time, it will help improve the efficiency of airflow through your cases and like case porting, it is an all gain no loss modification.

Updated
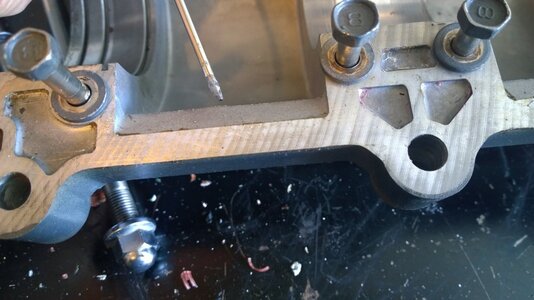
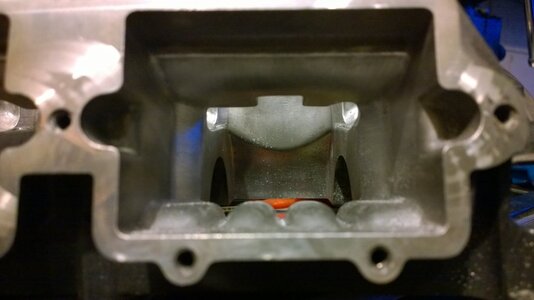
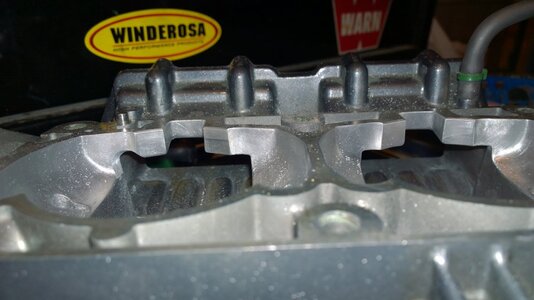
If you look at the screwdriver tip, you can see the casting flash. You can use a Dremel or a small file to clean it off. I went through my cases thoroughly as well as my cylinders cleaning up only the flash out of all the transfer ports. In the last pic you can see how all the edges on that same surface the screwdriver was pointing at are nicely cleaned off with no flash left behind. If you notice the far wall of the intake tract, below the fingers you will see there is a line of casting flash going straight up...I removed that as well. Anywhere there was flash, it was removed.
 

Attachments

  • WP_20150812_001.jpg
    WP_20150812_001.jpg
    68.3 KB · Views: 97
  • WP_20150812_002.jpg
    WP_20150812_002.jpg
    95.1 KB · Views: 99
  • WP_20150813_002.jpg
    WP_20150813_002.jpg
    72.3 KB · Views: 96
Last edited:
More pics...

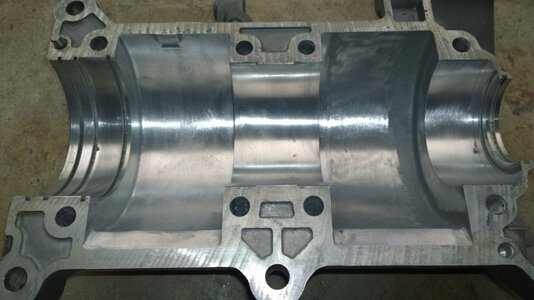
In the first pic, you can see the left side of the cases has already been polished compared to the right. I left a little bit of fine texture in the final polish but nowhere near as textured as the OEM finish. I also cleaned up and polished the intake fingers as well as did a case porting. Notice the little Mickey Mouse ears on either side of the intake...that is case porting. You can see the comparison between stock intake and ported. Stock porting has the squared off intake tract, ported shows how the corners are cut out. I found this to be an excellent mod, I really liked the performance results of it.
 

Attachments

  • WP_20150812_006.jpg
    WP_20150812_006.jpg
    88.6 KB · Views: 99
  • WP_20150814_003.jpg
    WP_20150814_003.jpg
    61.8 KB · Views: 92
  • WP_20150814_001.jpg
    WP_20150814_001.jpg
    80.7 KB · Views: 99
  • WP_20150814_006.jpg
    WP_20150814_006.jpg
    98.9 KB · Views: 97
Last edited:
Might be worth sourcing a 62T exhaust manifold from an early 701 couch (WR111, Waveraider, etc) and fitting that rather than modifying the 61X version you have. They are very cheap second hand. I think the exhaust chambers are universal (we once fitted a late Superjet stock chamber onto a 650 with a corroded chamber. No problem at all).
 
Looks like I'll be tearing into the case this weekend to clean, polish and port. Thanks for the info ProPulsion!
X2kid - do you know if the cap on the manifold can be moved from one side to the other? I found some really cheap manifolds but the wrong side is capped off.
 
Anyone have an extra waterbox laying around? I'm going to be working on the motor this week and weekend and can't fire it up until i track down a cheap waterbox.
 
I googled images of 701 exhaust manifolds and can see what you mean with the cap and the different exhaust directions (left and right). I can only suggest you Google all the various 62T-engined couches and see if you get a match. Failing that you can either modify your existing manifold as previously suggested or source a 'B' pipe with a 62T manifold (this is what I run on my 760 62T cylinder Superjet). You'd most likely be fitting a 'B' pipe sooner or later so why not just do it now?
 
I wish an aftermarket pipe was in the budget at the moment! I just want to get this thing on the water ASAP so I'm trying to track down oem stuff for now. Winter (or what we call "winter" here in san diego) has seemed to disappear and I'm getting the itch to ride. It's been in the high 70s all week.
 
The best thing I can suggest is don't cut any corners. OEM crank seals, etc.

If you are patient you will come across deals on the parts you need from part outs or leftovers. You can also try posting up a wanted ad.
 
Finally got around to cracking the case to clean and check everything. I cleaned up any casting flash in the case with a dremel and checked all the bearing which feel and sound almost new. I want to replace the seals but the driveshaft coupler is still attached to the crank. Any ideas on how to get it off? The crank is already out and everything that I read just tells me how to remove it with the motor assembled.
 
Hmmm...my only thought would be to put the coupler into a vise, put a generous amount of heat to it by way of propane torch only, where the collar is threaded onto to the crank because it should have loctite holding it on, and use the crank webs as your leverage to thread the crank off of the coupler. Don't lock up the coupler too seriously though, if it is a stock coupler it will be cast aluminum which can break. That is only my thoughts of how to remove it with the crank out of the cases, there may be other options but at the moment I can not think of any.
 
Just want to confirm you cleaned out the bearings with carb cleaner/gas/kerosene before spinning them for sound/feel.

I nearly missed a bad bearing with pitting in the race because it had some oil in it and seemed fine when I spun it. As soon as I cleaned it out with carb cleaner, it sounded like hell. I was shocked.

I don't have experience with removing the shaft coupler with the crank out of the engine so I will let others speak there. I think you need the coupling tool and a blow torch. Try holding either the coupling or crank in a vice and turning after heating up. You'll have to break the loctite with heat. Hopefully there is no corrosion...

Also shock loading (rubber mallet on your breaker bar) can sometimes break loose what would take a really high amount of static force (leaning on the breaker bar).

The threads are regular right hand.
 
Last edited:

Just4Fun

First World Problems...
Location
Southern Oregon
Step 1 Lock your crank webs into a vice you won't hurt them. Tight you don't want them to slip.
Step 2 Apply heat to coupler only for about 10-20 seconds aluminum expands at a greater rate than steel.
Step 3 If you don't have a coupler tool use a long pry bar or a piece of angle iron. Position it through the center of the coupler and apply pressure until it comes loose.
 
Top Bottom