Build of X1-C hull from Performance Jet Worx

I'm looking forward to starting my first AM hull build. I went from a stock 650 SN in June 2014 to a slightly modded 701 RN in October 2014, and now to this new AM hull project. I decided to jump on the newly released carbon hulls by Performance Jet Worx, based on the XFT hull design.

My build is starting from a cosmetically challenged ski that I picked up locally. Believe me it looks much worse than the picture reveals, back turf was hard and ripped away. Bottom is scratched like crazy but the hull is solid (heavily reinforced).

Initial_ski.jpg

It has good internals as a starting point:
  • Big bore 753cc motor 62t
  • Dual 48mm Blackjack carbs
  • X-scream steering with wide flat bar
  • B pipe
  • Total loss ignition
  • Pro-tec trim
  • Prop and cone (don't know the pitch)
  • Pro-tec head
I know there are lots of debates about the merits (or not) of Blackjacks and total loss, but the setup works at present. I had it out on the Lake a few times before putting it in the garage.

I have already bought for the new ski
  • 2 gallon Jazz tank from Xscream (which will last around 30 minutes with these big carbs, may pursue another option later)
  • Competition length pole from Xscream
  • Rebuild kit for the pump and midshaft from JetManiac
  • New midshaft
  • Green hoses for water & fuel
  • Bilge pump (though apparently old pump in ski works, switch was broken)
  • Surf armor switches for TL and bilge pump from OCD
Ski is the white & green option.
IMG_1301.JPG
IMG_1303.JPG
Ski was boxed and shipped today, will arrive next week.
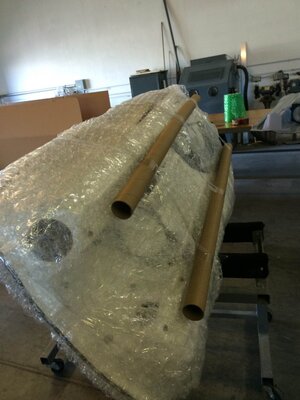
IMG_1307.JPG IMG_1311.JPG

I'll provide subsequent posts in another week once it arrives. Looking forward to getting it going. A bit of a late start (I was riding all winter here in central texas) but I have my other skis to keep me busy on the water.
 
Last edited:
Decided to install my new Thrust innovations EZ-Flow Pro Trim on this ski. I was going install it on my old ski. Decided to return it and get a green one. This is the one that is coming.pump.JPG
 
@txsuperjetfreak96 sure let me know when you are in town. Most people in Austin seem to ride on Lake Travis. A bit tricky to access with the lower water levels. A lot of standups on docks on LBJ but I rarely see anyone else riding there.

@Matt Jones I was looking at different options for a while. Finally decided to pull the trigger so I could spend some time riding this summer.
 
2015-05-06 17.03.28.jpg The hull has arrived safely. Now time to move it to the lake for further construction.

Started the conversation with the Texas Parks & Wildlife Department about titling and registering. I was hoping that I would be able to get it titled before actually installing the engine. Nope. Need to have it installed so that it is "sea worthy" for the inspection. I sent them the Coast Guard info about why bare hulls do not have HINs. They were polite and it seems like it will not be a problem once the ski is complete.
 
View attachment 277192 The hull has arrived safely. Now time to move it to the lake for further construction.

Started the conversation with the Texas Parks & Wildlife Department about titling and registering. I was hoping that I would be able to get it titled before actually installing the engine. Nope. Need to have it installed so that it is "sea worthy" for the inspection. I sent them the Coast Guard info about why bare hulls do not have HINs. They were polite and it seems like it will not be a problem once the ski is complete.
Sweet


Sent from my iPhone using Tapatalk
 
Made some progress the last few days on the build. First of all I complete disassembled my donor superjet. It was quicker than I expected. The whole process took about three hours.
IMG_0106.JPG
I kept the engine as intact as possible to avoid having to replumb the fuel lines or disassemble the electrical. It seems to be completely in together.

IMG_0107.JPG
IMG_0109.JPG
I move the steering over to the new pole. I’m perplexed that there is no stopping bolt on the Xmetal pole.

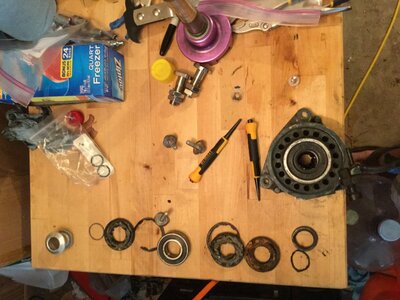
I spent most of my remaining time on replacing the bearings in the intermediate housing. I was following the line of reasoning “if it isn’t broke keep messing with it until you break it”. I had already purchased the kit from @JetManiac. It took many more hours when factoring in multiple trips to the store for tools that I did not have.
IMG_0110.JPG

For reference for anyone thinking of doing this. First of all, it is possible. I did everything with a hammer though a vice would have been better, and a press the best option. Some specialty tools are needed. First, you need a bearing and seal press kit. I was able to borrow one from AutoZone for free. I used this to first remove the mid shaft. Second, you need a seal picker. This is a tool that helps pull out the seal. Third, you need clip pliers to pull out the old clips and put in the new clips. I had grease already.
 
Finally I unpacked the new ski.
IMG_0112.JPG

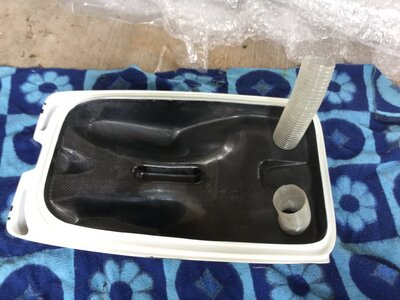
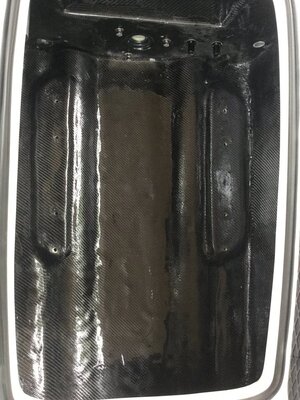
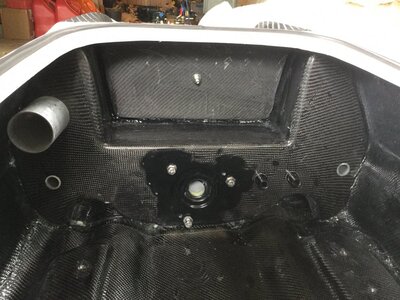
Here are some pictures of the interior and exterior. Build quality is very good.
IMG_0113.JPG
IMG_0114.JPG
IMG_0115.JPG

Here are some of the parts that came with the ski (including the extra wear ring I bought) The pump shoe is pre-installed as is the scupper. There is a nice intake grate. Carbon fiber ride plate.
IMG_0117.JPG IMG_0118.JPG IMG_0120.JPG IMG_0122.JPG
 

JetManiac

Stoked
Site Supporter
Vendor Account
Location
orlando
Made some progress the last few days on the build. First of all I complete disassembled my donor superjet. It was quicker than I expected. The whole process took about three hours.
View attachment 277390
I kept the engine as intact as possible to avoid having to replumb the fuel lines or disassemble the electrical. It seems to be completely in together.

View attachment 277391
View attachment 277392
I move the steering over to the new pole. I’m perplexed that there is no stopping bolt on the Xmetal pole.

I spent most of my remaining time on replacing the bearings in the intermediate housing. I was following the line of reasoning “if it isn’t broke keep messing with it until you break it”. I had already purchased the kit from @JetManiac. It took many more hours when factoring in multiple trips to the store for tools that I did not have.
View attachment 277393

For reference for anyone thinking of doing this. First of all, it is possible. I did everything with a hammer though a vice would have been better, and a press the best option. Some specialty tools are needed. First, you need a bearing and seal press kit. I was able to borrow one from AutoZone for free. I used this to first remove the mid shaft. Second, you need a seal picker. This is a tool that helps pull out the seal. Third, you need clip pliers to pull out the old clips and put in the new clips. I had grease already.

New hull looks good. The steering stop is included with xmetal pole it is also how you mount the chinpad.
 
Got the pump mounted and shimmed. I have the extra wear ring housing installed because I have the pump in the rear location. If this doesn't work out, I'll move the pump in the forward position but then I'll need a new driveshaft. Ignore the tape, it's just to keep things from swinging around.
IMG_0126.JPG
 
I am perplexed with the X-scream pole setup. First of all, I guess I just place the bracket like this about anywhere? Any reason to have it a little further forward or back. I'll center it when installed.

No bolts seem to be provided to mount it to the backing plate. Something standard for that purpose?

Also, the pair of pole bolts are rather short. Wonder where I would attach a spring. Do you not use springs with AM poles or hulls?

Some photos of an X-scream install / guidance would be useful.
IMG_0128.jpg
 
I would just center it up good, most guys just run a tight pole, but some have got a spring to work on theme. Yeah they dont come with mounting bolts for bracket just go get some s/s ones.


Sent from my iPhone using Tapatalk
 

Sanoman

AbouttoKrash
Location
NE Tenn
You will have to buy your bolts and other hardware.l would also round out the holes just a bit to help with mounting to the topimage.jpg
 

Sanoman

AbouttoKrash
Location
NE Tenn
As far as placement txsj is correct,but how long is your pole and how far back do you want to be in the tray?
 
Top Bottom