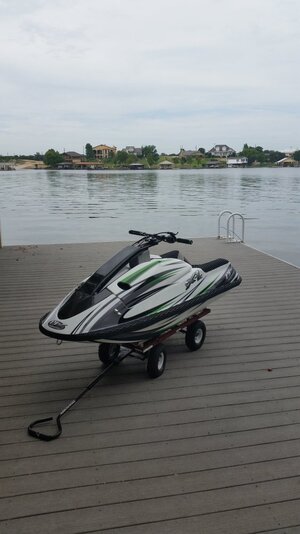
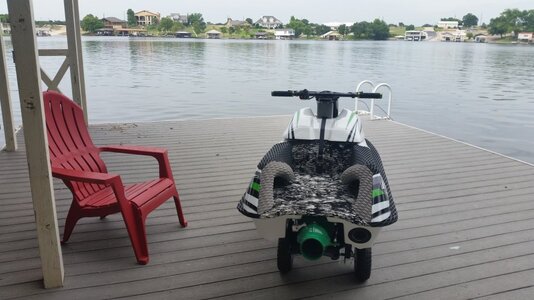
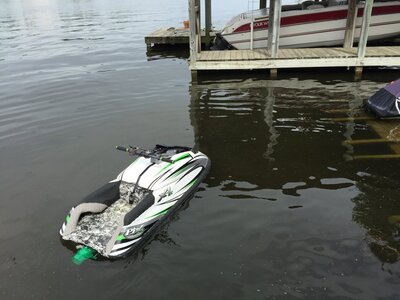
Build of X1-C hull from Performance Jet Worx

Guys thanks for the feedback. That solves the problem I was having about where to put the spring. I'll pick up some mounting hardware.

@Sanoman thanks for the photo. Makes it clear and also illustrates the purpose of those rubber doughnuts that came with the pole.

My pole is on the shorter side (competition version not sure the exact length). I have probably an inch total where I can move the bracket around so I will probably just center it.
 
My other question is about the waterbox. I have the stock RN waterbox. I tried a mockup today with my engine and b-pipe. It's a really tight fit. I may be able to wedge it in the front with some turf and / or put in a strap to hold it.

Someone had suggested no waterbox, but this seems potentially problematic from what I read, from a sound and pressure issue.

Is there a waterbox that is smaller and better suited for AM hulls? I don't have a sense of the different waterbox sizes based on their descriptions on the web. I was looking at the Xscream and the H20 designs one. Anyone have a suggestion?
 

Sanoman

AbouttoKrash
Location
NE Tenn
My other question is about the waterbox. I have the stock RN waterbox. I tried a mockup today with my engine and b-pipe. It's a really tight fit. I may be able to wedge it in the front with some turf and / or put in a strap to hold it.

Someone had suggested no waterbox, but this seems potentially problematic from what I read, from a sound and pressure issue.

Is there a waterbox that is smaller and better suited for AM hulls? I don't have a sense of the different waterbox sizes based on their descriptions on the web. I was looking at the Xscream and the H20 designs one. Anyone have a suggestion?

Several different boxes out there.The xmetal box (IDK about the h2o box) has got an angle on the bottom to help with the rocker in the nose.l would not think you would need too small a box.Problem is not enough hulls on the market right now to ask anyone.Get ahold of the builders of th X1-C or JetManiac and ask him some dimensions.But Yes do your buds a favor,run a waterbox lol
 
With the set back pump I use the stock drive shaft. Requires a midshaft that is pressed a bit further in. The other option would be to tweak the drive shaft and midshaft. I'll look at that next if I upgrade the pump in the future.
 
I managed to remove the mid shaft coupler on Sunday. After trying various approaches, here was my recipe.
  • Bake mid shaft and coupler in an oven at 500 degrees for 10 minutes. Oops forgot to remove those o-rings (very stinky).
  • With rag, grab coupler (burn self in process) and run the mid shaft under cool water til it is cold. Coupler is still surprisingly hot.
  • Using hydroturf, wedge coupler to boat trailer and clamp on using C-clamps. Sorry no picture of this. It was so ridiculous that I could not show it. Having a vice as described in other posts would have helped.
  • Apply @JetManiac mid shaft tool (the one with splines), attach a 28mm socket, and attach 2 foot breaker bar borrowed from Advantage Auto. Came off in just one minute.
This process was assisted by the fact that I have a coupler with six points, so it made it easy to slide it on the flat metal of the trailer. Could not use the 5 point coupler tool that I bought for this purpose since I did not correctly count the points.
 
Further work was stalled because I realized one engine mount was broken.

I started installing the pole bracket but did not have the right size hole saw to complete the job, and needed to buy longer bolts.

I guess this whole process gets easier when you have a garage full of tools and parts from past builds.
 
Is there any reason I should not mount my electrical plate horizontally? It doesn't fit in the vertical spot where I would expect it to go, because of the irregular size of the TL plate. Further it is very close to where I would normally mount the switches and the primer. Seems like it would fit nicely horizontally and be easier to access. The place I would normally mount is not completely vertical in any case. I would attach it to some UFO mounts so no drilling required.

IMG_0134.jpg
 
I finalized the pump installation. I had to replace the cap top bolt used for the trim since the head popped off while I torqued it.

Because I opted to run with the extra pump housing installed, I had to extend the steering cable. Ended up buying a 1m long piece of stainless m5 threaded bolt then cut a piece of it. I only needed about 5cm. I used a zinc connector to tie it on (could not find a stainless one).
2015-05-30 13.37.54.jpg
 
Got the pole bracket mounted and the pole installed. I turfed the plate the goes under the hull because the hull was not completely flat underneath. Forgot to take a picture of it. Also, I mounted the bolts in reverse of what you might expect so I have more room to fiddle with the water box mounting below. The bolts stick out a little too far because I couldn't get exactly the right size locally and didn't feel like cutting them. This will be hidden by the nose piece in any case.

For reference this is the way to install the X-scream pole. The bolts are pushed out from the inside through two plastic spacers. Then there are two nuts on each side to keep it all together. Putting the tubes in was a huge pain. You need to pus the tubes into the pole first before putting into the hull. I used some grease to make everything slide easily.
2015-05-30 14.17.06.jpg 2015-05-30 15.42.23.jpg
 
I made some progress over the past week. The main accomplishment was to install the mounts and get the waterbox fitted in correctly. Because I had difficulty finding the Xscream waterbox in stock (at least when I was looking) and didn't want a much louder and smaller waterbox, I tried to make the stock waterbox work. To do this with the limited amount of space in the hull, I swapped out the 45 degree B-Pipe to waterbox connector with a silicon 90 degree equivalent. Then I added another 45 degree silicon connector to the waterbox to make all the angles work. This means that the waterbox is mounted at an angle in the hull if that makes sense. I connected it to a few pieces of my old exhaust tubing. The picture doesn't do it justice. I have to say I made a mess of installing all the attachment points.

Off on a work trip for a week now. Should be just another day of work when I get back to get everything finished. IMG_0170.jpg
 
Finally got back from travel and wrapped everything up. I ordered new custom coils and a starter relay from Dales Jet Sports to match his custom total loss. Hooked up all the hoses and electrical. The engine and components I transferred from the doner ski were quite dirty. I cleaned them up as best I could. I've tried to do some further work on the routing but I realize it is not that clean. There is so little room. I got the Jazz tank squeezed in between the pipe and the battery. In the future I'll probably get a smaller battery but this is what I had already.
IMG_0171.jpg IMG_0172.jpg IMG_0173.jpg
 
First ride report. I went out for about 20 minutes to get used to the ski. I haven't ridden this kind of hull before so it is a learning experience. My reference point is a modified superjet.

Overall feeling is totally different. Very light and maneuverable. When I accelerate it jumps out of the water. I am able to ride with my feet against the tray, having my feet back in the holds feels unnatural right now. Maybe its the short pole or I just need to get used to it.

The ride ended rather abruptly after the bpipe coupler popped off and I swam it back.

No backflips for a while until I can cruise around at speed and keep it level.
 
Last edited:
Top Bottom