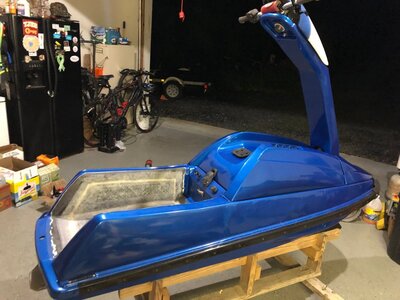
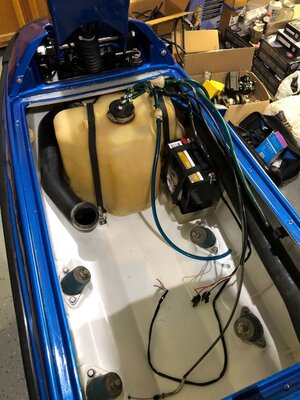
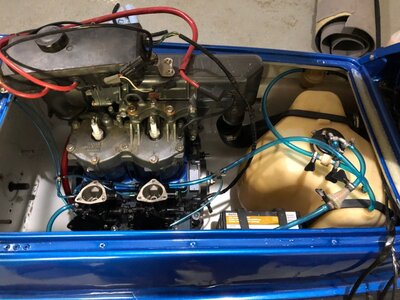
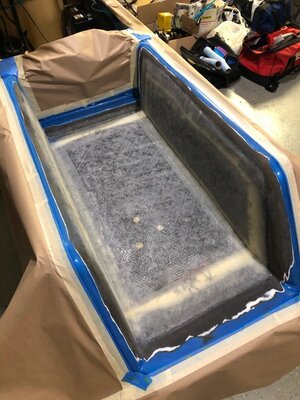
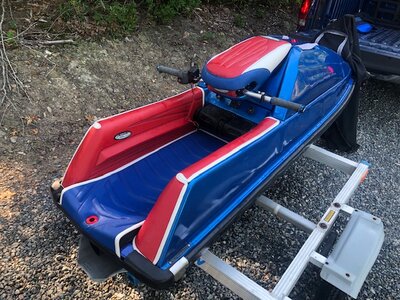
Experimenting on my first ski

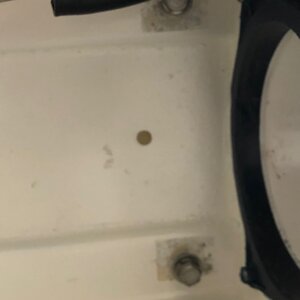
After it had time to cool and harden, I noticed there was a little flex above the pump shoe area where the foam hadn't properly spread into the thin void there. This is definitely an area I want strength and no gaps, so time to fill it in. Lets bust out the 1/2" bit and make a hole to pour a bit of foam in. Actually from experience, a bigger hole might be better, so lets go with the step bit and really widen it out. Then as I start to drill, I see much more tray material coming out than expected. Oh crap! You dumbass, there's a pump cavity 1/4" below that surface! Came very close to destroying an almost new 18V drill at that moment.
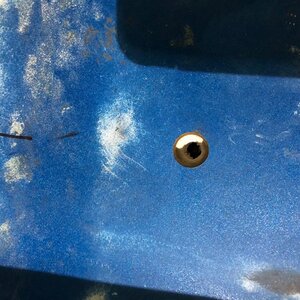
IMG_8128.jpg

OK, I think that’s enough for that night. Tired, pissed off, and sick of this tray. Decided to end it on a higher note and used that bit to drill out the through hull for my electric bilge. The blue billet fitting looked good on there, but I still went to bed pissed AF!

So that was mid-June, almost 3 months into this fun. Most of my free time had gone into this thing, which hadn't been all that much until all my progress in the last couple weeks. The ski couldn't be done before my friends visited soon, and I had trips and other stuff going on after that. Plus the ski was now 20 min away in a hanger at the municipal airport, because a friend there is a glass expert and has lots of supplies and expertise to help finish this up better. All that meant it was definitely gonna take longer to finish up, and my summer was gonna be a little drier. :( Guess I'll have to take the kids out on the couches a little more. Little did I know just how long that dry spell was going to be....

(Time to finish getting ready for my camping trip. Might be a week before any more updates.)
 
Last edited:
Hope so. With the denser foam we used, the tray doesn’t feel much lighter than before I started. We’ll see I guess. As long as I got it together well enough that it doesn’t crack apart on me.
 
Last edited:
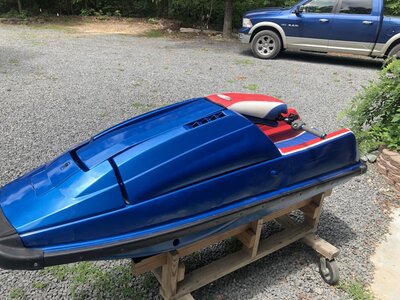
Like I said, life was a little busier after that. Next time I touched my ski was September! So I got some epoxy mixed with flox and filled in my stupid oops. I also followed Craig's lead and filled in the hood seal area next to the pole bracket just enough to level it out. The few SNs I've seen all seem to sag up there, making it easier to get a leaking seal. Not a lot accomplished, but at least it's something.

IMG_9766.jpg
 
Another month now, into mid-October. I Decide to drill some holes (more carefully this time), and fill in my air gap under the tray. Give it time to harden up, and now it feels nice and solid all over. Then I flop it onto its side and do one of the gunwales. The fun part here was after pouring and placing the panel, keeping the ski balanced on the stand while quickly getting up and standing on it to weight it down. Keep in mind my big size 13 feet wouldn't fit, so I'm effectively standing off the edge of a step for 8 minutes, and if I shift my body weight, there's a good chance the ski will slide on the bunks and end up bad for me and/or it. But all's well that ends well, and everything came out fine.

IMG_9765.jpg

Didn't get back and put the other panel in until late April. My damn ski has been in project mode for over a year (not running since 9/2017), and I was planning on riding it last June! :( Would've went quicker if it was at my house, but not until the glass work is done. Well at least I'm finally getting something else done.

Stupid tray!
 
Last edited:
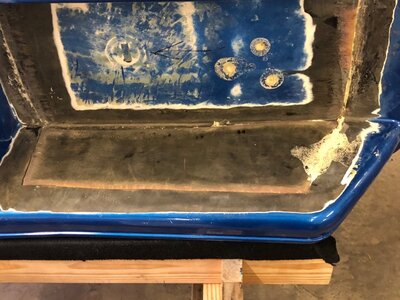
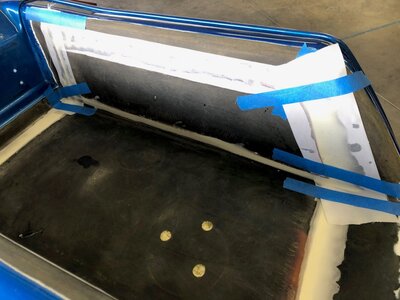
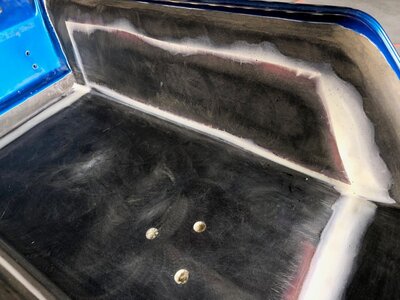
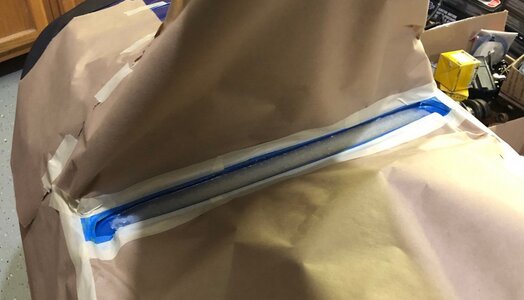
5/5/19: Finally making more steady progress! So I finish sanding off all the areas that need glass and work on glass prep. To fill in the gaps around the panels and make the final product smoother/stronger, we decide to use epoxy mixed with micro-balloons. On the spots that have more uneven edges from the foam, a little cabosil to thicken it up helps. To help it fill the gaps smoothly without it running, or needing to do multiple applications, I put peel-ply over the top of the epoxy. It somewhat keeps it where I want it. The micro helps it be easily sanded later when getting ready for the glass. Again, I would've been lost on this without Bob at the airport helping out and letting me use some of his supplies and knowledge, though at this point I was still doing all the work. (Keep in mind this picture was after curing, before removing the peel-ply. Ski had to be on its side while doing the gunwales. No amount of cabosil would let me do it upright like this.)

IMG_0815.jpg

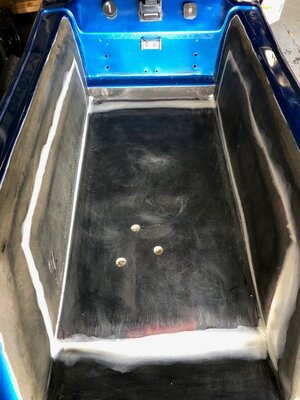
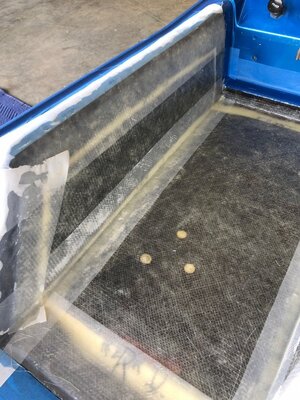
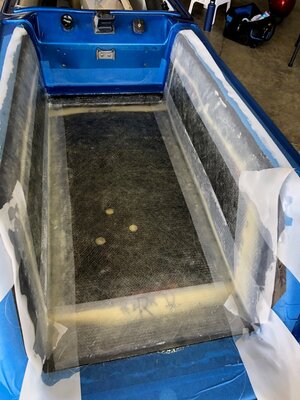
The 3 sides had to done in separate visits, and I finished up on 5/22. These shots were before my final sanding. Holy crap, this thing is starting to look like a ski again! Later, Bob said my prep work looked better than his, and he's been doing glass work for years on large and small scales. Hopefully all that "patience" and tediousness will pay off. I figured once I got it ripped apart, I might as well take the time to do it right.

IMG_0816.jpg

IMG_0817.jpg
 
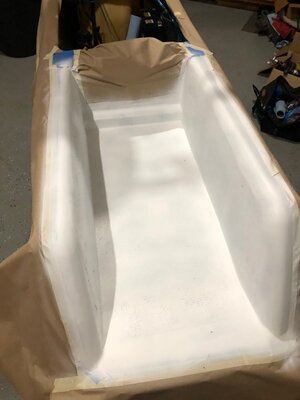
6/1: The day I've been waiting for. Ski is ready, Bob has time available, and we're getting some glass laid! So we cut 3" strips to go over all the edges, using simple biaxial weave cloth. On the rear edge of the tray, we do a 3.5" strip covered with a 4" strip. Then over the entire tray, we do a layer of 1708 in 3 pieces, with a 1" overlap along the gunwale bottoms. Boy does that 1708 take a lot of resin! I can see why some people use short, skinny rollers to work in the resin and squeeze out air when working with larger or thicker pieces of glass. This was done with just a brush, and took a lot of work to get it done thoroughly. Bob had done all his work with lighter weight sheets, so he didn't have any rollers. Live and learn. In the end, we had a glassed in tray and I went home happy about my ski for the first time in a while!

IMG_0848.jpg

IMG_0849.jpg

What you see at the seams is peel-ply Bob put on to help keep the edges and corners smooth and sharp, with less sanding required. I'm glad he had enough sense to tell me to tape up around the edges where I didn't want resin on paint. Good idea, because this stuff gets messy if you don't already know. Next up is a busy week at work, then a week camping (which was great and I just returned from), and I can peel this stuff off and start sanding. That's gonna feel better than the plastic film you peel off of new electronics! :cool:
 
So I am now caught up and posting in real time. Finally brought her home 2 days ago! Got the glass sanded down and smoothed the transitions out on the edges. Put fresh paint over my hole patch on the bottom, and got everything underneath reinstalled.

d1e735b880c5a861e36d010699cfe369.jpg


4a42294efecd4b35e0033883899da611.jpg


The plan is to get a rattle can of matching paint so I can redo the lip at the front of the tray, and a little overlap under the mats where needed, and have touch up paint for the future (I think Craig’s gonna use the same color on his). Really wish I could've kept all within what the mats will cover. Over the rest of the fresh glass, I was just gonna stick with the appliance epoxy I already have in the engine bay.

Should I use a different paint over the tray? I’m just looking for something to seal up the new glass. Where I’m spraying blue paint, can I put it directly on, or does it need an undercoat? If so, can it just be what I paint the tray with?

I got my lightened flywheel installed also, thanks to an awesome Black Friday special from PFM Industries. Got my ADA coupler installed on the crank, but need to dig around and find my midshaft now. Boxes and piles of parts have been sitting around my garage for too long now (for only having one ski and not having built up the parts inventory many others have). Regardless, I’m happy to see it coming along! Wife’s not thrilled to see it in her parking spot at the moment though.
 
Last edited:
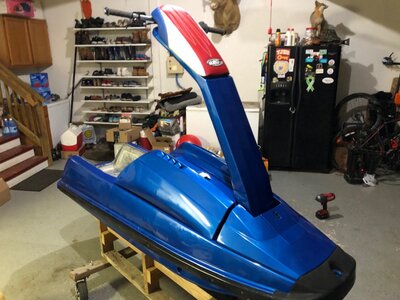
Got some more work done over the last week. Got the pole installed, and most of the stuff hooked up on it. Put on the nose piece and sat everything in place for a better look. Man, I can't believe how nice this is coming along!

IMG_0986.jpg

IMG_0985.jpg

So apparently my new ADA couplers have a problem. Turns out the midshafts on 90-92 SJ's are a smaller diameter, and ADA doesn't make one that fits. Go figure! :rolleyes: Cold Fusion won't work either. Trying to source something else, or should I just swap out the shaft in the midshaft with a RN one, which I hear others have done just fine. Gotta look more into that. So until my coupler issue is finalized, engine isn't getting installed. I did set it in place though so I could run my new fuel lines. Now it's really starting to look like a ski again!

IMG_0991.jpg

IMG_0993.jpg

Decided instead of the appliance epoxy to go with a quality epoxy primer over the fresh glass. Still waiting on my touch up paint to come in to finish the body stuff. Also got a hold of some underlayment to go under the mats, which I've been told I'll be happy I did later.

IMG_1004.jpg

The reinforced resin that I used to level out my sagging hood seal:

IMG_1005.jpg

IMG_1006.jpg

I think a couple coats will do me. Wondering if I should put anything else over it before the contact cement for my mats, any thoughts? Still cant't do that though until I get the blue paint to finish the front of the tray (really wish I could've kept it all under the mats!).
Left to do: hook up and adjust steering, install new electric bilge, tear into carbs (which I should've done last year), and slap it all together once I get the last couple things I need!
 
Last edited:
So last weekend I got my touch up spray paint. Made sure I had the right paint code. Got home and started spraying , and the damn color was off! Based on swatches I saw, I think the rattle can was right, and the guy that painted the ski originally got the code or mix wrong. Funny thing is, I actually like the color better on the rest of the ski. Problem is now I have a definite color mismatch.

fc77cbe34dd69ec84e5fdee38935ae13.jpg


0abef77cd3db139af18590825c955883.jpg


Well the border at the front is under the extinguisher, so it shouldn’t really stand out. The rear will only stand out at the ends of the gunwales, so I sanded it down with some 800 grit and went over it again. This time I tried to blend it in with the existing paint. I think it turned out decent, especially considering that only a small bit will be visible once the rear bumper and mats are installed.

After finally finishing with the blue, I put some clear coat over the fresh paint. Seeing how it’s July 4 week in VA, it’s a little humid. Turns out that does a number on the clear, and makes it turn cloudy as it dries. This is a small sample of what I had show up:

d4701e0fef2b94a7e9c4942c76437723.jpg


Turns out all you need to do to get rid of it is gently put a heat gun on it. It worked really well with almost no work and little time involved. Guy in the video has some pointers to follow.

Bottom with no heat, some heat above that, and done above that. When you think it's done, give it a little more and it might get even better:
395e3f684cd1c7bb11ae3f244dbc6142.jpg


And done:
82edd9ae3018c94fb592eb36e0eb72f9.jpg


In the meantime, I got my new bilge hooked up - the Tidy Bilge kit from OCD is awesome! Remember though when I put in my through hull for it last year? Guess I should’ve looked at where others’ were, or waited until everything else was going back in to pick a spot. Now I’ve got some wonky routing going on. At least when I put the engine in later, routing the hose over the bump on the side of exhaust hose gave it a small loop seal.

c2215041f1e9395c791a2a5daaef6b26.jpg


Next time the engine’s out, maybe I’ll tweak that some. On that note, I’m not overly pleased with much of the routing of my lines and cables. I’ll work on that later, the priority now is getting this thing in the water. Not the way I normally run, but it’ll work for now as nothing's kinked or rubbing in a bad spot.

Paint work finally done, it’s time for some mats! I started with some underlayment a buddy had (picture taken before gluing anything):
e047ea13c66bb0349d46c2871d8414f2.jpg


I had cut it 1/4” narrow on the sides to allow room for the side mats to fit snug. Then when I put the contact cement on it, the foam naturally absorbed a bunch and took 2-3 coats to get it done and tacky. Apparently it actually expands as that glue soaks in, as the pad ended up being the exact width of the tray, and grew almost an inch in length. (Don’t put it on yourself hoping for similar results!) After dry fitting the mats again, I realized I need that gap on the sides of the pad after all, so I trim it down with a razor. As long as a clean cut is made, it actually pulled up fairly easily and mostly clean.

I then look online to see if there’s any tips on doing the mats. Guess I should’ve watched this before doing the pad:

As I now realize, it’s best to do the sides before the bottom mat (which I knew) AND the underlayment (which I didn’t). The only good thing about what I did is it allowed room for the expansion that unexpectedly happened. I’m guessing if you order a properly cut underlayment from Jettrim, it’s not the same material and won’t have the same issue.

Well I got the side mats on, and the video was quite helpful. You definitely want to adhere in the order shown, top rail, front edge, stretch around the rear, then pound down the rest. Rubber mallet all over afterwards is very helpful, and I can see why he says to superglue the edges since the cement doesn’t grab them as well and a lot of forces will hit there.

0d4f2f4ac16af79515ac6b2bc4512655.jpg


Now the wedges are on, and all that’s left is the bottom mat. And the carbs, now that I finally go a hold of some jets and needles. They’re in decent shape, just need a little cleaning. Might do a rebuild in the near future (again, could’ve done it last year!), but she should run good for now, as I’m just trying to get this girl wet!
 
Last edited:
So I got hard at it again today. Spread some glue first thing and got the bottom mat in place. So Gary (RIP) stressed stretching the mat as it's layed down to ensure a better end result. I stretched it so well that the padded part ended up under the bumper, even after going over the kick wedges. Luckily it ended up ok and the mounting screws still went through deep enough. Getting the cover installed that goes over the bond rail/rear bumper joint was not as smooth. Luckily I got the bond rail bumper stretched just enough when I installed it that I could just barely get the bolt worked into the hole. I can definitely say that putting that damn thing back on last year was one huge PITA and I don't look forward to doing it again anytime soon, especially since I had no help at the time.

I had turned it over the other night, and it was pure music! Compression came out at 166/168. Craig says it’ll probably come down a little after running since everything inside got a little coat of oil during installation. Either way, looking good for a stock engine.

Next was the carbs. I got the existing jets cleaned up. Didn't have any 70-75 low jets available, so we left the 67.5's in that it already had. Depending on how well it tunes, that may help decide if I get rebuild kits and get jets while I’m at it. Only had one “new” needle, and the other one was showing a little grooving starting, so we’ll see how it goes for now. I can at least tune it good but maybe not great and do some breaking in on the engine. (Gonna be hard not to just hop on and get it, worse than buying a new sports car!)

For my own use as much as anyone else’s, here’s my initial carb settings, all straight from the manual except for the LSJ:
Needle: 1.5
Spring: 115g gold
Popoff: should be ~55#, pump was only ranged 0-30#
Low jet: 67.5
High jet: 130
Low screw: 7/8
High screw: 1-1/8 front, 1-1/2 rear

The rest of the day involved me fumbling around like a blind chipmunk. I think I tried to mount the spark arrestor bracket on the carbs 3 times, and kept pulling it as I remembered things I had to do underneath. Had to connect and adjust the throttle, then sync the carbs. Only have an idle adjust on the front carb, though the book shows and talks about using one on both. As long as the throttle sync is right, I don’t see how it should matter. Plus, these carbs were already used as-is before. Other stuff I kept forgetting: pulse line, attach supply, do the initial setting on the adjusters. Eventually I finally got everything and put the spark arrestors on, minus the cover.

Next issue was the hood. Put the inlet tubes on and tried to install the hood – not happening. Had to reroute my tank vent line to clear the front tube. Also did some rearranging on my primer lines. (Did I mention I’m not thrilled with my routing and will change it down the road when I get more tubing and take care of some other neglected tasks?) Still no go, had to remove the rear tube to clear the intake. Finally came across a notable difference where the SN doesn’t like a 62T. Finally success with the hood. Then I set the top over the spark arrestor and still no good, not the part the tube goes on hits the intake. Maybe not with a/m air filters, but that’s not happening right now. Time to bust out my angle grinder for its maiden voyage and cut it down. Hood finally fits with everything else in place, one more problem down!

One of the other things I had wanted to do with my old engine was install a cooling pisser line. Never got around to it, so I’ll do it during all this. Except that I forgot until halfway through today. Was just gonna get to it later, but Craig said it’s meant to have it and it’ll run poorer without it. Not feeling like a 45 min trip to town and the hardware store, we raid his garage. Found some good hose and borrowed and T-fitting and through hull, so now that’s taken care of and something finally won’t have to be rerouted later.

Unfortunately all this, and another errand, took a bit longer than I was expecting, so I had to get ready for work right as I finished. I turned it over one more time just to feel better, than hung it up for the night. Maybe if I’m not deadly tired in the morning I’ll take it down and start setting the idle, etc. I came across a recommended break-in routine also, so I can work on that too:

1) Set idle, run 5 min
- Let engine cool (after every step)
2) 10 min @2000 rpm
3) 15 min @2500 rpm
4) 30 min @3000-4000 rpm
5) Hit it! (Double the oil for the first 2 tanks)

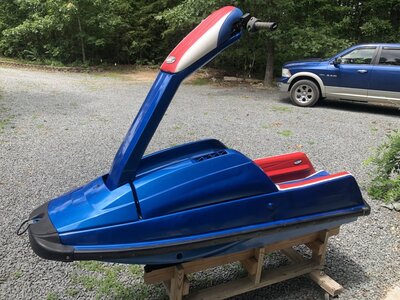
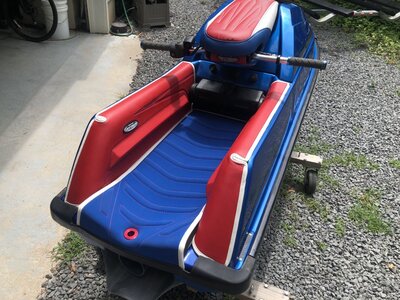
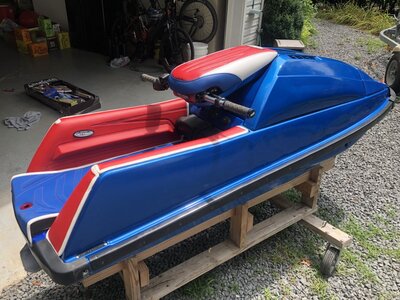
So now for the good part, here’s how it looked after finishing the mats and getting it out in the sun. Damn, that girl’s hot! Excuse me while I take a minute for myself….

IMG_1044.JPG

IMG_1045.JPG

IMG_1046.JPG

IMG_1048.JPG
 
Last edited:
Got off work Monday morning and couldn’t wait to go play! Got it loaded onto a trailer and down to the water with a Pet tach in hand (interesting little gadget!). Almost forgot the gas in my haste, so I mix up some double thick juice and pour it in. Crap, forgot about priming. Go get another jug of 50:1 and knock that out. One splash was enough, and she roared to life!

Figured out how to make the tach read consistently, and got my idle set. Boy was that some beautiful music. Only took almost 16 months to get there, plus the previous 6 months of sitting broken. After the initial idle run, it was time to let her cool down and go to bed. Man, it’s hard not to hop on and let her rip, but it still feels good just getting to first base!


Get home Tuesday morning, back to the water. Try messing with the throttle some, and she’s getting some hesitation just off idle. Trying to determine if it’s a lean stall or rich bog. Luckily you bastards have already figured this out for me, so I took some advice and got it figured out. http://www.x-h2o.com/index.php?threads/2009-superjet-off-idle-bog-battery.117666/ Now I’ve got a steady idle with smoother initial response. Didn’t have it running higher up as much as I wanted because of the idle and low adjustments, and it had run long enough for this session. Time to cool down and hit the hay again. Tomorrow is riding time!!
 
Last edited:
Finally the day, I get to consummate this project! Get her warmed up on the trailer, make sure the idle is good, try a few blips and don't quite like the feel. Seems rich, so I dial it down a little and finally take her out. Idles ok, needs some crafty throttling to get it up to 1/3 throttle if it was idling for any period. Take it in and dial down a little more. Now when out, it idles rougher and throttles up worse. Tuns out my initial thought 2 days ago was right and it was lean after all. Undo my day's adjustments and it does better. Turn it out just a hair more and it's not great, but doing decent. Passes the 10 second restart test smoothly and has much less issue in the bottom 1/4 range. Of course every moment out on her to this point was a great feeling, but now it's time to play! Couldn't stop grinning, laughing, and hollering like an idiot! Did a good bit of running from 1/4 to 1/2 throttle, with a little bit above that. She felt good through all of it, and handled great! I'm loving the mats and wedges, and will not be wearing my Chuck Taylor's any more (though they were good on the stock mats). Even had a couple brief 3/4+ bursts, and man did she come to life! Wish I had done the 62T upgrade a while ago. The only aftermarket upgrades done through this project were lightening my flywheel and the billet couplers, not sure how much I'm getting from that. I've been riding another friends stock 650 occasionally, and man have I missed the bite from my Hooker 9/15. Between Friday and Saturday, I think I may be done with my break-in period (about 2/3 tank, plus a full one behind it). I have low jets and other bits coming from @JetManiac tomorrow, so Hopefully this thing can be screaming smooth before work Sunday.

I definitely like my straight bars over stock, but how much difference is there between 0 and 4 degree bars? Might almost be a tad too straight, and I don't have anyone here to compare with.

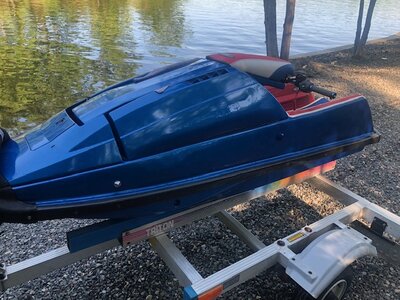
Again, big thanks to Craig @superjet119 for helping make this happen! Here she is after getting her first splashes. She looks happier when she's all wet!

IMG_1054.jpg

IMG_1055.jpg
 
Top Bottom