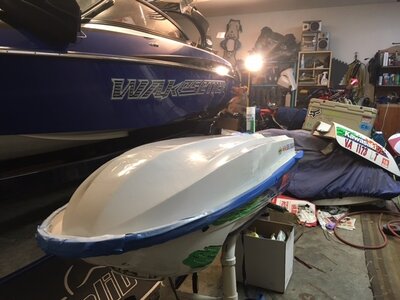
Hole in the bottom

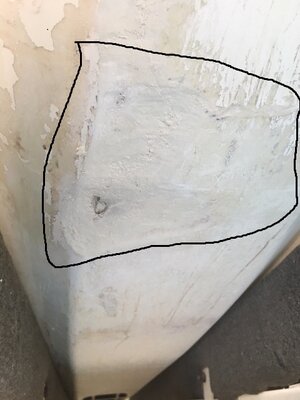
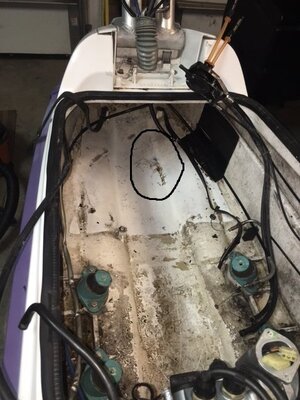
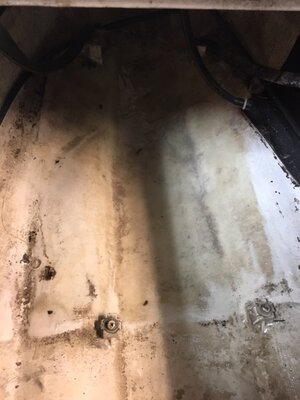
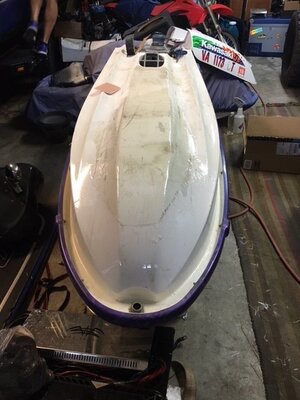
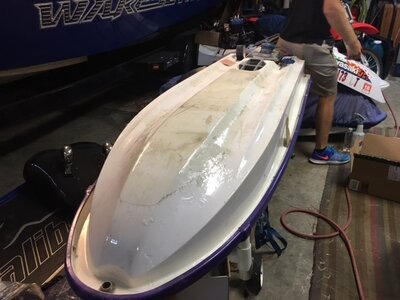
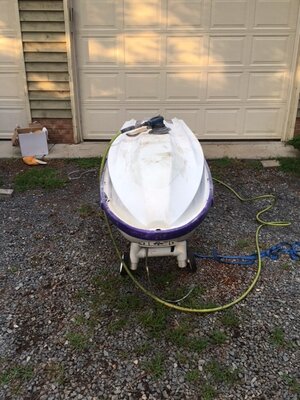
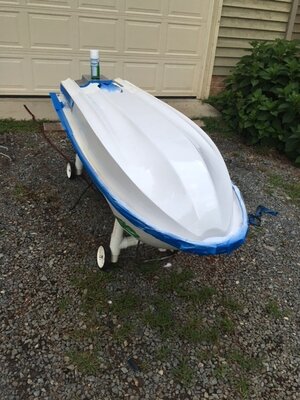
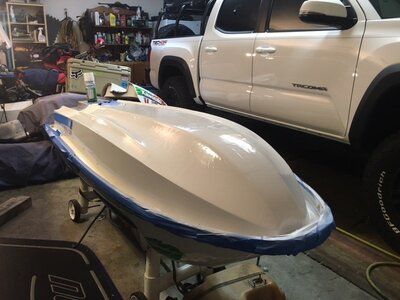
Hey I work at a jet ski shop in Tempe, we do fiberglass work and paint as well as service and basically anything that has to do with skis including rentals. We get a lot of damage on our fleet but we get the pleasure of working on stand ups often as well. Here is a 750sx a customer brought in and basically wanted a hole fixed and tubbies installed flush with the bottom deck. Pics

image.jpeg image.jpeg image.jpeg image.jpeg image.jpeg image.jpeg image.jpeg image.jpeg image.jpeg
 

Vumad

Super Hero, with a cape!
Location
St. Pete, FL
Looks very nice. What is the method you use to fill the hole? Or put another way, recreate the shape to layup the missing area. I have a few methods I like but interested in the method a professional prefers.
 
My boss is the professional, has been doing glass for 25+ years. With this ski the hole had been repaired with the wrong type of glass with made the entire repair pop right out. i didn't show a pic of the ski when the damage was properly ground out. The whole was much bigger after the grid I away bad glass. Aluminum tape on the bottom, glass from the inside first obviously in which we did an area about 6" further Han the damage to give it strength. I want to say we did a second layer on the inside for this guy but I don't remember that fondly. Pull the aluminum tape, and then we cut glass to build up the area first, then a final pice again about 6" past the area. when it dries (I live in AZ so about a day) I will grind it lightly first, then 80 grit DA, glaze the area to fill in pinholes and create a waveless flat surface. Prime, block it out, paint, color sand.
 

Vumad

Super Hero, with a cape!
Location
St. Pete, FL
My boss is the professional, has been doing glass for 25+ years. With this ski the hole had been repaired with the wrong type of glass with made the entire repair pop right out. i didn't show a pic of the ski when the damage was properly ground out. The whole was much bigger after the grid I away bad glass. Aluminum tape on the bottom, glass from the inside first obviously in which we did an area about 6" further Han the damage to give it strength. I want to say we did a second layer on the inside for this guy but I don't remember that fondly. Pull the aluminum tape, and then we cut glass to build up the area first, then a final pice again about 6" past the area. when it dries (I live in AZ so about a day) I will grind it lightly first, then 80 grit DA, glaze the area to fill in pinholes and create a waveless flat surface. Prime, block it out, paint, color sand.

I have a method that could save a little time and weight over that.

I rebuild the boat with 5 minute drywall mud. It dries fast, is cheap and sands like butter. I then layup a light repair on the outside first, the drywall gives it the right shape right from the start. Then i go inside, the drywall comes out easy, prep and layup a heavy repair. Then i blend it all in. This method works with vacuum bagging inside and out if weight is a consideration. I have similar method i call "on-the-part" that uses more material but saves even more weight.

Thoughts?

Ill have to look into the aluminum tape. I usually use packing tape but it doesnt hold a shape. The aluminum tape sounds like a good method. Thanks for the tip.
 
The aluminum tape is usually not necessary, if we rapid from the outside in then we'll push the glass into the hole as we coat it with resin on the brush. That helps he glass grab onto the hull, we still build it up with pieces we can layer to build up the void, and cabasoil does great. The issue is typically strength and also duration of the repair. The method of glass if my boss does insures the repair is goi to be stronger than the original hull. Dry time at a day is not bad at all, we glass on a Monday, body work and prime Tuesday, block primer out and prep it for paint Wednesday, colorsand Thursday for that mirror finish and that's a done deal. Usually doing anywhere from 2-5 skis at a time depending. I'm not the one with all the knowledge, I'm just learning, but it's crash to hands on feel the different materials each company used in their skis. I own an fx1, 2001 round nose, 96 blaster, 90 square, sxr hull, and an x2. The kawasakis are definitely fiberglass however you can't really feel it until you grind into it a ways, they used a very weird layup that makes it seem almost like smc but it's definitely glass. Square and round nose bottom is smc, but the square seems a lot more plastic like, very weird layup schedule for at hull, round nose with the "hand layed" style topdeck is a dream to work on but the bottom deck is same as a square, but when you grind into a rn it's much more glass feeling than the square which is odd because rumor has it the bottom decks are the "same". THey are the same design but definitely different schedule. Fx1 being all "hand layed" style is amazing, when you repair or add glass it doesn't stick out like a sore thumb on the inside of the hull. I was able to completely rework the underside of my fx making it as smooth as a factory superjet on the underside. Notice when you look at superjet in the light you will see on a square, they are usually wavy like an Oceanside beach. Even on the rn hulls typically you will notice one or both sides of the tray walls will be either sucked in or pushed out due to the foaming inside. Too little foam will cause the wall to suck in, too much foam and it will push out. Most of the time we have to repair a hole though it's on a vx110 from the rental fleet, they are extremely easy to work on. My boss is a standup rider but he doesn't get on the X much anymore let alone gotten to ride his skis in forever. Maybe he can chime in, I'll see what he thinks about your method for repair, it would definitely save a lot of dry time in the winter.
 

Quinc

Buy a Superjet
Location
California
My boss is the professional, has been doing glass for 25+ years. With this ski the hole had been repaired with the wrong type of glass with made the entire repair pop right out. i didn't show a pic of the ski when the damage was properly ground out. The whole was much bigger after the grid I away bad glass. Aluminum tape on the bottom, glass from the inside first obviously in which we did an area about 6" further Han the damage to give it strength. I want to say we did a second layer on the inside for this guy but I don't remember that fondly. Pull the aluminum tape, and then we cut glass to build up the area first, then a final pice again about 6" past the area. when it dries (I live in AZ so about a day) I will grind it lightly first, then 80 grit DA, glaze the area to fill in pinholes and create a waveless flat surface. Prime, block it out, paint, color sand.


What do you use to "glaze the area to fill in pinholes"?
 
i wish i had your knowledge and skills. glass work befuddles me.

my sn hull has a hole in the bottom and my repair is too embarrassing to admit to publicly
 

Quinc

Buy a Superjet
Location
California
i wish i had your knowledge and skills. glass work befuddles me.

my sn hull has a hole in the bottom and my repair is too embarrassing to admit to publicly

Key is to rough up the surface with 36grit, clean it with acetone and the most important step is to use the correct Epoxy resin and NOT Polyester resin.
 
I just finished up a repair very similar to this on my 1994 750sx. I laid 2 sheets of fiberglass in the belly. I then flipped it over and poured some epoxy resin in the hole from the outside to fill it in some. I then cut out 5 pieces of cloth and laid them in the hole to fill it in some more. I then cut a large sheet to cover the whole nose section of the belly trying to emulate this post. After sanding with four coarse to fine sand paper I thought I had a really smooth surface until I painted with appliance epoxy paint. I did this repair in 1 week since it is still riding season and I need to get back on the water. I plan to pull the motor again this winter and sand down again and add some more epoxy to try to make it look factory again. What sanding tools did you use to make your repair so smooth? Should I sand this by hand? How are the edges of the glass so straight?
 

Attachments

  • 750sx hull 1.jpg
    750sx hull 1.jpg
    95.9 KB · Views: 55
  • 750sx hull 2.jpg
    750sx hull 2.jpg
    74.4 KB · Views: 52
  • 750sx hull 3.jpg
    750sx hull 3.jpg
    105.4 KB · Views: 53
  • 750sx hull 4.jpg
    750sx hull 4.jpg
    63.9 KB · Views: 54
  • 750sx hull 5.jpg
    750sx hull 5.jpg
    96.9 KB · Views: 56
  • 750sx hull 6.jpg
    750sx hull 6.jpg
    160.6 KB · Views: 55
  • 750sx hull 7.jpg
    750sx hull 7.jpg
    153.3 KB · Views: 57
  • 750sx hull 8.jpg
    750sx hull 8.jpg
    97.5 KB · Views: 55
  • 750sx hull 9.jpg
    750sx hull 9.jpg
    100.9 KB · Views: 53
I cracked it pretty bad on a tree which is what caused it. I used a grinder to get most of the loose/cracked hull out of the way which is what caused the hole area. Looking for some sanding tips on how to get this repair looking perfect. It will do for now.
 

bored&stroked

Urban redneck
Location
AZ
And now I have a small hole in the bottem of my superjet from a hidden rock. That's what I get for commenting on this thread haha
 
That's a bummer. I used the Total Boat 5:1 Epoxy kit from Amazon with the slow hardener. Cost around $50 and worked great. If you get that kit select the faster hardener because the slow takes about 24hrs to harden. Be careful with drips as they are a PITA to sand down. A lot easier to wipe them off when it's still wet than sand them down flush with the hull after it has hardened.
 
Top Bottom