- Location
- Folsom, CA
Hi, I decided to post this as I found it hard to find all of the necessary information in one place and It was my first time building a 155 pump.
Items needed:
A OEM 155 pump (commonly found in the late 90s triple cylinder Yamaha sit downs. I found mine in perfect condition on eBay for around $80, it was from a 98 gp1200), a Superjet jet pump rebuild kit (bearings and seals), a Superjet driveshaft, a Skat-Trak E-75 155/75/20 Magnum Swirl impeller in the appropriate pitch for your application, and a new wear ring housing if needed (I went with the stainless steel Solas YDS-HS-155)
Assembly:
1. Remove the stock drive shaft and bearings from the stator section. I did this by smacking the long end of the shaft on the ground. Doing this should knock the shaft and bearings out together.
2. Remove the seals. Just use a long flat head or punch and a hammer and slap them out.
3. Clean all grease and prep for powder coating or paint. If you choose to do so. If you do it takes time to tape everything off, cause you have to do it twice. I use heavy duty duck tape to tape everything off for sand blasting and then after they're blasted I use special high temp silicone tape for powder coating.


4. After they're all pretty its pretty easy to "press" the bearings and shaft in. First put the bearings on the shaft by heating them with a torch and simply sliding them on. Then put the seals in the pump by using a nicely sized socket and tap them in. Then grease the bearings on the shaft and stick the entire thing in your freezer for about an hour. Then with the stator section supported where the shaft has room to go down, torch the hole where the shaft goes and then slide the shaft and bearings into place. If you do all of this correctly it will be very smooth and easy.
5. Install your impeller with the appropriate washer between it and the seals.
6. Test fit your wear ring. When I first slid mine on the impeller would not spin at all. This is either because the tolerances were not correct on the new wear ring or the new impeller. I had to very carefully grind down the edges of the impeller to get the tolerances within spec. I cant stress this enough VERY CAREFULLY! I had to re test fit probably 6 times before it was right. You want .3mm-.5mm. Buy a feeler gauge if you don't have one, they're a great tool to have.
7. Bolt your pump together but install your stator section upside down (with the 2 alignment pins removed) where the cooling lines are closest to the pump mounting ears (if you don't do this you will have to modify your pump so that the steering cable will fit). Most 155 wear rings are not threaded so you have to get creative. You can use thread inserts or be lazy like me and go to ace hardware. I will probably change this in the future to ease serviceability.
In these photos the stator section is bolted up normal. I had to remove it and take it all back apart to flip it 180.


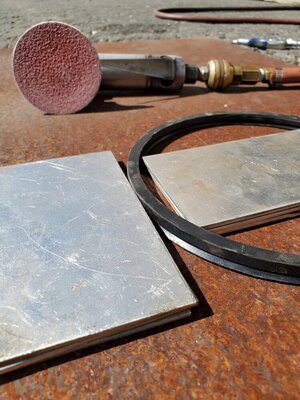
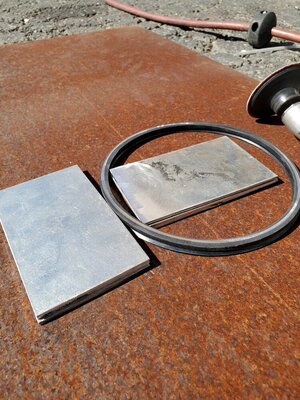
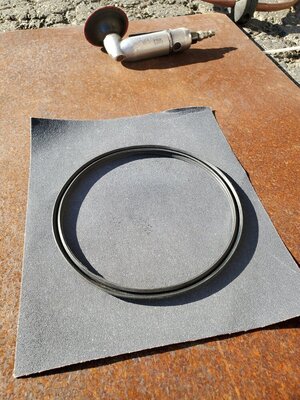
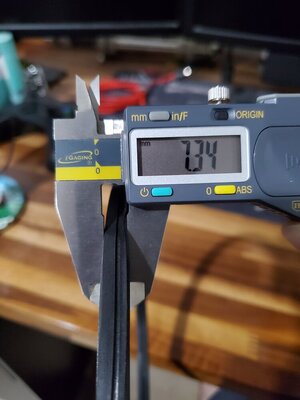
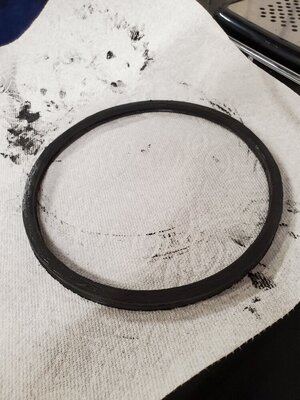
8. If your pump seal is too thick like mine you will have to mill it down to the correct thickness. I'm doing this by using two pieces of steel on a flat surface that are the correct thickness as a guide so when I grind it down it will be as flat as I can get it.
Complete:


Items needed:
A OEM 155 pump (commonly found in the late 90s triple cylinder Yamaha sit downs. I found mine in perfect condition on eBay for around $80, it was from a 98 gp1200), a Superjet jet pump rebuild kit (bearings and seals), a Superjet driveshaft, a Skat-Trak E-75 155/75/20 Magnum Swirl impeller in the appropriate pitch for your application, and a new wear ring housing if needed (I went with the stainless steel Solas YDS-HS-155)
Assembly:
1. Remove the stock drive shaft and bearings from the stator section. I did this by smacking the long end of the shaft on the ground. Doing this should knock the shaft and bearings out together.
2. Remove the seals. Just use a long flat head or punch and a hammer and slap them out.
3. Clean all grease and prep for powder coating or paint. If you choose to do so. If you do it takes time to tape everything off, cause you have to do it twice. I use heavy duty duck tape to tape everything off for sand blasting and then after they're blasted I use special high temp silicone tape for powder coating.


4. After they're all pretty its pretty easy to "press" the bearings and shaft in. First put the bearings on the shaft by heating them with a torch and simply sliding them on. Then put the seals in the pump by using a nicely sized socket and tap them in. Then grease the bearings on the shaft and stick the entire thing in your freezer for about an hour. Then with the stator section supported where the shaft has room to go down, torch the hole where the shaft goes and then slide the shaft and bearings into place. If you do all of this correctly it will be very smooth and easy.
5. Install your impeller with the appropriate washer between it and the seals.
6. Test fit your wear ring. When I first slid mine on the impeller would not spin at all. This is either because the tolerances were not correct on the new wear ring or the new impeller. I had to very carefully grind down the edges of the impeller to get the tolerances within spec. I cant stress this enough VERY CAREFULLY! I had to re test fit probably 6 times before it was right. You want .3mm-.5mm. Buy a feeler gauge if you don't have one, they're a great tool to have.
7. Bolt your pump together but install your stator section upside down (with the 2 alignment pins removed) where the cooling lines are closest to the pump mounting ears (if you don't do this you will have to modify your pump so that the steering cable will fit). Most 155 wear rings are not threaded so you have to get creative. You can use thread inserts or be lazy like me and go to ace hardware. I will probably change this in the future to ease serviceability.
In these photos the stator section is bolted up normal. I had to remove it and take it all back apart to flip it 180.


8. If your pump seal is too thick like mine you will have to mill it down to the correct thickness. I'm doing this by using two pieces of steel on a flat surface that are the correct thickness as a guide so when I grind it down it will be as flat as I can get it.
Complete:


