FX-1 My First FX1 Freestyle Build

I recently purchased a 1994 FX1 which was bone stock aside from a b-pipe and msd ignition. I rode it once and it wasn't that great compared to my old 2008 SJ. So it's time to completely strip it down and build it to what it needs to be.

My list so far is:
RRP billet handpole w/ OVP steering
RRP trim system
RRP adjustable footholds
Tom21 tubbies
Tom21 144 pump tunnel
Reinforce the entire ski
Possibly shorten the gunwale
Rocker the rear

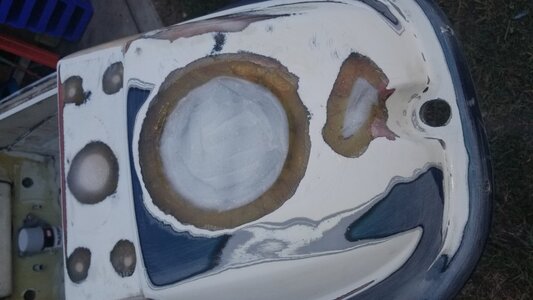
So far I haven't been disappointed. I pulled the turf off only to find someone had drilled a bunch of holes for what seems to be surface mounted footholds. No epoxy was used, just drywall anchors that fall into the foam when you try to thread a screw in them. Good thing I was planning on removing the foam anyways...
20190827_165500.jpg
20190826_181151.jpg
 
I am thinking about cutting back the rear gunwale which I roughly taped in green. I would then mount the rrp holds as close to the rear of the ski as possible.

I am almost second guessing using the rrp holds because of how far towards the center of the tray they stick out. They almost don't allow me to widen the tray because of how deep the inserts are.
20190827_172024.jpg20190827_171537.jpg
 

Sanoman

AbouttoKrash
Location
NE Tenn
You could take some depth out of the recessed pieces that go in to the sides,but that still doesn’t keep the holds from sticking out into the tray.Have you thought about using just footholds?
 
You could take some depth out of the recessed pieces that go in to the sides,but that still doesn’t keep the holds from sticking out into the tray.Have you thought about using just footholds?

Yeah, I was thinking about that but I dont think it would save much space. I do like your idea about cutting down the inserts. Cound widen the whole tray and cut the middle out of the inserts enough to match the tray width.
 
Started to fill in the front instead of turfing over it. 20190904_213108.jpg
I've got some damaged spots in the nose that need to be repaired and then I will cut out the fuel filler and glass it smooth.
If anyone has a cold fusion internal fill for sale, I'm looking for one.

20190905_175846.jpg

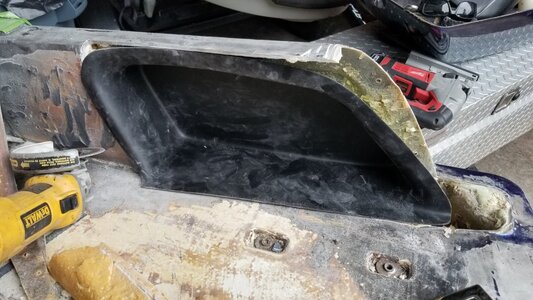
I cut down the rear of the ski and started to test fit the rrp footholds and they will need quite a bit of modification to make them fit the way I would like.

20190905_183902.jpg

20190905_183859.jpg

I'm thinking about cutting them in half roughly where the green tape is. That way they won't stick out as far towards the center of the tray, which will allow me to widen the front of the tray as well.
 

Attachments

  • 20190905_183902.jpg
    20190905_183902.jpg
    136.5 KB · Views: 17
Cut out the fuel fill to glass it smooth and worked on a damaged spot. I used duct tape to hold the west systems 406 filler in place. Once dry, I'll layer the inside and outside with glass mat.
20190908_162728.jpg
20190908_170322.jpg
20190908_172415.jpg
 
I put 3 layers of glass on the fuel filler and damaged spot in the nose. I used a plastic bag to trace out each layer starting with the smallest piece. Once that dries, I plan on filling that with 406 to fill the void. Once I get close to the surface, I will use 410 so it can easily be sanded and shaped.
20190909_175928.jpg
20190909_180132.jpg
20190909_181247.jpg
 
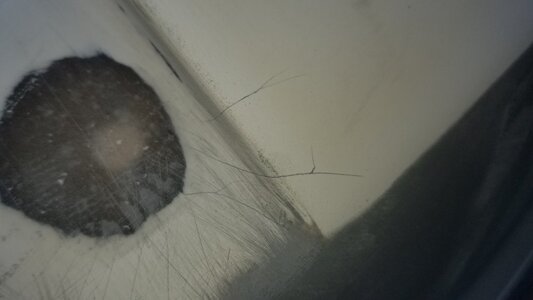
There are quite a few hairline cracks in the nose and around the handpole mount. I had similar cracks in a blaster I restored years ago and they eventually became visible through the paint. What is the best way to eliminate these cracks from growing and showing through the paint one day? I'm thinking I could take a very small dremel bit and grind out about 1/16" into the cracks and fill with epoxy and cabosil?
20190911_163553.jpg
20190911_163605.jpg
20190911_163610.jpg
 

Attachments

  • 20190911_163553.jpg
    20190911_163553.jpg
    50.4 KB · Views: 9
There are quite a few hairline cracks in the nose and around the handpole mount. I had similar cracks in a blaster I restored years ago and they eventually became visible through the paint. What is the best way to eliminate these cracks from growing and showing through the paint one day? I'm thinking I could take a very small dremel bit and grind out about 1/16" into the cracks and fill with epoxy and cabosil?
View attachment 382726
View attachment 382727
View attachment 382728

When I did my build I had tons of spiderweb cracks. Used a small ball looking burr on the dremel. About the size of a bb. You need to grind along the full length of each crack and down to fiberglass on the gel coated top half. Fill with epoxy / cabosil to get it back smooth. When you get down to just pinholes left, blow them out good with compressed air then use glazing putty to finish up.

The burr I used was like the ball one in this set.

QLOUNI 20pcs Rotary Bit Burrs Set HSS Tungsten Carbide Wood Milling Burrs with 1/8''(3mm) Shank for DIY Woodworking, Carving, Engraving, Drilling https://www.amazon.com/dp/B076DQZKXB/ref=cm_sw_r_cp_api_i_2oVHDbV24WJ0B

Sent from my iPhone using Tapatalk
 
Top Bottom