Blaster Noob to Glass. Minor Hull Repair

Didn't think about using a roller. I'm only familiar using epoxy for the most part when I use to build wood r/c airplanes. But then micro balloons were the only filler for spots needing it.

I'll hit up west marine at lunch. Its next to harbor freight where I'll grab a new sanding block and some paper if they have anything decent. Otherwise Home Depot pit stop on the way home tonight. I don't know of a local store that would sell the supplies I need otherwise. I'll definitely look at us composites online later on as well.

What epoxy filler is used for this type of repair. I saw at West Marine several different containers of filler. No clue yet as to which is preferred over another.

Thanks guys. You all have been a pleasure to learn from. Thanks for putting up with me.
 
Lot of guys seem to like cabosil... I personally prefer micro balloons over cabosil... This might relate back to my rc airplane days as well.. Either will work

Sent from inside a beer can
 

Vumad

Super Hero, with a cape!
Location
St. Pete, FL
You're on the right track. All of the composite repairs are the same. Prep with cleaner and sanding. Mask off areas you aren't working. Layup new materials.

I would use cab-o-sil, not microspheres for this job. Yes, microspheres are lighter and easier to sand, but this is your bottom deck. Easier to sand means easier to scratch.

I prefer buying 80 grit sand paper from home depot over harbor freight. The harbor freight stuff clogs quicker. I buy the big packs (25 sheets). I buy a lot of the other grits from harbor freight, but I use mostly 80 grit so I spend the extra buck or 2 on that.

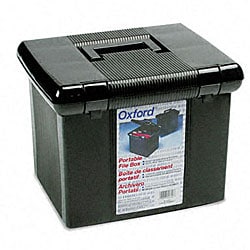
I also bought one of these for my sand paper, as I have several of every grit size from 40-1200 and it was starting to get a little unmanagable.
Portafile-Black-Letter-Size-Hanging-File-Box-P11404703.jpg
 

Vumad

Super Hero, with a cape!
Location
St. Pete, FL
Lot of guys seem to like cabosil... I personally prefer micro balloons over cabosil... This might relate back to my rc airplane days as well.. Either will work

Sent from inside a beer can

Or you can mix using both.

Microspheres sand easier and are lighter, but they scratch easier and leave pin holes. The bottom deck will see abuse and the weight is negligible. I use both, but for a high impact area like OP is repairing, I would use cab-o-sil. More work to sand but will hopefully resist damage a little more. It's also a very easy to sand area. Most of the job could be done with a DA and would be effortless.

You can actually mix anything with resin that doesn't have a moisture content. Talc, milled fibers, those are all options. I actually mentioned milled fiber in my first post for deep gouges. Milled fibers would be too thick for this job, and a layer of glass would probably be too. Plus, fibers and glass would need a second sealing / filler coat after sanding.
 
Awesome info guys. I'll definitely look up cabosil. Hopefully West Marine has some. I only have two small containers of 410 and 407 if my memory serves. Just the stuff that came in the small repair kit I bought. West Systems stuff.

I do prefer the stuff that is harder to stand for the obvious reasons and abuse the lower will see. I personally do not beach my ski. If I do I'm off it holding the bow up till I set it down so it wont float away. I would like to perform the best repair not the easiest. Though after you guys helping me with process, items needed and the confidence that comes along with it I think this repair at its hardest will be very smooth. I've got time.

You guys kick a$$
 

Vumad

Super Hero, with a cape!
Location
St. Pete, FL
Awesome info guys. I'll definitely look up cabosil. Hopefully West Marine has some. I only have two small containers of 410 and 407 if my memory serves. Just the stuff that came in the small repair kit I bought. West Systems stuff.

I do prefer the stuff that is harder to stand for the obvious reasons and abuse the lower will see. I personally do not beach my ski. If I do I'm off it holding the bow up till I set it down so it wont float away. I would like to perform the best repair not the easiest. Though after you guys helping me with process, items needed and the confidence that comes along with it I think this repair at its hardest will be very smooth. I've got time.

You guys kick a$$

I believe cab-o-sil is also labeled as fumed silica
 
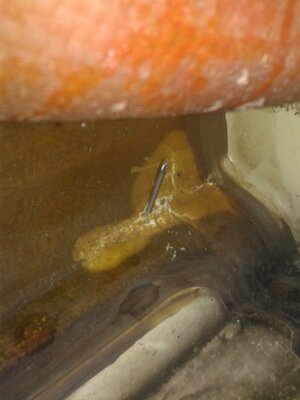
Well while waiting for the last coat of epoxy to fully cure I was looking at the pump shoe and noticed its broken right where the intake grate bolts up. So a heat gun a hammer, utility knife and a screw driver plus about 1 1/2 hours later I got the shoe out in billions of pieces. Some of the gel coat did come off with the glue so I'll have to prep and get those spots covered in resin.

I was curious if you guys know how much 5200 I'm going to need. I ordered a blowsion aluminum shoe just a moment ago and want to order the 5200, just not sure what size I should buy.

Thanks fellas. Happy Mother's day btw.
 

Vumad

Super Hero, with a cape!
Location
St. Pete, FL
I've never done a pump shoe so I can't help much, but I'm confident one tube of 5200 is plenty.

Why order it? Have you checked your local hardware store. My Home Depot has it.
 
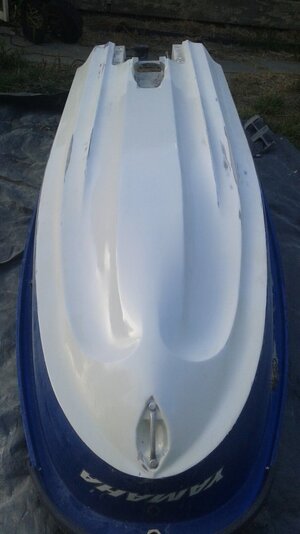
Well I'd really like to extend my appreciation and a big thank you to you guys that helped me. I really was more nervous than this process should have made me. But since this is my favorite object I couldn't chance it. Now that it's been a few weeks and I've had some time to mix a few rounds of epoxy and filler. I've learned a lot so far and have gone through sanding too much and needing to prep and mix more epoxy and then hurry up and wait. Did that a few times. But now I've got my hull into better shape. Today I sanded to 320 grit. I'm sick of sanding. But it must happen. I decided to get some paint on it to see what it will look like!

Shook up the rattle can for a few minutes while I stared at the hull. Wiped her down after blowing her off and tack cloth. Shot a light mist and then about 15 minutes later hit it again with a thicker coat. I can see some pin holes but I'm not worried about them. I was more concerned with how blem's will look. So far so good. I didn't go into this project expecting a brand new hull. Nor do I intend to at this point. So I'm very happy!. Tomorrow some more sanding, prep and hopefully get closer to the real paint sesh.

I've also now installed an aluminum pump shoe. I'm really glad I noticed how bad my stock plastic shoe was. It was broken and sure to fail sooner than later. Took a bunch of grinding to get it to seat properly but I managed. I had to epoxy some spots where the gel coat came off and bare glass was showing. But that was no big deal. I used a file to get a lot of the chitty work done since it was going to be hidden, then used my sanding block to get it nice and smooth. Tunnel should be a big improvement over the stock shoe. The new aluminum shoe looks much more flow'y!


Motor. I rebuild and rejetted the carbs for the riva pipe I had. WHAT A PITA this pipe is to install. I cut a wrench in half, pulled the starter. Now she's drop in ready. I also bought an Impros Hooker 10/16 prop and can't wait to get a new stator and wear ring and rebuild my pump with all new parts. I'll run the stock pump and beat up impeller for now. I really wanna see what the difference is gonna be!


Thanks again guys. Much appreciation (virtual beer) to you all.

20150505_195748.jpg 20150516_184500.jpg
 
Last edited:

Vumad

Super Hero, with a cape!
Location
St. Pete, FL
For the pin holes, You can try some bondo glazing putty from the auto parts store. I have not used it on a ski, only a plug, but it says it is water resistant. I used the basic single stage stuff but the pro version has a hardener. It worked very well for filling in my pin holes. It filled in many I didn't even see, as after I sanded it there were freckles everywhere. I sanded it with an 80 grit using no pressure almost so I am sure you can try a lighter grit.

It's the bottom of the ski so it's not a problem but an option of you like to give it a shot.
 
I'm still thinking about it. I don't think the pin holes will really bother me. Few coats of paint and I won't really see them anyway. Great suggestion though. If I ever get to the point I want to rebuild my B1 to the point of new that is definitely something to consider.

I have an old 83 JS550 that is in absolutely terrible shape. I was going to play with it to get a little more familiar with body work. Already got it running.
 
Alright I'm to the point where I'll be painting the hull very soon. I was curious what your experience with this epoxy has been regarding recoating. The can states within 30 min or after 7 days. Have you sanded it at all? If so how did it come out? I was planning on running 400 grit over the first layer where I did the test in the center of the hull to blend in anything unseen. I really don't care about perfection I just don't want to make anything worse. Such as crackling, lifting or any other potential problem with a paint I've never really played with.


Thanks guys! I can't wait to get this thing done. New exhaust, new hooker 10 16 prop, will have a new wearing and hopefully a solas ss pump soon. Oh and a picked up a UMI finger throttle. The stocker always seemed to make my finger sore after a few hours ride.
 
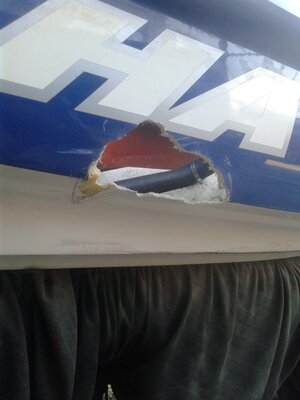
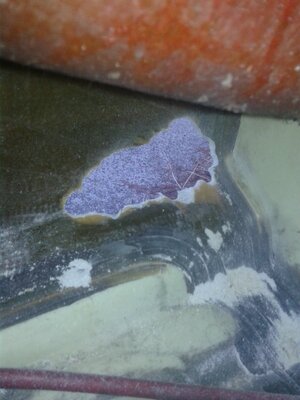
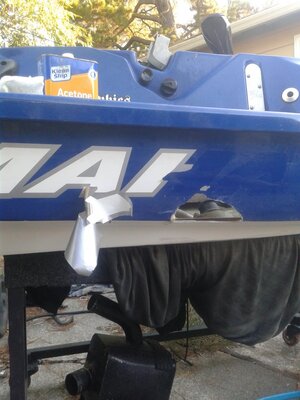
Well its been 2 months and ski is apart again. I rode on Monday with a coworker and he lost control and ended up t-boning me. So I've got a hole to repair. I've never played with glass to this extent but it makes sense. What I've done is grind out the bad. Still a bit more to go before I start glassing. I know I have to bevel the perimeter. Any preference on what weight glass I use? I have some glass matt and a HUGE roll of unknown weight glass. IMG_20150722_072655.jpg IMG_20150723_184111.jpg IMG_20150723_190131.jpg IMG_20150723_190200.jpg IMG_20150723_190816.jpg IMG_20150722_072655.jpg IMG_20150723_184111.jpg IMG_20150723_190131.jpg
 

Vumad

Super Hero, with a cape!
Location
St. Pete, FL
I have a method i made up that i call "on-the-part". It works very good but adds extra cost. It only requires you can access both sides of the repair.

This is how i would personally repair that hole...

Put pink foam, or cardboard, or something ln the inside.
fill the hole from the outside to the inside backer with something easy to sand, i like using drywall mud.
Make your hull shape, minor imperfections are no big deal.
wax the hull and your drywall, layup glass and make a mold of the area. Make sure you overlap the mold larger than the damage so you can reattach it later. (Youd probably have 6"x1' 1/8"-1/4" thick)
Remove, fully prep the repair area, wax the mold.
Reattach the mold.
layup your repair so it sticks permanently to the hull but not to the mold.
Remove mold when dry.
do minor body work and paint.

You can save time if you have access to another ski that you can just splash a quick mold from.

This way adds minimal extra expense, while mimizing the thickness of the repair since you layuo the riht shape the first tkme.


I wish I had done exactly what you said. But being new to this and having poopti excuses for anything I say in this very post. . . well. I didn't listen.

Guys if you read this needing glass help. Do what this guy said. Come out of this worried about the interior glass look rather than being a dumbas$ like me, lucky to have a harbor freight DA from painting the house, breathing in all sorts of stuff because I'm way too cheap, sanding for way too long because I didn't listen (read).

I now am at the point where I might need just a few small touch up spots of resin/capo.


Today of all things while already 2 weeks into this on and off I decided while waiting for some resin to cure to make a mold of the same line my hole went through, but right next to my repair. I laid down some food wrap plastic, used some masking tape to make a "trough" around the area I was molding and laid 3 layers of glass just to see what I'd end up with. And damnit I saw just how easy this repair would have been had I LISTENED (read).

SO please learn from my mistakes. Drink less, ride more, and repair glass like more experienced guys suggest. Some things seem backwards at first, glass repair being one thing that can absolutely seem that way. But once I had started and it "clicked" in my dumbass brain I realized exactly what I should have done and how much easier this could have been.

Doh!
 
Top Bottom