Old Mariner FPP Kawi 650 Headpipe question

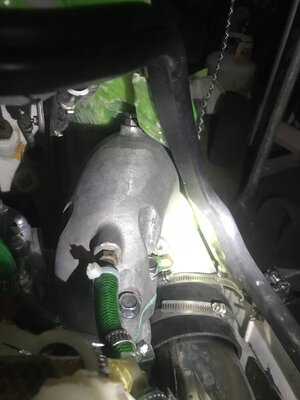
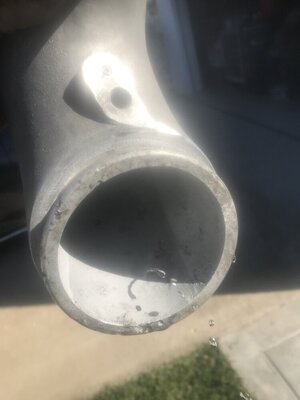
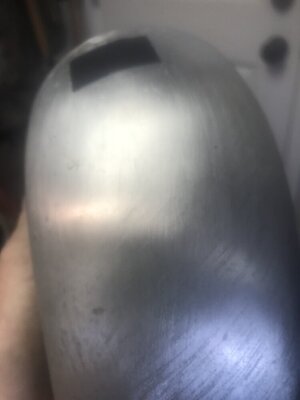
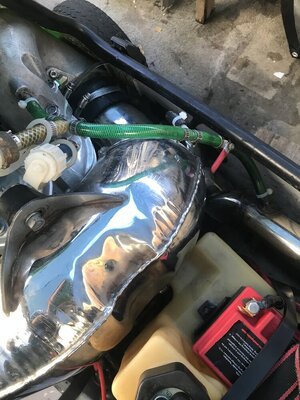
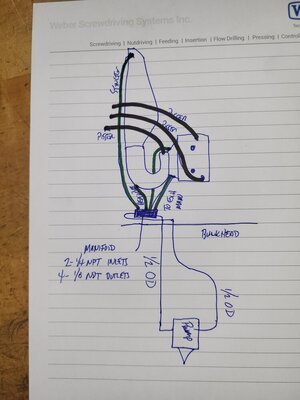
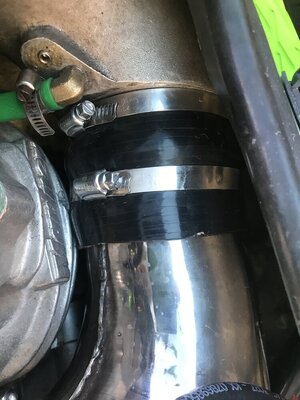
So, I have an old Mariner Factory Pipe head pipe for Kawasaki 650 with two adjusters. The old adjusters were frozen but I was able to drill and repair with oversized jets. Pretty stoked on that. My question is this: there is a port between the water jacket and exhaust lower on the headpipe approximately where the third adjuster and cooling inlet/outlet would be if there was one. The third pic is of the back of the pipe where there is no third adjuster. The water in the pic was poured into the upper port into the water jacket when the pic was taken. Is this how these head pipes are made? It’s an older pipe, did they not put the 3rd adjuster yet and have the port open? I’m running it on a 750 with a FPP limited chamber. It pulls pretty hard off the line but top end isn’t screaming. I’m thinking about putting a little epoxy there then adjusting. I think I would have that bottom jet closed anyway. I’m building more for bottom to mid range power. Thanks for any help!
 

Attachments

  • AEC15598-9C82-4F51-B1C8-D9018F4C2A2D.jpeg
    AEC15598-9C82-4F51-B1C8-D9018F4C2A2D.jpeg
    93.3 KB · Views: 35
  • F08544DF-7A35-43F8-936D-3F3194EB8F45.jpeg
    F08544DF-7A35-43F8-936D-3F3194EB8F45.jpeg
    58.7 KB · Views: 28
  • DADAFECA-EA37-462A-972C-A295C8E6FC2A.jpeg
    DADAFECA-EA37-462A-972C-A295C8E6FC2A.jpeg
    43.8 KB · Views: 29
Location
dfw
Take a good look, you may have to fill it with water to be sure. If there is a hole it would have likely been drilled through a fitting hole..
 
yes, the older gen mariner fp headpipes had an injection hole on the bottom that was not adjustable. you can weld it up or use some high temp epoxy putty and fill the hole in. i had a 550 headpipe like that and i filled the hole in with high temp epoxy putty with no issues.
 
Thanks! That’s exactly what I wanted to hear! The hole is plugged with a tiny screw right now. Ima go test in the morning. I knew I probably should have epoxied it when it was clean.
 
Just make sure you have at least one screw injecting water otherwise the pipe will over heat and you'll dramatically loose power. Hotter pipe will make more rpm and power up top, cooler pipe will make better bottom but less rpm. Plugging that hole will allow you to dry the pipe out more so you'll pick up some rpm. Then you can adjust your screws to find the sweet spot
 
Perfect! I’m looking for bottom to mid range but my last FPP limited pulled pretty hard all the way and was ting ting ing top end too. Adjusters we’re frozen when I got it 8 years ago for $450, but they were froze in the right spot I’ve finally done some research and am running separate cooling lines to the engine and headpipe to keep temps down and pressure up in the pipe. I think that’s what was killing my top end right now with that open port. Now I’m starting to wonder if too much water in my stock (drilled)waterbox was always affecting my top end. I got a TRD 2” baffled wb now which seems to still have some back pressure (just from blowing in it). I’m thinking about a flow control valve now and pinched the stainless steel 3/8 line into my exhaust in an effort to spray rather than dribble. This WB sounds as pretty badass so everyone can enjoy my ski with me- I got some earplugs!
 

Attachments

  • image.jpg
    image.jpg
    160.5 KB · Views: 26
I set all of my skis up with separate lines to the engine and headpipe for that very reason. Makes it easier to control the pipe temps. If you're not getting the pipe hot enough, you can run a restrictor in your outlet off of the headpipe. I have my screws on the headpipe as follows: top screw 1/2 turn out, middle screw just barely cracked open. A flow control valve will restrict water into the waterbox at lower rpms which help with bottom end.. for more rpm, a little more water going into the stinger will add more back pressure to the pipe which will increase your top end power a little. I put the flow control valve on the line coming off the head so that I always have constant pressure on the headpipe. Depending on ambient water temp where you ride will determine how big of a restrictor to use. Start with a piece of 1/4 in fuel line and go from there.
My superfreak has 2-1/2 cooling lines from the pump. They go into a 2 in/4 out manifold with 4 3/8 lines out. 2 feed the engine to pissers, 1 feeds the headpipe to pisser, the last goes to the flow control valve with no pisser.
 

Attachments

  • 20230925_154818.jpg
    20230925_154818.jpg
    88.3 KB · Views: 26
Perfect! Ya, I’ve been scratching my head a little about the single 3/8 line to the engine and how to cool it evenly. And really about the way pressure in the headpioe would vary when the fcv opens. That is if they were on the same line like I’ve seen in pics. Should I have more than one 3/8 cooling line to my exhaust mani? I’m assuming you’ve got 800+cc in your freak. I will definitely put a Y into two ports to cool evenly and have both lines out of the head to pissers I’m running 750 sp sbn44 6* timing plate hooker 9/15. I don’t race, just freestyle in the bay but the water does get warm in the summer-like 75* maybe. I like it better right now at 60*. So does my ski. I was out yesterday and the chamber still wasn’t sizzling with that lower hole plugged but I need to reroute cooling now. That diagram is a big help. I guess I may have to drill/tap my pump for a 1/2” cooling line.
 
single cooling line for the engine should be sufficient. im actually just running a 735 thats fully ported with all of the supporting parts. i also have a x2 with a built 750 sp as well with a blaster limited chamber instead of the 750 chamber. i have dual cooling on it with 1 feeding the engine and 1 feeding the pipe. i ride in much warmer water than you and have never had an overheating issue with 1 cooling line. im running higher compression in my 750 as well as i have a milled head thats set up for 98 or so octane so i just mix 110 and 93 together.

with a dedicated line feeding the pipe, you can probably get away with 1/2 turn out on just the top screw. also wouldnt hurt to remove the headpipe and connect it tose a water hose so you can see how much water is actually going into the exhaust. and also to make sure the closed screw isnt leaking water into the exhaust.
 
So I was busy for a while but finally am getting back to my ski. I took the Head pipe off last night and tested the water jets by plugging the inlet, blowing in the outlet and turning the jets to find out I had to be flooding this pipe. I had to run the screws down tight and cut a new seat, now it should be tunable with the third bottom port epoxied as well. I got a flow control valve and I am looking for a cooling distribution block I guess might be the name for that? This engine is out of a cheap Ski I snagged on offer up but the next one is a fresh motor with milled head that I took a shot at porting myself….we will see how I did I guess. So with your cooling routing how do you flush the system? I rode strictly saltwater so I’ve got to flush every time.
 
No need for a water distribution block as your ski doesn't have 2 1/2 lines coming from the pump. I'd just run 1 line to exhaust manifold to feed the engine and the other to the pipe. This is only doable with 2 cooling lines coming from the pump. If your pump isn't drilled and tapped for a 2nd cooling fitting, you'll need to do that as well before installation is complete.
 
I’ve got two cooling lines from the pump. Before I had both to the exhaust mani then the forward line from the head into headpipe and the rear out a pisser. Now I’m thinking I want to run separate cooling to the pipe . I was thinking about tapping and running a 1/2” line to cool the engine. 1/2 to Y to two 3/8 into exhaust mani then two out of the head to pissers. I’m not sure how critical it is to cool evenly or if too cool is going to wear faster since the cyl won’t be expanded to spec and the piston will be. How hot is too hot? I have a temp gun and saw 150* on the pto end. I’ll have to check again with this pipe dialed in. Stoked that there might be a little more power here.
 
It is possible to overcool the engine which can cause a cold seize so more is not always better. Ideally, the water coming out of the pisser off the head should be in the 120-130 degree range. 1 single line to the engine should be plenty.
 
Any tips on installing the silicone coupler between Head pipe and chamber? I blew an older one off that had some wear, Then replace with a new one installed dry that also popped off at the Head pipe. This time I have tightened the sleeve on the chamber With about 1” of sleeve to slip over the head pipe. As you know this thing is a real pita to get on. Last night I had the hose clamp tight with 1/8” silicone coupler visible between the clamp and head pipe but today it appears that the coupler and hose clamp has slipped that 1/8” and is not tight.
 

Attachments

  • image.jpg
    image.jpg
    130.3 KB · Views: 6
A little windex really helps especially on a new coupling. I use windex specifically because it is alcohol based and doesn't leave any residue when it evaporates. Also need good stainless clamps to hold the chamber on..what I do is bolt the headpipe on but with the bolts finger tight, slide the coupler on to the headpipe,then the clamps and leave everything loose. Then attach chamber to the hose to the water box hose then to the coupler. Once everything is connected, then tighten everything.
 
Cool, thanks. I’ll give that a shot. I have already made the mistake of putting it together greasy. That Windex trick sounds like a solid tool I think part of my problem is not being able to feel the bottom side of those hose clamps to make sure that they are perfectly aligned. I think as soon as there is some vibration the coupling starts to migrate and hose clamps loosen. I will try to get back out today before a big storm moves in.
 
Got together with a new coupler and am golden! Exhaust pisser is probably 110* and engine about 120-125. I can hold my hand in it. Got it tuned so the end of the chamber sizzles a little after a long pull but is just a little cooler at the coupler. FCV kicks ass and I have little to no hesitation ever. It hiccuped and stalled twice on a huge nose stab but I think cuz I was low on gas. I’m back baby! Every sesh is epic in SD bay! Let it rain, I’m beat from shredding thanks for the help! I think the separate cooling to the pipe has gotten me more bottom end but I do feel like it flattens out a little sooner top end. But that may also be my TDR waterbox. Sounds badass but kinda loud after a while and there’s definitely some back pressure…
 
Top Bottom