Picked up another JS

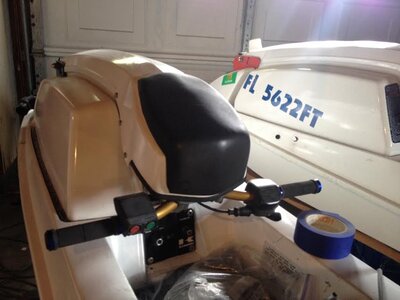
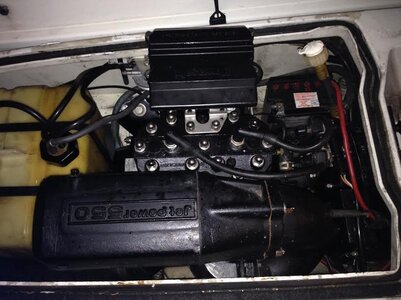
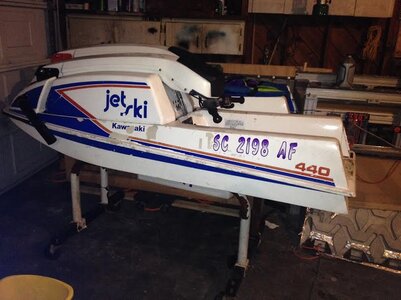
Found a 440 local to me pretty cheap with a fairly new PP 550 in it. Compression was 105 in each cylinder which from what I've read is ok for a 550 (?) ... kinda surprised since my 440 reads 152.

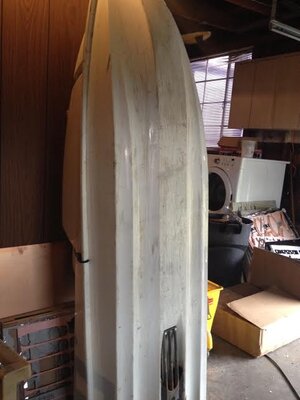
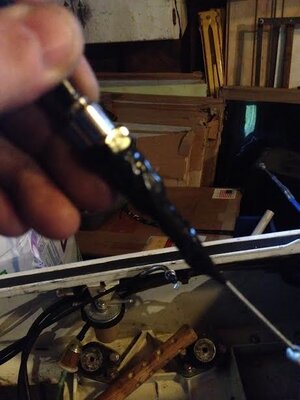
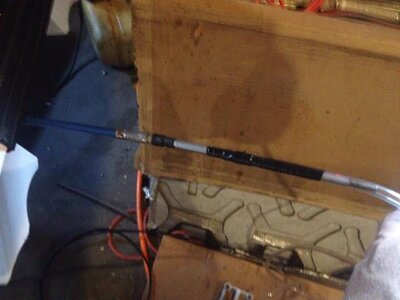
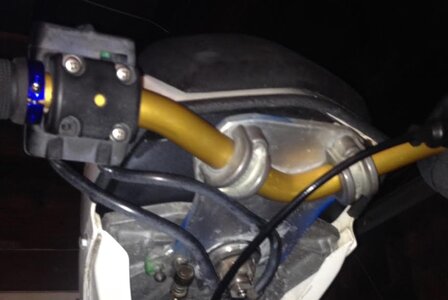
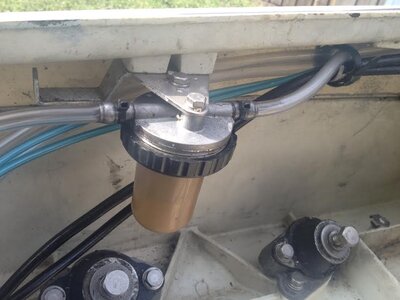
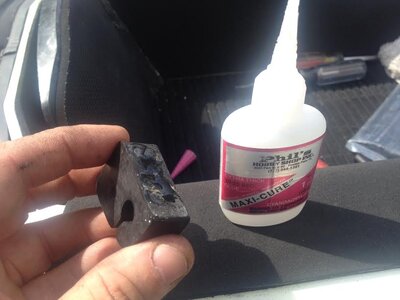
Anyway, hull is solid, engine seems good, it did start and runs. I think there's a fuel problem, there is no one way valve on the vent line, and the lines that are in the ski are all lacking clamps. No pisser installed which is sorta weird. Also carb could use a cleaning or rebuild, it's been sitting for 2 years.

Needs turf, fuel filter (original is missing), fuel lines, and new bars and finger throttle would be nice to do later.

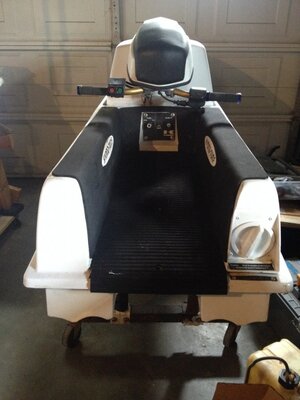
Could not pass it up, decided to bring it home. I'll be a loaner ski for my friends.
 

Attachments

  • 550a.jpg
    550a.jpg
    56.4 KB · Views: 85
  • 550b.jpg
    550b.jpg
    50.7 KB · Views: 87
Last edited:
Location
macomb
nice buy. fun for friends and a good backup. Id keep it stock as it is your "backup" ski, lol. ive always had like 3 racing and freestyle skis I use mainly, then one stock superjet or 750sx just incase any mishaps or a friends wants to ride.
oh, and 102 compression?? how long has it been since the engine has been ran? fire it up and run thick premix through it to get the cylinders lubed up and check the compression again.. a "dry" engine that has not been ran in a while and doesn't have much oil to seal the rings will score low in compression tests. if you retest later anywhere below 120, rebuild it. if you want any performance and don't want to break the bank, I offer porting, head milling, cylinder decking, ext. and if it turns out you need to rebuild it, I can bore your cylinders. lmk
 
Location
macomb
oh, and I have many parts for these as well. right now for performance I have a PJS half pipe, miled head, two brand new 1mm oversize wiseco piston kits, bunch of stuff.
 
Location
macomb
Compression is TOO low if it remains 105. Might be able to get away with it if you mill the head and change gaskets and rings
 
Hrm... well my service manual says:

300cc 119-185psi

440cc
1977-1983 119psi
1984+ 84-134psi

550cc
1982-1983 119psi
1984 128psi
1985+ 78-112psi

650cc 125-192psi
 
Last edited:
Spent a whole week trying to remove the decals and graphics, wow what a pita.

Sanded it down and did a rattle can job with appliance enamel, actually came out ok. Also filled all chips and gouges with thickened epoxy. Filled, saned, and re-painted the bottom (no photo).

Replaced the stock bars, and have a new throttle and steering cable on the way. Old steering cable looks fine but binds at the limits of travel for some reason.

Also added a pole spring.
 

Attachments

  • photo 3.JPG
    photo 3.JPG
    103.7 KB · Views: 64
  • photo 4.JPG
    photo 4.JPG
    120.3 KB · Views: 62
  • photo 5.JPG
    photo 5.JPG
    106.7 KB · Views: 61
  • ski2.jpg
    ski2.jpg
    38.4 KB · Views: 59
  • ski0.jpg
    ski0.jpg
    107.1 KB · Views: 59
  • ski3.jpg
    ski3.jpg
    27.4 KB · Views: 58
Last edited:
Next is to install the hydroturf and steering cable, then I finally get to go back to getting the engine back in.

BTW, how do you install the hinge for the panel cover? Is it just glued to the hull? Mine was missing the cover, so found a new one but not sure how it's installed. Thanks
 
Last edited:
Installed new turf, damn this was much harder than I imagined. Apparently I lack the ability to follow directions because I installed the bottom first and it was a huge mistake. Don't ever do that. I recovered but it was not a graceful recovery AT ALL! I had all sorts of problems and had to peel the turf off at least 4 times. Do the bottom LAST! Follow directions!
 

Attachments

  • turf.jpg
    turf.jpg
    107.8 KB · Views: 59
Last edited:
Well, I tried to do a leakdown test on my engine, and accidentally set my regulator too high, and blew all the seals. I've been cursing myself for being so stupid. I should have used a small manual pump.

I started the teardown, and discovered that I have a full circle crank which is super old (1977-78) so I'm hoping the crank is even still useable... will split cases tomorrow. I didn't have a 22mm socket to remove the engine bed plate, but everything else has been stripped off of it. Seals ($20 per seal for the old circle crank seals) are on the way :|

In the meantime, I decided to replace the screwed up steering cable. I couldn't figure out what was wrong with it... it would bind in one direction, but not the other. I finally concluded that it must be bent at the rear pushrod. When I removed the pump to replace the cable, I discovered WHY it was bent. Some fool (previous owner) used the wrong bolts to mount the pump... with these bolts you must use a socket, but a socket will not fit between the pump and the steering cable. The only way to do it is to force it in there (like I did to remove the pump) and doing so bends the hell out of the pushrod and pushrod tube. He should have used socket head bolts instead of hex bolts.

The pump actually looked ok, and the drive shaft was centered perfectly, and I found a stainless impeller ... so that was the good news before I started the pain of replacing the steering cable. Not sure of the pitch though.

On a side note, if my crank is shot, does anyone know if it's possible to use the stock 550 jet power bread box exhaust and bn44 carb on a 440 engine?
 

Attachments

  • steering.jpg
    steering.jpg
    14.3 KB · Views: 45
Today was a long but productive day. Replaced the steering cable and throttle cable.

Previous owner spent hours doing this WRONG and drilled a new hole through the hand pole to run the throttle cable. :| That probably took three times longer than doing it right! WTF.

Anyway, I found that using vinyl fuel line, pushed through first, to pull each cable through made the process easy. It took longer to take the pictures than to pull it through. Steering cable was EASY. Took longer to remove it than to install it.

For the throttle cable, I pulled the rubber end cover off because I had problems feeding it through. If I'd used my brain sooner I could have covered it with electrical tape, but instead I lubed it up and then removed it from the cable.

After feeding the cable through, I realized I screwed up big time, because no way in hell was that thing going back over that adjuster end. After some cursing and meditating, I figured out the solution. Wrap electrical tape from the cable to the adjuster, increasing in diameter to make a smooth profile. Lube it up and slide it in er on... and it goes right in!
 

Attachments

  • cable1.jpg
    cable1.jpg
    22.9 KB · Views: 36
  • cable2.jpg
    cable2.jpg
    27.7 KB · Views: 36
  • cable3.jpg
    cable3.jpg
    23.2 KB · Views: 35
  • steer1.jpg
    steer1.jpg
    26.2 KB · Views: 33
  • steer2.jpg
    steer2.jpg
    32.5 KB · Views: 35
Last edited:
Discovered the steering plate I bought off ebay is a custom (home made) quicksteer plate. Cool thing is, it has two holes... stock steering and quick steer steering. I can move the steering cable connector from one ball to the other. Kinda nice if someone is not used to the quick steering.
 

Attachments

  • steer3.jpg
    steer3.jpg
    31.7 KB · Views: 37
Replaced all fuel lines with vinyl line. Also drilled out the panel and installed a primer pump in place of the choke knob. I hate that this vinyl line kinks so easy but it is nice to be able to see the fuel and check for bubbles. I also revered the sediment bowl (which was missing, I found one on ebay!), so that the line from the fuel selector enters directly. Most disconnect the selector, but I like it since I ride in the gulf, I can't always find somewhere shallow to pull the hood and see how much fuel I have. Reserve has saved me a few times. I scrubbed the corrosion and installed zip ties after the photo.
 

Attachments

  • fuel1.jpg
    fuel1.jpg
    73.9 KB · Views: 37
  • fuel2.jpg
    fuel2.jpg
    39.1 KB · Views: 34
I washed the steering cable mounts (black rubber) in soap and water, and applied some CA glue (super glue). These things stuck to the hull INSTANTLY. Make sure inside of hull is clean.
 

Attachments

  • steering1.jpg
    steering1.jpg
    35.3 KB · Views: 33
Split cases and examined crank. Side play and big end radial clearance is good, crank seems to be useable. That's good news because otherwise I'd need not only a new crank but case halves (unless I had crank rebuilt which would probably be even more expensive).
 
Top Bottom