- Location
- Ontario, Canada
Folks,
This is a build thread for me to post and refer back to in the future. If my frustration, mistakes and finding help others, great! I'll no doubt be asking some questions.
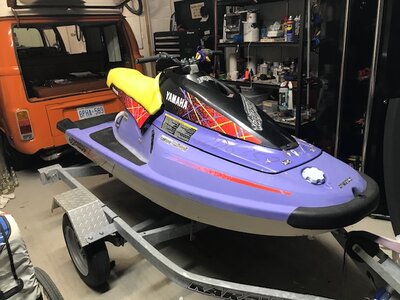
Picked up a low hour, bone stock neglected Blaster in July. I say low hour because the mid shaft rotates smooth and if I had to guess it (along with all other components of the ski) was never serviced. Oiler was intact, pump had compost growing in it etc. Badly weathered/neglected, but didn't look like it had been ridden much. Not a single chip on the impeller, cylinders unscathed with honing marks still present, pump bearing smooth, minimal play in steering bushing... Once I got it running, it ran perfectly smooth even though I sincerely doubt the carb had ever been apart (factory paint still on perfectly un-marred screws).
Glass work:
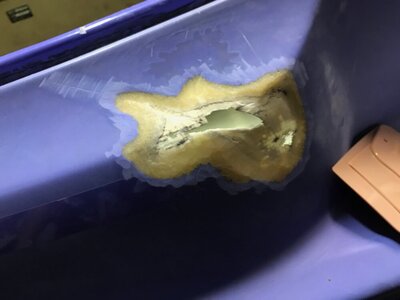
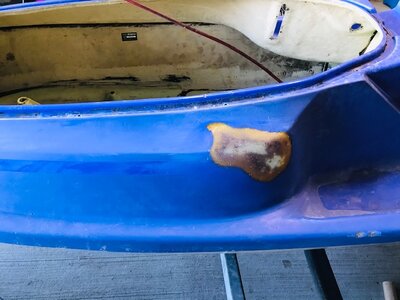
Fall starts in mid Sept in my part of the world, so that's when the teardown began. It was crashed into a dock by one of the previous owners so that needed to be addressed. I did 3 layers of chop strand fiberglass + resin to build it up then marine tex to rebuild the body line. Nose piece on the hood had a chunk missing. I used aluminum duct tape as a backing, built up the area where the chip was with marine tex (4 coats/ sanding in between), sanded it to match the hood line then peeled off the tape from the back side.
Paint:
Product: Interlux Brightside, color: Blue glo white thinned with interlux 333 brushing liquid
Rustoleum appliance epoxy rattle bomb
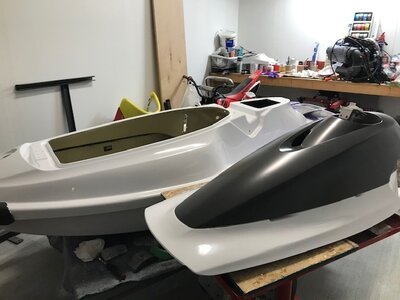
After watching a lot of videos, reviews and reading forums I still couldn't decide if I wanted to go the appliance epoxy route or roll and tip method. Hiring a shop was out of the question. I figure I could screw up 3 times and still save $ doing it myself. So I tried both, ha! Even now that I'm done I'm not sure what I would recommend. They both turned out great. Roll and tip definitely turned out waaaay more glossy. Mirror like finish, where the rustoleum appliance epoxy was more of a satin/ semi gloss finish with a tiny bit of orange peel. Roll and tip = 0 orange peel.
I am very confident in the roll and tip paint, don't think it'll ever peel. I used Interlux single stage polyurethane paint thinned out with their "brushing fluid" aka paint thinner. It's a special "slow drying" thinner apparently. Probably spent more than I needed to on it, but this isnt something I wanted to do twice to save $5, so I bought the recommended product. 2 quarts of paint did the whole thing. I also got the Interlux primer - which also gets thinned, rolled and tipped. One word of advice, don't buy more than you need. I noticed that after a few days you get a layer of paint that hardens on the top that you have to scrape off. It always came off in one piece, but I cant imagine this is good. If you get a gallon and only use half, the other half would probably be junk by the end of the year sitting on your shelf.
I painted housed for 4 years (i'm pretty good with a brush) and this was not as easy as I thought it was going to be! The bottom of the hull was a breeze, but the top deck was tough to put on an even layer over edges/ sharp contours. Drips/ sags etc. were a lot harder to control than spraying the appliance paint. Also you need to move fast! If it takes you 20 min to get back to where you started, you'll be left with a nasty line/ seam where it joins up. I got best results jumping from side to side. Roll/tip about 16" at a time, and jump back and forth from side to side of the machine, finishing at the rear. Ensuring each "lap" would blend nicely. This whole process took a looong time. 4 coats bottom, 4 coats top. 20-30 minutes each coat, 20-30 minutes sanding each coat. 8 coats total x 30 min + 6 x 30 min sanding + a couple dozen beer = never wanting to do it again.
Rustoleum epoxy paint went on the nose piece only. More or less just to satisfy my curiosity. Results were excellent, i'm just not a fan of the sheen. It was cheap and re-coat happens after 15 minutes. Start to finish was ~45 minutes then I left it to dry. It says 7 days minimum, but for me it was more like 2-3 weeks before the paint was rock hard. Unlike a lot of "normal" spray paint, this stuff shoots very thin, sagging is practically a non issue, in fact it's almost the opposite. You need to put effort into layering it up, or your finish will be very dull. Spray pattern is small so lots of overlapping is necessary for uniform finish. Get a "gun" handle for the can, helps a lot in keeping the can perpendicular to your work.
Roll and tip Pros:
Super nice finish!!
No overspray
Better product
Cons:
24hr before re-cote
must be sanded between cotes
Must have good brush control
Must move quick!
Pump:
Pump/ impeller was mint. Since this is a shoe string build I'm leaving it as is.
R&D intake grate
Blowsion pump shoe
4" silicone coupler for the nozzle turned up a couple degrees as a hillbilly static trim setup
D-cut stock ride plate
Stubby cone
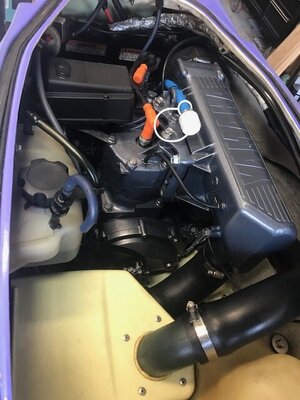
Engine:
Current:
61x stock
High Speed Industries "wake up kit" consisting of an exhaust stinger, water routing, carb jets/ spring, and stator timing adjustment.
Future:
Port cylinders - possibly this winter... As mentioned, this is a shoe string build. If you've read this far, perhaps you recommend templates for cylinder porting? A few people offer then, i'm just not sure who I want to support yet...
Other idea floating around: Find a complete 62T or 760/ port it and throw it in stock. Or possibly find a rough 62t cheap, bore it to 735, jets, etc. Whatever I end up doing will be in favor of reliability and cost. I like the idea of a healthy stock 760. Mid range power would be great for my style of riding. A 62t would be nice too, 73hp vs 63hp would certainly be noticeable. My stock 2010 SJ was a rocket compared to this thing.
Pipe if I can find one for under a million dollars. In my part of the world this will probably never happen. There's no F'ing way i'm paying more than a few hundred for a used banged up 25 year old hunk of pipe. It's not the only way to pick up a bit of power. Big power yes, but it doesn't need to come first. A pipe is worth what someone is willing to pay, I'm fine with that, and props to the guys who have them and are selling for a nice profit.
In a way, the price of AM pipes is motivating me to build up a decently snappy motor just by playing with timing/jetting/porting/water routing and a little help from an exhaust stinger/sleeve.
- Seat cover and hydro turf on order
- Will be running new old school TAG mx fat bars from my 2005 parts bin. Purchased some 1 1/8 bar glamps off amazon for cheap, drilled/ tapped some 1/4"aluminum flat bar, screwed it all together.
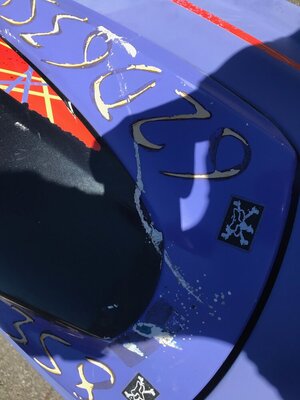
Some pics below, lots more to come!



