SF Circus Rideplate Project

clouse22

BDB Kustomz
Site Supporter
Location
Lake Orion, MI
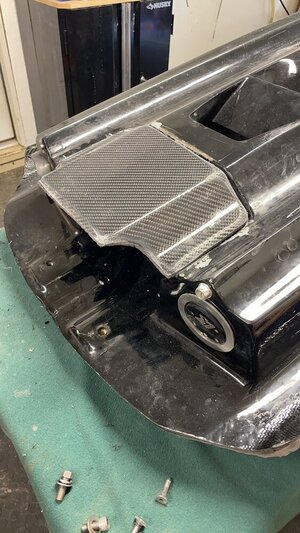
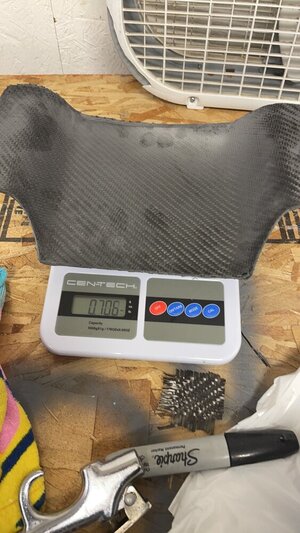
With it being the boring Michigan offseason I decided to take on a project to occupy my time and learn/experiment more with composites. Picked up a circus hull in early December and the ride plate is hideous. Plan is to make a mold and replicate in full carbon with a visual finish.

After I replicate this particular plate. Plan is to extend the plug to create a longer plate for Great Lakes / Small surf & Rec riding.

No plans of vacuum bagging or infusion currently as this is just me playing around in my garage. Maybe in the future. Anyway, enjoy the process!

Here are a few videos I watched a few times that I found helpful:


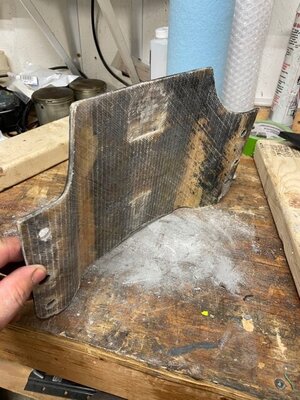
First step was to fill all the multiple holes and start the sanding/prep process. A lot of bondo, sand, bondo, sand etc to get the plug back to a mint finish.
1.jpg2.jpg3.jpg

After I got the surface somewhat close to the shape I wanted, I then picked up a cheap filler primer. 3-5 coats later....

4.jpg

Started to wetsand at 220 then 380 then 400 and then 800 and noticed a few blemishes. So used some cheap filler putty

5.jpg

Primer again and now looking good.

6.jpg

Another round of wet sanding 220, 380, 400, 800, 1000, 1200 trying to get a nice almost mirror like finish. Then some polish.

7.jpg

Plan was to throw a sticker in and see if I can imprint a logo into the mold (weird idea not sure if it would work)

From the videos I made a flange out of cheap foam board wrapped in packing tape. Braced the sides with some 2x4s. Cheap hot glue gun to stick the stuff to the plug.

8.jpg9.jpg

Started waxing and then realized....im a jackass and did all this on the wrong side!!!!! Doh! Lesson learned

So currently working on the other side....will report back when the process continues.
 

schicks

Karma Enforcer
Location
West Michigan
Hahaha, i thinking "wrong side!!" scrolling through.

Was the pump hitting the ride plate? May want to build that ride plate surface up with some bondo on the correct side, so when you layup a thick part it doesnt rub worse, or if layup thickness is the same, it gives a little more clearance. Dont build up to much on pump shoe side of plate, youll end up with a lip.
 
Last edited:

clouse22

BDB Kustomz
Site Supporter
Location
Lake Orion, MI
Hahaha, i thinking "wrong side!!" scrolling through.

Was the pump hitting the ride plate? May want to build that ride plate surface up with some bondo on the correct side, so when you layup and thick part it doesnt rub worse, or if layup thickness is the same, it gives a little more clearance.

Yes....Its been a while since Ive built / worked on superfreaks. Great hulls, but nothing is done without a grinder in your other hand lmao.

Thought about the pump clearance as well. Good news is that this plate was recessed pretty good in the pump area so there is room to build a thicker plate and compensate in that area. I plan to address this more before finalizing the plug now that I have my pump mocked up.
 

Christian_83

Xscream
Location
Denmark
Just a pointer, i would try to paint the surface you wanna "copy" with 2K paint insted of rattlecan.
I did it will filler and rattlecan for a coupler cover, and it took off the rattle can paint, eventhough waxed really good.When i did it with 2K paint, it was way better.
Also look at the videos from easy composites in uk. They are super nice.
 

McDog

Other Administrator
Staff member
Location
South Florida
When I did mine I skipped the paint and just used mold release on the plug instead and it worked great.

Keep posting as you go and we will try to keep you from wasting more effort as best as we can.
 

clouse22

BDB Kustomz
Site Supporter
Location
Lake Orion, MI
When I did mine I skipped the paint and just used mold release on the plug instead and it worked great.

Keep posting as you go and we will try to keep you from wasting more effort as best as we can.

Yeah I have no plans to paint the plug...every thread ive seen says sand the primer to the best finish possible. Im going to apply 6-7 coats of wax and then use PVA
 
With it being the boring Michigan offseason I decided to take on a project to occupy my time and learn/experiment more with composites. Picked up a circus hull in early December and the ride plate is hideous. Plan is to make a mold and replicate in full carbon with a visual finish.

After I replicate this particular plate. Plan is to extend the plug to create a longer plate for Great Lakes / Small surf & Rec riding.

No plans of vacuum bagging or infusion currently as this is just me playing around in my garage. Maybe in the future. Anyway, enjoy the process!

Here are a few videos I watched a few times that I found helpful:


First step was to fill all the multiple holes and start the sanding/prep process. A lot of bondo, sand, bondo, sand etc to get the plug back to a mint finish.

View attachment 406451View attachment 406452View attachment 406453

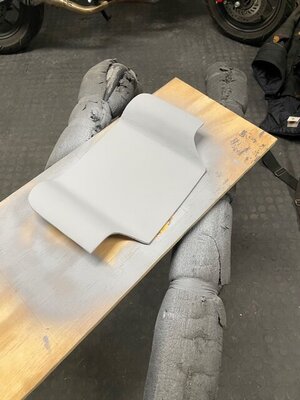
After I got the surface somewhat close to the shape I wanted, I then picked up a cheap filler primer. 3-5 coats later....
View attachment 406454

Started to wetsand at 220 then 380 then 400 and then 800 and noticed a few blemishes. So used some cheap filler putty

View attachment 406456

Primer again and now looking good.

View attachment 406457

Another round of wet sanding 220, 380, 400, 800, 1000, 1200 trying to get a nice almost mirror like finish. Then some polish.

View attachment 406458

Plan was to throw a sticker in and see if I can imprint a logo into the mold (weird idea not sure if it would work)

From the videos I made a flange out of cheap foam board wrapped in packing tape. Braced the sides with some 2x4s. Cheap hot glue gun to stick the stuff to the plug.
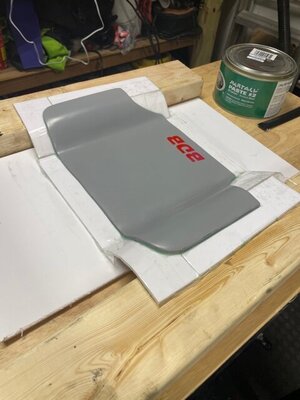
View attachment 406459View attachment 406460

Started waxing and then realized....im a jackass and did all this on the wrong side!!!!! Doh! Lesson learned

So currently working on the other side....will report back when the process continues.
I was reading this and was wondering the whole time,,, why is Bobby working on this side of the plug if he wants to make a reveal part, lol. Dang it, well that was practice to make the other side perfect. I did this same project on a Rickter plate last year

make sure you have a good rigid frame on the back side of your mold
 

Attachments

  • FED2AB66-1AEF-4FCB-A412-C723F6796770.jpeg
    FED2AB66-1AEF-4FCB-A412-C723F6796770.jpeg
    209 KB · Views: 29
  • 44C48FC0-C575-40C9-9CAF-ABA07BBC5137.jpeg
    44C48FC0-C575-40C9-9CAF-ABA07BBC5137.jpeg
    231 KB · Views: 30
  • 332CE19B-4337-450F-8DE0-E445D421BB5E.jpeg
    332CE19B-4337-450F-8DE0-E445D421BB5E.jpeg
    217.6 KB · Views: 32
  • 65AD7D8E-82A6-4E9E-8817-9D81BBD8B5E8.jpeg
    65AD7D8E-82A6-4E9E-8817-9D81BBD8B5E8.jpeg
    185.8 KB · Views: 31
  • CCAB111A-45D8-4E44-904A-1E42CA15E95D.jpeg
    CCAB111A-45D8-4E44-904A-1E42CA15E95D.jpeg
    284.9 KB · Views: 34
I made a mold for a plate for my badass and it worked out well. But do yourself a favor and make sure you put enough flange on to vacuum bag it. You might not be considering it now, but it is really nice to be able to do it. It's not much more work to keep the option opened now.
 

clouse22

BDB Kustomz
Site Supporter
Location
Lake Orion, MI
I was reading this and was wondering the whole time,,, why is Bobby working on this side of the plug if he wants to make a reveal part, lol. Dang it, well that was practice to make the other side perfect. I did this same project on a Rickter plate last year

make sure you have a good rigid frame on the back side of your mold

Thanks George! Those came out awesome! And yes...i will have the nicest plug ever made after this LOL
 
Don’t get too caught up in vacuum bagging this part, Resin is strong and if a wet way up is done correctly you aren’t going to make any significant weight or strength benefits. The part will actually be nicer looking since it won’t have the Peel ply and bag printing on the exposed side. Trick is to liberally paint your prepped mold surface with resin then lay your dry carbon onto the mold and work the resin through the carbon until it is fully wetted out and repeat for each layer and both sides will turn out great when finished. Pre wetting on plastic and transferring to mold traps air and turns into a disaster and the reveal layer is going to look like a pile of spaghetti.
 

clouse22

BDB Kustomz
Site Supporter
Location
Lake Orion, MI
Don’t get too caught up in vacuum bagging this part, Resin is strong and if a wet way up is done correctly you aren’t going to make any significant weight or strength benefits. The part will actually be nicer looking since it won’t have the Peel ply and bag printing on the exposed side. Trick is to liberally paint your prepped mold surface with resin then lay your dry carbon onto the mold and work the resin through the carbon until it is fully wetted out and repeat for each layer and both sides will turn out great when finished. Pre wetting on plastic and transferring to mold traps air and turns into a disaster and the reveal layer is going to look like a pile of spaghetti.

My thoughts too...its a rideplate...its going to get beat up like the bottom of the hull
 

clouse22

BDB Kustomz
Site Supporter
Location
Lake Orion, MI
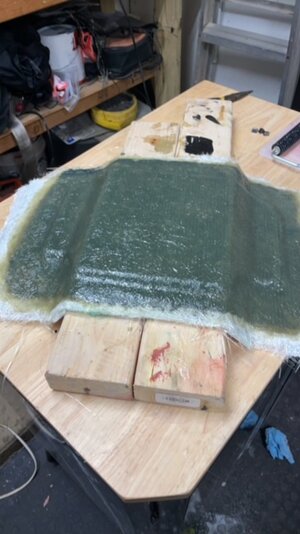
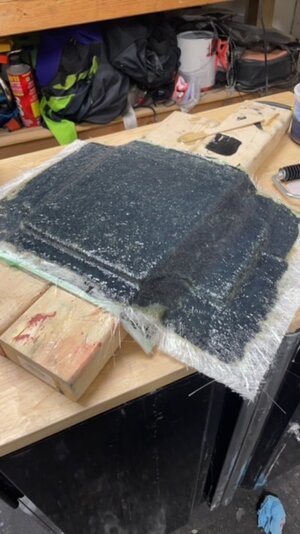
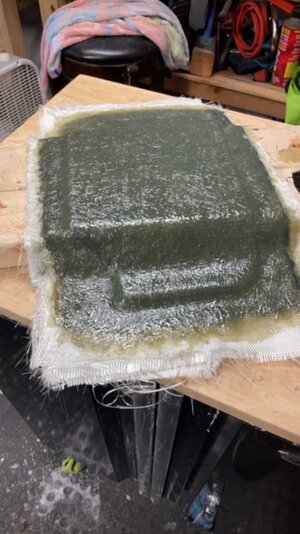
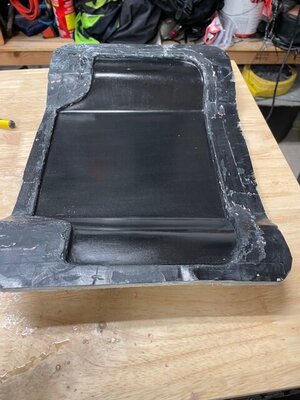
So the mold is made. Forgot to take a final pic of all sanded and flange built but you can get the idea on the above pics of the process.

I did about 5 layers of wax after some polish. Then i did a very light layer of pva. Let completely dry then layed on a heavy coat and let sit for about an hour.

Next was the black tooling gel coat. Layed on liberally and let set up for about 35-40 min to get tacky enough that you can brush your finger across without distoring. Then time to start laying glass. All in all I used 9 layers of glass. Started with some chopped mat after the gel coat and layed 3 layers. Called it a night and came back the next day and layed about 6 more. I then let it sit for 2 days. With the colder temps here my garage sits at about 60 degrees so I wanted to be sure it was completely dry & cured

Popped it out of the mold Saturday evening. The flange is ugly as to be expected as no surface prep was put into it. Washed off the pva and now ready for some fine tuning. This week I plan to wet sand and polish the mold out to 1500 grit. Then hopefully lay up my first part.

Anyway here are some pics...

10.JPG11.JPG
12.JPG13.jpg
14.jpg
 
Last edited:
Top Bottom