Blaster Start/Stop switch ?

I recently replaced the head. In the process I was going to go with the ADA head/girdle set up. However once I got it on I was not getting the compression I should have and found out my blaster has a 650 in it. I went back with the stock head and had the carb rebuilt. I got everything back together yesterday and it now starts fine, which was my previous problem but now it will not stop with the start stop switch.

I searched and saw a similar problem with the runaway engine issue however mine just idles unless I hit the gas, its not going wide open. It also will stop if I pull the plugs. When I start it, I use a method in the runaway engine thread to stop it bu hitting the stop button and wide open throttle.

I opened up the switch and it looks brand new. If I push the kill button down, I get no spark at the plugs. If I push the stop switch down, I still have spark. I even opened up the stop switch and hit the start button and I still have spark. How can that be?
 
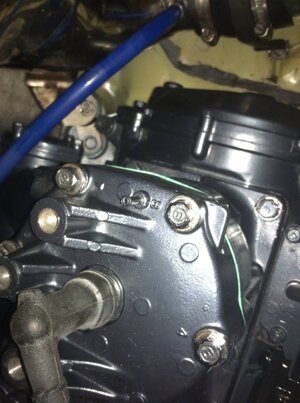
Also with the stock head, what do I need to do with the water outlet, it used to go to the exhaust but now I have no connection there. What can be used to plug it?
 

Attachments

  • 10616564_708361299243668_6143752947367596209_n.jpg
    10616564_708361299243668_6143752947367596209_n.jpg
    69.8 KB · Views: 21

simofx-1

freeride
Location
new zealand
what exhust are you running if stock there is a place for it to go in the side,if not just put short hose on and kink it with cable ties
trace you stop wires back to the electic box looking for a break/or it may not be connected in e box
 
Thanks for the reply. I am hopeful its something with the switch vs an air leak of some kind causing it. Could taking the bolts out of the cylinder to change out to the girdle studs have caused a leak there?
With the kill switch, I get no spark to start it, but once started, the kill switch will not cut it off either...very strange.
I will check those wires. How do you open the ebox?
 
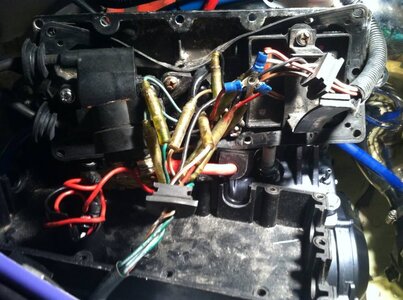
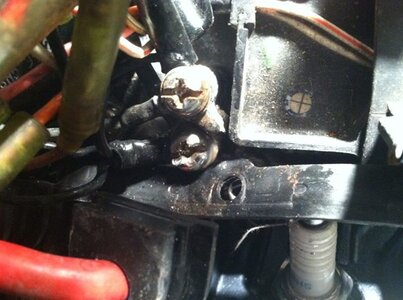
got it was ebox problem...I found the connection in the ebox to be loose. Screw was partially stripped and not tight. I stripped it more trying to take it out and/or tighten it. I cleaned the connection and put dialectic grease in there and my start/stop is working now. The box itself only had 4 screws in it so I know moisture was getting in. This is the first time Ive been in the ebox, can you tell me how bad it looks and how I can get that screw out and a new one in as well as where to find the screws for the box itself.

Thanks,
 

Attachments

  • 10408610_709180872495044_8364762060532988119_n.jpg
    10408610_709180872495044_8364762060532988119_n.jpg
    95.3 KB · Views: 19
  • 10593173_709180869161711_2150277785932667955_n.jpg
    10593173_709180869161711_2150277785932667955_n.jpg
    61.2 KB · Views: 11
Location
Stockton
Jetmaniac on this site has the cover screws.

If the head is stripped I'd prolly try a "small pair of new regular jawed" "vise grip" brand vise grips, hit it with a hammer first then clamp on real hard and break it free

Ace hardware where I live has a lot of stainless screws, the Philips machine screws for sure, never looked for the cover type screws
 
Last edited:

JetManiac

Stoked
Site Supporter
Vendor Account
Location
orlando
As harbor said, vise grips will remove the stuck ground bolts. Otherwise you can cut another slot in them with a dremel and remove with screwdriver.

You need to check all of the connections in your ebox. Quite a few have non oem ends (the blue ones with a/m crimped ends). Check connection quality of all of them or redo those.
 
I already put it back in with the grease on the connection to see if it solved my problem and it seems to have done the trick. The screw is about 1/8 inch from tightening so that the connection is loose. I know its a bandaid but figured it will get me thru the rest of the summer. Plan to take it out and get it fixed up good after riding season is over. Do you have the correct screws for the ebox so I can at least seal it up good as well as the ones for the inside connection? I would need them as well as some of the timeserts to reduce the head screws to fit the lord mount.

Thanks again and yes, looking in there at the nest of wires, it looked like someone played around in there quite a bit.
 
Top Bottom