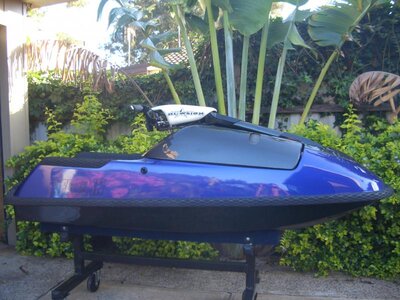
Superjet build

Location
australia
FINALLY?????

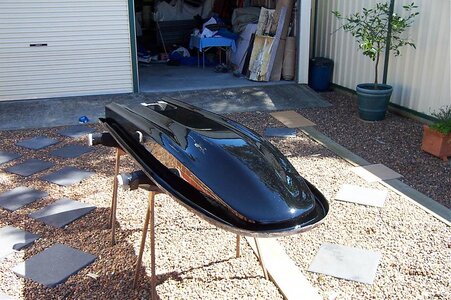
you posted pics of this ski fresh out of the molds 12 days ago :bigeyes2:
very clean build and very quick build !
:headbang:

the pics of the ski out of the moulds where alot longer than 12 days ago the whole build was done over a 4 month period the last 4 weeks i really got stuck into completeing it trust me i wish that thats how long it would of takin
 
holy %$#&! this thing is DONE already?!?!

you dont mess around! do you even sleep?!:sleeping:


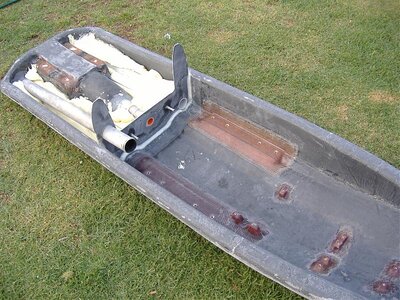
i just cut them in flush after, and worked at them from the inside area to give a cleaner finish in the tray i think that i should get more strength by doing this, then i did a couple of layers across the underside of tray across lifters to tie them in better.

i agree that itd give it a cleaner finish, but it gets turfed over, so that doesnt really matter in the end. one thing that i think would be of concern is the fact that you cant reinforce the bondline area, behind the firewall, once the footholds are in place. that may, or may not, matter, depending on your riding style.


nice job, man!
 
Location
australia
i think you forgot to post about 100 pics. Nice fast build, I'd love to see more detailed pics of the build.

didnt take as many pics as i should have but hear a couple more
 

Attachments

  • 200710270001.jpg
    200710270001.jpg
    246.5 KB · Views: 72
  • ski build 007.jpg
    ski build 007.jpg
    120.6 KB · Views: 110
  • 115.jpg
    115.jpg
    140.5 KB · Views: 116
  • ski build 005.jpg
    ski build 005.jpg
    113 KB · Views: 96
  • ski build 016.jpg
    ski build 016.jpg
    167.9 KB · Views: 109

eel

Our home is girt by sea
Thats a great example of a zero bullschit surf build. Check the engine bay shot. No money has been spent on trinkets and baubles, just stuff that works.

I love the clean rigging!
 
Last edited:

Roo

it's all good
Site Supporter
How many layers top of material bottom? top?

what weight material fiberglass and carbon fiber?

has, this thread needs 100+ pics...!!!

awesome build man, more inspiration to add to the fire...
 
Location
australia
How many layers top of material bottom? top?

what weight material fiberglass and carbon fiber?

has, this thread needs 100+ pics...!!!

awesome build man, more inspiration to add to the fire...

alright here it goes bottom deck is 1 layer double bi carbon fibre then 8 layers double bi fibreglass then another carbon then vac bagged, top deck is 1 carbon then 7 layers double bi glasswith overlaps and 3-4 extra layers in tray around nose and pole area, then lifters where glassed in from the inside of ski and the tray was tied in with the lifters as you can see in the in the top deck pic and added 3 layers around hood seal area
 

Roo

it's all good
Site Supporter
alright here it goes bottom deck is 1 layer double bi carbon fibre then 8 layers double bi fibreglass then another carbon then vac bagged, top deck is 1 carbon then 7 layers double bi glasswith overlaps and 3-4 extra layers in tray around nose and pole area, then lifters where glassed in from the inside of ski and the tray was tied in with the lifters as you can see in the in the top deck pic and added 3 layers around hood seal area

Luker, thanks for taking the time to type that out...

Care to share what weight(s) Carbon and Fiberglass you are using (OZ, etc)?

-Andrew
 
Location
australia
finally got the jetting all sorted out now , all i need to do is cut the standard length umi pole down -2" and will be all good other than that ski rides very good :brap:
 

chad

I pretty much love beer
Site Supporter
thought id post up my build i been workin on here in aus , made my own top and bottom deck moulds, bottom deck is epoxy resin with one layer of double bi carbon, then layers of double bi fiberglass and another carbon to finish vac bagged, top deck was carbon then double bi glass, then all mounts i made up out of stainless flat bar glassed into bottom deck, made a carbon double bi bulkhead, and double bi glassed it in form both sides fitted all water lines scupper exhaust and drive shaft tunnel which was glassed in aswell, then foamed half of the bottom deck, lifters where then fitted to top deck before the decks where joined and the lifters where cut in flush an then double bi on the inside of top deck then decks plexus joined together, foamed and then twurl weave carbon fibre, in engine compartment and then epoxy primed and painted black then white speckle,[/ to cover overlaps, dags and places where carbon doenst like to go! so now im at the stage of painting top deck ,weighed the whole ski the other day foamed with lifters aluminium pump shoe, scupper, exhaust came in at 45 kgs 99lbs little bit more than i would have liked but i built it with strengh in mind and i think its still lighter than a stock superjet i think correct me if im wrong so not long now till im on the water abuseing it

answered in the first post
 
Location
australia
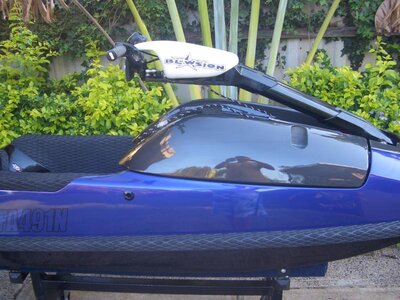
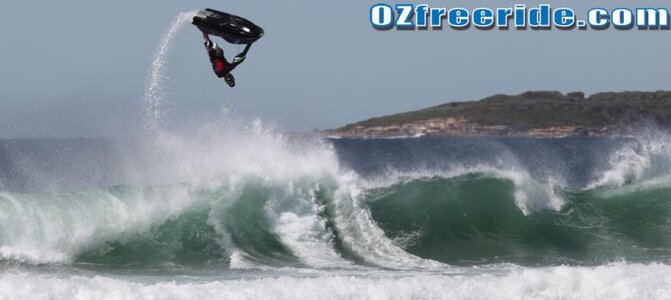
well i thought id update this build its been 2and a half years since first built and has not yet broken, cracked, stress cracked or anything and its had a every throw chuck and bail thrown at it and hundreds of flat landings,hundreds of hours ride time, freshened up the motor and got some 38 blackjacks on! repainted about 6 months ago pics (purple) looks blue in pics tho?? and just finished putting in the xft foothold and still not a drop of water in the foam still like new anyways here some pics
 

Attachments

  • ski 1.jpg
    ski 1.jpg
    74.8 KB · Views: 42
  • ski 2.jpg
    ski 2.jpg
    86.4 KB · Views: 34
  • ski3.jpg
    ski3.jpg
    69.3 KB · Views: 32
  • ski4.jpg
    ski4.jpg
    86 KB · Views: 52
  • ski 6.jpg
    ski 6.jpg
    31.4 KB · Views: 32
  • ski 5.jpg
    ski 5.jpg
    80.8 KB · Views: 25
Last edited:
Top Bottom