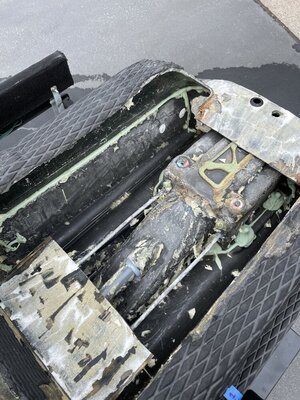
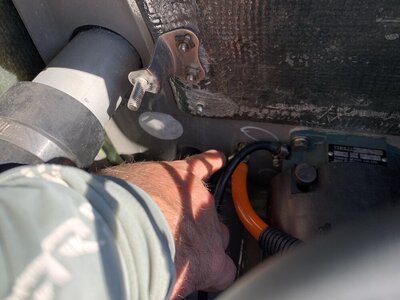
Superjet foam Problem
- Thread starter pioui1
- Start date
- Location
- Asheville, NC
Both of the above answers are spot on. Its a daunting task, but worth it in the end.
1. Remove turf, clean up tray.
2. TAPE your lines that you want to cut, double and triple check that your lines clear the bulkhead and pump cavity.
3. Mark your tape with arrows on the line you are to cut. This is an easy step to skip, but marking the correct lines will ensure you don't cut the wrong side of the tape!
4. Select your cutting tool, make precise and controlled cuts along the marked tape lines.
5. Gently pry the cut tray area and remove the cut area in as few pieces as possible.
6. Dig out all foam using various tools. (pry-bar, screwdrivers, cats-paw, your own paw and whatever else you can jam in there) BE CAREFUL AROUND COOLING LINES
7. Pressure wash inside of tray area to remove the remaining bits of foam
8. Seal ALL fittings/through hull openings and bulkhead with 3M 5200 or comparable marine sealant. This step is crucial! The inside of the tray MUST be cleaned thoroughly and all loose or floppy old sealant must be removed to ensure proper adhesion of the new sealant. (add trim tube, tray drains or larger cooling lines at this time if desired)
9. Fill tray with water after all sealant has cured for the recommended time. This will immediately expose any areas that may be leaking or require extra attention before final closing of the tray area. Now is also the last chance to reinforce the gunnel area of the hull. Highly recommended while you are in there!
10. Cut and fit new styrene foam for all accessible tray cavity areas, any areas that have voids should be filled with expanding foam. I like to leave the bottom chines open to give any water a place to easily exit through hull drains.
11. Once your tray is at maximum capacity with foam, reuse any pieces of the original tray and fiberglass you originally removed. This can save a lot of time and also give extra strength to your new repairs. Double check there are no cracks in the 90 degree edges of the tray, now is a good time to reinforce them from the inside.
12. Do your final layup for the tray area and wait for it to cure.
bored&stroked
Urban redneck
- Location
- AZ
I like the simple remove, replace with loose foam, and add drain line method myself.
bored&stroked
Urban redneck
- Location
- AZ
3yrs of use on a 4yr old ski that comes with zero warranty of any kind.
If you use it constantly, it happens sooner. If you leave it in the water, it happens sooner. Every ski is different and so is every rider.
If you use it constantly, it happens sooner. If you leave it in the water, it happens sooner. Every ski is different and so is every rider.
I don't used it a lot3yrs of use on a 4yr old ski that comes with zero warranty of any kind.
If you use it constantly, it happens sooner. If you leave it in the water, it happens sooner. Every ski is different and so is every rider.
Why not?
I don't used it a lot
Why not?
Who cares why? Maybe he's got 14 other skis or maybe he's just got other sh* going on.
Op, from my perspective you need to make a decision based on the time you have available. Yes it sucks there's water inside your tray. To "fix it" is going to take A LOT of work. If you are like me and you have just enough time and energy to go burn a tank and a half of gas once a week, DO. NOT. CUT.
thank you very muchBoth of the above answers are spot on. Its a daunting task, but worth it in the end.
1. Remove turf, clean up tray.
2. TAPE your lines that you want to cut, double and triple check that your lines clear the bulkhead and pump cavity.
3. Mark your tape with arrows on the line you are to cut. This is an easy step to skip, but marking the correct lines will ensure you don't cut the wrong side of the tape!
4. Select your cutting tool, make precise and controlled cuts along the marked tape lines.
5. Gently pry the cut tray area and remove the cut area in as few pieces as possible.
6. Dig out all foam using various tools. (pry-bar, screwdrivers, cats-paw, your own paw and whatever else you can jam in there) BE CAREFUL AROUND COOLING LINES
7. Pressure wash inside of tray area to remove the remaining bits of foam
8. Seal ALL fittings/through hull openings and bulkhead with 3M 5200 or comparable marine sealant. This step is crucial! The inside of the tray MUST be cleaned thoroughly and all loose or floppy old sealant must be removed to ensure proper adhesion of the new sealant. (add trim tube, tray drains or larger cooling lines at this time if desired)
9. Fill tray with water after all sealant has cured for the recommended time. This will immediately expose any areas that may be leaking or require extra attention before final closing of the tray area. Now is also the last chance to reinforce the gunnel area of the hull. Highly recommended while you are in there!
10. Cut and fit new styrene foam for all accessible tray cavity areas, any areas that have voids should be filled with expanding foam. I like to leave the bottom chines open to give any water a place to easily exit through hull drains.
11. Once your tray is at maximum capacity with foam, reuse any pieces of the original tray and fiberglass you originally removed. This can save a lot of time and also give extra strength to your new repairs. Double check there are no cracks in the 90 degree edges of the tray, now is a good time to reinforce them from the inside.
12. Do your final layup for the tray area and wait for it to cure.
- Location
- North Bend, WA
How do you remove the tray from the stock adhesive? I am finding I can remove my tray rather easily other than right at the top of the pump cavity.
lt’s got plexis adhesive bonding the tray to the top of the pump tunnel.How do you remove the tray from the stock adhesive? I am finding I can remove my tray rather easily other than right at the top of the pump cavity.
- Location
- Charlotte, NC
I always use a heat gun to heat the glue up and loosen it up so it will separateHow do you remove the tray from the stock adhesive? I am finding I can remove my tray rather easily other than right at the top of the pump cavity.
What he said. It will chip away easily when it's hotI always use a heat gun to heat the glue up and loosen it up so it will separate
- Location
- Asheville, NC
I also found that a really sharp chisel can be used to cut through the glue when you hold it like a knife. Not plunge cuts, dig a corner of the chisel into the glue, then lightly tap the handle of the chisel and it will butter through that glue. Got my FX-1 mega clean using that method. You can also get a chisel underneath the glue flat and twist, it will help lift the glue and break the bond.


