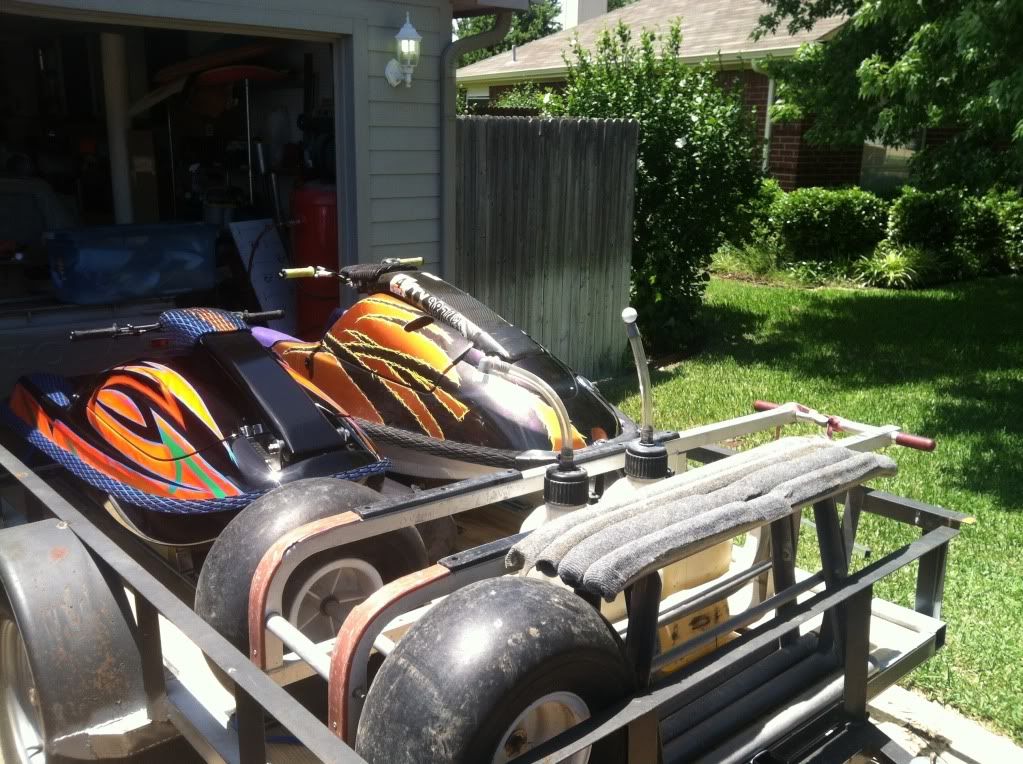
Other Swapmeet's modular trailer build

swapmeet

Brotastic
Location
Arlington TX
Now that I have a AM hull, I don't want to use my "Beverly Hillbilly" trailer any longer. It's a single ski trailer with bunks for two skis going perpendicular. It's sketchy...
Here it is being used to haul axles...
574466_3647133545971_944262501_n.jpg

(i'll try to find more pics)

In a perfect world, I would have a 6x12 enclosed trailer, but thats not in the budget this season. Maybe next year....
So I found a smoking deal on a 5x10 utility trailer. The deal being that I traded it for a Type 53 Mosin Nagant (Chinese Battle rifle) and some ammunition. (~$200 value)

My goal, is to retain the ability to haul "things" (trees, dirt, mulch, greasy parts, lawn mowers, bikes, etc) in the trailer and still be able to haul skis.
I will achieve this using "e-Track", a product that I was turned on to by a fellow X'er, dragginblazer. He used it in his enclosed trailer build. More details on the e-track as the build progresses.

But, with all builds, there is usually a issue or problem to over come. On my trailer, the width of the two skis only left 1.5" between the trailer to the ski, ski to ski, and ski to trailer. With a fancy custom painted AM hull, that just wasn't enough room. A 6x10-12' trailer would run me about $850-$1200. So I decide to widen the 5x10 a total of 5", 2.5" on each side with square tube. This will double the space between everything, So 3" between each... LOL a lot of work for an extra 5"...

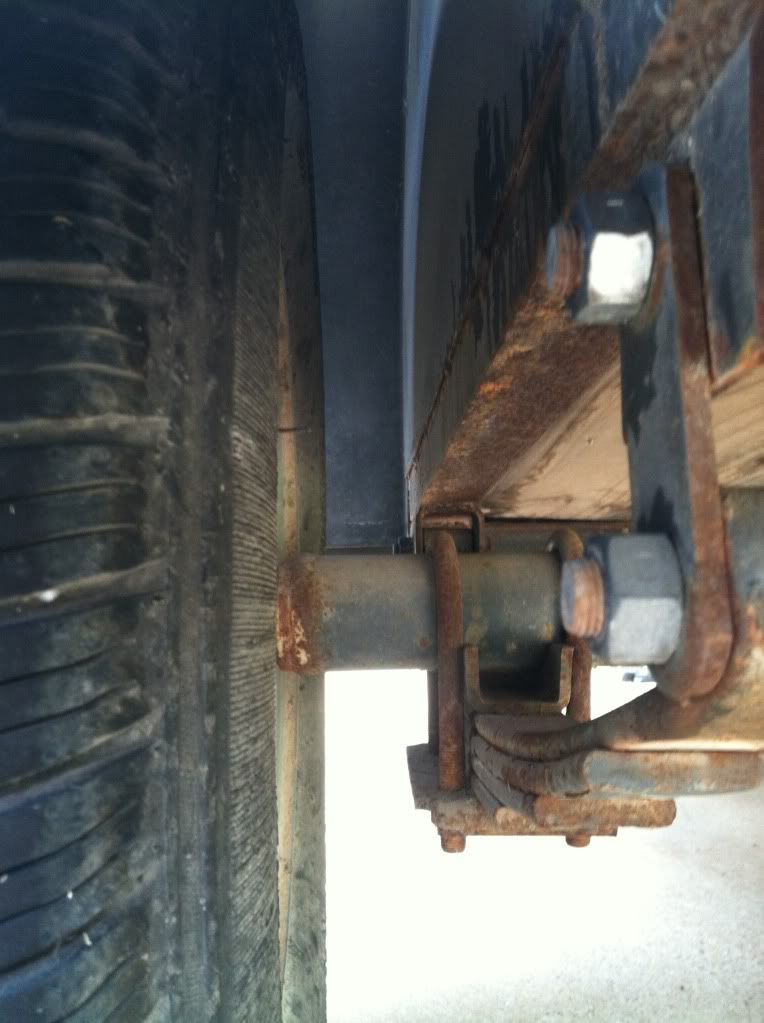
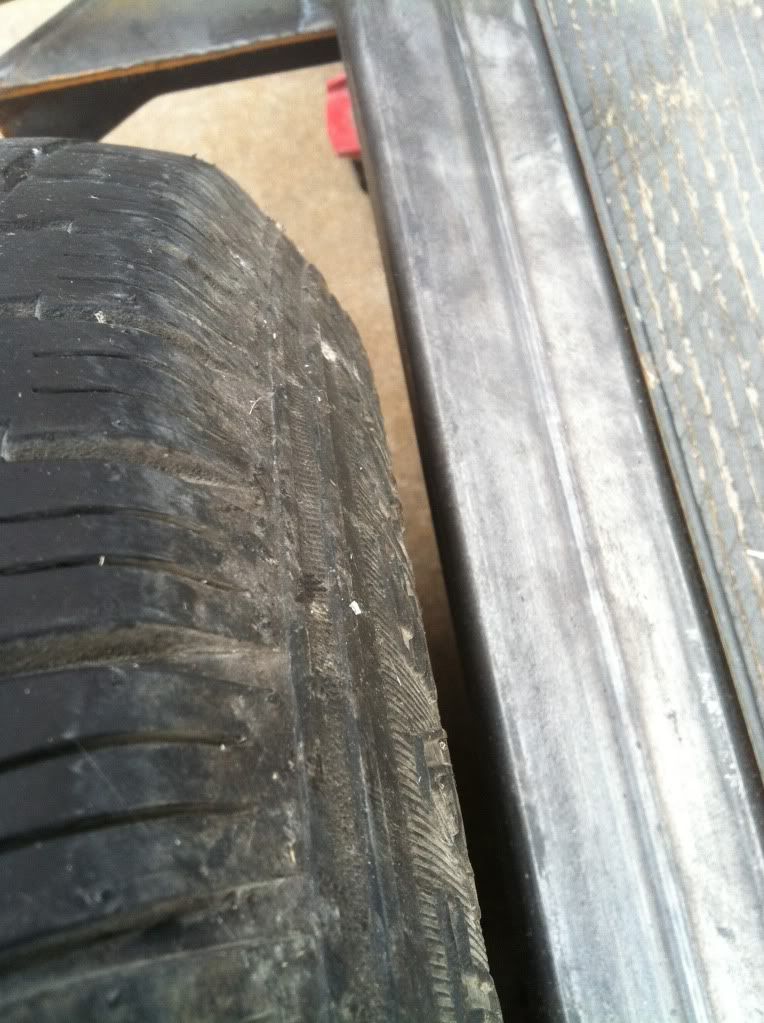
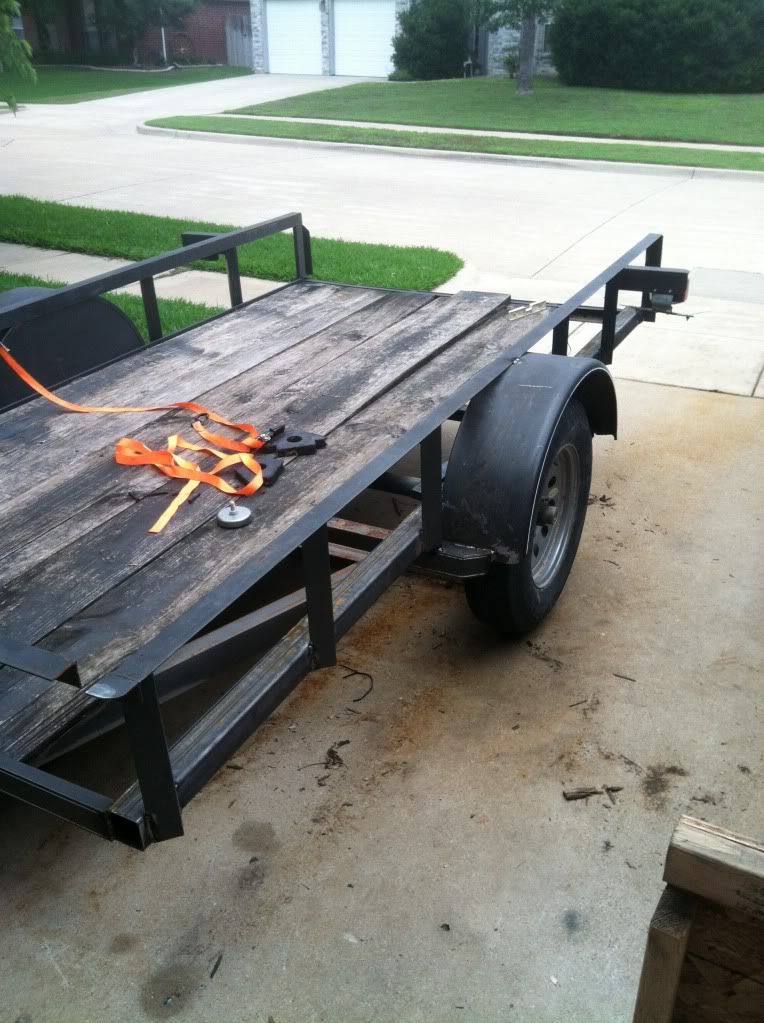
I'm cutting the side rails and fenders off, welding the tube on, and re-attaching the rails. There is enough room (barely) for the tire to fit with the additional width, but if its an issue i'm prepared to notch the square tube for the needed clearance. I'll have to play it by ear.


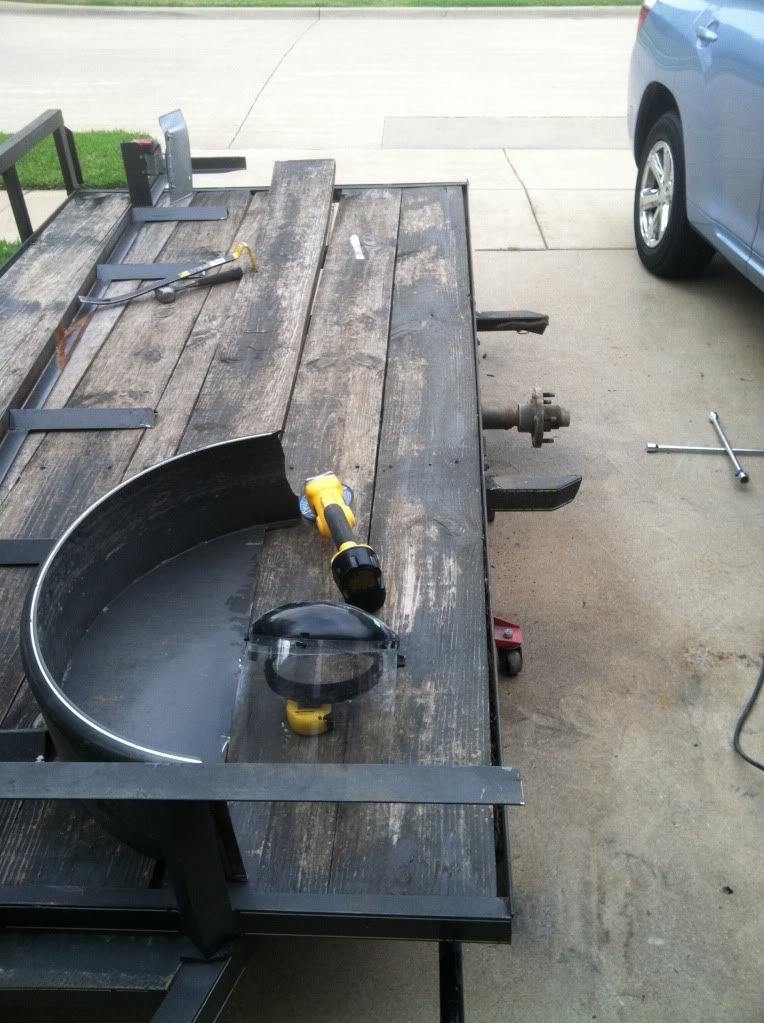
The way it currently sits.
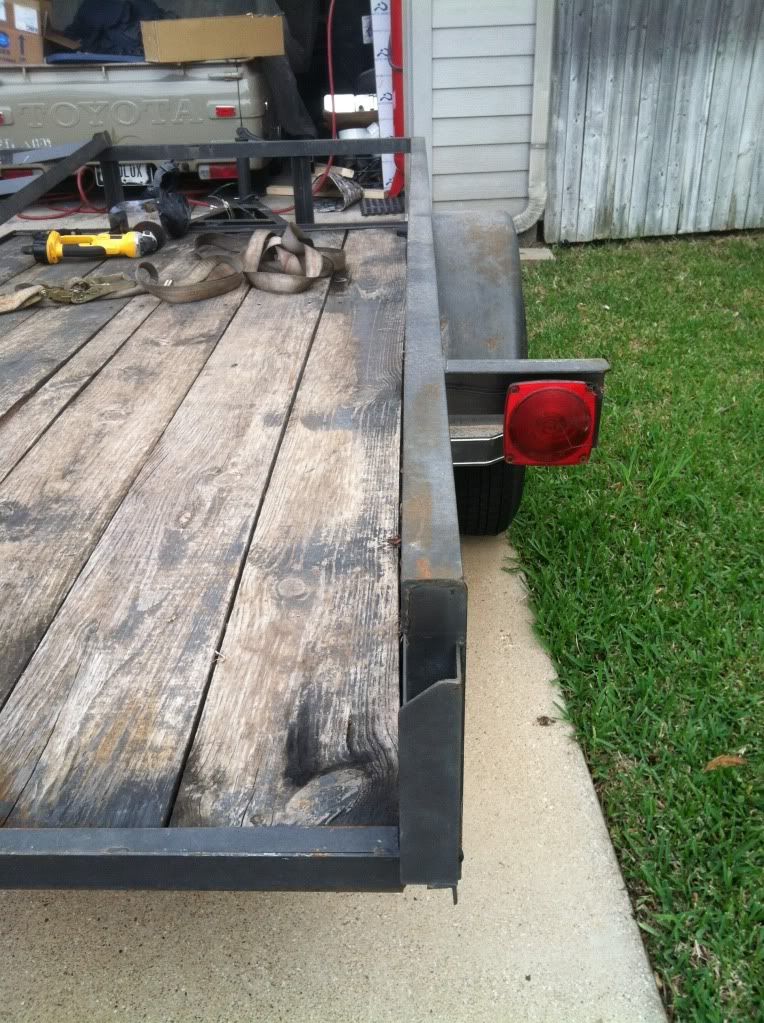
3484EBE5-70C4-44E6-ACAA-34287981CB1E-3719-000004445865A1DF_zps1840607f.jpg


This was a very difficult set of welds to cut.
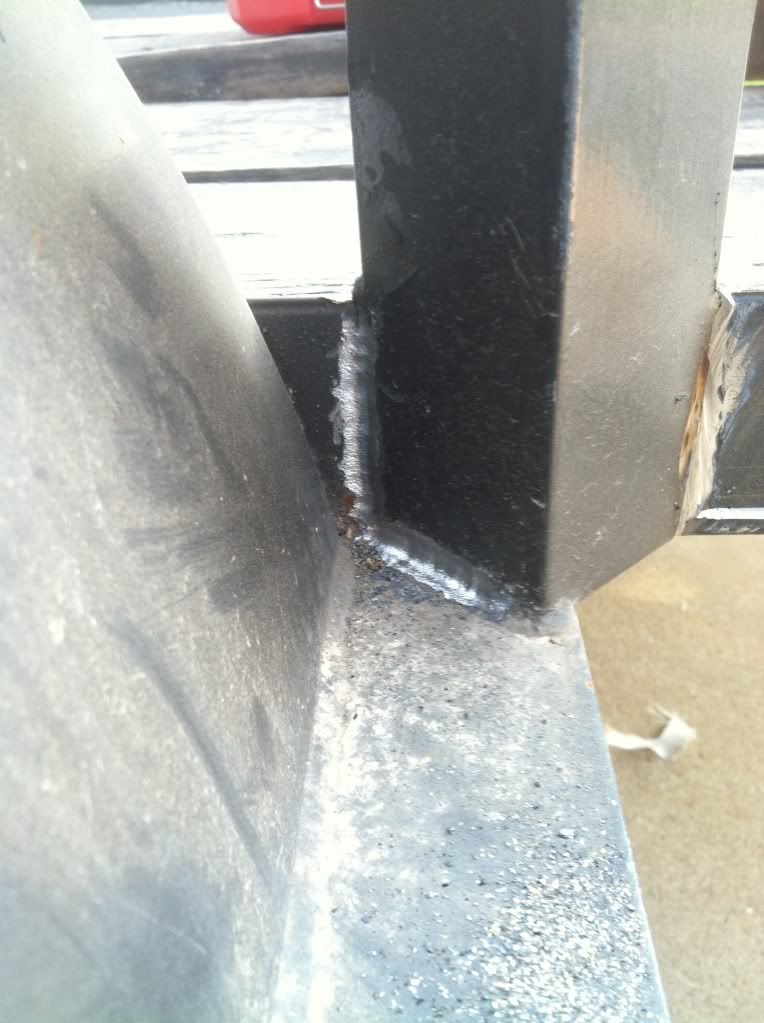
A75455EF-D749-407C-B523-D5C9A8070028-3719-00000444CEB4BFF6_zpsf23415be.jpg


Rails off... (Check out the aroused piece of wood!)
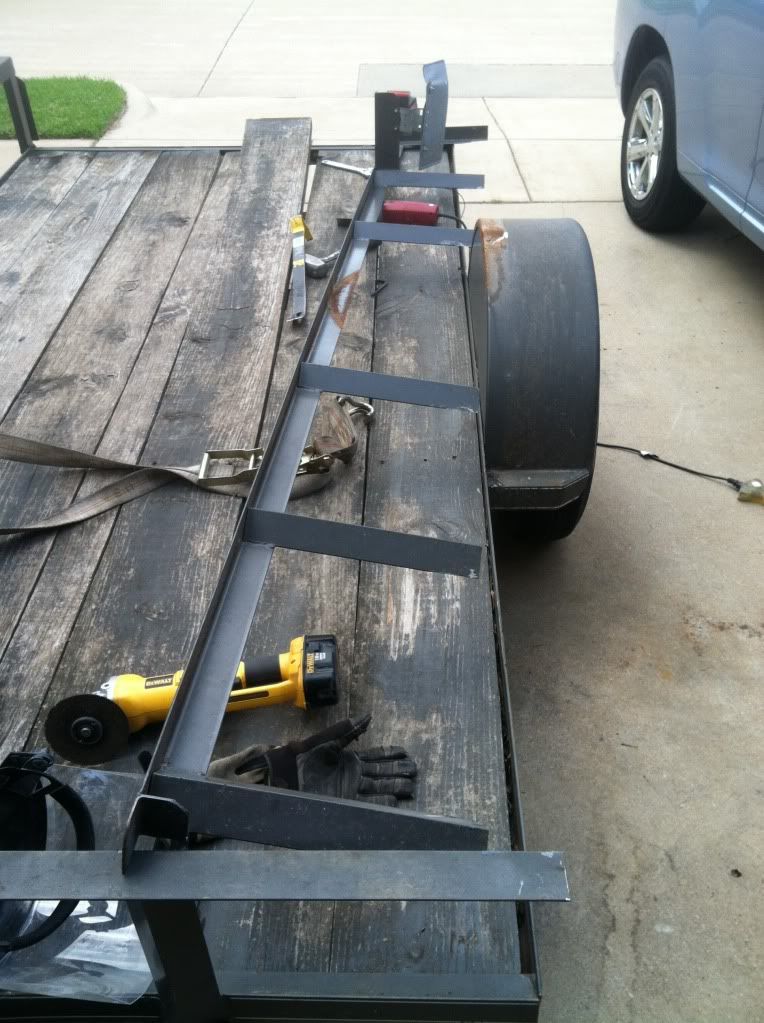
B7722714-9901-4C72-935F-FD3AFF309D32-3719-0000044472CAA454_zpsd6115292.jpg


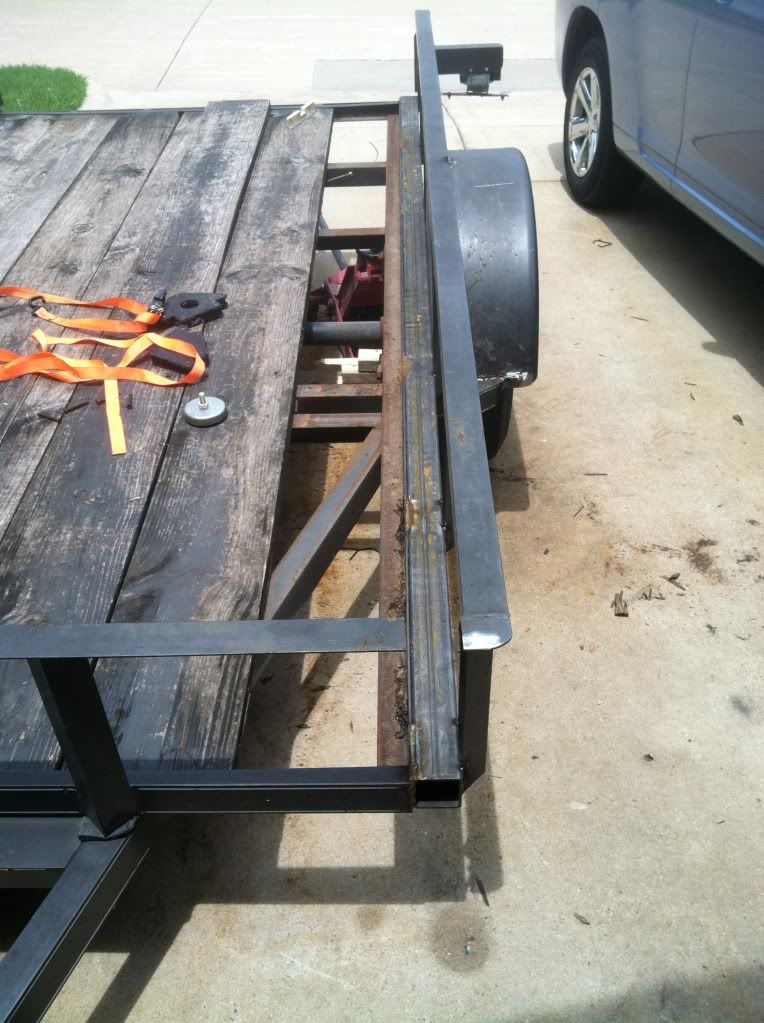
Space between the tire and frame.
7221F9BD-A854-4814-8C98-CB659156F0FA-3719-0000044488F54A6C_zps948f462e.jpg


How it sits today....
924AB72F-8192-4B02-937F-0611977FB959-3719-00000444AADAE30B_zps1074b20f.jpg


I've been working on it when I have time/ while i'm waiting for parts for my Backie Chan.


I'm really looking forward to getting the e-track on.
 
Last edited:

swapmeet

Brotastic
Location
Arlington TX
No, on those tough to reach welds I used a oscillating multi tool with a $20 carbide plunge cut blade. Completely destroyed the blade on one side.

Hink, you should see the other trailer loaded. All this one needs is some wood, maybe a coat of paint. But I doubt ill paint it.
 
Location
Idaho
I think you set the record for the most build threads in a 6 month span. I was in the same situation with my single shorelander trailer. I cut it down the middle and widened it to accommodate a standup and now a superchicken.
 

swapmeet

Brotastic
Location
Arlington TX
Lol!!!! That's pretty funny. This one will be short and sweet unlike my other thread(s).

Im hoping that the etrack stuff will inspire some other folks once I get it installed.
 

swapmeet

Brotastic
Location
Arlington TX
Well, things went from poking along to pulling 3 consecutive late nights and taking a day off.... So I need to update this mofo...


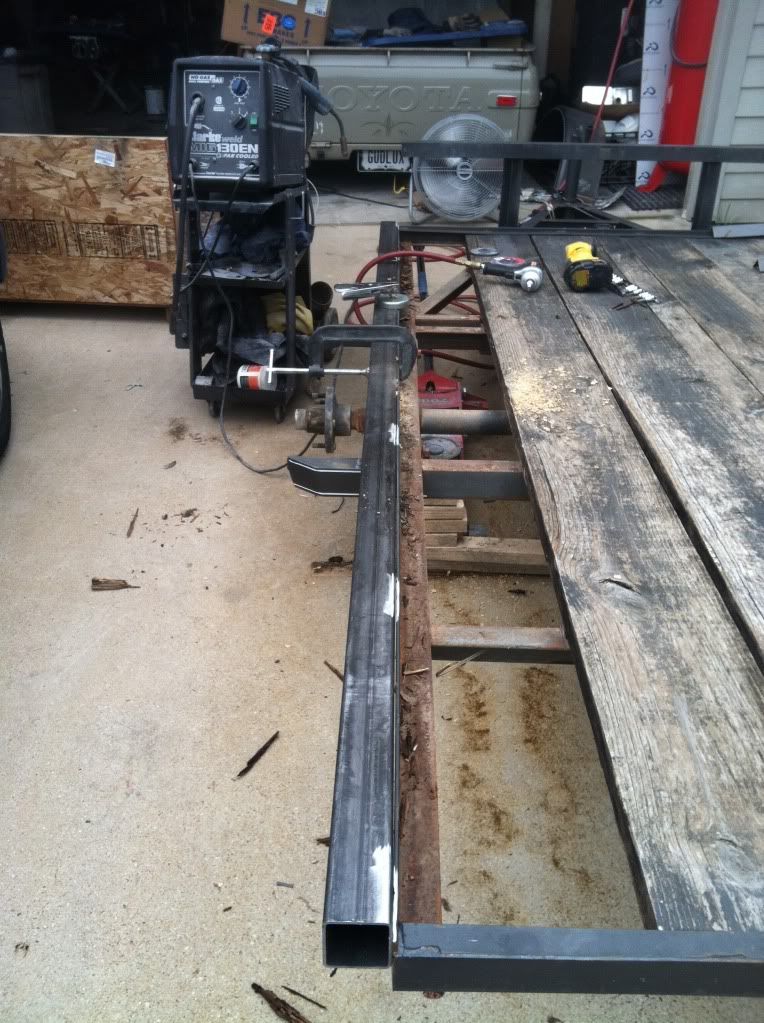
As with any project that has a 'left and right' side, the second side is always easier.

I welded on the 2.5" 1/8" wall square tube. The trailer wanted to bow down on the ends, so I used a C-clamp and a floor jack to get everything in line for each weld, starting in the center, where it lined up fine.

E7F17227-FFDA-4ED3-81F1-2A1184913763-695-000000E9F4D22D70_zpscef81831.jpg


The resulting gap... I'll use wheel spacers to give myself a little more clearance.

1F9996E4-9C39-4844-BEEA-564218FFA647-695-000000E9E872064E_zps6ec85891.jpg


I put the fender on first, which was a mistake, so I had to cut it back off (only did tack welds first, learned that lesson the hard way years back).

The rails also wanted to bow some, so again, floor jack etc.

9FEC4F37-697D-43F8-A09C-EA45530E7302-695-000000EA18FF3C2C_zps740427f1.jpg


Still need to buy a small piece of 1.5" angle to fill this gap.
F0CAA3ED-10F8-4688-B2AB-1424B068E026-695-000000EA207F9A9E_zps377b87c2.jpg


From here... I just worked and worked....


And the Pictures????


tumblr_inline_mfmigfah2M1rcsf7e.gif


That day/ night I widened the other side... cut out the old boards, wife and I wrestled the new (pressure treated) ones in (at midnight the Sat before we took our first trip to the lake).

Then we figured out the spacing for the bunks and associated e-track. This is why I keep my wife around. I suck at math LMAO...
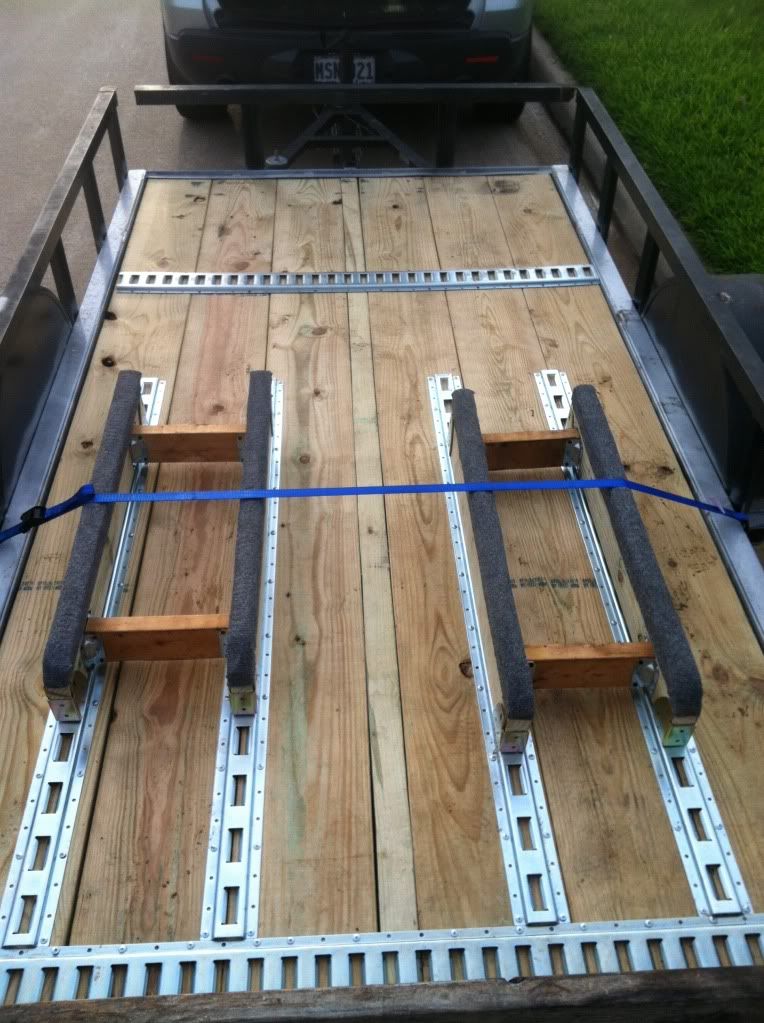
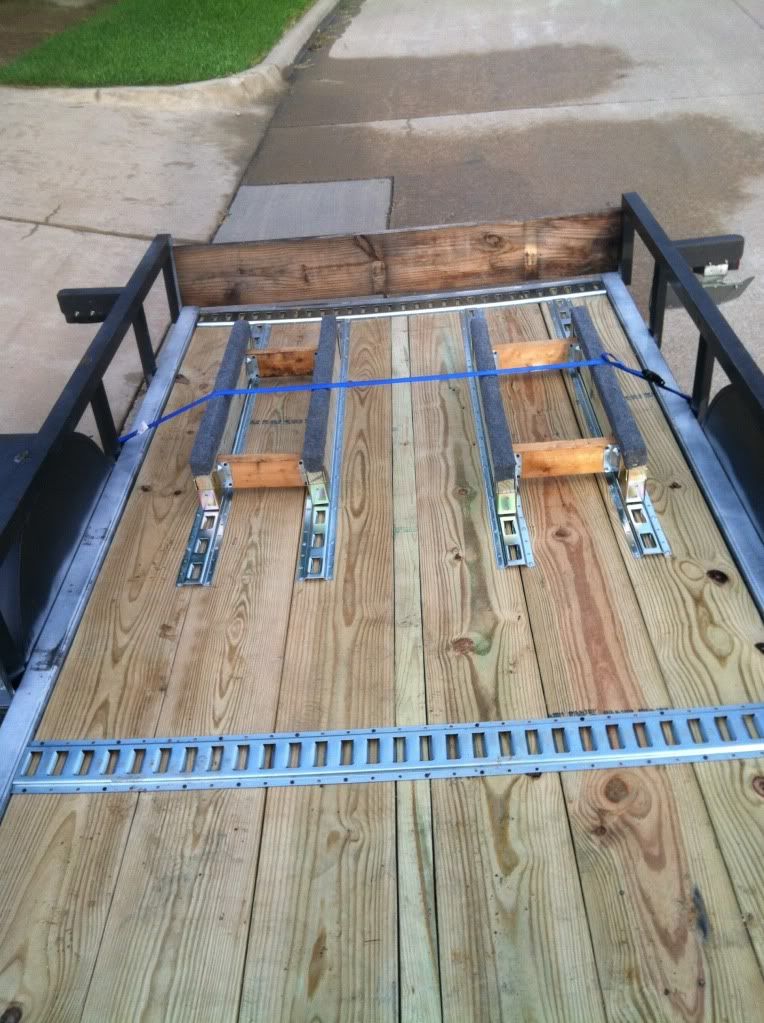
Mounted the e-track...

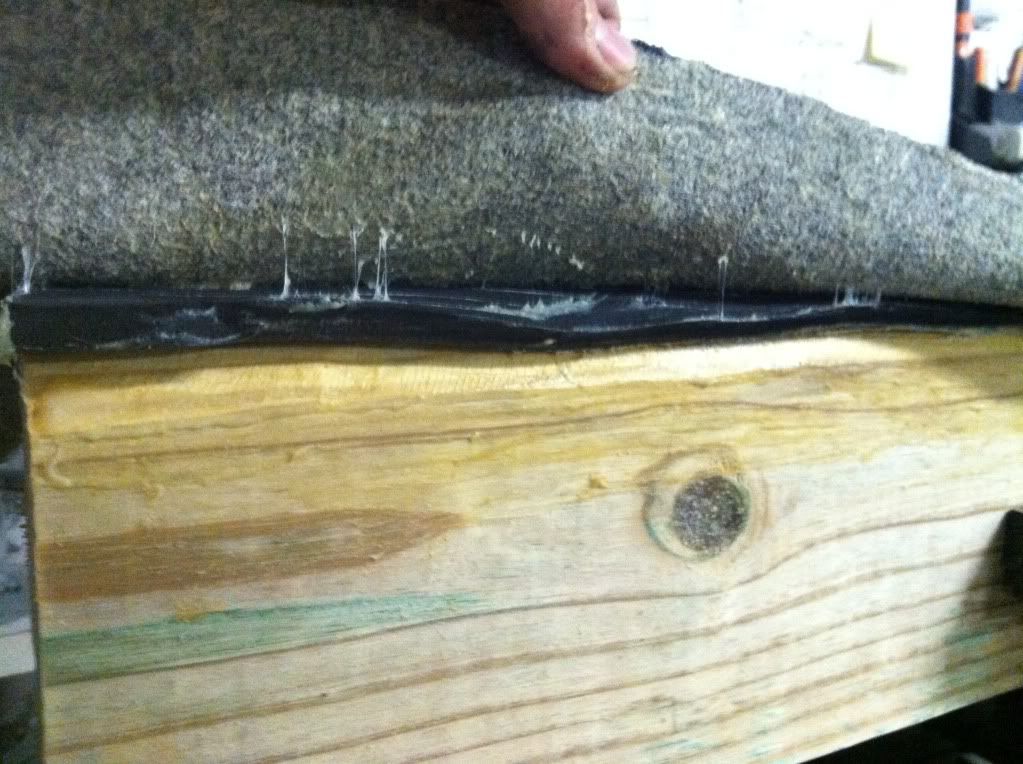
And then she went to bed and I stayed up and made bunks (after I had her put down contact cement on the carpet lol).

The bunks are made from 2x6 pressure treated pine.
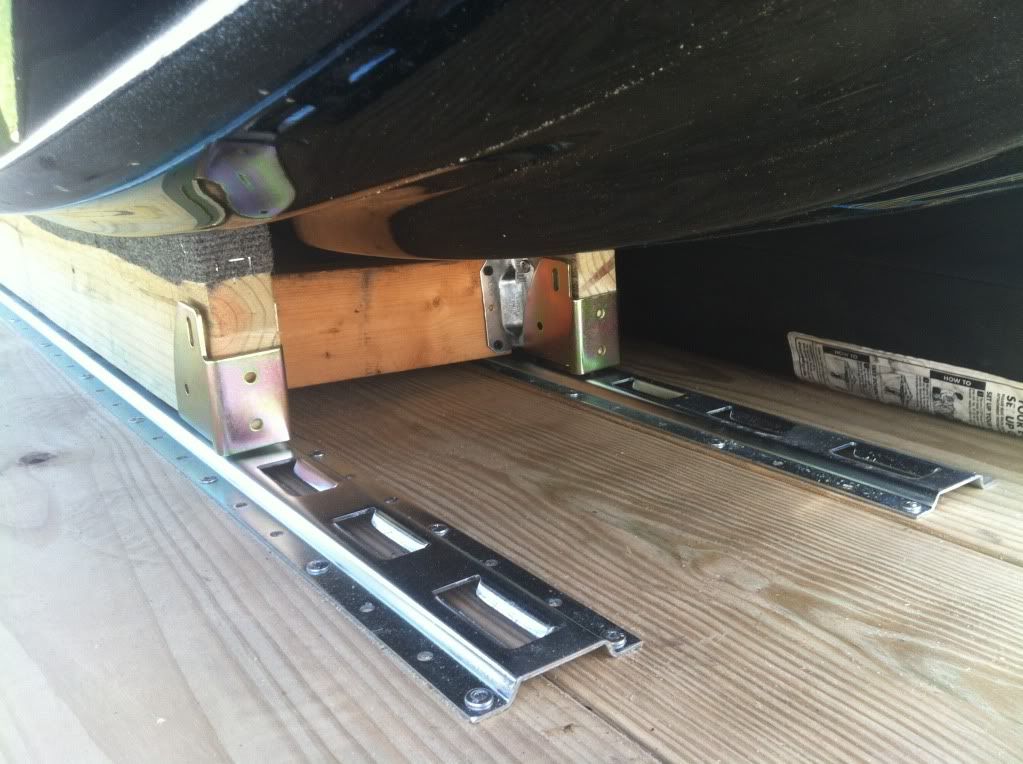
For the BC bunks, I added some 9mm underpad to hopefully keep the paint nice. Also it helps when straping down the ski. Helps it snug down on the bunk.

Managed to take a pic...
2BD2512C-1DA5-4355-8D3B-2035B39C3B86-2999-000003A98C5900E7_zps4636e443.jpg


And here is how it sits when unloaded...

E45F6194-9265-411D-B242-0C34A39F9B98-2999-000003A9E4B2292F_zpsb9931df4.jpg


The bunks arn't held in by anything except the ski weight. The metal retainers are locked into the etrack. The wood connecting the bunks keeps the retainers from flopping side to side, which they will do. (they are designed to lock a load into a 18 wheeler, not hold skis...)

The horizontal e-track is for tie down points.

AEFCF5B4-9C2B-48DF-9B60-D3833BEBCAF9-2999-000003A9ED3D61DB_zpsf9068637.jpg


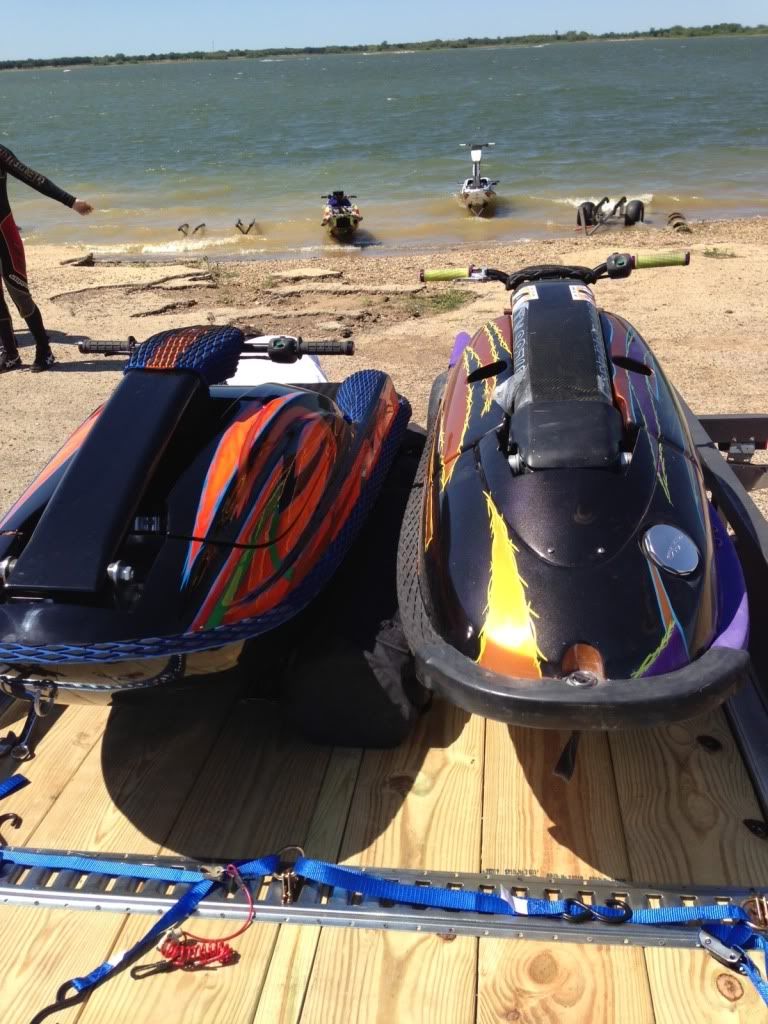
You can see the ringed tie downs in this pic. Also, my EZ up fits perfectly inbetween the skis!

64FD353C-6AC8-4E4A-842E-A877789F94D8-2999-000003A9DA451040_zps722d0e7a.jpg


57EC0D38-E81D-4CEF-B5DD-46C4F4A420C5-2999-000003A9C90F3DFF_zps11e70026.jpg


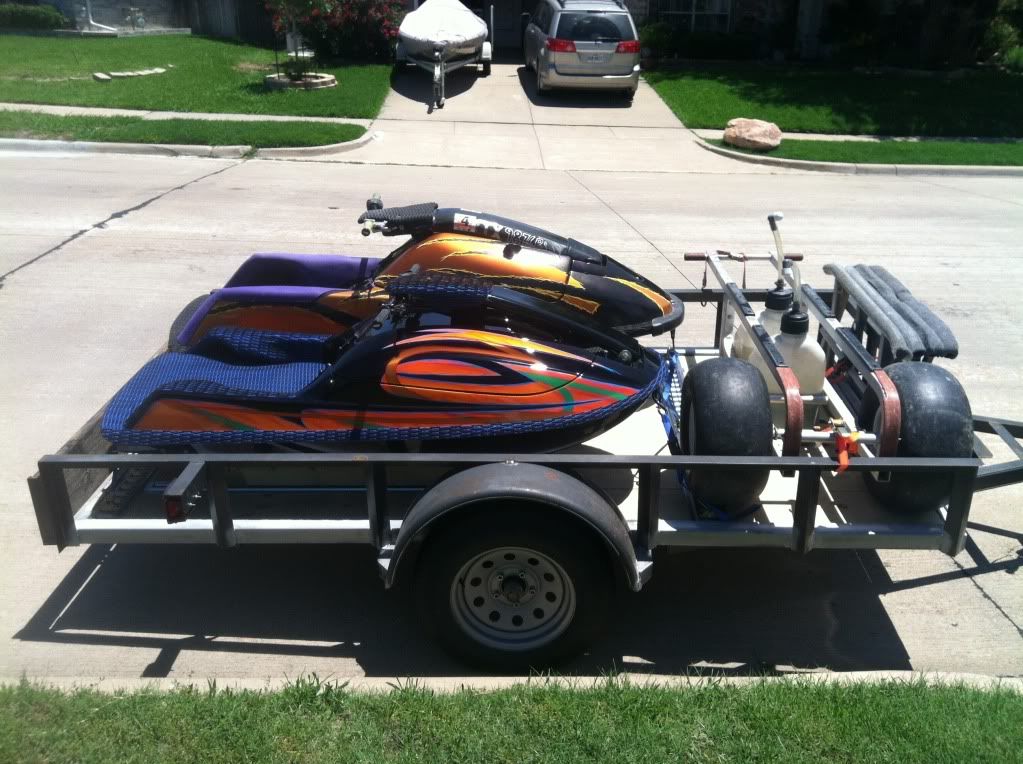
Loaded up!
D6967818-8C29-490C-855A-EA261244B082-2999-000003A9BF4313FA_zps6700834c.jpg


28153004-E941-4658-8F54-8A82EB57CE93-2999-000003A9A1C8DA2D_zps32f7e5f5.jpg


Now...... here is my problem. All the weight is in back, and it makes the tongue of the trailer bounce on the hitch ball. Its makes a god awful racket!!! I have a few things to add yet, so it will provide some additional weight to the front (small tool box and a fuel can holder), but I don't think its going to counter balance 600lbs of skis.

I'm up for suggestions, so let me know. My idea currently is to add more e-track to move the bunks to the front of the trailer, and slide the skis all the way forward, and put my cart and other gear in back.
Hoping to add those items before I go back to the lake Saturday.

Also the trailer is getting painted gloss white to keep it cool on the 110* Texas summer days.
 
Last edited:
That's a pretty sweet set up swap. Perfect for two skis and the tote. I'd add a small box up front with a lock and add tool box. That will make more difference than you think. Or, add holders for the gase tanks sandwiched between the tote and the tool box.

Scottie
 

dragginblazer

Do Good Jetski Crew
I'd add a steel toolbox on the tongue and mount the spare in front of the axle on the side rail.

Craigslist for some cheap toolboxes.

Sent from my HTCEVOV4G using Tapatalk 2
 
Last edited:

subhard

TITS OR GTFO
Location
anchorage ak
Not really his weight will be ok

Use a scale and pick the front up of the trailer should be about 80kg

Lol ok. If its bouncing theres obviously not enough tongue weight. So are you saying he's okay with it bouncing or are you saying he needs 80kg. Make up your mind
 

Poizen

Mical
Site Supporter
Location
South Africa
Lol ok. If its bouncing theres obviously not enough tongue weight. So are you saying he's okay with it bouncing or are you saying he needs 80kg. Make up your mind

The tounge when picked up should weigh 80kg

The bouncing coukd be springs or lack there of my jetski trailer bounces like crazy because its springs are to stiff
 
Top Bottom