You are using an out of date browser. It may not display this or other websites correctly.
You should upgrade or use an alternative browser.
You should upgrade or use an alternative browser.
Super Jet Swapmeet's "Really?" RN build
- Thread starter swapmeet
- Start date
SkiDiggity
formerly kawirider142
Ski looks great man!!! way to go !
swapmeet
Brotastic
- Location
- Arlington TX
Well, this thread is absolutely no fun anymore. Dunno if i'm as disgusted with the thread as I am the project, because i'm pretty tired of staring at this ski.
I've had some updates to post but its all generic boring blah blah blah stuff. Can't even think of any good gifs to relate...
ok...
this works...

I think part of the problem is that its already May and I haven't been on the water or inhaled the sweet aroma of two-smoke in the air...

Maybe because half the fun is the story and the story is almost over...

But I digress.................
Motor is in and aligned...ish... I don't think its 100% perfect... i'm gonna have someone else double check my work.
Chamber is in, TDR waterbox is in, most of the water lines have been run (did that last night).
Bilge switch is in, that required some creative thinking.
Primer is in.
Hooked up steering and centered it.
Ride plate is on as of last night. Its a D-cut protec I think.
Mounted the pole.
Ran a new SS switch, had to put new plugs on it. (I used weatherpak plugs like GM uses, they're great for weather proofness, but finding parts and snaking them through a pole is a PITA.)
Stole the bendix out of my wifes 650 thats been parted out to facilitate the BC build.
#zero FW is torqued,
FW cover is on,
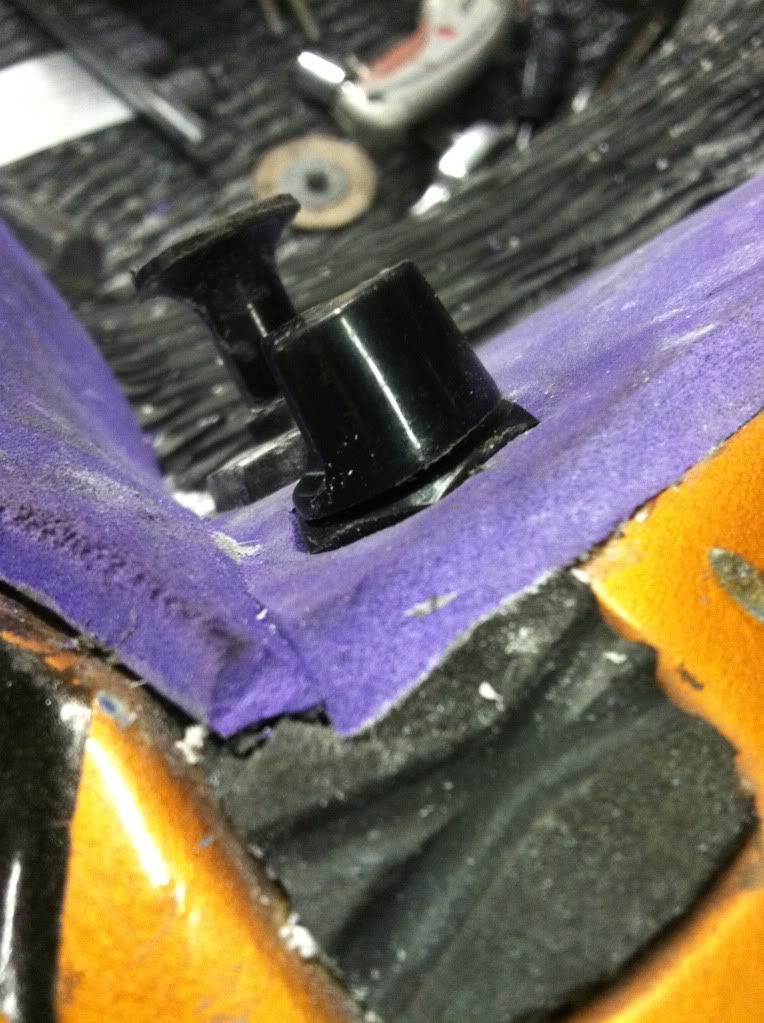
On the bilge switch, its a rotatory switch, and for whatever reason my dash plus the purple turf was too thick for me to thread the plastic nut. So, I pressed the nut into the turf, and cut that shape out. Then I screwed the switch in from the back. Not rocket science but a lesser man would have used a toggle... maybe...?
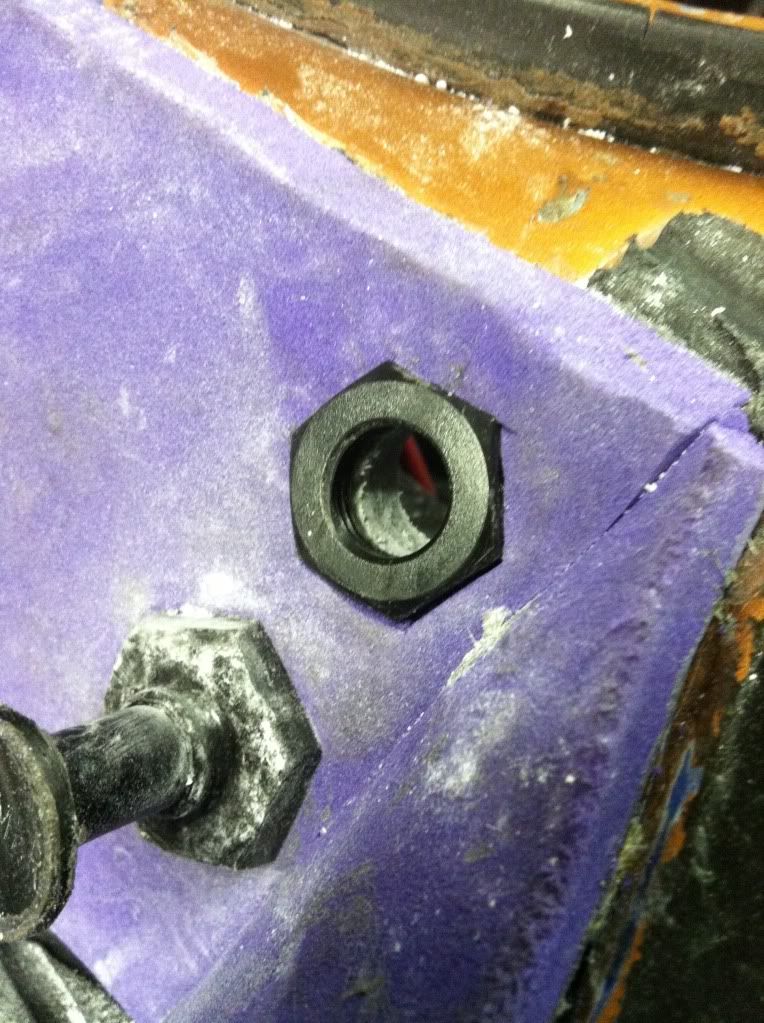
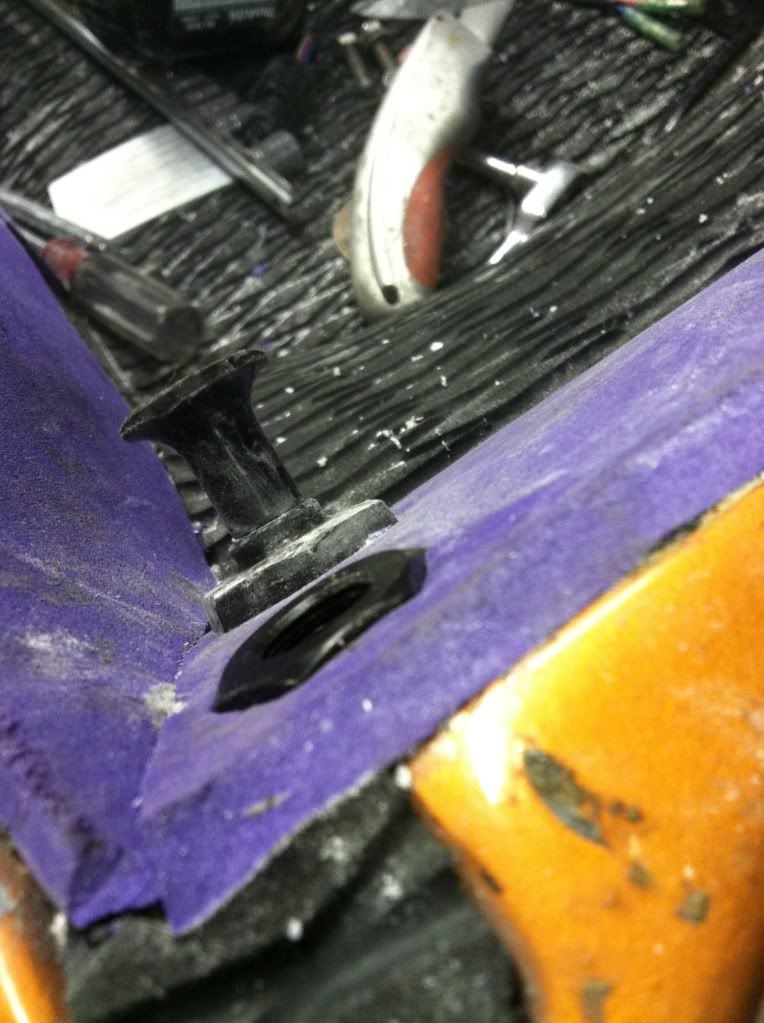
Then, because the nut wasn't threaded down enough... the knob wouldn't turn when screwed into place.
So I had to clearance it...
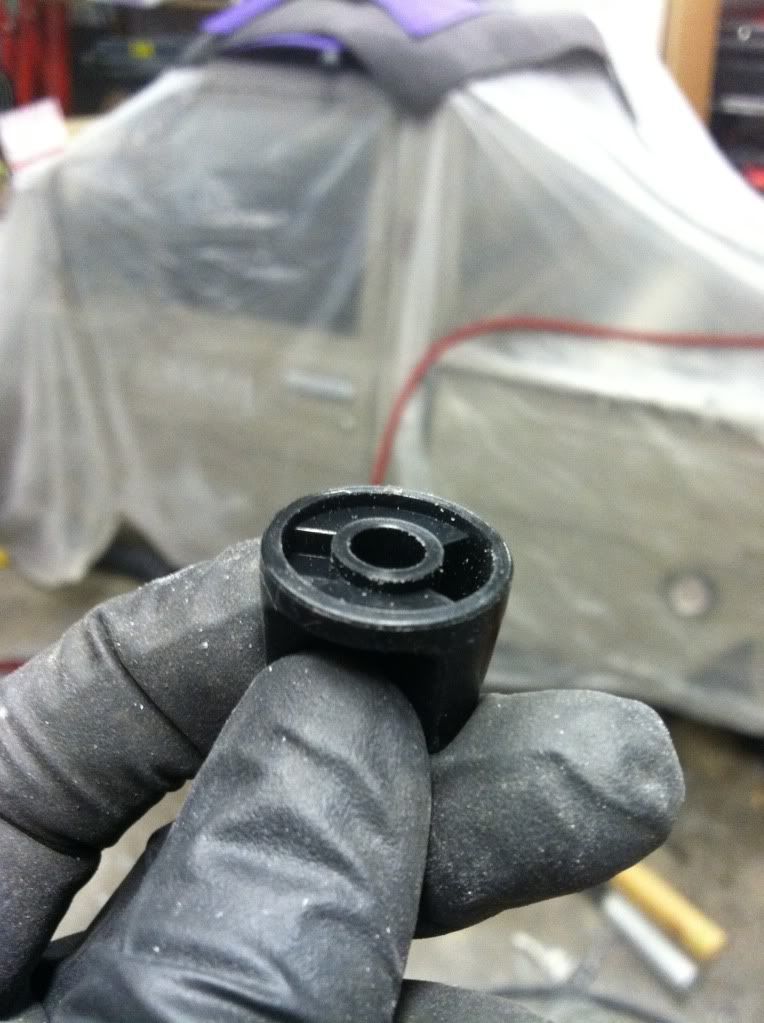
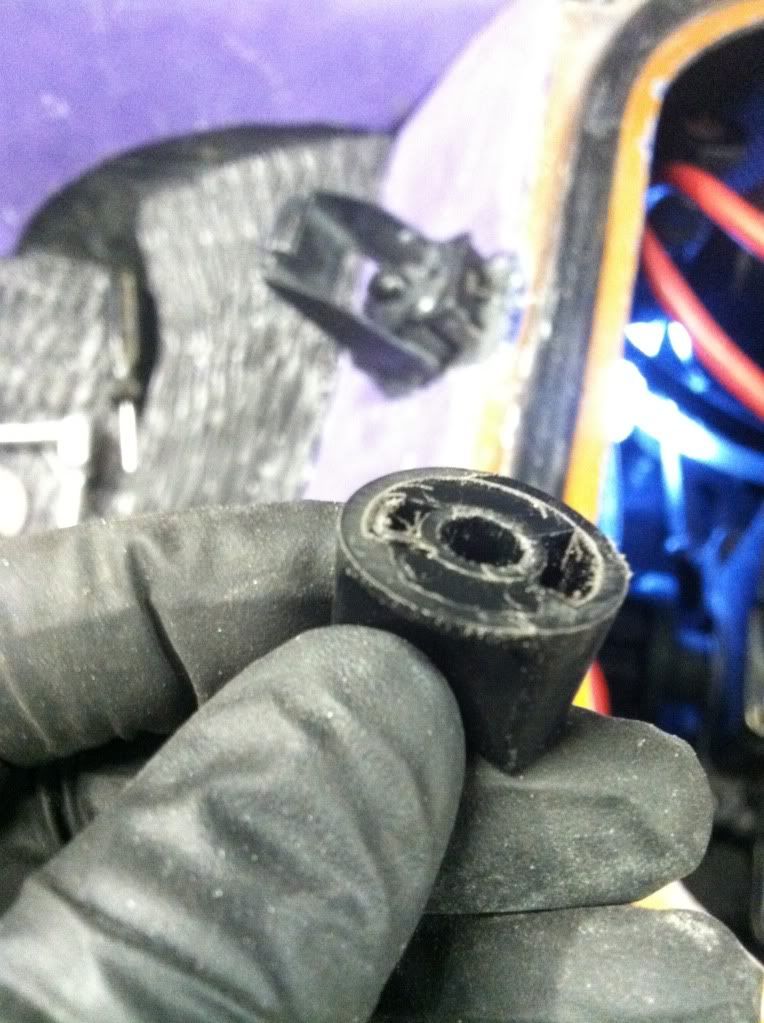
The rest of my photos are old now... so i'll have to take some fresh ones of where I am.
Whats remaining:
Exhaust hose
Fuel tank (Thinking about ditching the Aluminum tank and using the one from my wifes 650)
Fuel lines
Primer lines
coupler cover
battery
turf Ricky Bobby holds,
mount Ricky Bobby holds,
Mount U-bolt in dash for limiting rope.
I think thats it.......

I've had some updates to post but its all generic boring blah blah blah stuff. Can't even think of any good gifs to relate...
ok...
this works...

I think part of the problem is that its already May and I haven't been on the water or inhaled the sweet aroma of two-smoke in the air...

Maybe because half the fun is the story and the story is almost over...

But I digress.................
Motor is in and aligned...ish... I don't think its 100% perfect... i'm gonna have someone else double check my work.
Chamber is in, TDR waterbox is in, most of the water lines have been run (did that last night).
Bilge switch is in, that required some creative thinking.
Primer is in.
Hooked up steering and centered it.
Ride plate is on as of last night. Its a D-cut protec I think.
Mounted the pole.
Ran a new SS switch, had to put new plugs on it. (I used weatherpak plugs like GM uses, they're great for weather proofness, but finding parts and snaking them through a pole is a PITA.)
Stole the bendix out of my wifes 650 thats been parted out to facilitate the BC build.
#zero FW is torqued,
FW cover is on,
On the bilge switch, its a rotatory switch, and for whatever reason my dash plus the purple turf was too thick for me to thread the plastic nut. So, I pressed the nut into the turf, and cut that shape out. Then I screwed the switch in from the back. Not rocket science but a lesser man would have used a toggle... maybe...?


Then, because the nut wasn't threaded down enough... the knob wouldn't turn when screwed into place.
So I had to clearance it...


The rest of my photos are old now... so i'll have to take some fresh ones of where I am.
Whats remaining:
Exhaust hose
Fuel tank (Thinking about ditching the Aluminum tank and using the one from my wifes 650)
Fuel lines
Primer lines
coupler cover
battery
turf Ricky Bobby holds,
mount Ricky Bobby holds,
Mount U-bolt in dash for limiting rope.
I think thats it.......

Last edited:
- Location
- Jackson MI
All the fun stuff is done. Been there.....time for a new build!
BruceSki
Formerly Motoman25
- Location
- Long Island
I checked out of this thread about 3 or 4 weeks ago.
So you are telling me at page 58 you have finally got this ski almost to the point where you can start and ride it?
Props.
So you are telling me at page 58 you have finally got this ski almost to the point where you can start and ride it?
Props.
swapmeet
Brotastic
- Location
- Arlington TX
Started it tonight! Albeit via dumping fuel into the carb, but by god it started and ran!
Ill have pics tomorrow. Knocked a bunch off my list and added a few things.
:Banane01:
Ill have pics tomorrow. Knocked a bunch off my list and added a few things.
:Banane01:
swapmeet
Brotastic
- Location
- Arlington TX
I wasn't able to find a weatherpack connector yesterday. It amazes me that parts store employees don't know what these are. Just in case ya'll don't know either.

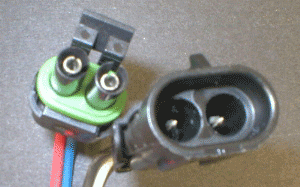
Anyhow, I jammed the metal pins in the other connector to test the motor and it worked in a pinch. I might grab the plug today.
LOL you can see where I did it in the bottom left of this pic.
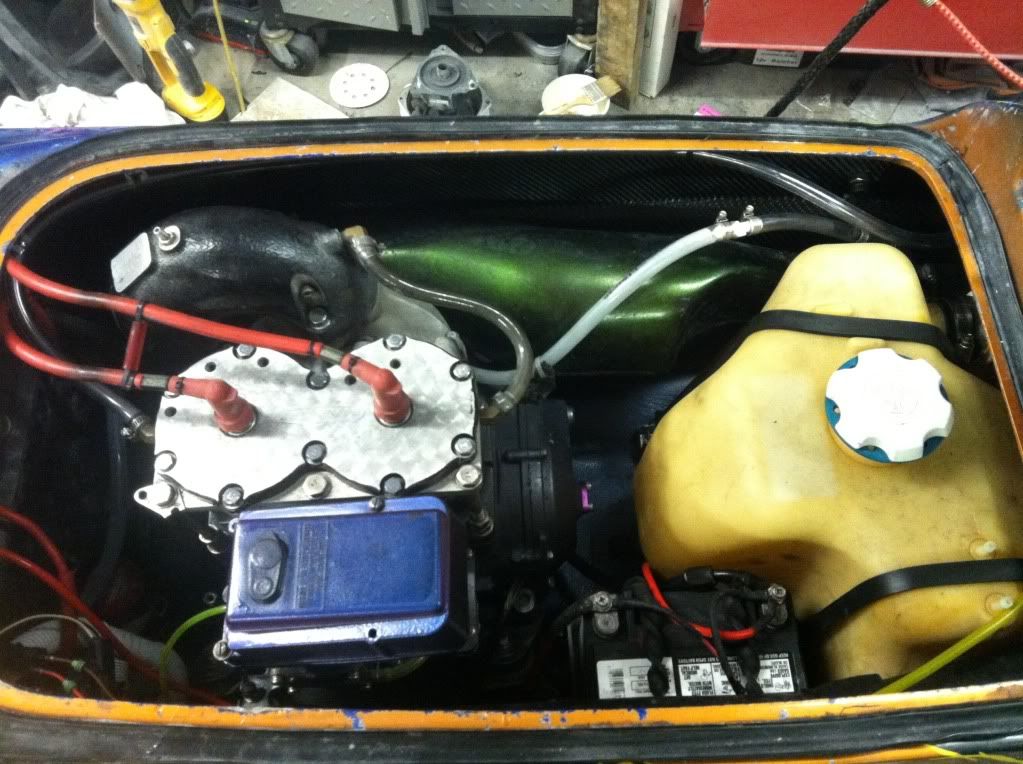
So there's the engine in, decided to go with the stock tank, rigged up the old school internal fill. I have some plans to paint it all to match, but it'll be after the season is over probably.
I installed the U-bolt for the limiting rope. I hammered on it a little so it didn't stick out so much, smacking your knee on those things sucks.
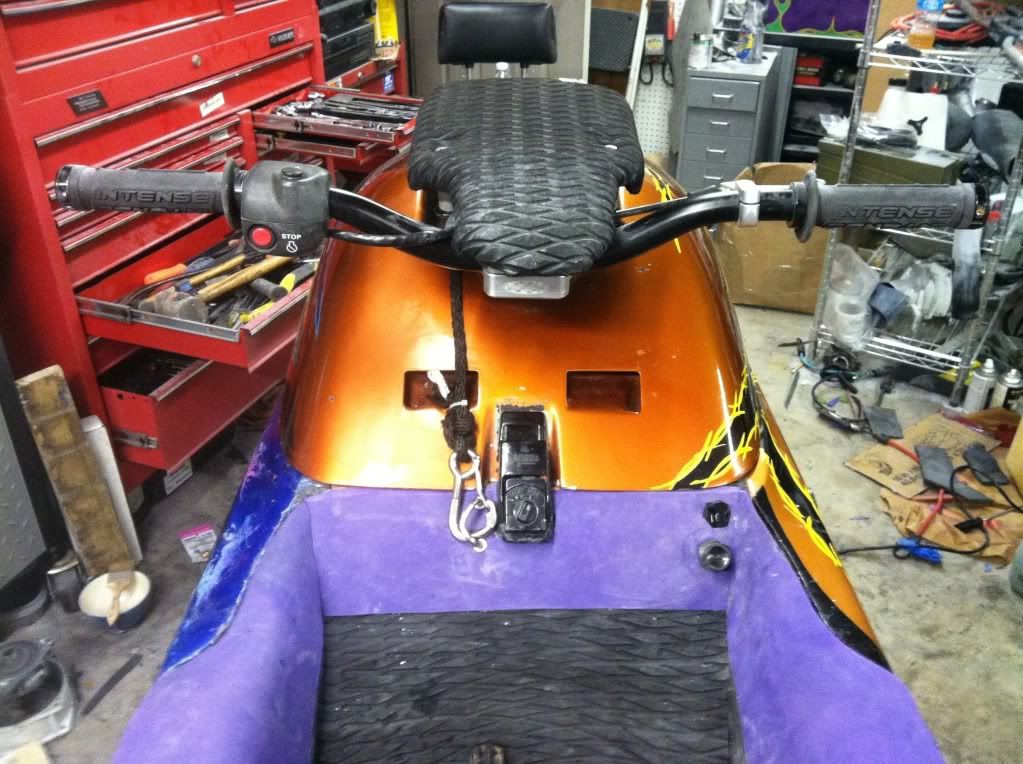
I bought some vacuum plugs to cover the dual cooling line that i'm not using as well as the trim tube. I don't have anything big enough to go over he trim tube. If anyone has a suggestion please chime in. This ski will probably never have trim while I own it so... I just reinstalled it as a feature for the next guy.
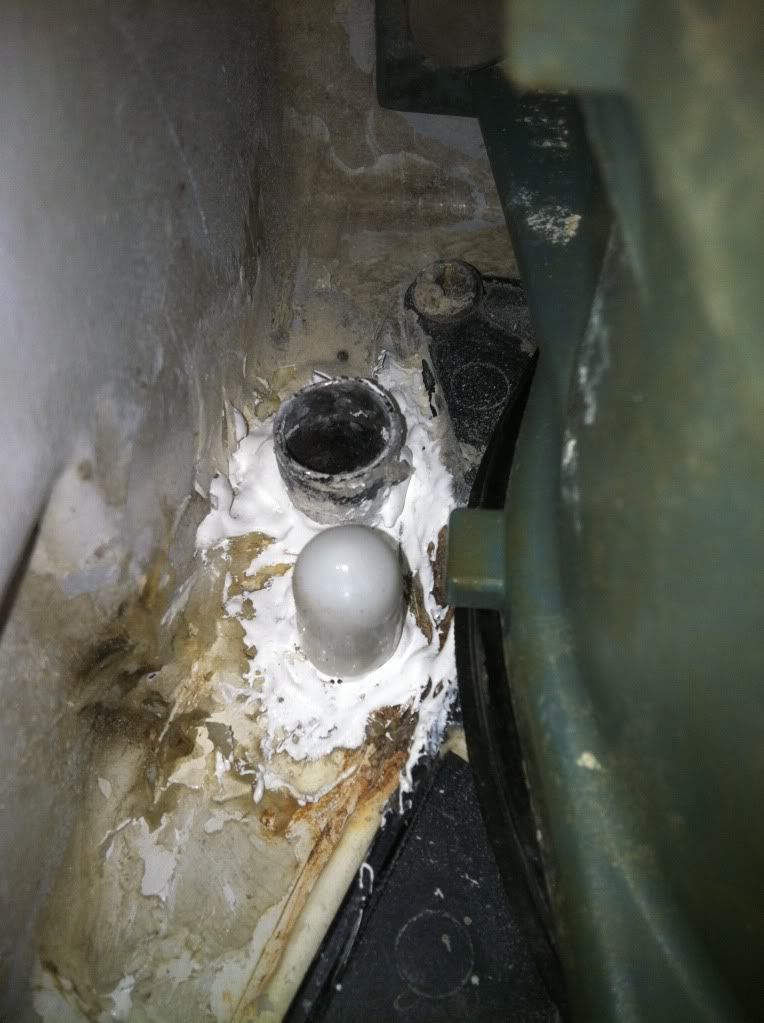
Yes, its ugly, but its sealed... I think.
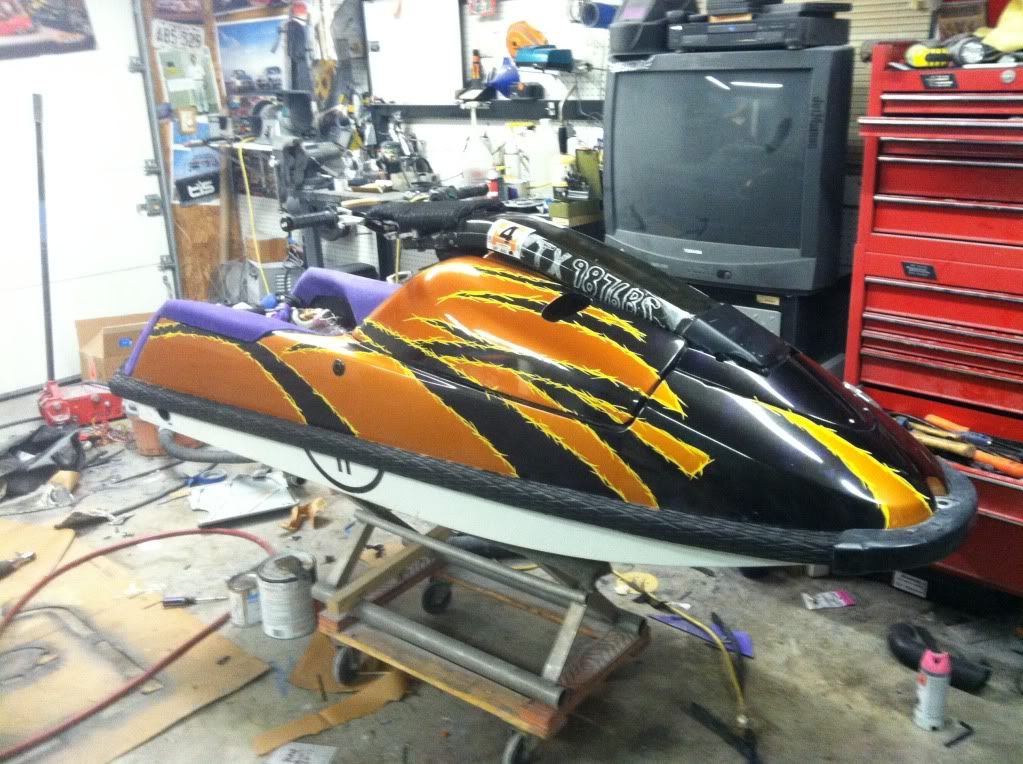
Here's this side with black turf on the rails and the handle pole. I tried to tie in the purple with some pin striping but it looks like poop, so no pics... :no:
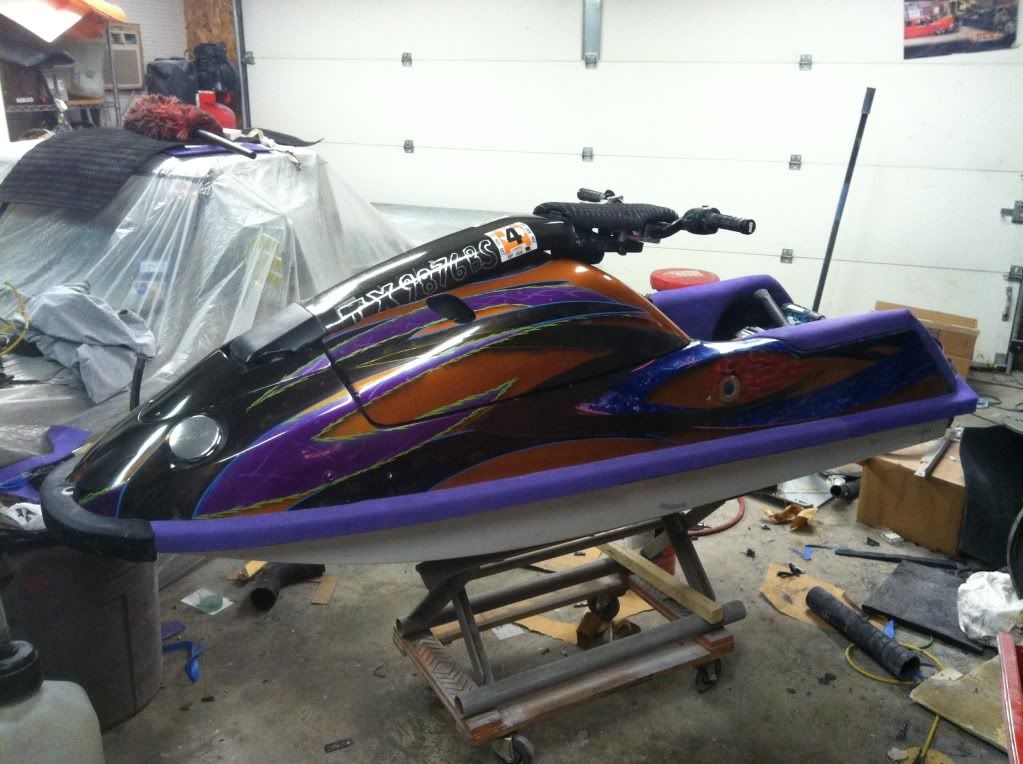
And the purple side...
Today I'm gonna buy some tygon fuel line, try to find a plug for that trim tube, and a weatherpack plug for my start stop.
After that I need to figure out placement of the foot holds, and turf them...


Anyhow, I jammed the metal pins in the other connector to test the motor and it worked in a pinch. I might grab the plug today.
LOL you can see where I did it in the bottom left of this pic.

So there's the engine in, decided to go with the stock tank, rigged up the old school internal fill. I have some plans to paint it all to match, but it'll be after the season is over probably.
I installed the U-bolt for the limiting rope. I hammered on it a little so it didn't stick out so much, smacking your knee on those things sucks.

I bought some vacuum plugs to cover the dual cooling line that i'm not using as well as the trim tube. I don't have anything big enough to go over he trim tube. If anyone has a suggestion please chime in. This ski will probably never have trim while I own it so... I just reinstalled it as a feature for the next guy.

Yes, its ugly, but its sealed... I think.
Here's this side with black turf on the rails and the handle pole. I tried to tie in the purple with some pin striping but it looks like poop, so no pics... :no:

And the purple side...

Today I'm gonna buy some tygon fuel line, try to find a plug for that trim tube, and a weatherpack plug for my start stop.
After that I need to figure out placement of the foot holds, and turf them...
Last edited:
hornedogg79
dodgin' bass boats
Just fill up the last few inches of the trim tube with silicone and let it dry. Run a wood screw in it and pull if you ever need it out.
swapmeet
Brotastic
- Location
- Arlington TX
Why is f/a turned forward? It will be a water collector turned like that.

Its always been like that since I bought the motor.... I ran my ebox upside down all last year also LOL, didn't even know.
I just guess at this stuff and hope it works out.
- Location
- Fort Worth, TX
I used pvc for my trim and scupper tubes. I put threaded fittings on them so I could cap them off.
SkiDiggity
formerly kawirider142
looks good. are you going to paint the other side to match too or just say F it and leave it?
iangdesign
Cats, lots of cats!
- Location
- United States
Probably no more fun, now that it's summer and all you wanna do is ride and have two builds going on. Finish this one up and get the Juan finished up and go ride those bad boys!
Looks good swappie!

Looks good swappie!

swapmeet
Brotastic
- Location
- Arlington TX
looks good. are you going to paint the other side to match too or just say F it and leave it?
I may add something to the black and orange side to help the purple tie in, but my intention had always been to have a different scheme on each side. Hind sight, I should have done the top of the rail on the black side in black turf, because the purple is what is throwing off the look for me. Of course now i've screwed it all up with purple pinstripes... so I don't know what i'm going to do.
SkiDiggity
formerly kawirider142
After I wrote that I noticed the black turf on the orange side and purple on the purple side and sat here thinking wow I am dumb he probably did that intentionally... well all in all the ski looks cool and is way different than anything out there. Can't wait for the review!!! love the side exhaust too btw.
- Location
- Jackson MI
How do you find time to keep your shop so clean? JK man build looks great for the wife, let her tear it up.
swapmeet
Brotastic
- Location
- Arlington TX
Welp, minus the footholds, I got pretty much everything wrapped up last night.
Installed fuel lines
Turned the F/A (thanks Jetmaniac!)
Installed the right weatherpack plug
Plumbed the primer
Got it to start and run
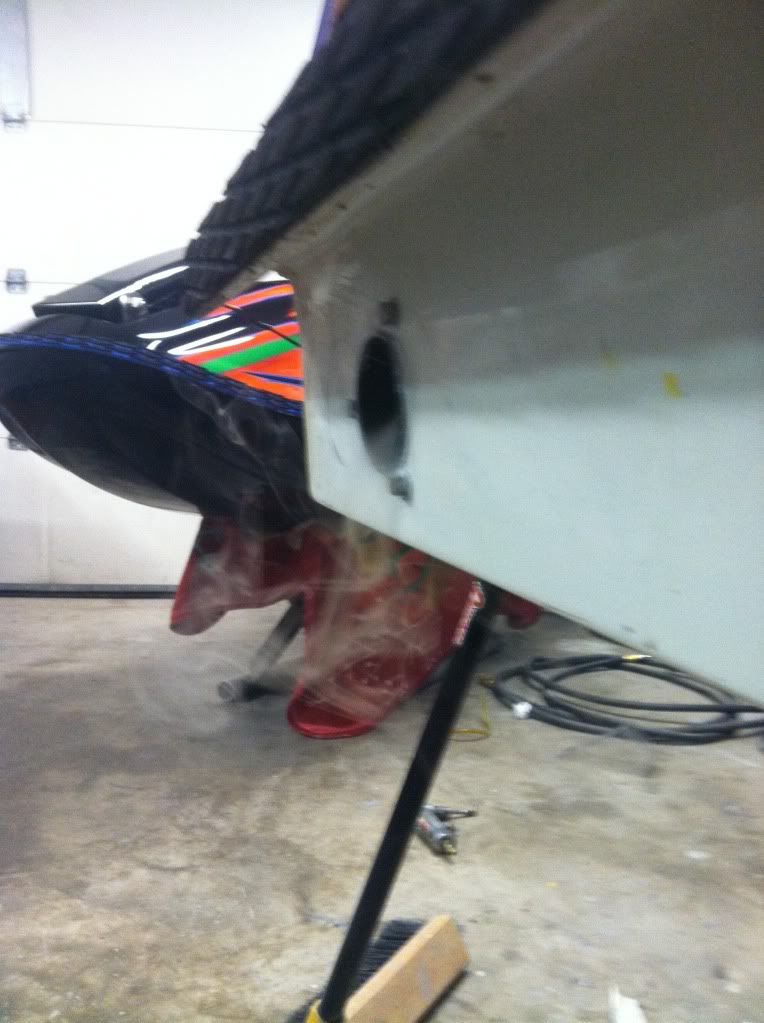
I thought I found a cap for the trim but it didn't work so I used Hornedoggs suggestion.
I still need to do the holds, but I think i'm gonna take it to the lake to do that, I'd like to only drill holes once.
To MCrider's point, my shop is so clean I didn't find the coupler cover until last night. Still need to throw that in.
Little smoke from the exhaust..... :sneaky:

- Location
- Discovery bay
Lol
Sent from my SCH-I605 using Tapatalk 2
Sent from my SCH-I605 using Tapatalk 2
VXSXH20
Sionis Industries
- Location
- Mid-Atlantic
Thats a hell of a mess for just a turf job!
I see somethin back there...best have a clean shop for that beauty!
I see somethin back there...best have a clean shop for that beauty!
SkiDiggity
formerly kawirider142
Love the Backie Chan hull just peaking around the corner in the back ground.. still awaiting pics on that beast!!!!! Awesome job and congrats for sticking with this build and finishing it to the end! This has been one of the greatest threads I have ever followed and I look forward to your upcoming posts on the Chan build  Way to go SWAP!!!!
