swapmeet
Brotastic
- Location
- Arlington TX
Been putting this off for a lot of reasons.
But I rode my ski for the first time yesterday... 24 days after I received it. I budgeted in my mind that it would take a month to assemble, if only because of little parts that I didn't have, or other possible issues inherent with all AM hulls. So 24 days was right in line.
Having a AM hull has been a massive learning experience. And the reason I came up with this name is because its the phrase i've heard from pretty much everyone who has owned even the highest quality AM hull. "Thats normal..."
But i'm getting ahead of myself. This will be a very minimal, factual thread about my ski going together. I need to take a bunch of pics of the paint, cause its amazing and worthy of its own thread lol.
Here is what I ordered:
Carbon Kevlar Backie Chan, non visual, with custom painted top deck and a black gel coat bottom.
No scupper or versa plug (despite Steve's wishes lol)
Sealed hood (breathe through pole)
Standard foot holds turfed to fit a size 9 shoe
I asked for a black gel bottom deck because I didn't want to have to worry about custom paint on the bottom getting screwed up from normal riding.
I wanted no scupper because they leak air when upside down. I'm gonna land wrong and away from my ski. I'd rather keep it semi air tight than have it take on a bunch of water.
What I'll be running:
Engine:
Jet Maniac Big Bore 781 on first bore.
Porting by 'Blue'
ADA head, 200psi (not sure dome size)
TBM Aluminum flywheel
Dual 38's set up by JM on stock intake.
ADA Kawi size billet couplers
Billet flywheel cover with plexi window
MSD Enhancer
Factory Bpipe with mod chamber
Xmetal first gen waterbox
JSS coil
JSS prepped ebox
Pump:
Solas 144 standard mag w/dual cooling (assembled by JM)
Minty OEM wear ring
Hooker 10/16 impeller
stubby cone
85.5mm reduction nozzle from #zero
ghetto quick steer on a OEM steering nozzle
Controls:
Xmetal comp length pole, bracket etc (Black)
Xmetal adjustable steering (Black turning Purple)
ODI lock on grips
Cold fusion finger throttle (Black)
"Big bore" throttle cable
Bar mounted RKO bilge switch
Misc:
1.87 gal kart tank
Rhaas motor mounts
Single 500gph Rule bilge (may add a second)
Antigravity 12 cell battery
WDK billet hood latch (Black)
Aluminum ebox plate w dimple die holes for strength
Many of you saw the crate (LMAO) so no need in reposting that pic.
But I thought it would be worthwhile to mention how nicely the ski was crated. A picture is worth a thousand words... so i'll let them talk.
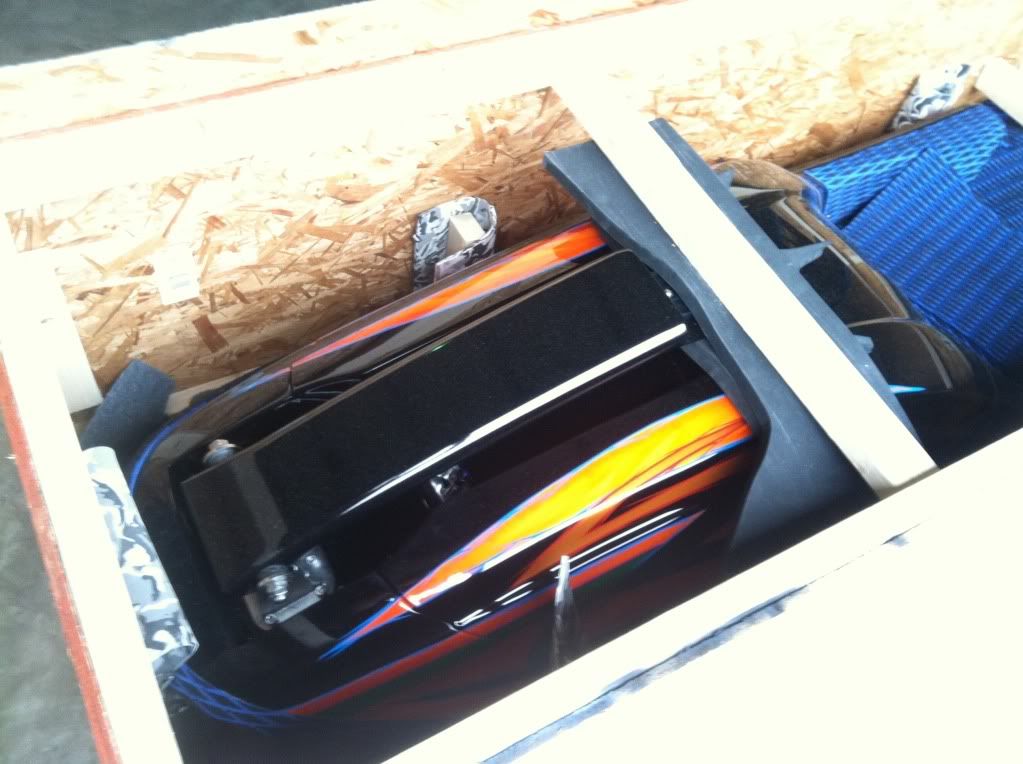
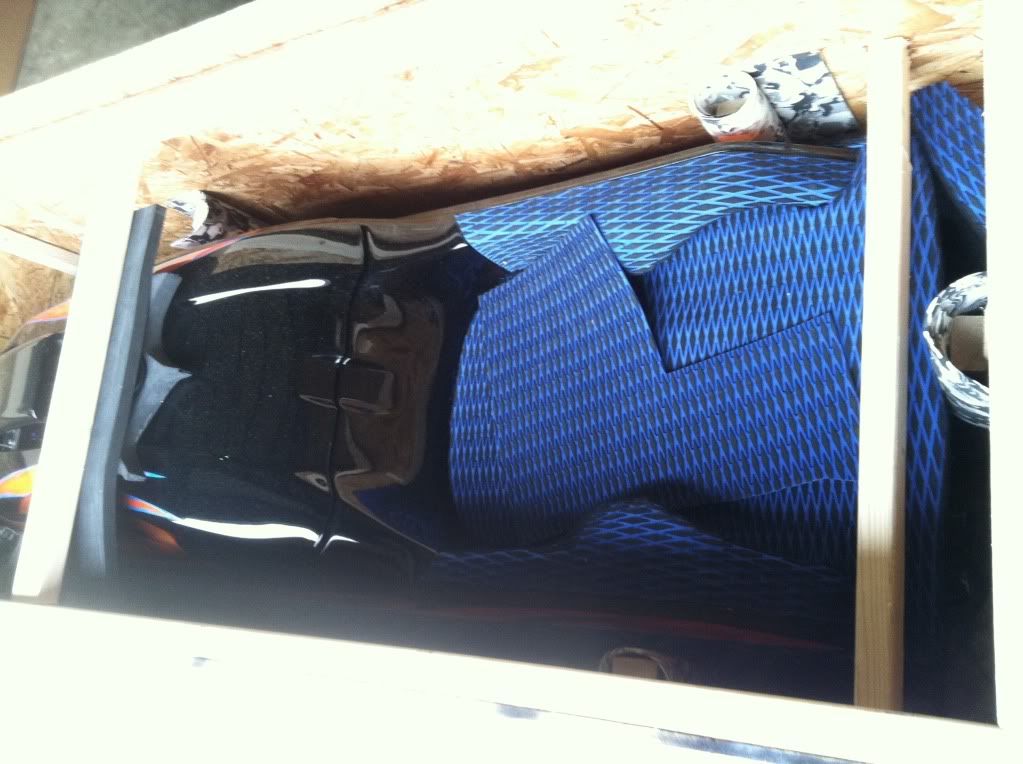
The crate was build like a brick poop house. And working in a industry that has product damaged in shipping on a regular basis, it was a relief to see how well the ski was packed.
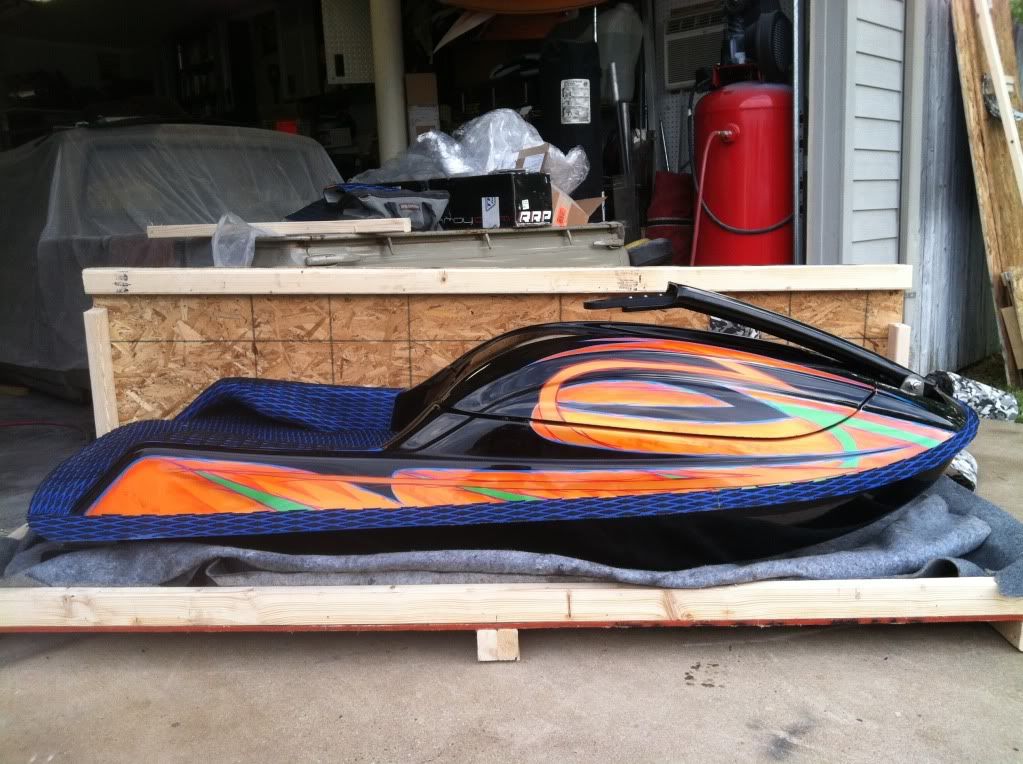
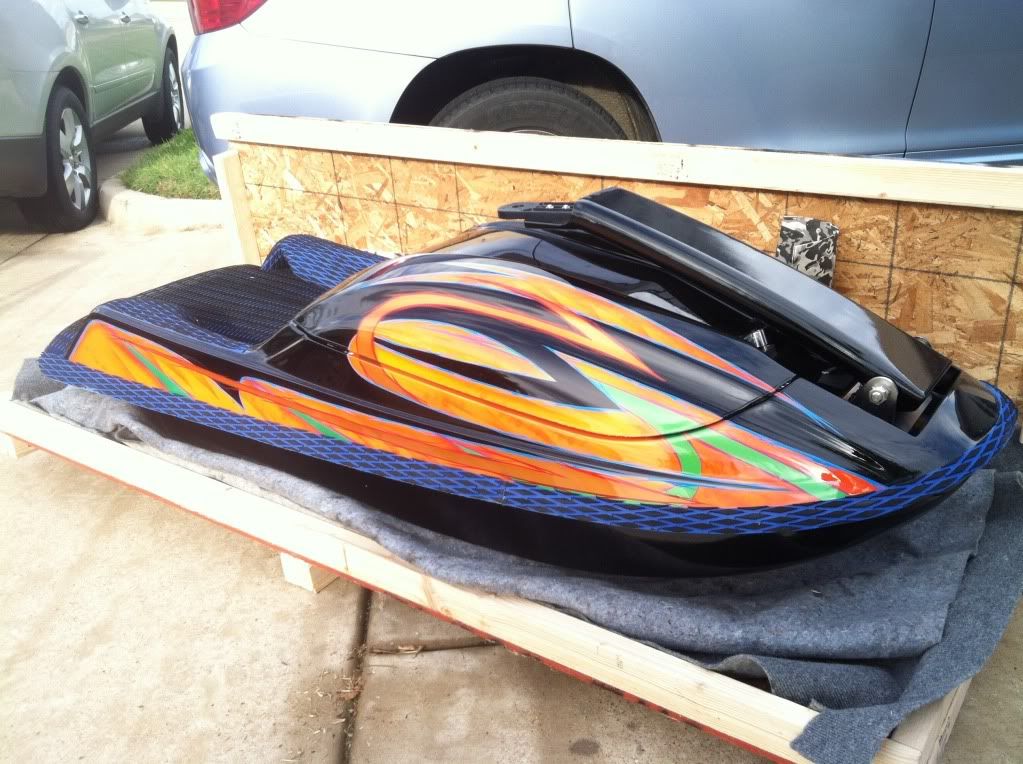
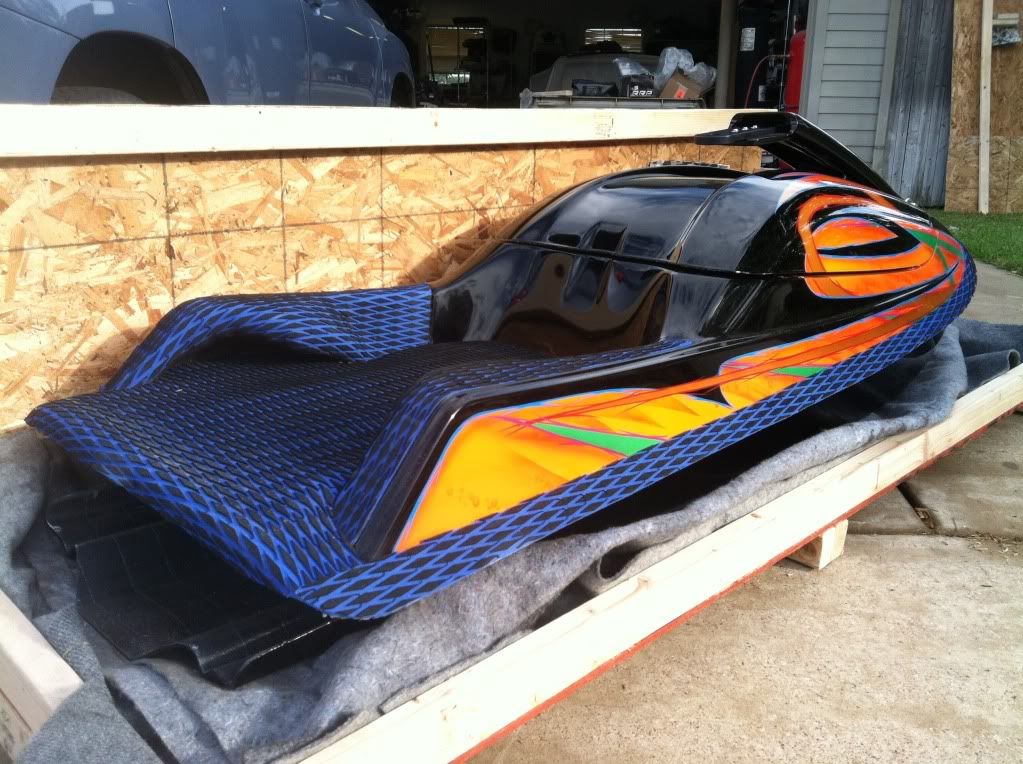
Photos just don't do this paint justice. It looks almost florescent in the sun, it literally burns your retinas with the contrast of the orange, yellow and black... I'll try to take some really killer photos soon, but the sun will have to be just right for the camera to get the exposure.
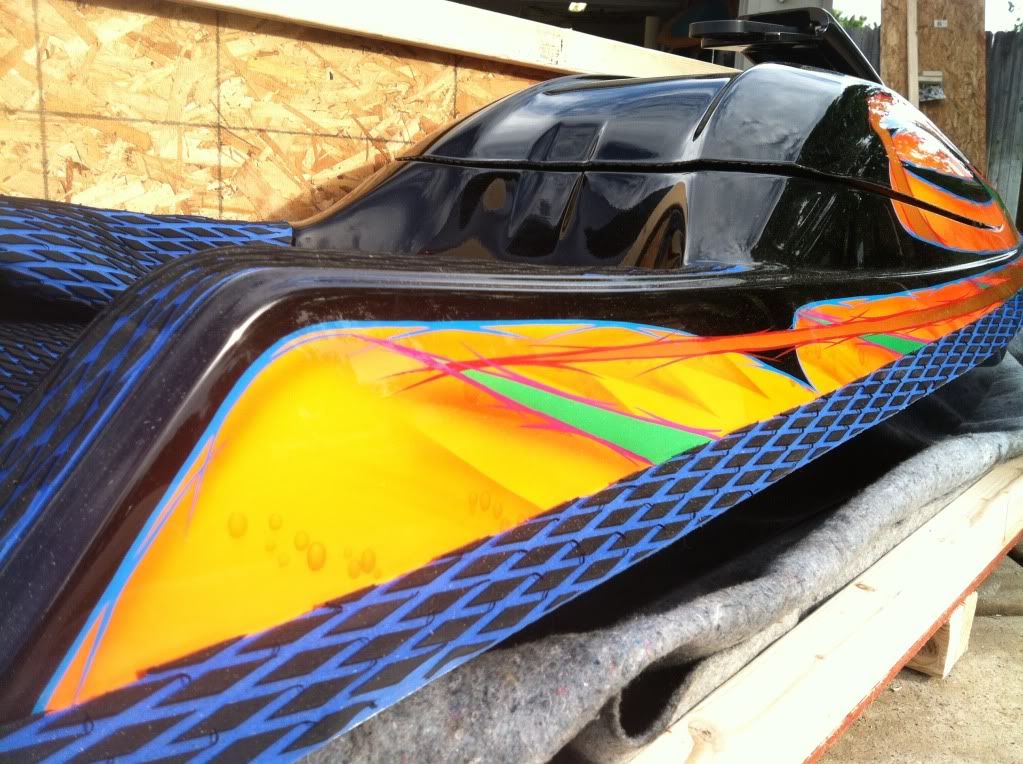
Very symmetrical for custom paint. That's not easy to do btw....
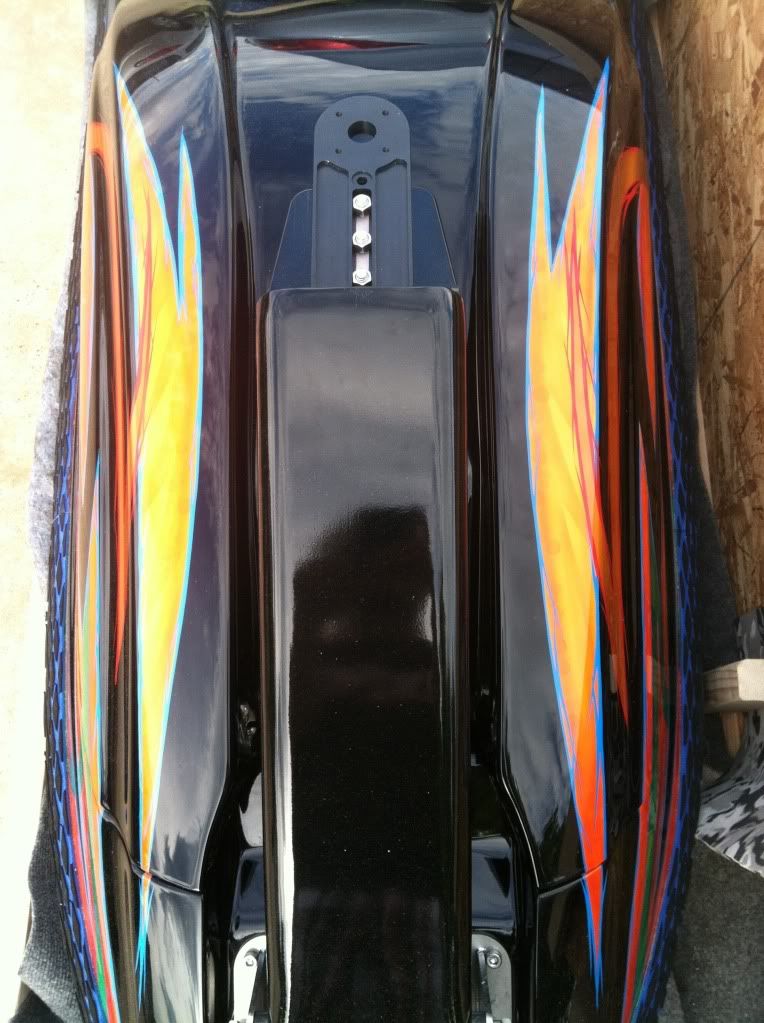
As you can see, the pole was installed when I received it. I ordered it through the best parts vendor in our industry IMO, JetManiac...
Steve and I discussed the possibility of painting the pole to match the ski, but once he had the design laid out, there was no point. Steve had some time while waiting for the truck to pick up the ski, so he installed the pole for me! This may not sound like a big deal, but this carbon kevlar isn't like a damn SJ. drilling and cutting the kevlar is a PITA, so this was a service that I would have paid for if Steve asked. He did not. (Should have since I'm such a PITA customer LOL)
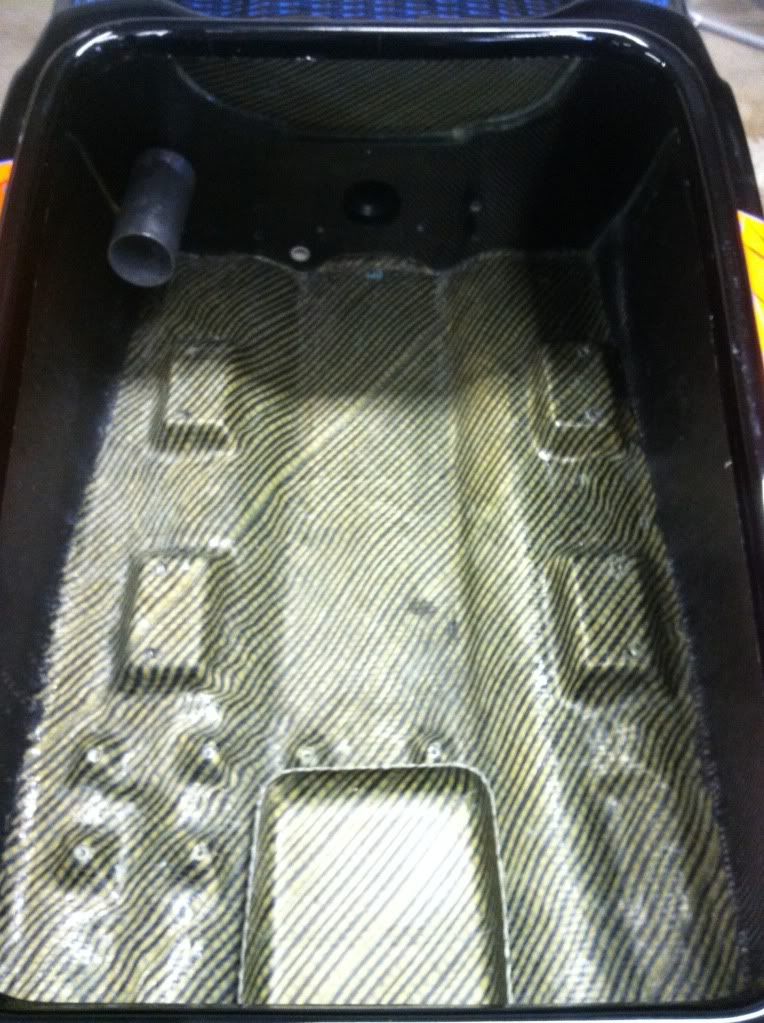
During the build process Steve would call to make suggestions/ offer alternatives. One of these was carbon sides on the engine bay. The carbon Kevlar is hard to get a clean cut edge and the carbon makes for a nicer finish. Plus it looks cool!
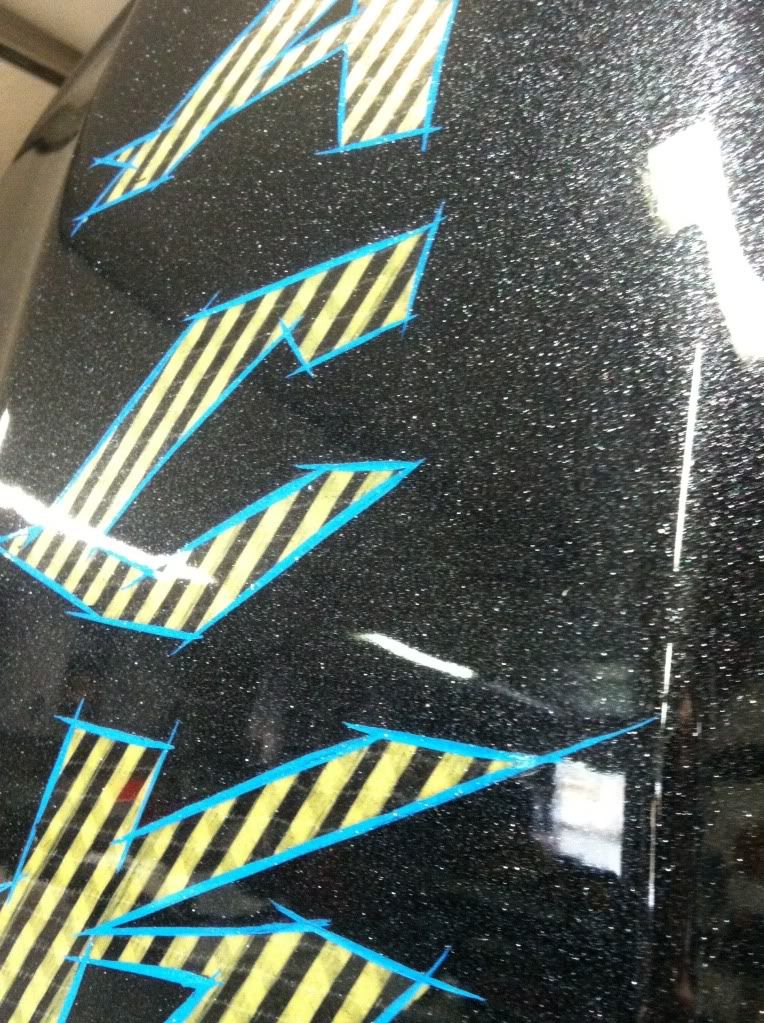
Steve always likes to do little custom touches to things, i'm the same way. He decided to do visual "Backie Chan" letters on the bottom which look great. But then he wanted to stripe the letters... which means having to clear it. So he called, checked with me, I said "sure", then a metric ass ton of ice pearl found its way into the clear LMAO.... I'm not complaining, it looks sick, its like getting surprise polished billet anything. It looks great but you're always worried about it getting jacked up in the weather etc.
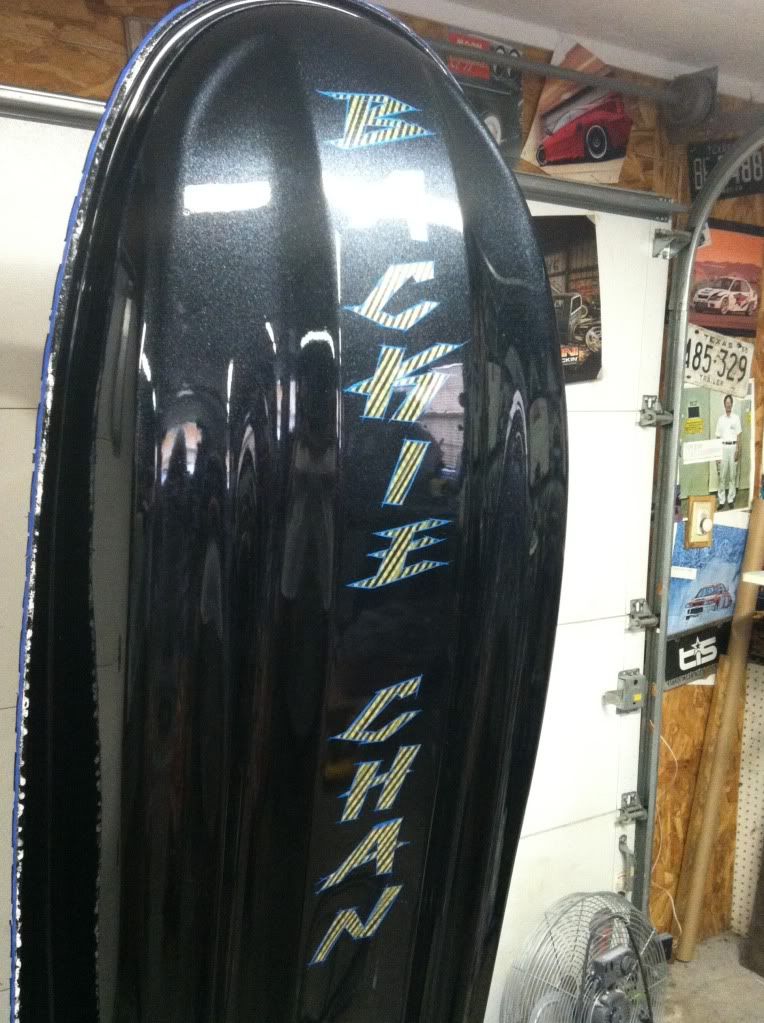
Detail of the pearl and letters.
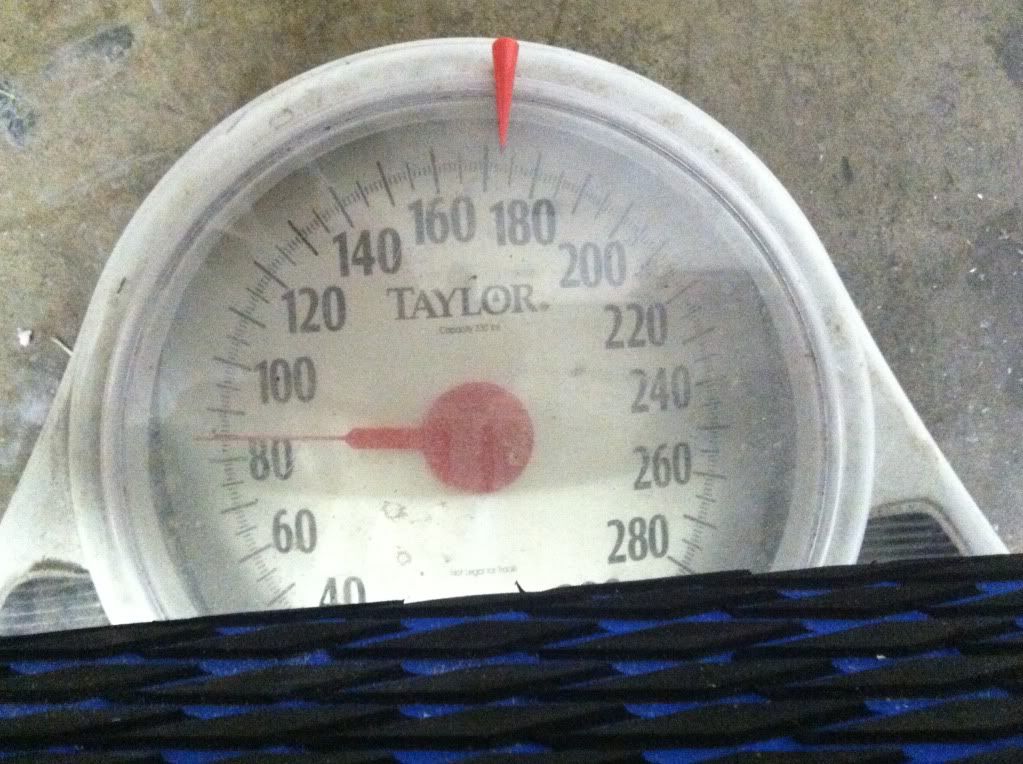
I tossed it on a crappy bathroom scale, so I could see how much it weighs before I started throwing things on.
The hull, hood, pole and pole bracket weigh about 85lbs.
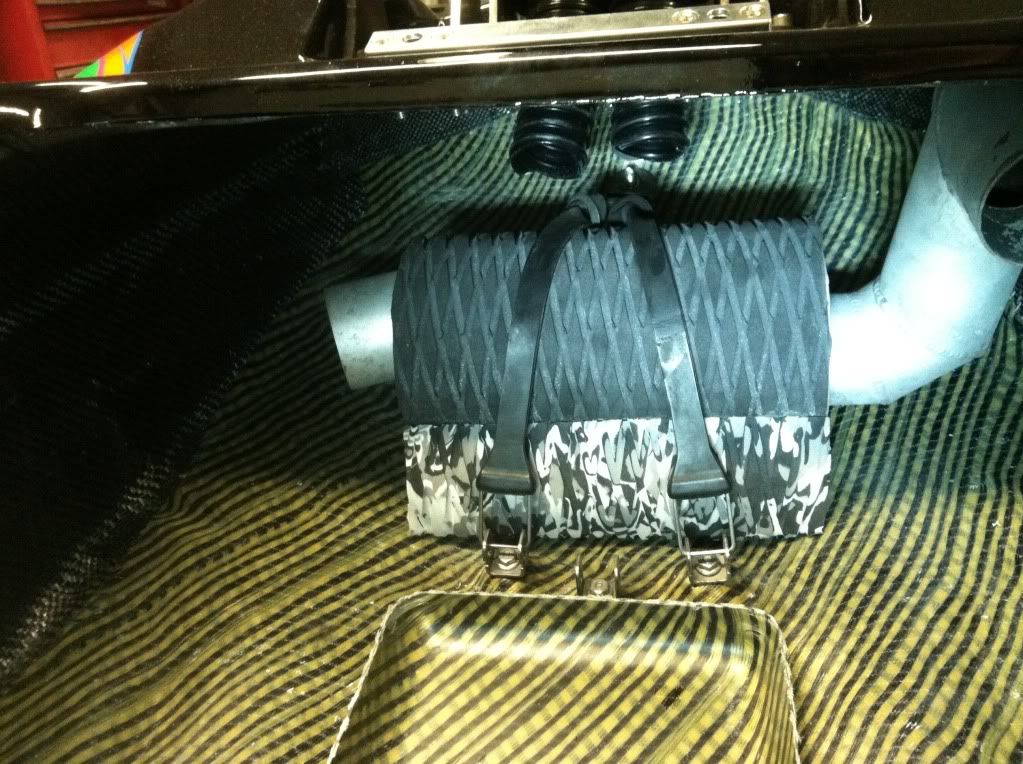
I'm using a first gen Xmetal waterbox purchased from 4Seasonspower.... the space is tight, a small waterbox is recommended.
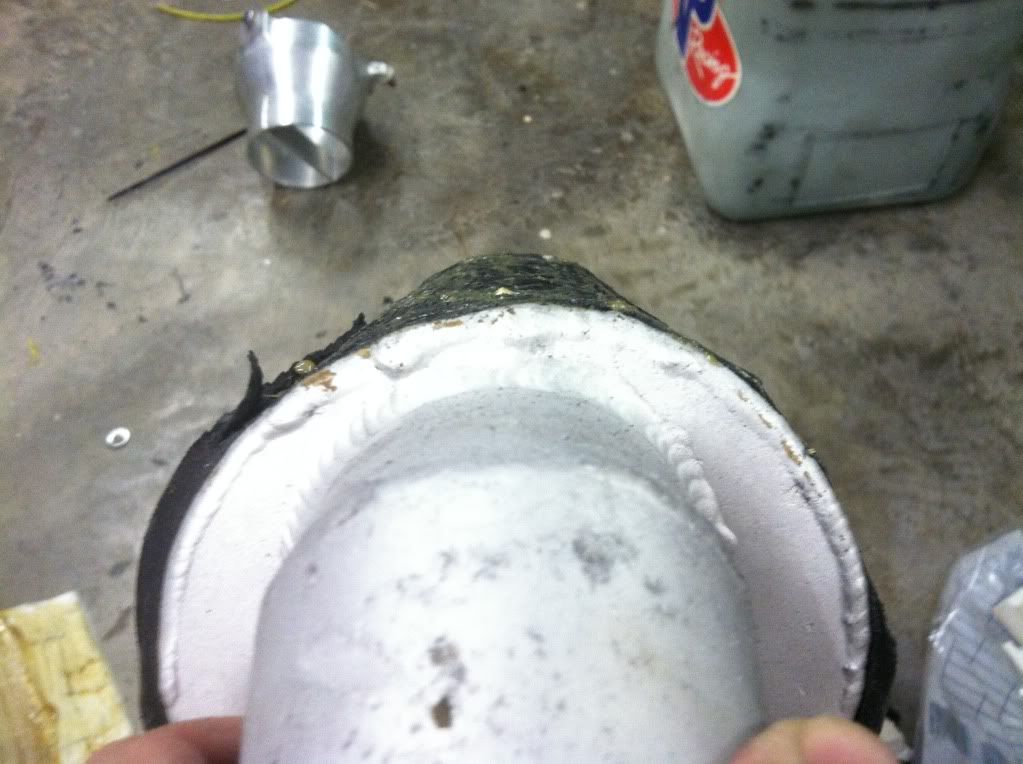
I made a 'foot' for it out of underpad and turf.
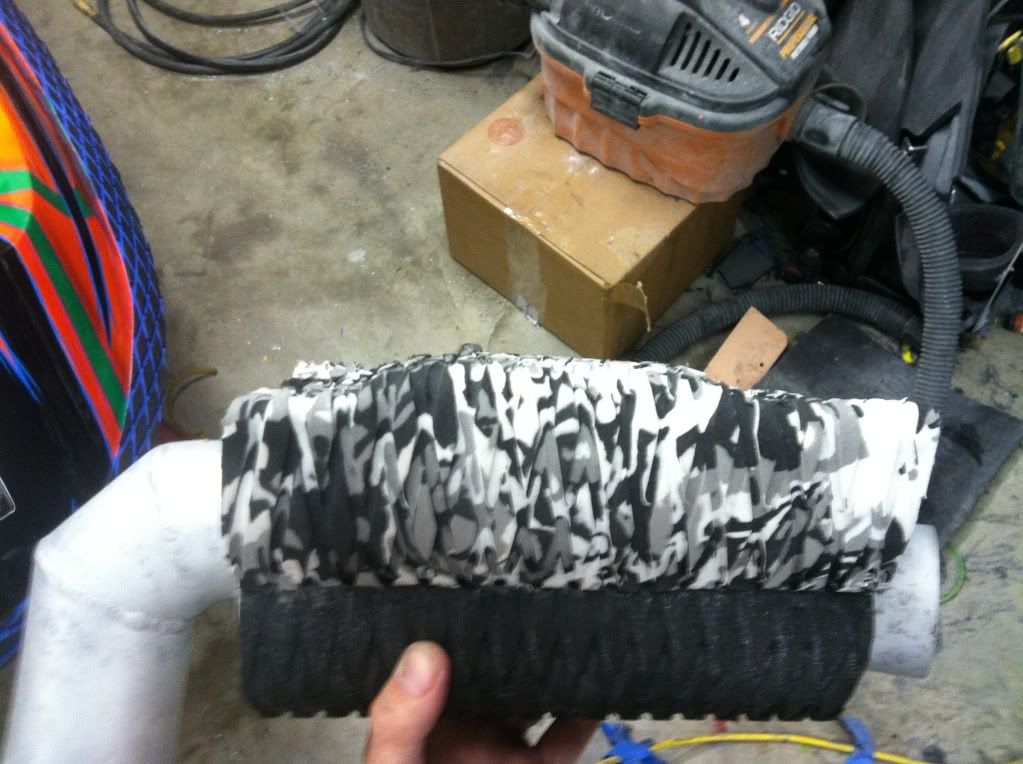
This is not the final location, when everything was said and done, it needed to be in front of the steering cable and SS wires.
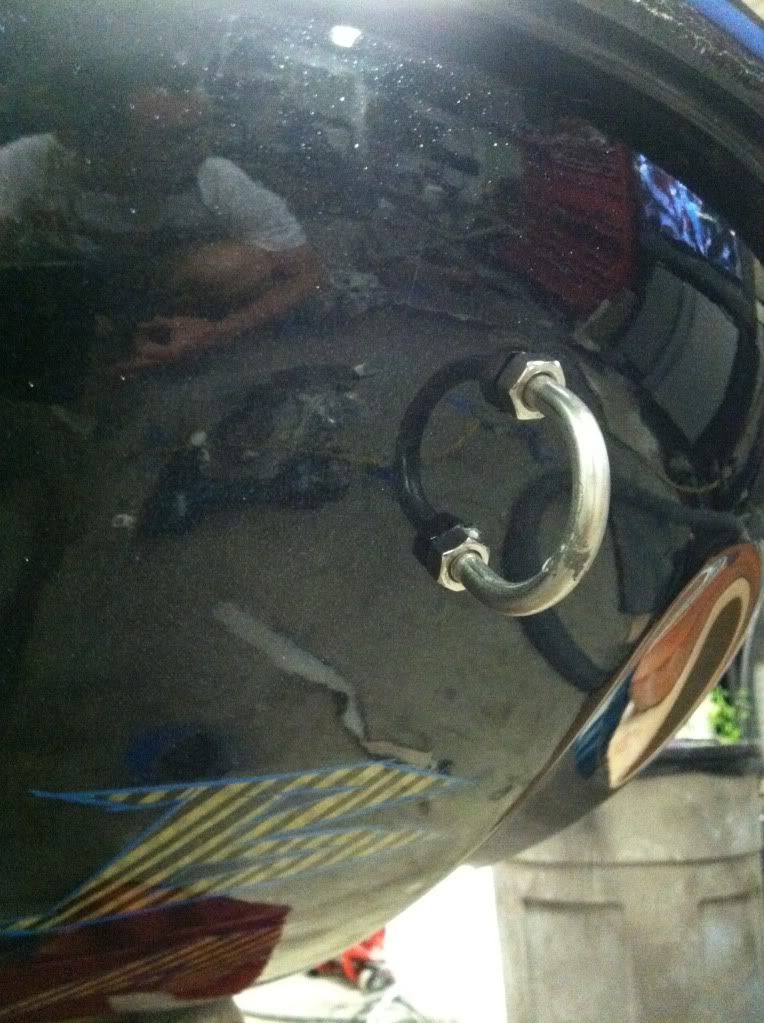
One of the first things I did was mount a U bolt for towing or tieing the ski down. For a moment I was going to name the ski "The Black Pearl" because of the pearl on the bottom, and because while mounting this I was watching Pirates of the Caribbean. And while drilling the holes I could hear Steve saying "Stop blowin 'oles in muh ship!!!!" LMAO...
Here is a pic of the U-bolt, with me watching Pirates of the Caribbean (you can almost see it in the reflection), while playing "The Circle Game" with all of you...
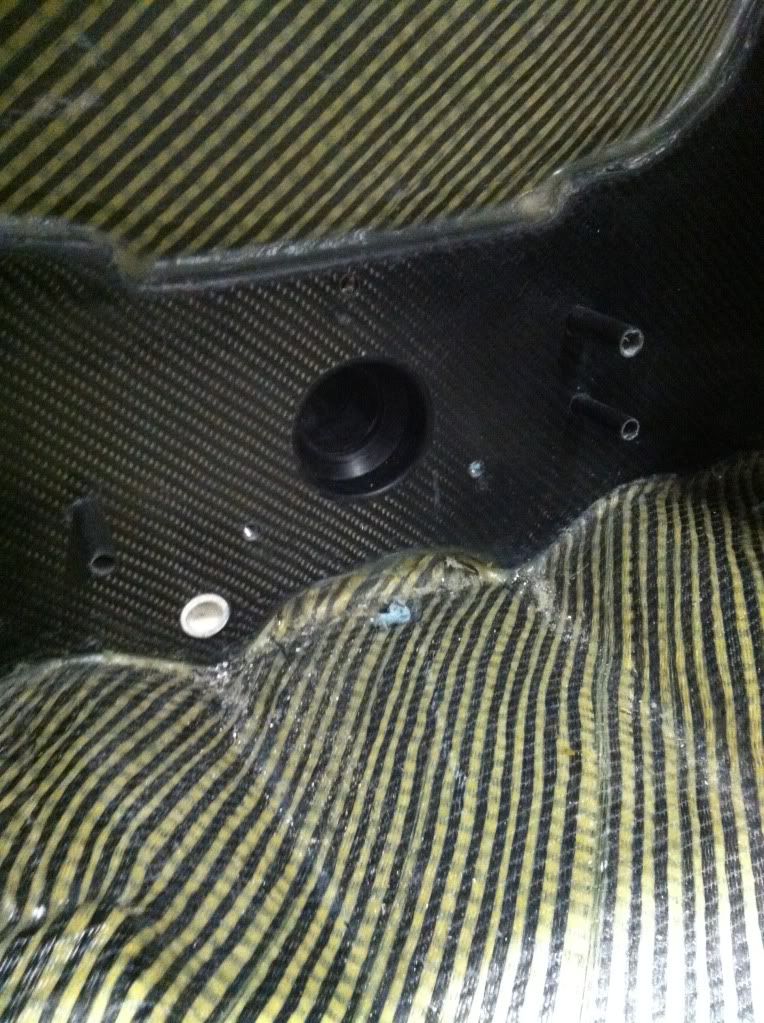
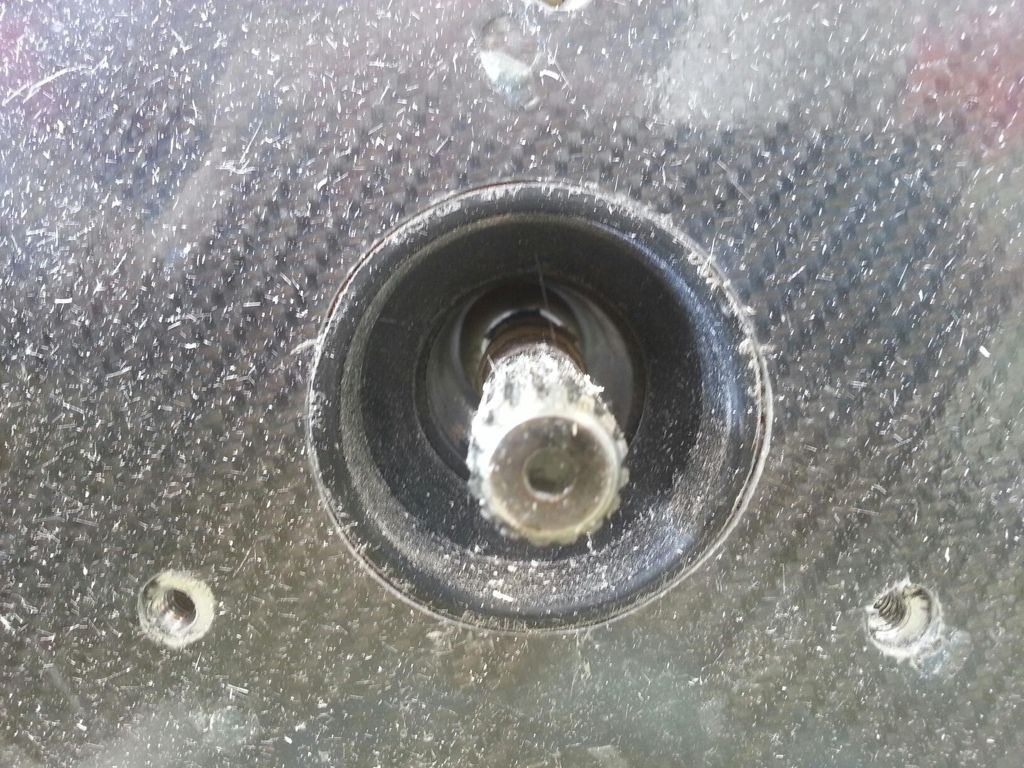
One thing that I more or less demanded was a recess for the midshaft to flex into. Steve found this awesome plastic hooptie and I believe I have the first ski of the bunch to get this, and I think all subsequent hulls will have it... So.... yay me.
Steve offers a optional composite ebox plate, which I believe glues on and keeps you from drilling holes in your dash. I didn't get one, I built one from sheet aluminum instead. Here is a pic by pic of how I made it.
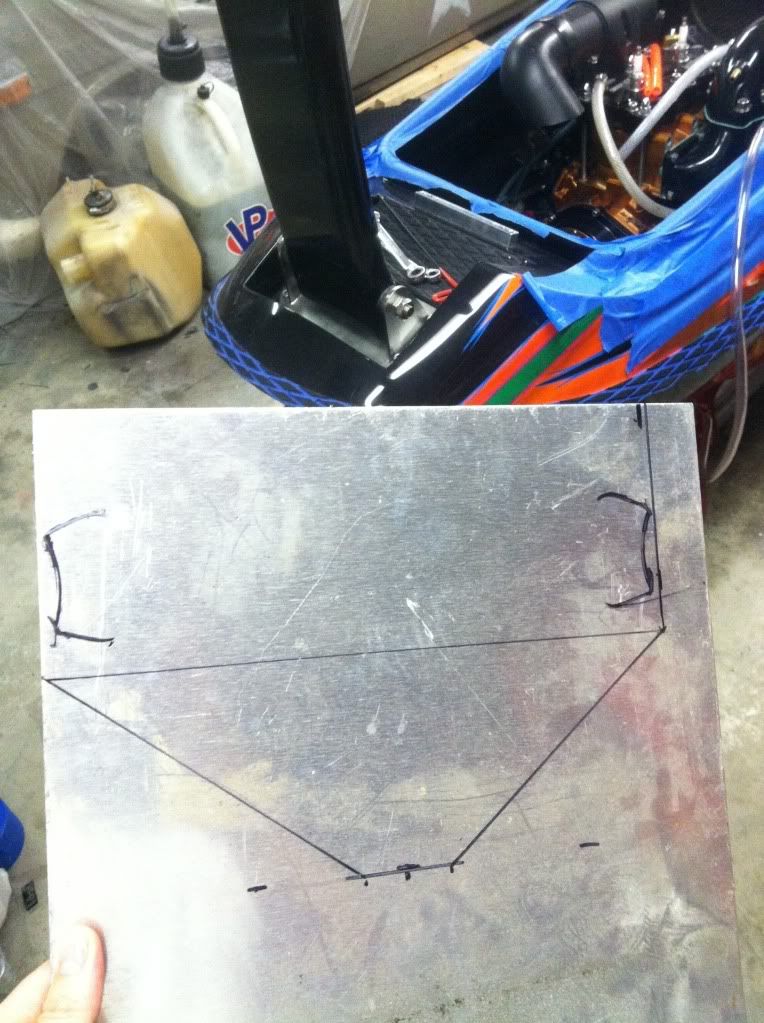
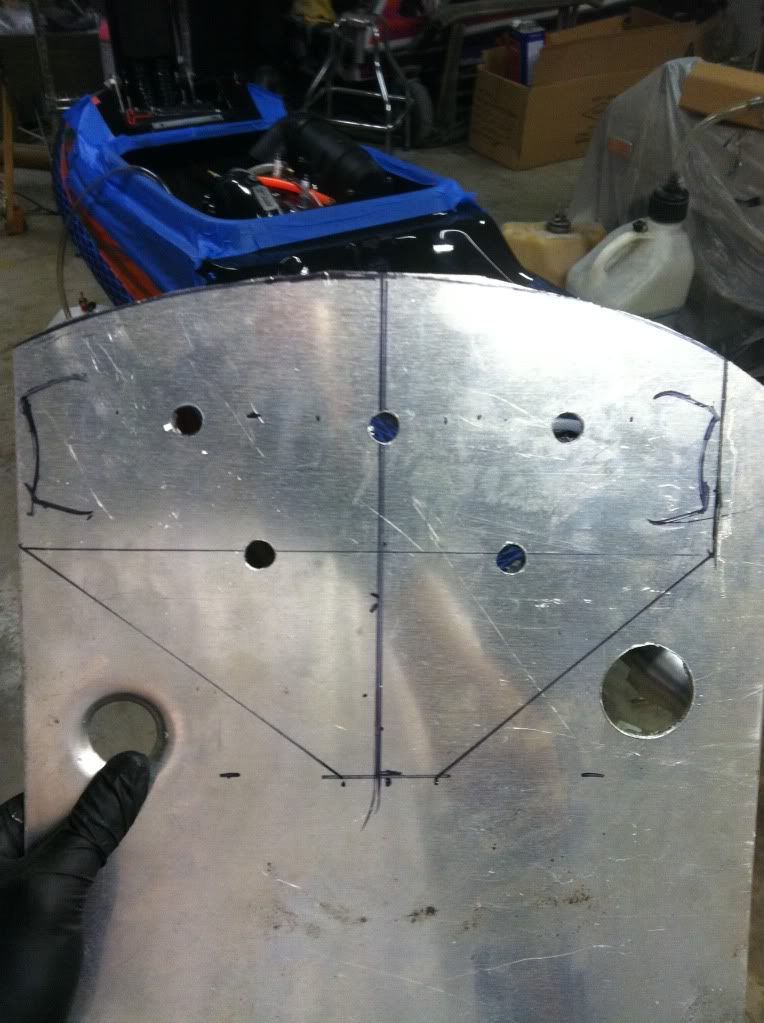
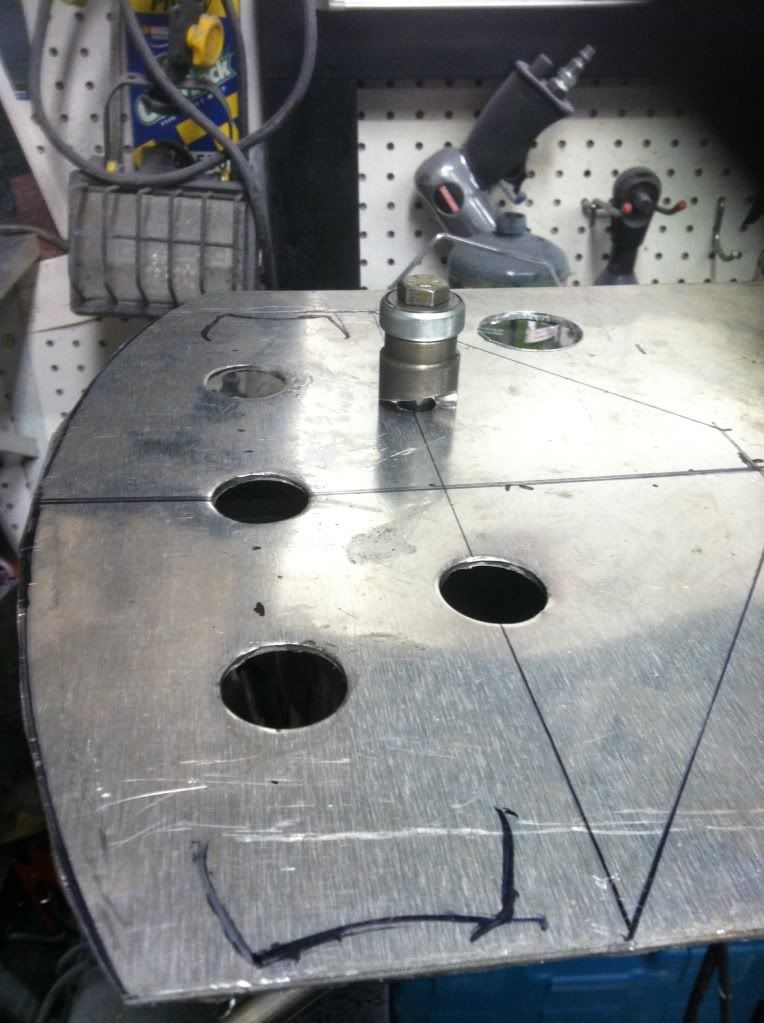
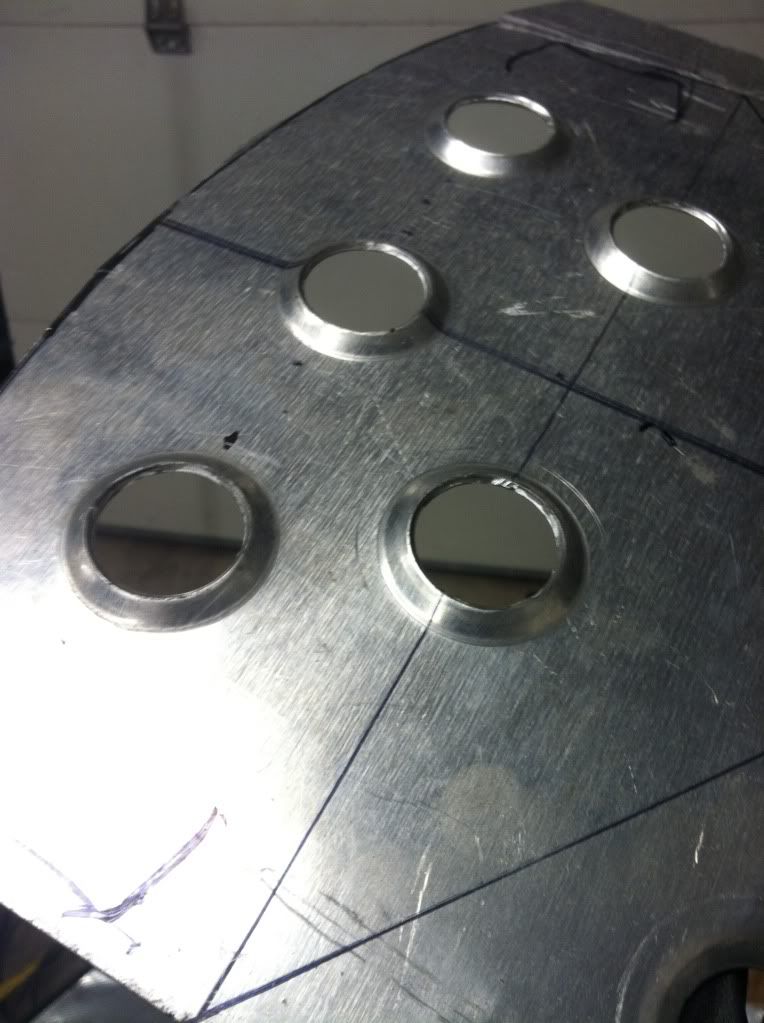
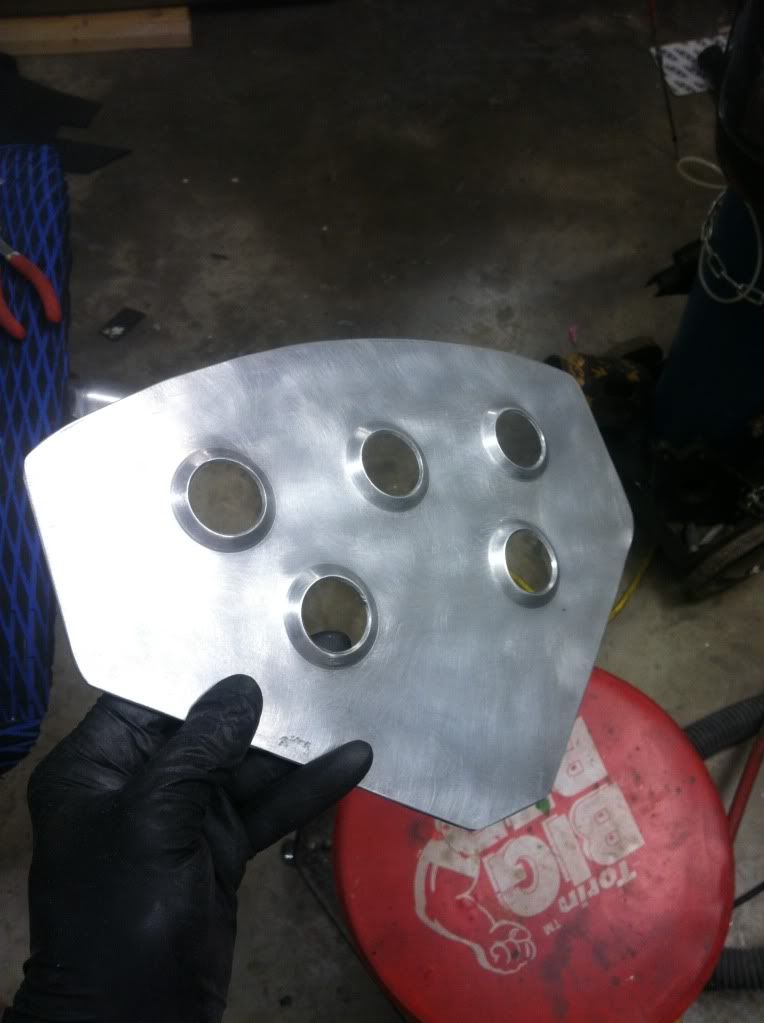
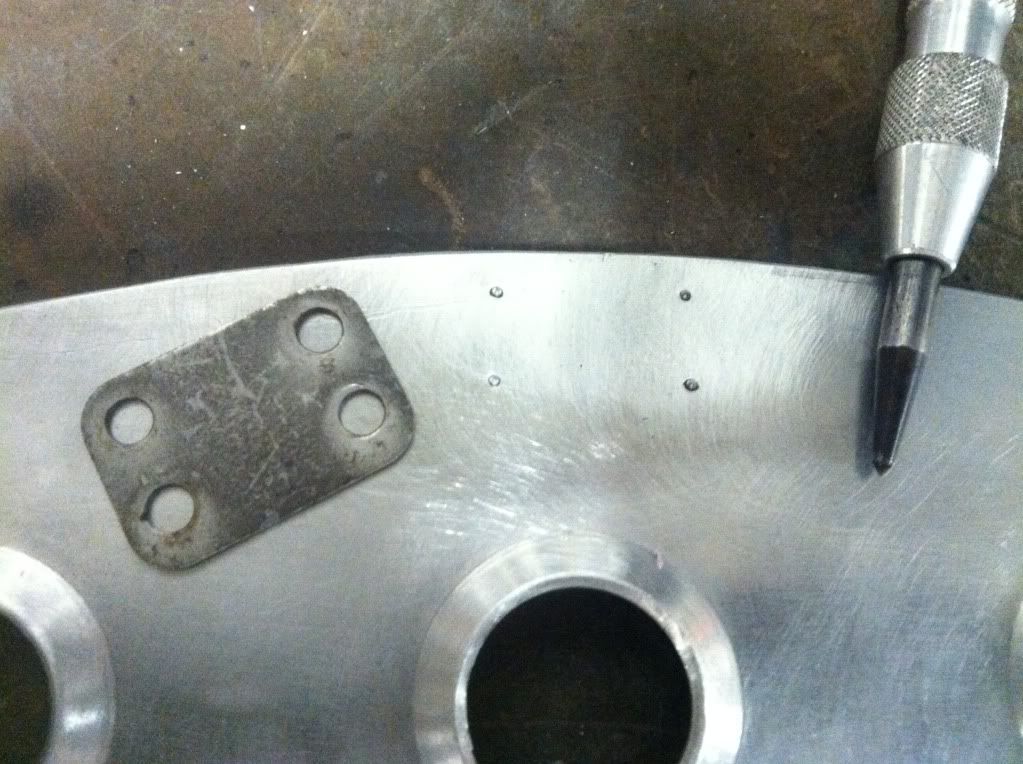
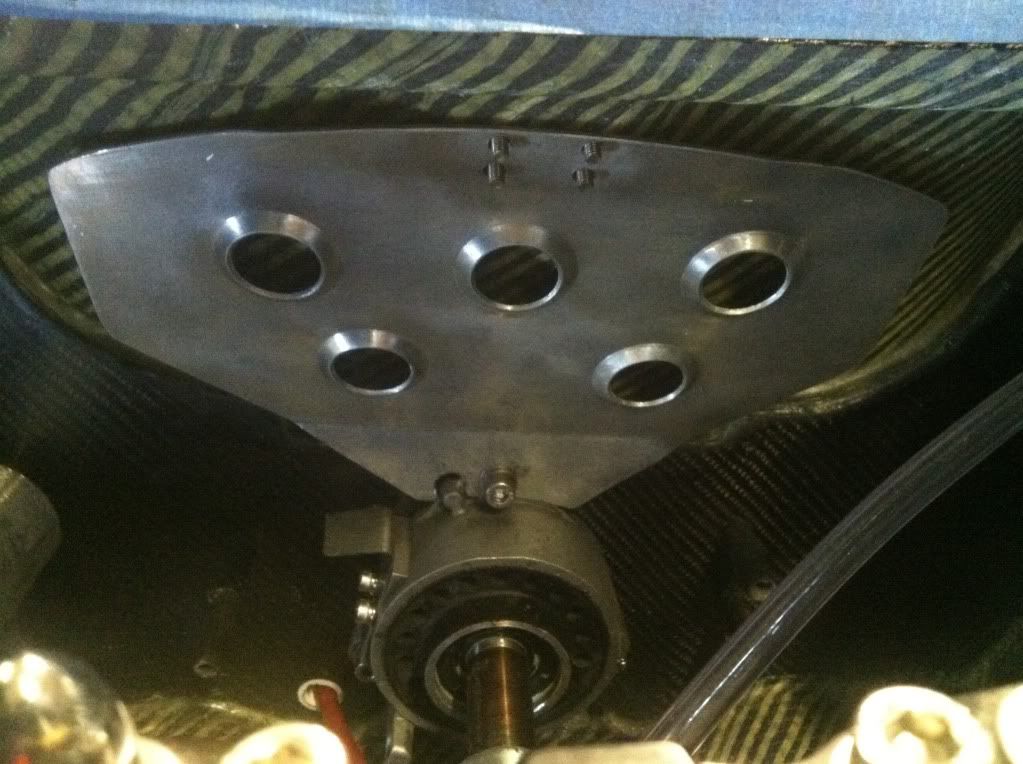
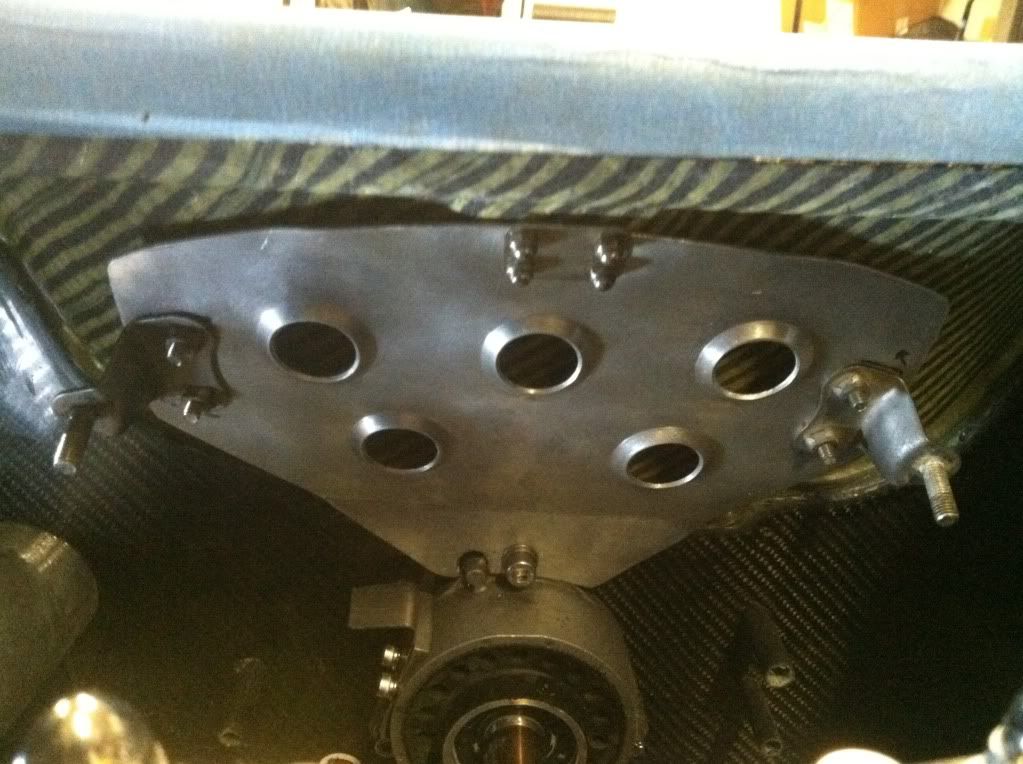
I ended up painting it with black epoxy spray paint, and its amazingly strong. Very happy with my work considering I had no idea what i was doing.
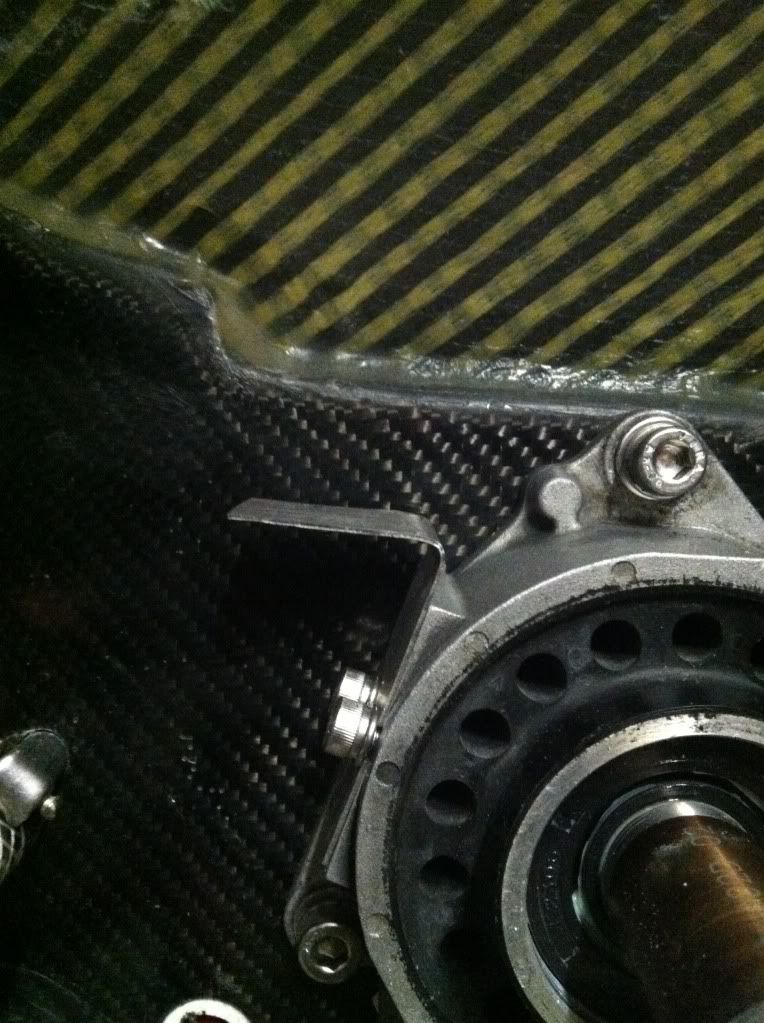
Because of how the midshaft needs to be clocked (for celarance from the bottom of the hull) you can't use the midshaft alignment mount with the factory coupler cover. I made this little metal tab out of stainless, but I didn't have it extend far enough towards the motor, and the coupler cover does not catch. If and when I take it apart, i'll make another one.
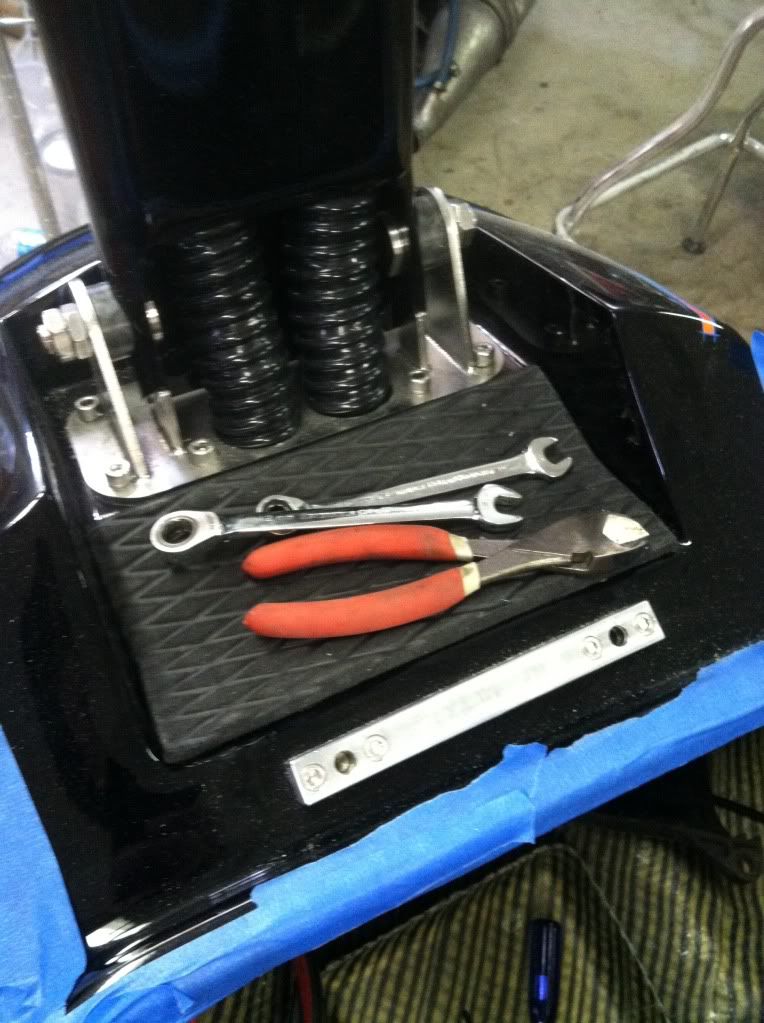
As I got started installing the engine, I noticed I was laying the tools just behind the handle pole, which was a painted surface. I cut and sanded a piece of molded turf and glued it to this spot. Worry free tool spot now!
For anyone who wants to see... the pump cavity.
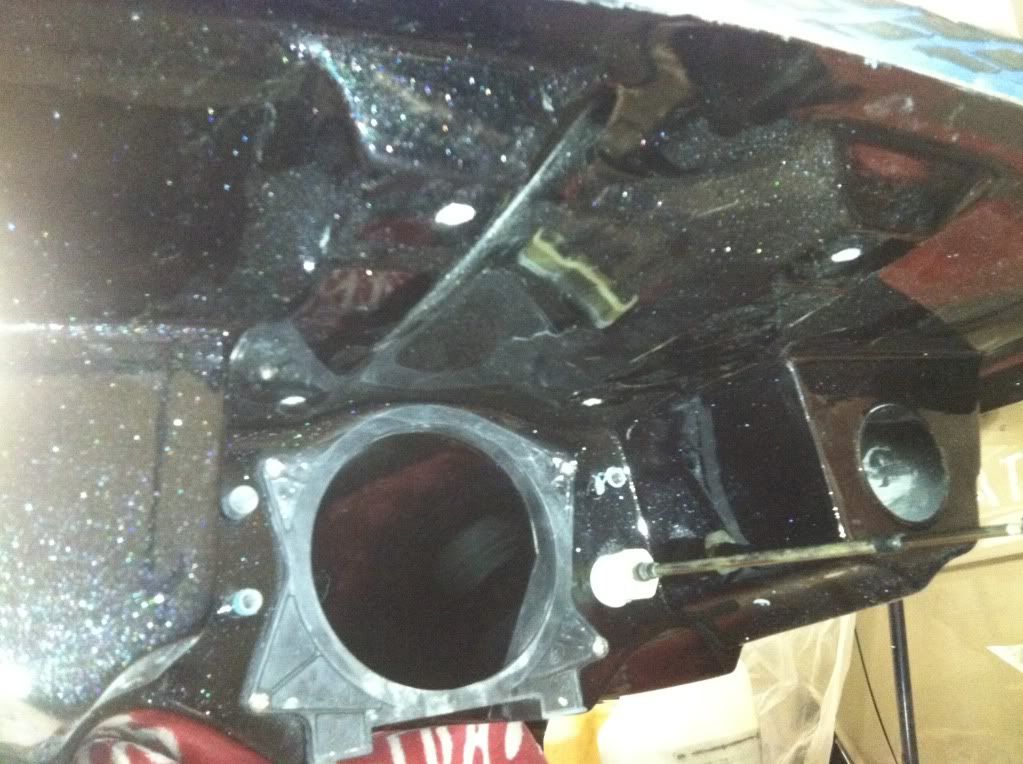
I had to file the holes on the pump a smidge to get fitment. I'm talking 1/16th of an inch, if that... very little... see thread title.
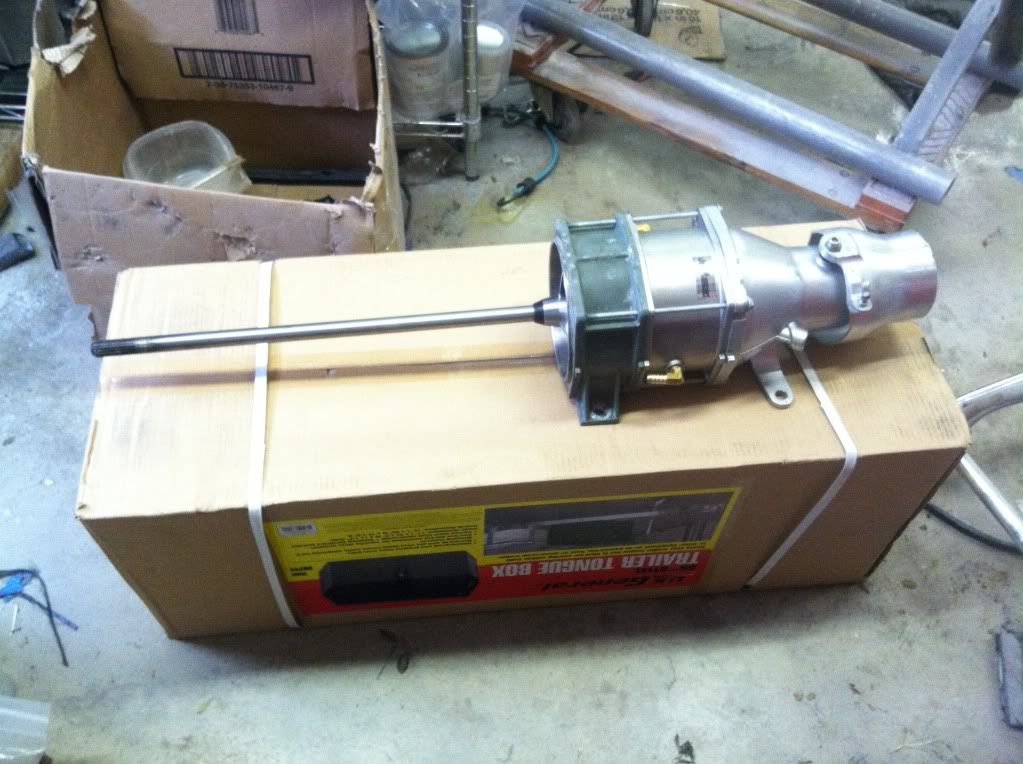
Solas 144 non setback mag built by Jetmaniac, bought from Brian (Deftons) along with the ATP nozzle that I could never get to center. (nearly chunked it the Sat night before I rode the first time... maybe thats normal too lol)
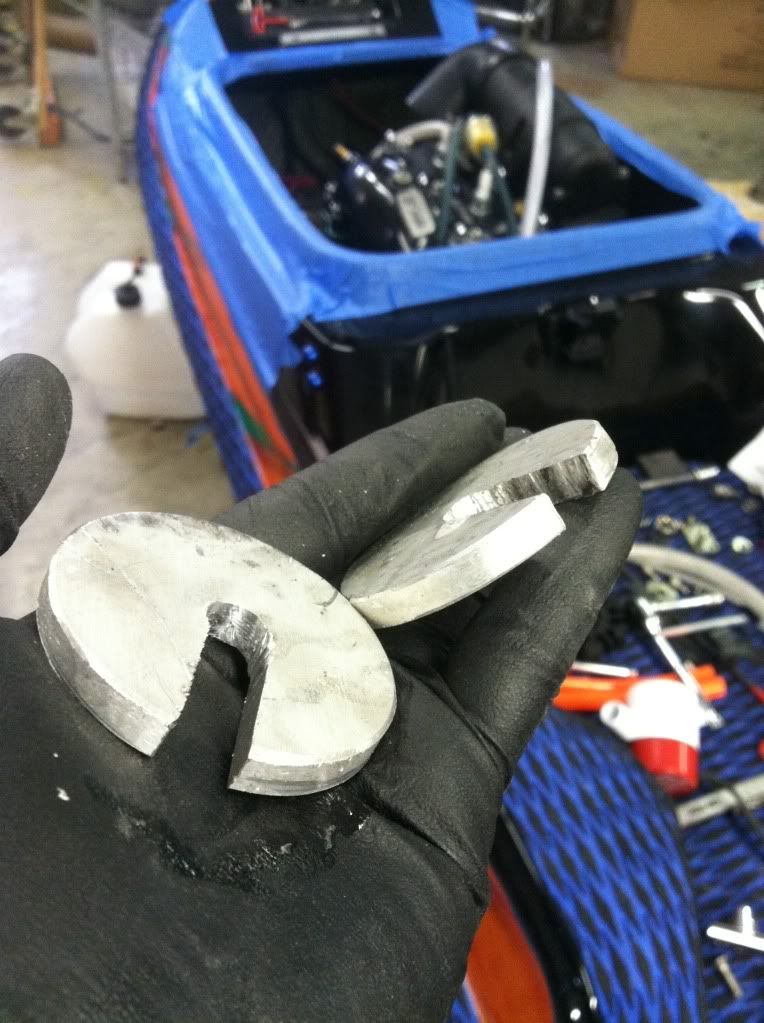
When it came time for engine alignment... my RN uses a TON of shims, and having 8+ indvidual shims is a royal PITA. So when I dropped the engine in (my old lady helped, didn't want to scratch it!) I could look at the gap and angle of the two couplers and see that it would need 'a lot' of shim in front. So I took some scrap 1/4" aluminum plate and a hole saw and a grinder and made these.
I guessed at 4 fender washers on each rear engine mount.
Swear to god this was my "this should get me close" guess... So I install everything, slide the motor side to side and.... "holy sheiot... that looks aligned!"
I even called Mr Miyagi over to check my work (he's WAY more perticular about this than I am) and after playing with it for a second he said "It doesn't need anything...That's aligned..." (resisting need to post a gif right here.....)
So yeah.. friggin awesome...
Also want to mention that besides one midshaft insert, all the holes and inserts in were well placed, of propper depth (no need to shorten bolts) etc...
The pump mount inserts are tapped to a more standard metric thread so customers arn't tied to the OEM thread pitch. He included bolts with my ski, not sure if this is Steve being a sweetheart or if he does this for everyone.
Engine in:
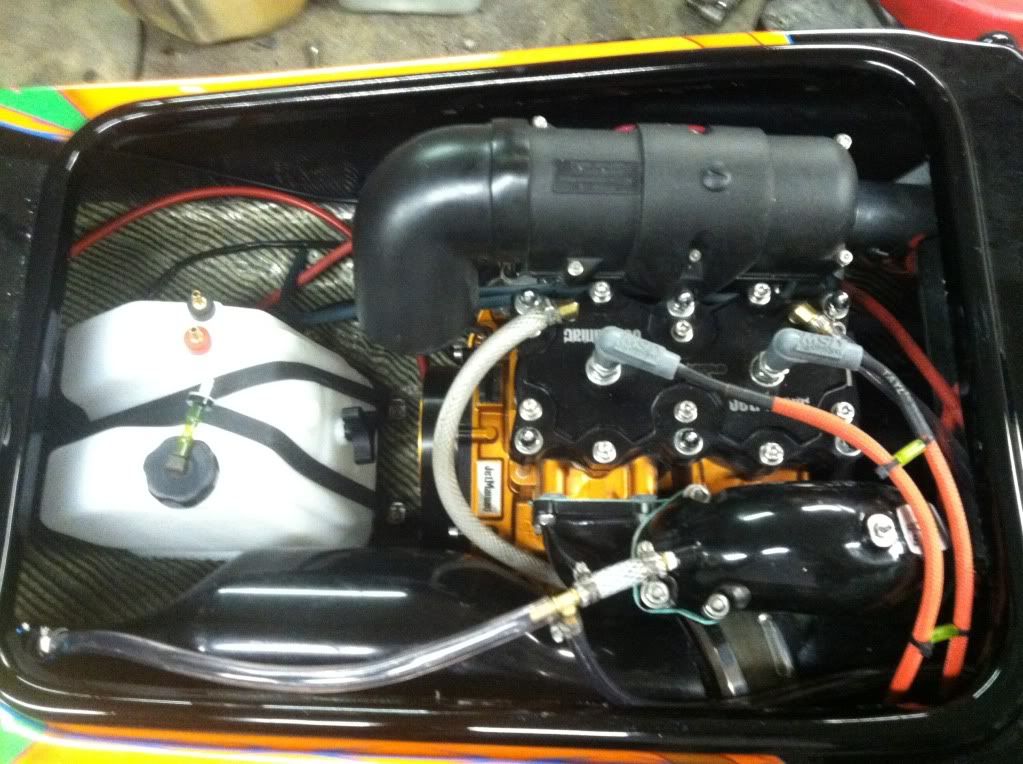
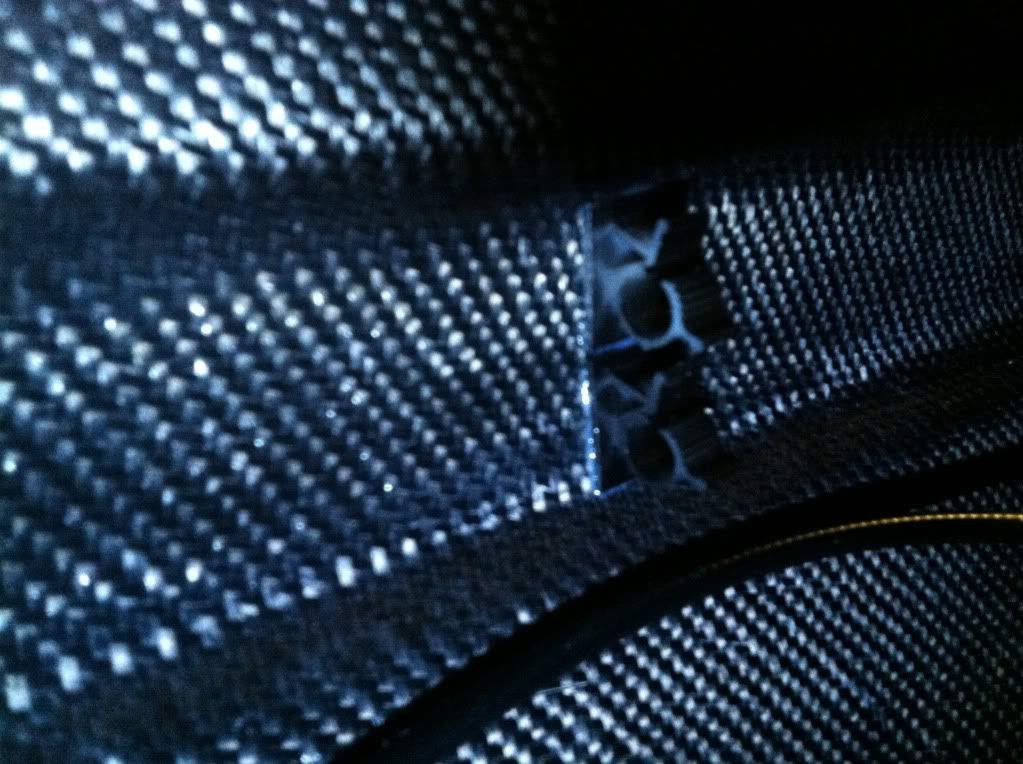
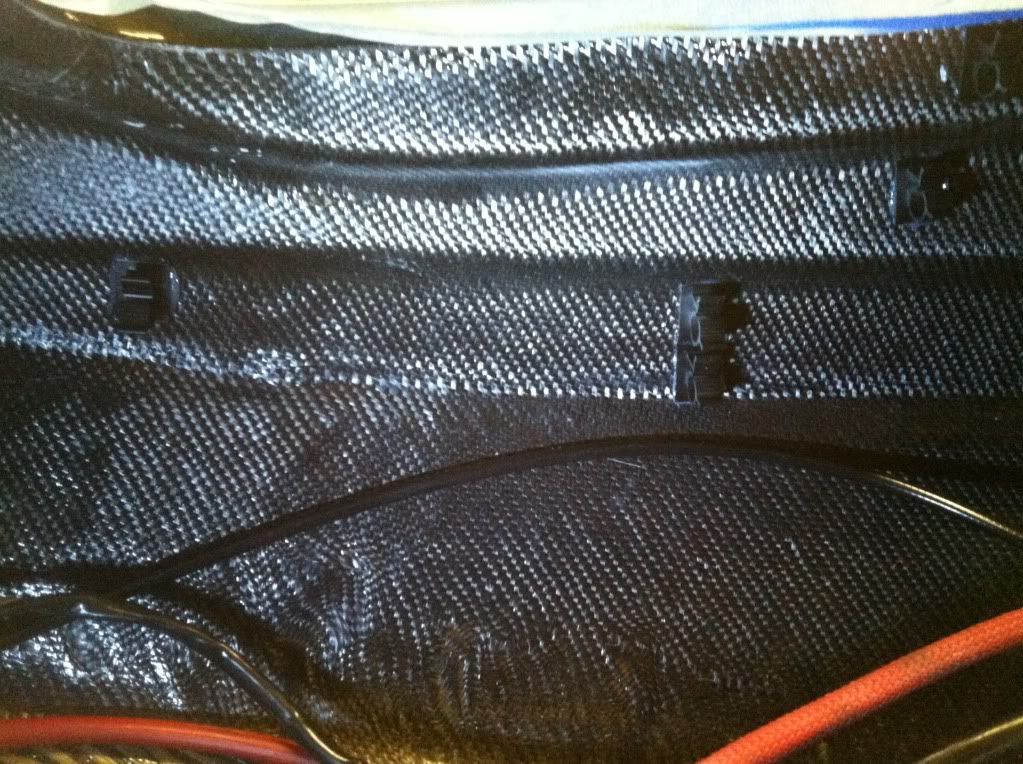
I found these cool clippy things at the hardware store, painted them black and epoxy them to the hull. I need more!
On the dash, I wanted to run a LED for my bilge pumps so as not to kill my antigravity battery.
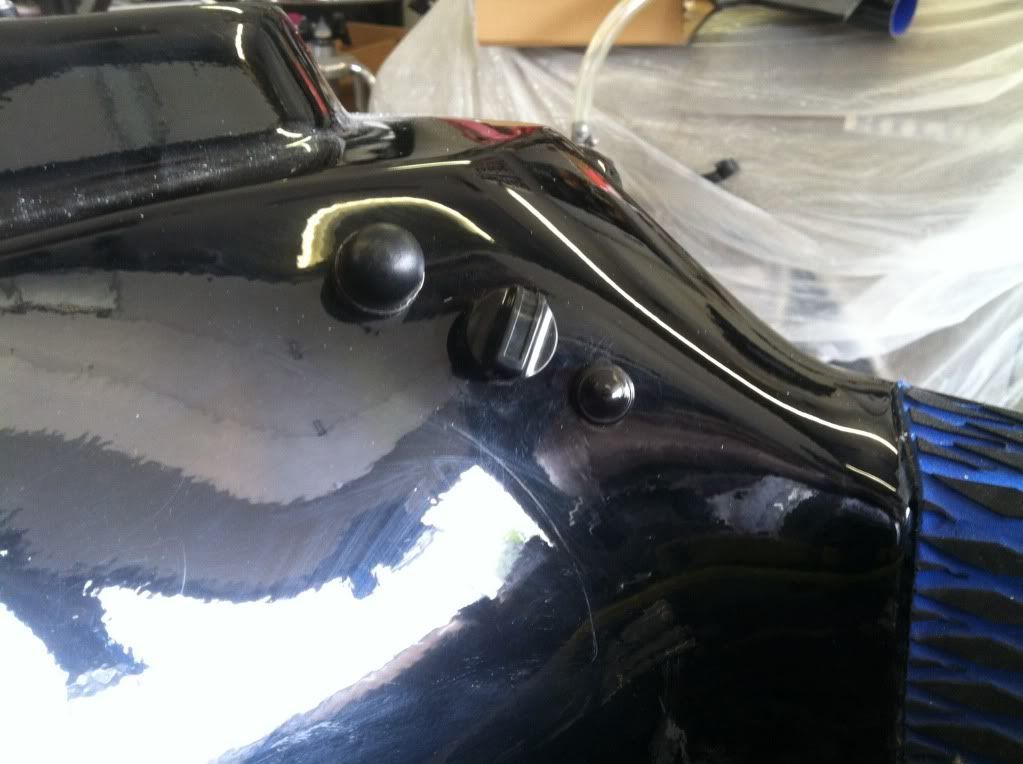
So here is the primier, Bilge switch, and the LED, which was stupid bright, so I used a lens tint to black out.
Bilge on!
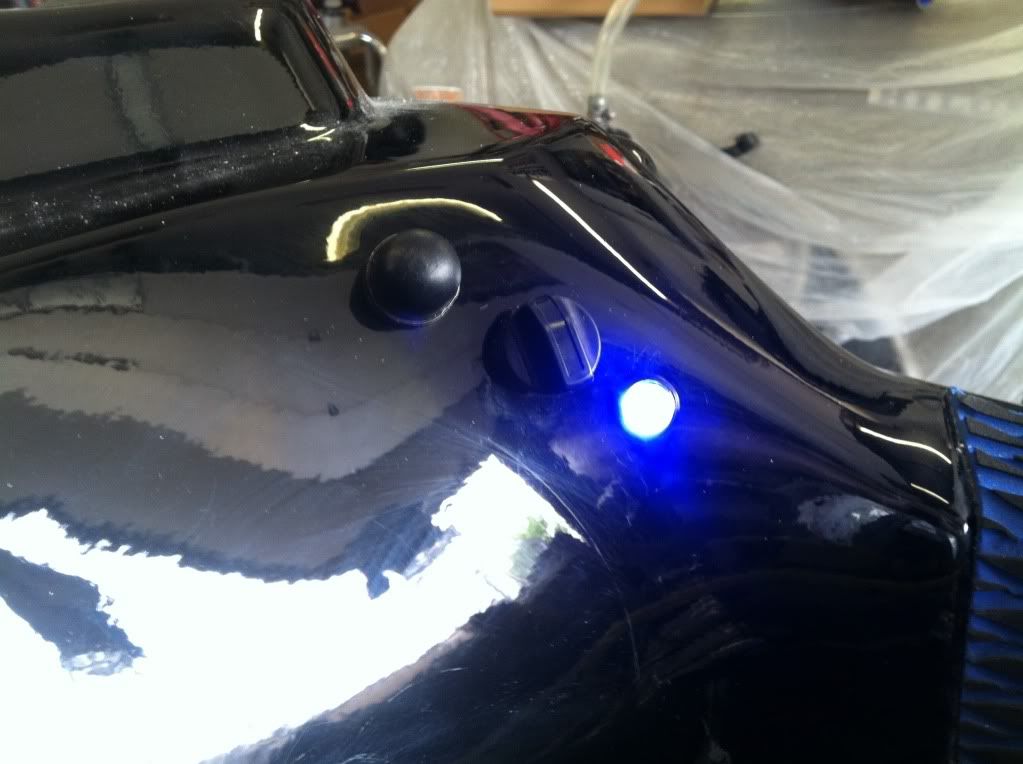
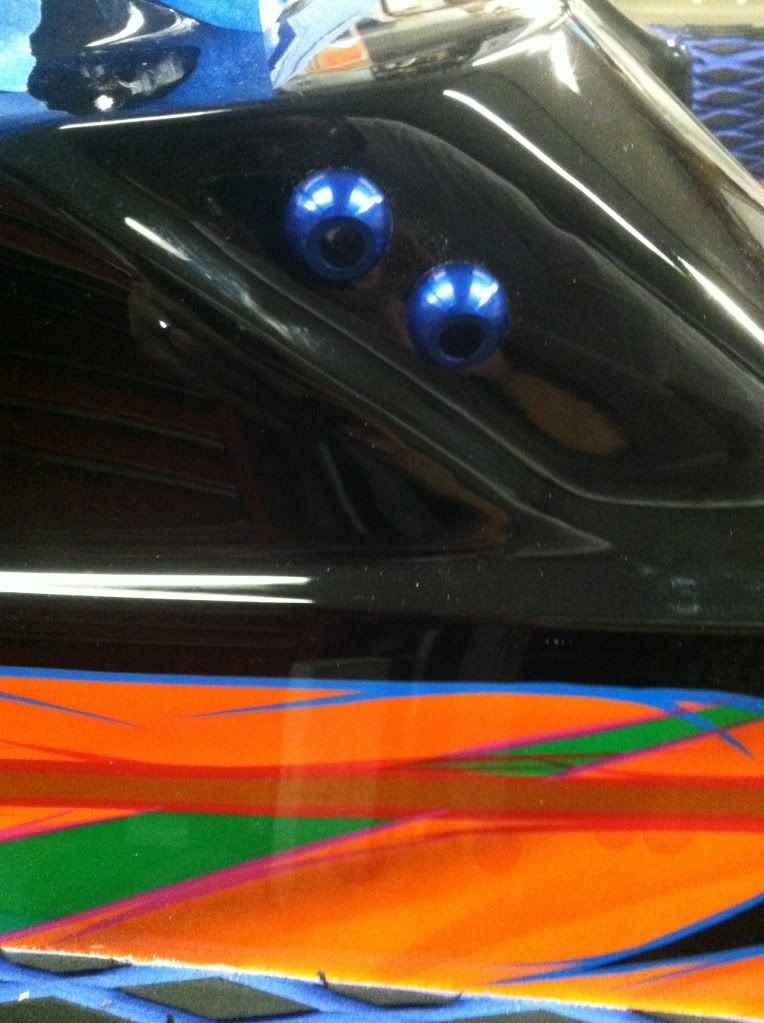
Blue-ano pissers, I left room for one more if I needed to add it later for a bigger motor.
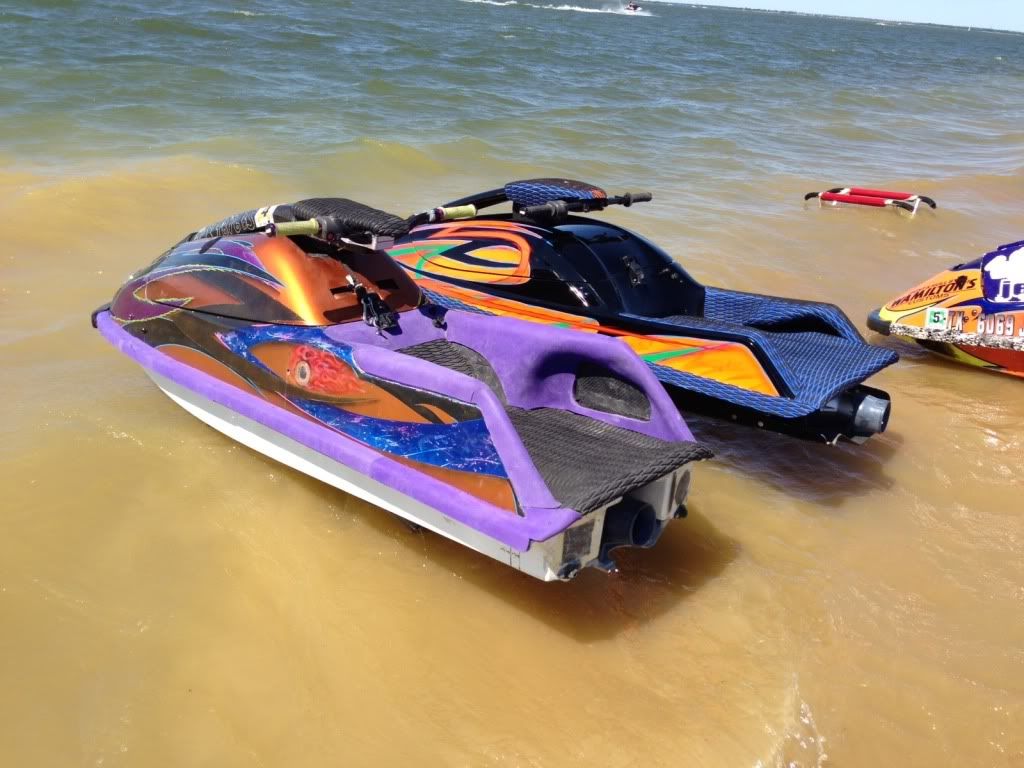
And here it is at the lake with the "Really hull"!
I have more to add, but honestly its taken me an hour and a half to type this up (part of the reason i've been dragging my feet) and thats without me finding 38 different gifs to describe my emotion...
LMK if you have questions...
- Spite
- Laziness
- Performance Anxiety
- Writers Block for a fun ski name
But I rode my ski for the first time yesterday... 24 days after I received it. I budgeted in my mind that it would take a month to assemble, if only because of little parts that I didn't have, or other possible issues inherent with all AM hulls. So 24 days was right in line.
Having a AM hull has been a massive learning experience. And the reason I came up with this name is because its the phrase i've heard from pretty much everyone who has owned even the highest quality AM hull. "Thats normal..."
But i'm getting ahead of myself. This will be a very minimal, factual thread about my ski going together. I need to take a bunch of pics of the paint, cause its amazing and worthy of its own thread lol.
Here is what I ordered:
Carbon Kevlar Backie Chan, non visual, with custom painted top deck and a black gel coat bottom.
No scupper or versa plug (despite Steve's wishes lol)
Sealed hood (breathe through pole)
Standard foot holds turfed to fit a size 9 shoe
I asked for a black gel bottom deck because I didn't want to have to worry about custom paint on the bottom getting screwed up from normal riding.
I wanted no scupper because they leak air when upside down. I'm gonna land wrong and away from my ski. I'd rather keep it semi air tight than have it take on a bunch of water.
What I'll be running:
Engine:
Jet Maniac Big Bore 781 on first bore.
Porting by 'Blue'
ADA head, 200psi (not sure dome size)
TBM Aluminum flywheel
Dual 38's set up by JM on stock intake.
ADA Kawi size billet couplers
Billet flywheel cover with plexi window
MSD Enhancer
Factory Bpipe with mod chamber
Xmetal first gen waterbox
JSS coil
JSS prepped ebox
Pump:
Solas 144 standard mag w/dual cooling (assembled by JM)
Minty OEM wear ring
Hooker 10/16 impeller
stubby cone
85.5mm reduction nozzle from #zero
ghetto quick steer on a OEM steering nozzle
Controls:
Xmetal comp length pole, bracket etc (Black)
Xmetal adjustable steering (Black turning Purple)
ODI lock on grips
Cold fusion finger throttle (Black)
"Big bore" throttle cable
Bar mounted RKO bilge switch
Misc:
1.87 gal kart tank
Rhaas motor mounts
Single 500gph Rule bilge (may add a second)
Antigravity 12 cell battery
WDK billet hood latch (Black)
Aluminum ebox plate w dimple die holes for strength
Many of you saw the crate (LMAO) so no need in reposting that pic.
But I thought it would be worthwhile to mention how nicely the ski was crated. A picture is worth a thousand words... so i'll let them talk.


The crate was build like a brick poop house. And working in a industry that has product damaged in shipping on a regular basis, it was a relief to see how well the ski was packed.


Photos just don't do this paint justice. It looks almost florescent in the sun, it literally burns your retinas with the contrast of the orange, yellow and black... I'll try to take some really killer photos soon, but the sun will have to be just right for the camera to get the exposure.

Very symmetrical for custom paint. That's not easy to do btw....

As you can see, the pole was installed when I received it. I ordered it through the best parts vendor in our industry IMO, JetManiac...
Steve and I discussed the possibility of painting the pole to match the ski, but once he had the design laid out, there was no point. Steve had some time while waiting for the truck to pick up the ski, so he installed the pole for me! This may not sound like a big deal, but this carbon kevlar isn't like a damn SJ. drilling and cutting the kevlar is a PITA, so this was a service that I would have paid for if Steve asked. He did not. (Should have since I'm such a PITA customer LOL)
During the build process Steve would call to make suggestions/ offer alternatives. One of these was carbon sides on the engine bay. The carbon Kevlar is hard to get a clean cut edge and the carbon makes for a nicer finish. Plus it looks cool!

Steve always likes to do little custom touches to things, i'm the same way. He decided to do visual "Backie Chan" letters on the bottom which look great. But then he wanted to stripe the letters... which means having to clear it. So he called, checked with me, I said "sure", then a metric ass ton of ice pearl found its way into the clear LMAO.... I'm not complaining, it looks sick, its like getting surprise polished billet anything. It looks great but you're always worried about it getting jacked up in the weather etc.

Detail of the pearl and letters.

I tossed it on a crappy bathroom scale, so I could see how much it weighs before I started throwing things on.
The hull, hood, pole and pole bracket weigh about 85lbs.

I'm using a first gen Xmetal waterbox purchased from 4Seasonspower.... the space is tight, a small waterbox is recommended.

I made a 'foot' for it out of underpad and turf.

This is not the final location, when everything was said and done, it needed to be in front of the steering cable and SS wires.

One of the first things I did was mount a U bolt for towing or tieing the ski down. For a moment I was going to name the ski "The Black Pearl" because of the pearl on the bottom, and because while mounting this I was watching Pirates of the Caribbean. And while drilling the holes I could hear Steve saying "Stop blowin 'oles in muh ship!!!!" LMAO...
Here is a pic of the U-bolt, with me watching Pirates of the Caribbean (you can almost see it in the reflection), while playing "The Circle Game" with all of you...

One thing that I more or less demanded was a recess for the midshaft to flex into. Steve found this awesome plastic hooptie and I believe I have the first ski of the bunch to get this, and I think all subsequent hulls will have it... So.... yay me.


Steve offers a optional composite ebox plate, which I believe glues on and keeps you from drilling holes in your dash. I didn't get one, I built one from sheet aluminum instead. Here is a pic by pic of how I made it.


I ended up painting it with black epoxy spray paint, and its amazingly strong. Very happy with my work considering I had no idea what i was doing.
Because of how the midshaft needs to be clocked (for celarance from the bottom of the hull) you can't use the midshaft alignment mount with the factory coupler cover. I made this little metal tab out of stainless, but I didn't have it extend far enough towards the motor, and the coupler cover does not catch. If and when I take it apart, i'll make another one.

As I got started installing the engine, I noticed I was laying the tools just behind the handle pole, which was a painted surface. I cut and sanded a piece of molded turf and glued it to this spot. Worry free tool spot now!

For anyone who wants to see... the pump cavity.

I had to file the holes on the pump a smidge to get fitment. I'm talking 1/16th of an inch, if that... very little... see thread title.
Solas 144 non setback mag built by Jetmaniac, bought from Brian (Deftons) along with the ATP nozzle that I could never get to center. (nearly chunked it the Sat night before I rode the first time... maybe thats normal too lol)

When it came time for engine alignment... my RN uses a TON of shims, and having 8+ indvidual shims is a royal PITA. So when I dropped the engine in (my old lady helped, didn't want to scratch it!) I could look at the gap and angle of the two couplers and see that it would need 'a lot' of shim in front. So I took some scrap 1/4" aluminum plate and a hole saw and a grinder and made these.

I guessed at 4 fender washers on each rear engine mount.
Swear to god this was my "this should get me close" guess... So I install everything, slide the motor side to side and.... "holy sheiot... that looks aligned!"
I even called Mr Miyagi over to check my work (he's WAY more perticular about this than I am) and after playing with it for a second he said "It doesn't need anything...That's aligned..." (resisting need to post a gif right here.....)
So yeah.. friggin awesome...
Also want to mention that besides one midshaft insert, all the holes and inserts in were well placed, of propper depth (no need to shorten bolts) etc...
The pump mount inserts are tapped to a more standard metric thread so customers arn't tied to the OEM thread pitch. He included bolts with my ski, not sure if this is Steve being a sweetheart or if he does this for everyone.
Engine in:

I found these cool clippy things at the hardware store, painted them black and epoxy them to the hull. I need more!


On the dash, I wanted to run a LED for my bilge pumps so as not to kill my antigravity battery.
So here is the primier, Bilge switch, and the LED, which was stupid bright, so I used a lens tint to black out.

Bilge on!

Blue-ano pissers, I left room for one more if I needed to add it later for a bigger motor.

And here it is at the lake with the "Really hull"!

I have more to add, but honestly its taken me an hour and a half to type this up (part of the reason i've been dragging my feet) and thats without me finding 38 different gifs to describe my emotion...
LMK if you have questions...
Last edited:

