Hey there! I'm Jeff and I (like I assume most of you) have been sucked into the awesome world of spending too much time & money on your Superjet (or other standup)
I will start with some story leading up to this time and money vampire I call my SN build... also sorry if my tenses get all messed I have been doing this build for a while now but have only now got around to posting a thread.
I have always been a snowmobile and dirt bike guy...snowcross, enduros, harescrambles... then after my girlfriend and I finished school we moved to Northern MN (from Canada) for a job where we get to work with a lot of awesome people with similar interests to ours. Amongst these people there were two distinct groups, the dirt bike guys... and the standup guys...
I soon had great friends in both groups, but I had been into dirt bikes a long time and had only rode a ski once before so with the shock of not being a student and actually making money I bought a new dirt bike. I told my standup friends I had made my choice and would not buy a ski in the foreseeable future... Soon after this I went out riding with some of the standup group and got to ride some superjets (no mods), 550's and 750's and of course it was way better than I had remembered...and now I want to be in both groups...preferably on a superjet.
At this time I am in need of a vehicle so I surely cannot be spending any more money on a superjet... well while I was at the bank getting a loan to buy a truck I ask if I could get a bit more added on so I could pick up a Superjet... and BOOM superjet mod fever was in it's incubation period...
I planed out my adventure to get a truck and superjet in one trip (it is a long drive to civilization)
The steps I required to catch the Superjet mod fever:
1. Head 5 hours south to Minneapolis to pick up my first truck (small car with a box)
2. Drive a bit longer and meet a guy at a lake to test ride a SN 701 superjet with a B pipe

3. Enjoy the difference that a b pipe makes, pay the man and shove superjet into newly bought truck, head north

4. Ride superjet and at lake with friends, enjoy having the most powerful ski in the group

5. Over load a trailer with skis and head to 2014 Sortie (lake city, MN) and have an awesome time

6. After riding some moded skis at Sortie, realize how badly you need to mod the Sh#t of your superjet
7. Choose box full of exhaust parts at Sortie as a prize for a draw without knowing a thing about it. (Turned out to be a NYNJA exhaust manifold and header pipe with all hardware)
8. MOST IMPORTANT STEP : Underestimate the powerfully awesome feeling of planning your awesome build and ordering too many new parts, then proceed to dig yourself a very deep modification hole that you must buy your way out of to have a running superjet
9. Become friends with @Parsonsjb88 and @plaidward and start builds together and constantly push each other into spending more time and money to be the best of the 3. ( I am the only one who doesnt have 62T cases)
...and there ya go, thats my story... sorry it has not gotten to any actual building yet... I have had a few of these (I'm not a real bad ass... there is ginger ale in there too)

OK! so I started with this 93 SN Superjet
 Well that is what the registration says, inside the hull someone wrote 92 hull in marker, anyway short list of mods it had when I bought it:
- 61X/61X 701
- B-pipe (I think limited)
- Footholds
- AM flame arrestor
- SS prop (unknown make or pitch)
- D cut ride plate
- Dual bilges that are plumbed to the hood latch area at asymmetrical angles (we called it crazy eyes)
- Dual cooling
- AM bars and grips
- Mega poopy turf job
- Super wet foam (I find out later)
- Hull cracks (likely from flat landing too much at Sortie)
THE BUILD PART (Explained as I was thinking about it at the time)
So this is what I was thinking come winter after riding the ski as I bought it for the summer, "I like this ski and I don't want to go too crazy with hull mods or I wont finish it for summer"
So at I decided to focus on rebuilding and modding the engine with minimal hull work (Just patch up the crack I found, and maybe some turf) so I can actually see how much a difference just the engine mods will make.
Mods I had planned on doing for sure at the start of winter:
- Bore to 82mm (718cc)
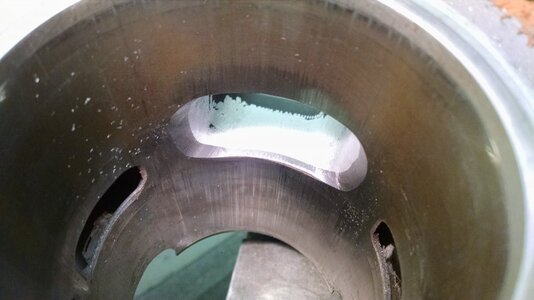
- Widen exhaust ports and clean up transfers & boost
- ADA High comp girdled head with 35cc domes
- New plug wires and boots
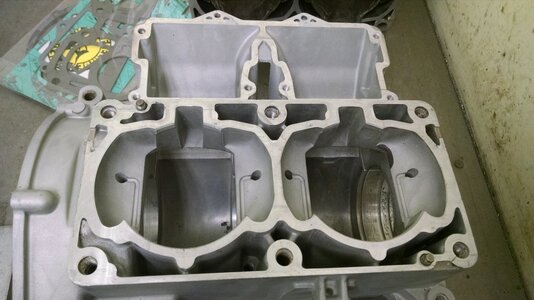
- Port & match cases
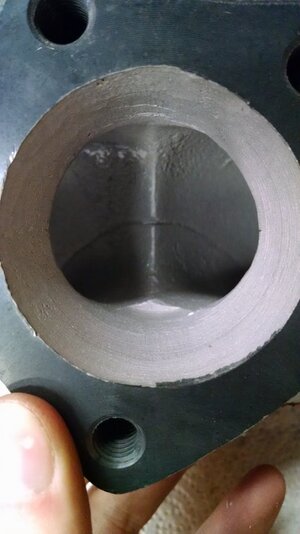
- Port & match Intake & exhaust manifolds
- Port & match Header Pipe
- Get C4 chamber
- Lighten flywheel
- Remove limiter
- Powder coat most engine components
- New flame arrestor
- Rebuild carb
- Patch hull
- Re-turf
That is about all I had planned, So I started with yanking out the motor

This Is when I noticed the crack in the side wall just bellow the black ID sticker (nothing too serious) and also that the pounding this thing received at Sortie tore the engine mount rubber right off the metal casting on the right rear mount

Having never pulled one of these apart before, I made sure to keep close track of all the mounting locations and hose locations etc, not knowing that I will be changing pretty much everything later on...
I will start with some story leading up to this time and money vampire I call my SN build... also sorry if my tenses get all messed I have been doing this build for a while now but have only now got around to posting a thread.
I have always been a snowmobile and dirt bike guy...snowcross, enduros, harescrambles... then after my girlfriend and I finished school we moved to Northern MN (from Canada) for a job where we get to work with a lot of awesome people with similar interests to ours. Amongst these people there were two distinct groups, the dirt bike guys... and the standup guys...
I soon had great friends in both groups, but I had been into dirt bikes a long time and had only rode a ski once before so with the shock of not being a student and actually making money I bought a new dirt bike. I told my standup friends I had made my choice and would not buy a ski in the foreseeable future... Soon after this I went out riding with some of the standup group and got to ride some superjets (no mods), 550's and 750's and of course it was way better than I had remembered...and now I want to be in both groups...preferably on a superjet.
At this time I am in need of a vehicle so I surely cannot be spending any more money on a superjet... well while I was at the bank getting a loan to buy a truck I ask if I could get a bit more added on so I could pick up a Superjet... and BOOM superjet mod fever was in it's incubation period...
I planed out my adventure to get a truck and superjet in one trip (it is a long drive to civilization)
The steps I required to catch the Superjet mod fever:
1. Head 5 hours south to Minneapolis to pick up my first truck (small car with a box)

2. Drive a bit longer and meet a guy at a lake to test ride a SN 701 superjet with a B pipe

3. Enjoy the difference that a b pipe makes, pay the man and shove superjet into newly bought truck, head north

4. Ride superjet and at lake with friends, enjoy having the most powerful ski in the group

5. Over load a trailer with skis and head to 2014 Sortie (lake city, MN) and have an awesome time

6. After riding some moded skis at Sortie, realize how badly you need to mod the Sh#t of your superjet
7. Choose box full of exhaust parts at Sortie as a prize for a draw without knowing a thing about it. (Turned out to be a NYNJA exhaust manifold and header pipe with all hardware)
8. MOST IMPORTANT STEP : Underestimate the powerfully awesome feeling of planning your awesome build and ordering too many new parts, then proceed to dig yourself a very deep modification hole that you must buy your way out of to have a running superjet
9. Become friends with @Parsonsjb88 and @plaidward and start builds together and constantly push each other into spending more time and money to be the best of the 3. ( I am the only one who doesnt have 62T cases)
...and there ya go, thats my story... sorry it has not gotten to any actual building yet... I have had a few of these (I'm not a real bad ass... there is ginger ale in there too)

OK! so I started with this 93 SN Superjet

 Well that is what the registration says, inside the hull someone wrote 92 hull in marker, anyway short list of mods it had when I bought it:
- 61X/61X 701
- B-pipe (I think limited)
- Footholds
- AM flame arrestor
- SS prop (unknown make or pitch)
- D cut ride plate
- Dual bilges that are plumbed to the hood latch area at asymmetrical angles (we called it crazy eyes)
- Dual cooling
- AM bars and grips
- Mega poopy turf job
- Super wet foam (I find out later)
- Hull cracks (likely from flat landing too much at Sortie)
THE BUILD PART (Explained as I was thinking about it at the time)
So this is what I was thinking come winter after riding the ski as I bought it for the summer, "I like this ski and I don't want to go too crazy with hull mods or I wont finish it for summer"
So at I decided to focus on rebuilding and modding the engine with minimal hull work (Just patch up the crack I found, and maybe some turf) so I can actually see how much a difference just the engine mods will make.
Mods I had planned on doing for sure at the start of winter:
- Bore to 82mm (718cc)
- Widen exhaust ports and clean up transfers & boost
- ADA High comp girdled head with 35cc domes
- New plug wires and boots
- Port & match cases
- Port & match Intake & exhaust manifolds
- Port & match Header Pipe
- Get C4 chamber
- Lighten flywheel
- Remove limiter
- Powder coat most engine components
- New flame arrestor
- Rebuild carb
- Patch hull
- Re-turf
That is about all I had planned, So I started with yanking out the motor

This Is when I noticed the crack in the side wall just bellow the black ID sticker (nothing too serious) and also that the pounding this thing received at Sortie tore the engine mount rubber right off the metal casting on the right rear mount

Having never pulled one of these apart before, I made sure to keep close track of all the mounting locations and hose locations etc, not knowing that I will be changing pretty much everything later on...
Last edited:


