Winter project RR

haggis

its raining again!
Im still going to finish that, just want to get this ski done first. I'll probably buy another hull to use it with, ive been packing up all my parts for moving house and realised that i can easily build another ski with all the parts ive gathered over the years!
 

haggis

its raining again!
Right, finished wet sanding the primer today ready for topcoat. Im back to work for a week so the paint shop has 7 whole days to get it done!

While i was finishing up i thought i would prefit some of the componants before its painted just to save damaging the new paint but came across a problem. The atp pole bracket fouls against the xft nose piece. doh! Even when i moved the bracket further back it still doesnt clear, now i could grind out the nose but inorder for it to clear its going to make the nose look like s***! So unfortunatly i think im going to have to buy another bracket prob an xft. Its a shame cos i realy like the atp one.
 

Attachments

  • 007.JPG
    007.JPG
    67.9 KB · Views: 63
  • 008.JPG
    008.JPG
    63.1 KB · Views: 65
  • 006.JPG
    006.JPG
    63.3 KB · Views: 83

haggis

its raining again!
On a plus note my new steering plate arived from chris at atp today, again the finish is topnotch as usual!

When i assembled the pole and my original atp steering, the plate is just a bit long. The new one is an inch shorter and will help save the knee caps! lol

Anodizing looks trick too.
 

Attachments

  • 013.JPG
    013.JPG
    41 KB · Views: 38
  • 012.JPG
    012.JPG
    43.3 KB · Views: 28
  • 014.JPG
    014.JPG
    62.3 KB · Views: 64
  • 015.JPG
    015.JPG
    73 KB · Views: 55

haggis

its raining again!
Well finaly got my hull painted, and it looks awsome! I ended up going with a heavy black metalic instead of the purple i mentioned before. The hood and nose have been re laqured aswell.

Will post some better pics later today.
 

Attachments

  • 135.JPG
    135.JPG
    71.1 KB · Views: 45
  • 136.JPG
    136.JPG
    68.5 KB · Views: 83

haggis

its raining again!
Got first coat of polish this morning! and some better photos aswell. Ive included some closeups of the painting i had to do around hand holds and bottom of hood, as i said in previous posts the original finish wasnt quite what i was expecting so after a bit of rubbing, masking and black basecoat i think it turned out good. Now its all laqured im well pleased and it was worth the hassle.

All i have to do now is some reinforcing inside and then i can start rebuilding.

Ive also moved to a new house with a garage so im able to spend more time on ski without the girlfreind getting to annoyed!
 

Attachments

  • 005.JPG
    005.JPG
    37.7 KB · Views: 32
  • 009.JPG
    009.JPG
    43.4 KB · Views: 65
  • 008.JPG
    008.JPG
    44.9 KB · Views: 55
  • 007.JPG
    007.JPG
    36.8 KB · Views: 41
  • 006.jpg
    006.jpg
    65 KB · Views: 47
  • 004.JPG
    004.JPG
    47 KB · Views: 31
  • 003.JPG
    003.JPG
    42.1 KB · Views: 40
  • 002.JPG
    002.JPG
    45.3 KB · Views: 54
  • 001.JPG
    001.JPG
    44.2 KB · Views: 51

haggis

its raining again!
So the hood required a little trimming around the inside of the air intake to allow it to seat properly. When i first fitted i found it was fouling against the choke and fuel knobs. I used the dremmel to trim each side back enough to clear knobs and allows them to be operated when hood is fixed down.

Im very impressed with how secure the hood feels when its latched, it take a fair push to clip the latch so i realy dont feel much need for hood straps, words which i may live to regret! lol.

I said in an earlier post that the atp pole bracket was stopping the nosepiece from fitting flush. After enquiring about other options i thought bollox to it i'll just file the top corners and see if i can get clearance, it didnt take as much as i thought it would.

So brackets on, poles on, hoods on etc the end is in sight!!!! thank f***!!!

Pics are a bit crap but im pretty happy with how its turning out.
 

Attachments

  • 001.JPG
    001.JPG
    102.2 KB · Views: 58
  • 002.JPG
    002.JPG
    82.4 KB · Views: 49
  • 003.JPG
    003.JPG
    46.6 KB · Views: 37
  • 004.JPG
    004.JPG
    70 KB · Views: 55
  • 005.JPG
    005.JPG
    94.1 KB · Views: 54

haggis

its raining again!
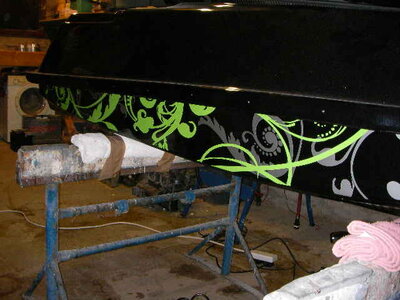
Needing to get the hull prep done for reinforcing but the grinder is curantly in use elsewhere, so ive ended up addressing some of the smaller jobs in the meantime.

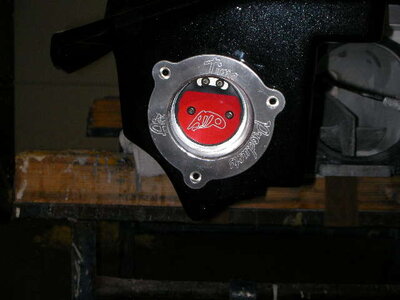
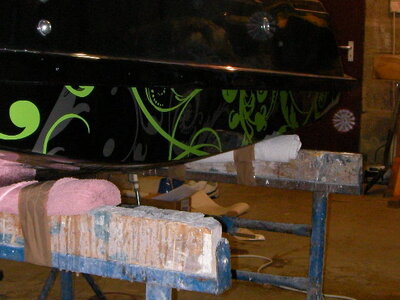
I started off by fitting the scupper valve. It was a pretty straight forward job, the only difficult part was getting the holesaw through the bulkhead. I also wasnt aware that there is a fitting on the back with a screw in that had to be cut aswell, it was a bit of a pain but got there in the end!

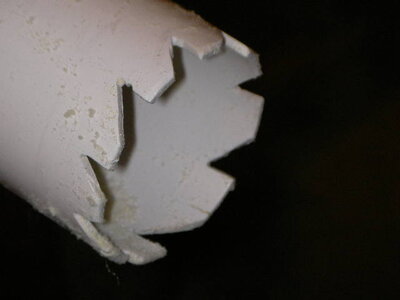
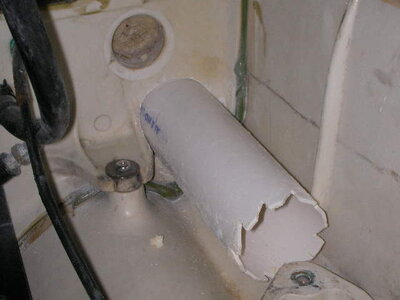
Once i cleaned the hole i cut some teeth into the end of the scupper tube and used it to cut through the foam, it worked a treat!

So its in but i havnt sealed it yet as i will have to remove it to finish the internal reinforcing (once i get my grinder back)!

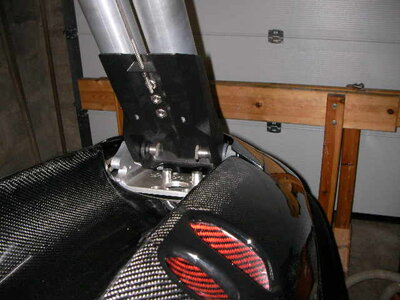
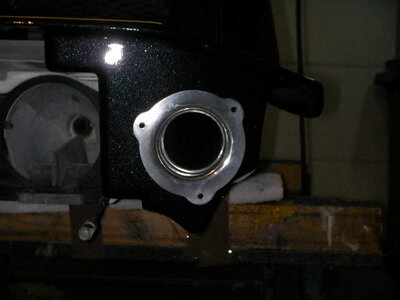
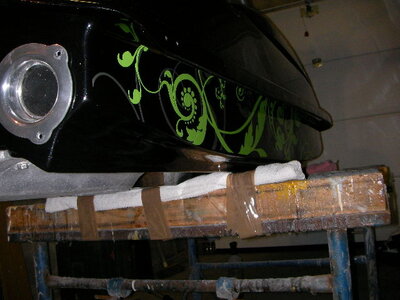
I also re fitted the exhaust tube, when i first set out with the build i had the intention on moving the exhaust tube up a little to clear the scalloped hull. Well in my haste to get the hull painted i forgot to do, so its now a little close to the edge for my liking, its not petruding but will look alot neater 5mm higher (matching the scupper), i'll trim the hole a little tomorow.

Im pretty happy with it now, the exhaust looks awsome polished along with the scupper.
 

Attachments

  • 007.JPG
    007.JPG
    30.4 KB · Views: 27
  • 006.JPG
    006.JPG
    37 KB · Views: 34
  • 005.JPG
    005.JPG
    40.6 KB · Views: 30
  • 004.JPG
    004.JPG
    72 KB · Views: 38
  • 008.JPG
    008.JPG
    36.2 KB · Views: 28
  • 009.JPG
    009.JPG
    39.3 KB · Views: 31
  • 003.JPG
    003.JPG
    37.3 KB · Views: 25

haggis

its raining again!
I also finished fitting the bracket and ran the cables up through the pole, drilled the holes for the pissers and fitted the hood hooks.

I had to file out the little bracket for the pins to allow the hooks to sit a little lower. I found that when they clipped into the pole bracket that it wasnt allowing enough leverage to let the back of hood come down and be secured. Its given me the clearance i need for the hood to seat properly now.

Its amazing just how much some products need little tweeks in order to get them to fit. I could make things a lot easier im sure by using say one manufacture! but i suppose you just buy what takes your eye or gets good feedback and never realy think how its all going to work together. Its all coming together tho.
 

Attachments

  • 001.JPG
    001.JPG
    67.8 KB · Views: 54
  • 002.JPG
    002.JPG
    39.9 KB · Views: 37
That's a really nice bracket. Never seen the ATP one before.

I'm at the same point fitting my WDK bracket, 24/7 hooks, and everything and the install is a major pain in the a$$. I'm running a single pool hose up into the pole and running the cables is the worst part of my build so far. Re-foaming was more fun than setting up the pole.

Looks good man
 

haggis

its raining again!
That's a really nice bracket. Never seen the ATP one before.

I'm at the same point fitting my WDK bracket, 24/7 hooks, and everything and the install is a major pain in the a$$. I'm running a single pool hose up into the pole and running the cables is the worst part of my build so far. Re-foaming was more fun than setting up the pole.

Looks good man


Thanks!

Yeah i would agree that the whole pole part has been a headache lol! Even just getting it setup straight was a pain.

The ATP bracket is a sturdy bit of kit, i like it a lot.
 

haggis

its raining again!
I forgot to mention that i ordered my graphic kit from exotic signs. I enquired about getting the jason stoyer vine kit which was in there portfolio section. After speaking with mike he made it avalible on there kit console under superjet freestyle gen2, kit 3.

Great customer service, orederd on thursday and it was dispatched on friday!
 

haggis

its raining again!
Well ive spent the last 4 hours applying the lower hull graphics, holy s*** it was tricky!!!

Patience is the key with this kind of graphic also a hot air gun is a must, its amazing how the vinyle can be stretched and manipulated back into shape.

Ive got any air bubbles out now and i'll keep the garage nice and warm for the next few days to allow it to get nice and stuck.

Cant wait to do the top!
 

Attachments

  • 001.JPG
    001.JPG
    44.9 KB · Views: 58
  • 002.JPG
    002.JPG
    68.7 KB · Views: 46
  • 003.JPG
    003.JPG
    65.3 KB · Views: 48
  • 004.JPG
    004.JPG
    74.4 KB · Views: 34

haggis

its raining again!
Now that xmas and new year is past i thought it was time to get back to the build. Since the hull is nearing completion and i cant do the reinforcing because the garage is f***ing freezing! i decided to start into the motor.

I started with the cylinders by removing the old sleeves, stuck it in the oven for a half hour @ 240 degrees. Now the first sleeve can out with very little trouble but the other was a right pain! I posted when i first got the cylinders that the one sleeve had a crack, well looks like when it was last resleeved they bored that side of the barrel a little tight which i can prosume that is why it cracked? anyway it was far harder to remove, i'll mesure the barrels tomorow.

These are the older ada cylinders and i wasnt sure if i could get new sleeves but ive recently seen that ada are offering replacments for this cylinder, there slightly larger and will require the barrels being bored to 90mm alowing to run up to 86mm bore. I gave the barrels a clean up ready to go to the engine builder.

I want to start assembling the bottom end over the next few days but before i do i need to sort the inlet porting as it looks crap! just needs a little tidying so whats best for filling?

Finaly ive had an issue or what i thought was the issue with the shaft on the mag pump. I went to install the pump and it wouldnt mate up against the pump stuffer, it was about 3/4 inch short and it felt as if it was all the way home in the intermediate coupling. So i thought ive got a set back shaft, long story short i stripped th whole pump to find that the shaft was a 1/4 inch shorter than a stock sj shaft, wtf? it couldnt be the pump or shaft so checked the splines in the intermediate and there was a bit of s*** jammed between one splines, after removing and cleaning the shaft went a further 3/4 inch in! I felt like a right twat! so new bearings and waiting on the 2 seals and it'll be sorted, lesson learned. lol. The end of the shaft had a 1/4 inch trimmed off.
 

Attachments

  • 007.JPG
    007.JPG
    77.1 KB · Views: 31
  • 006.JPG
    006.JPG
    71.2 KB · Views: 17
  • 005.JPG
    005.JPG
    68 KB · Views: 18
  • 004.JPG
    004.JPG
    70.6 KB · Views: 20
  • 001.JPG
    001.JPG
    62.1 KB · Views: 25
  • 002.JPG
    002.JPG
    75 KB · Views: 28
  • 003.JPG
    003.JPG
    69.8 KB · Views: 19
Last edited:

haggis

its raining again!
Yes it is, non set back 140mm.

The prop i got with the pump is a 15/23 and was used on a similar setup to what i'll end up with. But it might be a bit of trial and error with regard to prop size, i think when the ski is doen i'll see how this prop works and then look to get some advice from impros or someone.
 

haggis

its raining again!
What does everyone use to wash a crank, petrol or is there a specific product thats good?

some better pics of ski outside
 

Attachments

  • 011.JPG
    011.JPG
    46.5 KB · Views: 66
  • 012.JPG
    012.JPG
    76.3 KB · Views: 60

haggis

its raining again!
Got set into the cases today. Started by giving them a good clean and removing any excess sealent/gasket material.

I bought the cases secondhand and came line bored for larger cylinders and clearanced for 6mm crank, but they have had some porting done and on closer inspection they require a little more tidying than i thought.

First the inlet epoxy filling is pretty poor (first pic) so using the dremmel and a fine file i began removing quite a bit of excess filler. I've got it nice and square at the crank side and have made it as neat as i could over the fingers given the filling. I had thought about digging the epoxy out and starting again but its got a good base to fill on now so i'll give it a little skim and finish it proper.

The cases have been opened to accomadate the larger transfer area on the barrels. It just required a little more grinding and polishing, turned out ok i think. Tomorow i'll make a template of the barrels and see how close the cases are to matching, might have to grind a bit more.
 

Attachments

  • 009.JPG
    009.JPG
    70.9 KB · Views: 39
  • 013.JPG
    013.JPG
    44.4 KB · Views: 29
  • 014.JPG
    014.JPG
    45.5 KB · Views: 34
  • 012.JPG
    012.JPG
    45.8 KB · Views: 29
  • 011.JPG
    011.JPG
    45.6 KB · Views: 26
  • 010.JPG
    010.JPG
    65.9 KB · Views: 31
Top Bottom