650/X-2 X2 restore.

Location
Texoma
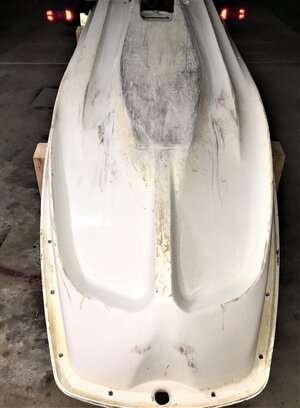
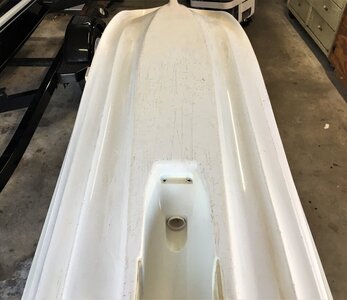
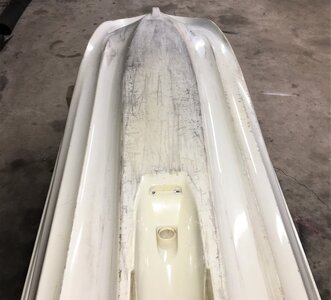
At purchase X2 started & created smoke, noise sporadically. Dropping fire to the plugs intermediately. Knew it was a basket case so not disappointed. Didn't bother diagnosing any further. Stator made in China, toss, going with JSS stator. E-box with butchered wires with OEM colors, easy fix. Secondary on coil, a brick shows lower resistance. Send to JSS. Pump/Engine alignment compromised. Forum members here pointed me in the right direction. (Thank you all). Remarkably good compression on both cylinders. 140/144. Leak down passed. Previous owners say the case has never been split & between both owners it is estimated 350<400 hrs? Maybe a testament to Klotz bean oil? No matter, splitting the case & doing overhaul on the 30 year old engine. So 1st step, hull recondition. This is where I like to have some opinions on material/procedure used.
1st. Sand down, various grits per progression
2nd. Dremel/clean cracks & gouges alcohol or acetone??
3. Fill with 3M SMC/Fiberglass repair adhesive -35, 08219, green. I could really entertain some opinions on this.
4. Evercoat( Hi Bond) white Gelcoat (hardener container included) with no wax, 3 layers
5. This is where I'm @ a crossroads. Do I final coat with paraffin wax or skip & use PVA (polyvinyl alcohol) as oxygen barrier? Opinions PLEASE.IMG_2238.JPGIMG_2238.JPGIMG_2239.JPGIMG_2239.JPG
 
Last edited:

E350

Site Supporter
Location
Sacramento Delta
@Lugnut and others:

I have read that the way to true the strakes is with a two foot length of aluminum pipe of the correct diameter wrapped with emory cloth or sand paper. I have to do the very same thing that you are doing to our '80's X2.

If you find the correct diameter pipe, would you post up what it is and where you got it please?
 

Vumad

Super Hero, with a cape!
Location
St. Pete, FL
At purchase X2 started & created smoke, noise sporadically. Dropping fire to the plugs intermediately. Knew it was a basket case so not disappointed. Didn't bother diagnosing any further. Stator made in China, toss, going with JSS stator. E-box with butchered wires with OEM colors, easy fix. Secondary on coil, a brick shows lower resistance. Send to JSS. Pump/Engine alignment compromised. Forum members here pointed me in the right direction. (Thank you all). Remarkably good compression on both cylinders. 140/144. Leak down passed. Previous owners say the case has never been split & between both owners it is estimated 350<400 hrs? Maybe a testament to Klotz bean oil? No matter, splitting the case & doing overhaul on the 30 year old engine. So 1st step, hull recondition. This is where I like to have some opinions on material/procedure used.
1st. Sand down, various grits per progression
2nd. Dremel/clean cracks & gouges alcohol or acetone??
3. Fill with 3M SMC/Fiberglass repair adhesive -35, 08219, green. I could really entertain some opinions on this.
4. Evercoat( Hi Bond) white Gelcoat (hardener container included) with no wax, 3 layers
5. This is where I'm @ a crossroads. Do I final coat with paraffin wax or skip & use PVA (polyvinyl alcohol) as oxygen barrier? Opinions PLEASE.View attachment 417735View attachment 417735View attachment 417736View attachment 417736


There are a lot of products you can use and PVA is probably not the best one. PVA would be ideal if you are going to add additional material to it. Say for instance you are going to poly resin or gel coat and then paint. You would want that slightly uncured surface for your next coat, as you identified with the 3-coats of gelcoat.

However as a final coat there are other options. Sanding aid is just a wax that you add to the gelcoat that does not have wax so that it is gelcoat with wax. it then cures fully and you can sand it properly. The best product is Dura-Tech high gloss additive. It is very expensive but will make you gelcoat finish like paint. This is a good choice on a bottom deck which is labor intensive to sand, but the extra expense on a bottom deck is not a particularly good investment. There is an in between product which works very well but leave some orange peel but I can't think of the name of it atm and don't see it on FGCI website. I think I have some left over at home so I'll try to remember tomorrow to post it.

Also not sure why you would use a green patch. Use white patch. You are finishing it white. Why have a bunch of green to make sure you cover.

Also what are you talking about in 4? Are you brushing or spraying gelcoat? Why not just skip a few steps and use awlgrip or some similar paint. I already has gelcoat on it. Why add several more layers of gelcoat? It's a bottom deck. It going to get beach rash again.
 

Vumad

Super Hero, with a cape!
Location
St. Pete, FL
@Lugnut and others:

I have read that the way to true the strakes is with a two foot length of aluminum pipe of the correct diameter wrapped with emory cloth or sand paper. I have to do the very same thing that you are doing to our '80's X2.

If you find the correct diameter pipe, would you post up what it is and where you got it please?

Use a contour gauge, scan it into fusion 360 and 3D print custom tooling. It works very well.
 
Location
Texoma
While waiting on Gel coat, PVA & filler to arrive...1st pic w/o shim. 2nd pic, shows linear mismatch. 3rd pic, .090 shim added to all 4 corners. 4th pic. Plate/intake with shim. No matter, they're being replaced with Jet Dynamics. 5th pic. My new trotline weight.
 

Attachments

  • IMG_2299.JPG
    IMG_2299.JPG
    64.5 KB · Views: 30
  • 245890488_907086153564563_4774415790457005954_n.jpg
    245890488_907086153564563_4774415790457005954_n.jpg
    140.9 KB · Views: 31
  • IMG_2297.JPG
    IMG_2297.JPG
    72.7 KB · Views: 28
  • IMG_2295.JPG
    IMG_2295.JPG
    50.5 KB · Views: 31
  • 245973237_4458504687562913_3707840316939836936_n.jpg
    245973237_4458504687562913_3707840316939836936_n.jpg
    131.2 KB · Views: 34
Last edited:
Location
Texoma
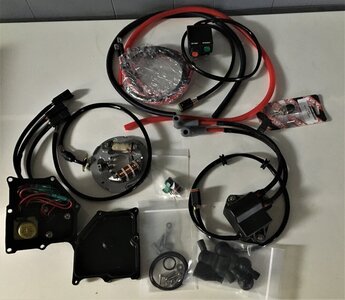
Just received my Jetski Solutions resto package. E-box resto with "plug & play" connectors, start/stop switch with lanyard capability, Stator remanufacture ( old stator was a proud disappointment of the PRC), now trot line weight, Coil plug wire replacement, new power cables., color correct wiring. 1st thing I noticed was how everything was packaged, to the 9s. Packaged better than I would have. Close ( I mean close) inspection of components for any "minute" flaws, 0, nada. Attention to detail is blaringly obvious, PROFFSIONAL. Price, imo, very reasonable considering the peace of mind & confidence in components out there in the middle of Lake Texoma. John, Cory, you guys knocked the ball out of the park.
Also, received Tom21 sponsoons. Adhesive plus bolt, blend & then gelcoat hull. Hull pump alignment/shimming determined, expect considerable improvement considering the shape it was in when purchased. Also considering shaft tunnel fill. More "homework" on that. Also received X2 pontoons(training wheels), but with discussions with my son I have a gut feeling he's gonna take them off sooner rather than later & allow me to use them for trotline buoys.IMG_2307.JPG
 
Location
Texoma
Pump shimmed .060(4X), shoe "just" level to hull. Intake grate shimmed to complement. Bearing support aligned so as shaft is "straight shot/dead center", no skewness/bind into Hooker impeller. Engine/coupling alignment surprisingly in the "ballpark, nothing radical. 8 shims put it "Lazer straight" on all 3 axis.
Shaft dead center of pump tunnel hole. Silicone gaps @ pump/grate/plate ensure laminar water flow. Don't get me wrong, nothing was easy. Alot of PIA back & forth. Pics forth coming.
Next endeavor, TRIM CABLE. Install has thrown a wicked curve ball & I seriously need someone to point me in the right direction.
1st, when purchase the inside brass nut assy was broke away from hull & dangling & the end of cable. Removed cable & repaired/epox nut assy.
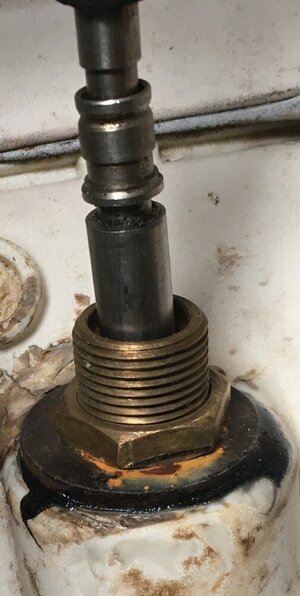
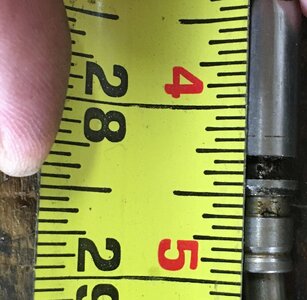
On the used cable, missing rubber boots, lube & replaced with electrical shrink. Install cable, poly line made it a snap. Used OEM O-ring, washer, c-clip. Installed back & tightened. This is where I hit the brick wall. See pics.
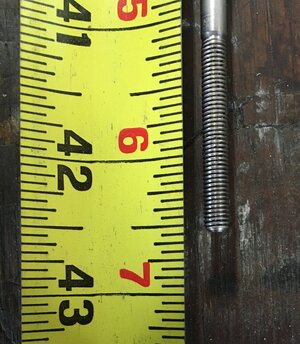
OEM cable length is 42"
The C-clip is 1" above the "the area of rest" relaxed, .5 " when forced down. This is not going to work, zero, nada.
No wonder the inside brass nut assy was separated from hull, spring force.
So, used cable in spec. This has partly slammed the brakes on progress.
Is this an issue among X2 owners?
Did I get stuck with Sunday night Saki binge?IMG_2399.JPGIMG_2398.JPGIMG_2400.JPGIMG_2401.JPG
 

Vumad

Super Hero, with a cape!
Location
St. Pete, FL
Is it possible you have the wrong cable or it is not symmetric? It's possible they put in a steering cable instead of a trim cable?
 
Location
Texoma
Is it possible you have the wrong cable or it is not symmetric? It's possible they put in a steering cable instead of a trim cable?
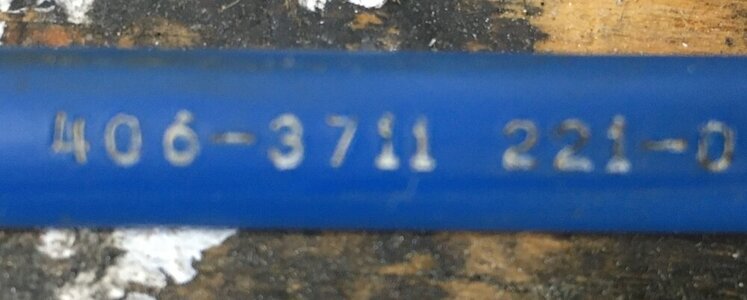
The overall length, 42" is true for both trim & steering, however the throw on steering is 4" while the throw is 1.85 on the trim. Also the pic of numbers on cable point to the direction of "true" but me think that might not be OEM. SBT maybe? All vendors are describing 42" with different "throws"
Pic of 42.5 would denote stretch but not enough to have these kind of results.
I am really scratching my head over this on.
Is the trim brass nut assy breaking away from bulkhead a "mentioned" flaw/occurrence?
 
Location
Texoma
Resolved.
Threaded SS cable. Stretched .5, unremarkable.
Inside C clip relief to relief. Stretched .75. Mystery solved.
Give a big SHOUT OUT to Bob @ SBT tech services for the patience & taking the time to pull new cable & give a accurate measurement of the relief distances.
If I'm ever in your neck of the woods, buying you a BURGER, yep.
 

Vumad

Super Hero, with a cape!
Location
St. Pete, FL
Resolved.
Threaded SS cable. Stretched .5, unremarkable.
Inside C clip relief to relief. Stretched .75. Mystery solved.
Give a big SHOUT OUT to Bob @ SBT tech services for the patience & taking the time to pull new cable & give a accurate measurement of the relief distances.
If I'm ever in your neck of the woods, buying you a BURGER, yep.

So is the problem you have the wrong cable or the right cable installed wrong?
 
Location
Texoma
So is the problem you have the wrong cable or the right cable installed wrong?
Neither.
Correct cable that had 300+ hours also(per manual) installed correctly. Part # embossed on used cable correct. Apparently not only the inner cable stretches over time, so can the sheathing.(?)
A few factors to consider. Poor lube PM coupled with maladjustments & hard use, feral slipped out further?? Really hard to determine the root cause. X2 was a basket case when purchased. "Tinkeritis" from pump, engine to exhaust was blaringly evident.
New cable on the way. At arrival, will do a side by side & try to determine what "let go" on used cable.
Just glad it was an easy mystery to resolve.
 
Last edited:
Location
Texoma
Arrival of new cable. Side by side comparison performed.
On the "old" OEM cable, an end feral let go & slide down the sheathing 3/4 ".
Moving forward, making progress.
 
Top Bottom