05 SJ styrofoam refoam and reinforce job

Proformance1

Liquid Insanity
Site Supporter
Vendor Account
Location
New York Crew
Well as I'm sure most of you know my ski weighs 340 lbs, so its time to refoam. Here is my weight thread: http://www.x-h2o.com/threads/65272
And here's some stuff where I first started workin on it: http://www.x-h2o.com/threads/48684
Originally it was Newman's ski, that I helped him build and did the front reinforcing with him on it back in 06. It is still holding up fine so, now its time to do the same on the back, plus to make sure it does not get wet again.
So far I have over 20 hrs into the reinforcing foam job. It's taking longer than I expected, but oh well, its a few months till Daytona.

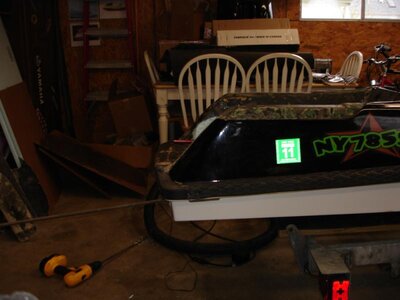
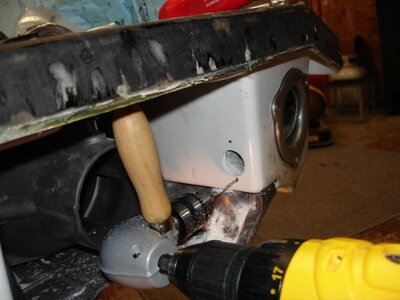
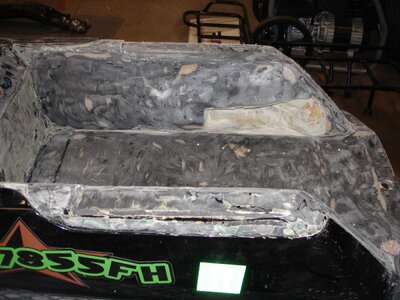
First I removed the turf I think I put it on way to good, it took forever to get off. Little scraps with a razor sharp putty knife. That took two nights after work. Then it was on to grinding off the old fiberglass and removing the Blowsioin Kicker footholds. Well again I think I put them on to good. That took a whole night and I had to drill out the pop reivets, graind off all the fiberglass, then break them out in 3 to 4 pcs each.

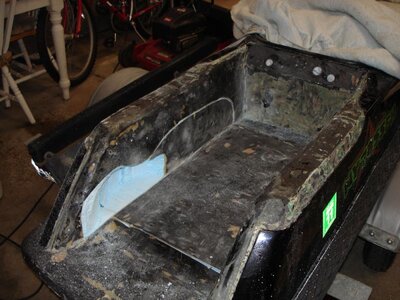
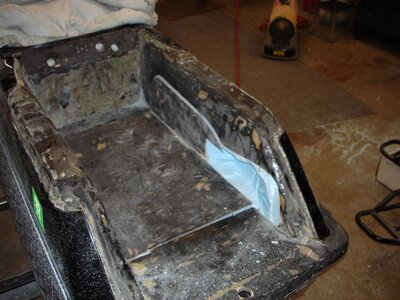
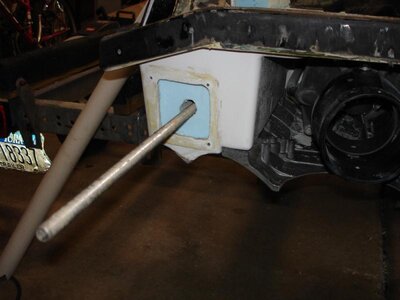
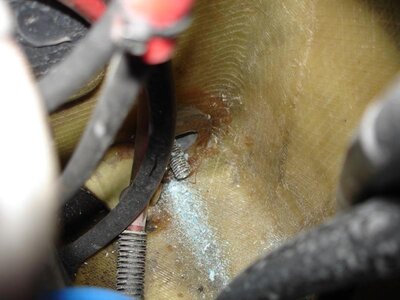
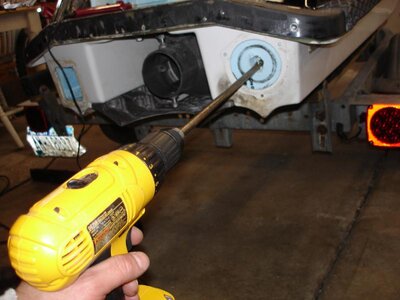
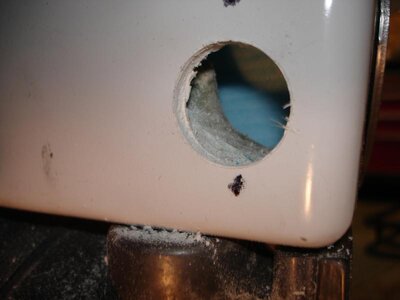
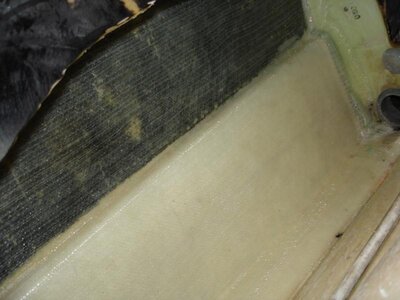
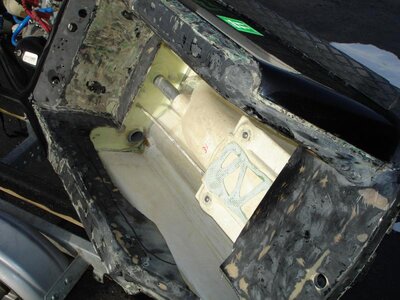
Next was pregrinding everything so I don't have to do it later. Then I cut the tray out, being careful not to cut thru to the pump area. Popped that out and started the tedious task of removing the wet foam. There is another two nights.

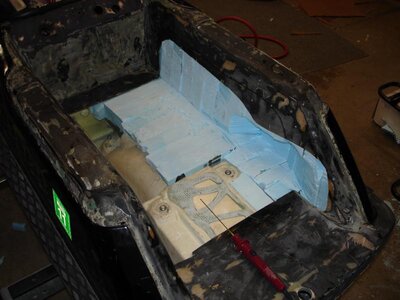
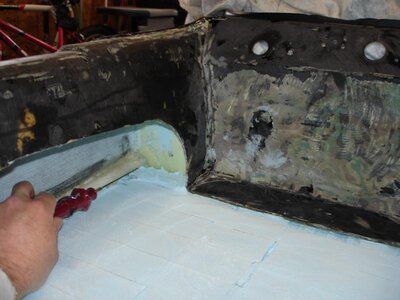
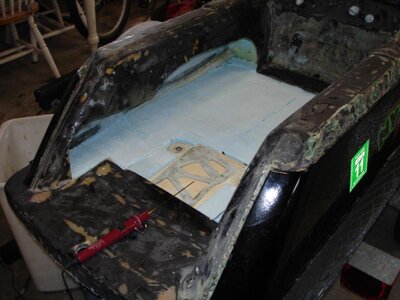
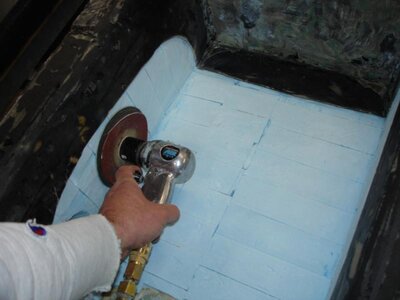
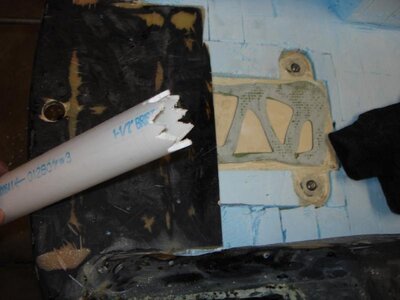
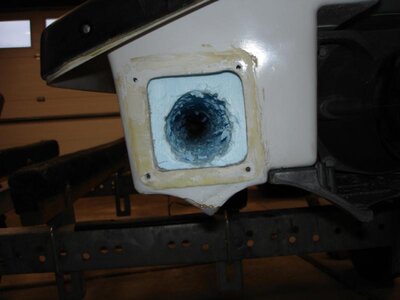
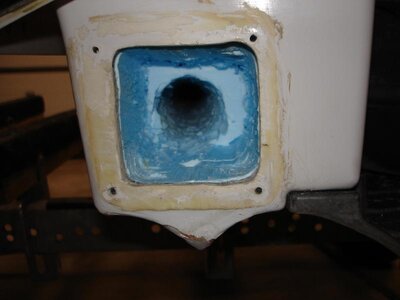
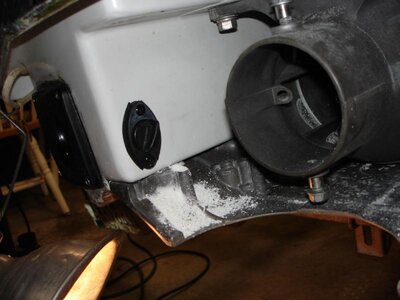
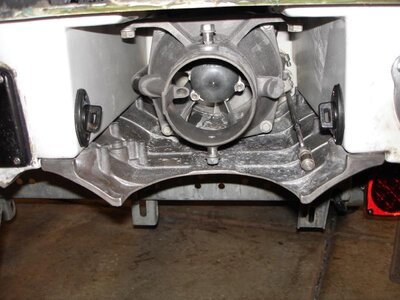
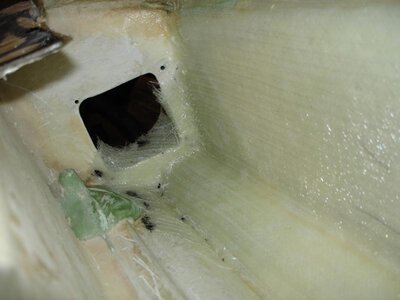
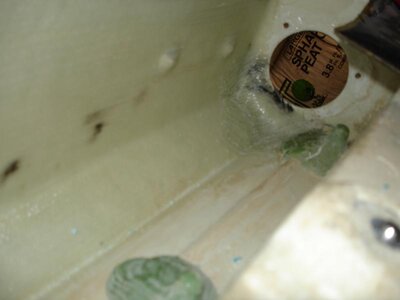
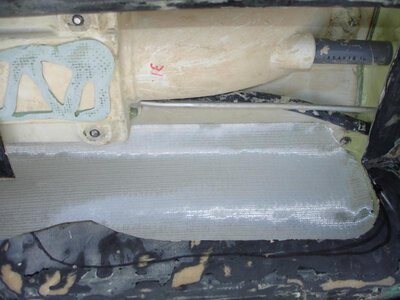
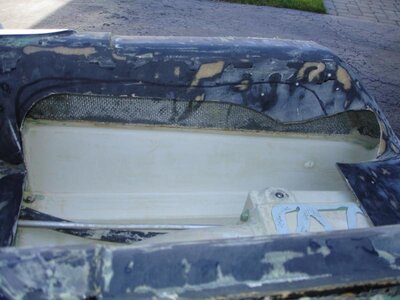
Finally I got it down where I could sand it with some 60 grit, and started putting 5 min epxoy on the bond line, pipe inlets/outlets, etc. Next it was time for the fiberglass reinforcing. I used US composites 12oz biax, with their 635 epoxy, 4:1. Luckily its been a great week here so I could work outside, hopefully it keeps up again this week.

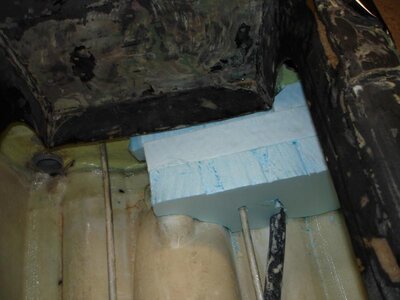
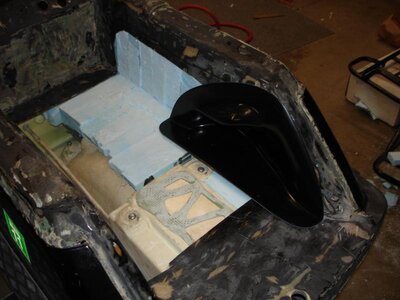
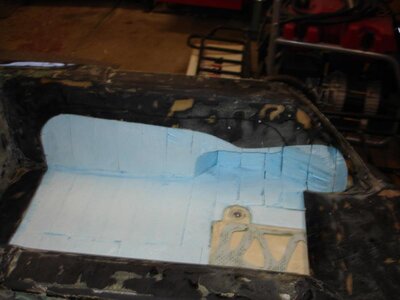
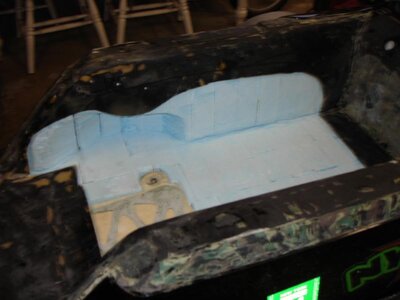
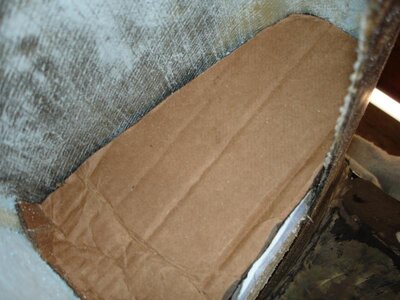
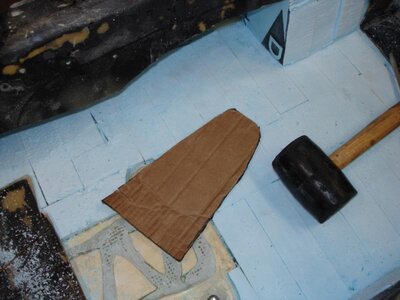
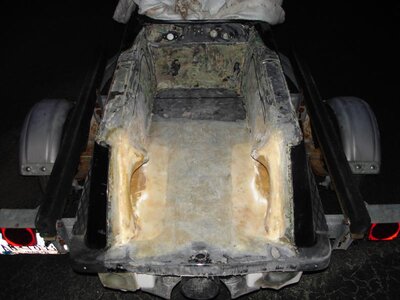
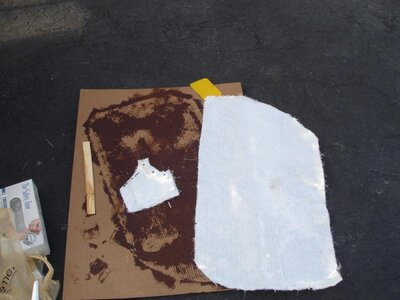
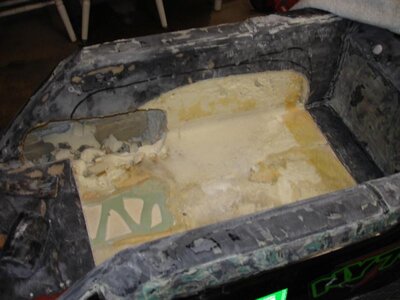
Once the fiberglass set up, it was time to start fitting up the Dow Styrofoam. This only has about a 25lb/sq in rating compared to the 40-60 lb/sq in rating of the urethane foam, but it won't hold water. Hopefully the 12oz will be strong enough to make up the difference. I thought about adding ribs to the sides, but decided against it. I used about 8oz of resin per side.
 

Attachments

  • DSC03041-01.jpg
    DSC03041-01.jpg
    72.8 KB · Views: 233
  • DSC03038-01.jpg
    DSC03038-01.jpg
    56.4 KB · Views: 294
  • DSC03064-01.jpg
    DSC03064-01.jpg
    40.6 KB · Views: 272
  • DSC03063-01.jpg
    DSC03063-01.jpg
    26 KB · Views: 274
  • DSC03062-01.jpg
    DSC03062-01.jpg
    50.9 KB · Views: 241
  • DSC03060-01.jpg
    DSC03060-01.jpg
    54.6 KB · Views: 251
  • DSC03059-01.jpg
    DSC03059-01.jpg
    72.1 KB · Views: 302
  • DSC03055-01.jpg
    DSC03055-01.jpg
    59.2 KB · Views: 278
  • DSC03048-01.jpg
    DSC03048-01.jpg
    55.4 KB · Views: 312
  • DSC03045-01.jpg
    DSC03045-01.jpg
    49.9 KB · Views: 301
Last edited:

Proformance1

Liquid Insanity
Site Supporter
Vendor Account
Location
New York Crew
More picts

I used a hot knife to cut the styrofoam. Great idea, but I bought the 20 dollar one and it takes time to cut. You can get stuff to fit pretty good with it though. I'm leaving a little space in the bottom ribs to let water drain to the back where I'm installing Sea Doo rear drains, in the pump area.
 

Attachments

  • DSC03065-01.jpg
    DSC03065-01.jpg
    47.2 KB · Views: 463
Last edited:

Proformance1

Liquid Insanity
Site Supporter
Vendor Account
Location
New York Crew
Thanks. Frosty and I toyed with the idea a few years ago, as others had. He did his orange boat this way and used 2lb urethane foam in the hard to reach areas. Now it seems at least one hull builder is doing the same so.... I'm going to do all I can to not use any foam. The little bit I used when we put in the scupper, back in 06, was soaked. The factory foam was damp.
 

BruceSki

Formerly Motoman25
Location
Long Island
subscribed. ive got to do the same to mine. i drilled some holes in the back and it drained for a few days. im sure my foam is soaked to as my ski weighs 350.
 

Proformance1

Liquid Insanity
Site Supporter
Vendor Account
Location
New York Crew
Well a couple more days after work cutting styrofoam. Its coming along nicely and basically i'm really not going to need to use urethane 2 part foam, unless I make a mistake. I may throw some in the tops of the footholds just to stiffen them up around the top of the foot area. It's taking a lot more time, but so far I'm really pleased. Footholds came in today along with other parts. I'm using Wamilton's Rickters. Ordered some turf and 9mm underpadding today also. An air grinder, hot knife and dremmel, really are needed to do this. I used cardboard for templates to get the pcs as tight as possible to the bottom and side walls.
 

Attachments

  • DSC03066.jpg
    DSC03066.jpg
    57.3 KB · Views: 396
  • DSC03067.jpg
    DSC03067.jpg
    56.5 KB · Views: 361
Last edited:
Looking real good Brian!!! My brother just foamed his new roundnose tonight with Steve, I think your quality of cutting the pieces blows their job out of the water. My only suggestion to you is that you don't use any two part foam no matter what. The reason being is that it may add some strength but it will only get wet. Water will get in the tray and it will slosh around will your riding and doing tricks. Eventually it will become soaked and retain water. I say if you want more rigidity in the tray just add more glass when you glass it all back together. Can't wait for Daytona!!!
 

Rickster

Matakana Menace
Proformance, great job on the foam placement, I'm doing the same right now on my RN, but decided to go with a more loose arrangement to allow the water to get out easier.

I am using styrofoam up to the tray area, and they using two part foam above for rigidity.

My only suggestion to you is that you don't use any two part foam no matter what. The reason being is that it may add some strength but it will only get wet. Water will get in the tray and it will slosh around will your riding and doing tricks. Eventually it will become soaked and retain water.

I have to disagree. If water has 'Soaked' into the two part foam, it means that the cells of the foam have been compromised, therefore the water will eventually drain from the foam the same way it got in.

:biggthumpup:
 
I don't know how often you've come across wet foam or tried to let it dry out but it never will, at least in all my experience with skis and boats. Once it's wet there is no going back.

Proformance, great job on the foam placement, I'm doing the same right now on my RN, but decided to go with a more loose arrangement to allow the water to get out easier.

I am using styrofoam up to the tray area, and they using two part foam above for rigidity.


I have to disagree. If water has 'Soaked' into the two part foam, it means that the cells of the foam have been compromised, therefore the water will eventually drain from the foam the same way it got in.

:biggthumpup:
 

Proformance1

Liquid Insanity
Site Supporter
Vendor Account
Location
New York Crew
I laid the scupper against the wall for 4 days with about an 1/8" of 2 lb 2 part urethane around it. It was still wet when I pulled it off. With the factory foam, I would agree that it will most likely drain over time, but aftermarket foam, absolutely not. Although Johnny at Blowsion told me once they had a ski hangin from a tree for over a year with drain holes in the back and it still never totally dried. Now this btings up a conversation that is of importance. DOES IT MATTER? I'm doing this because it needed to be done, in mine and most of my fellow riders opinions my ski was heavy, the scale proved that out. For normal surf riding, it would have been fine. With the cost of doing this job and all the work involved, I would not do it unless I had to. I have about:
US composites 170
Wamiltons 140
HydroTurf 130
Lowes 50
So we are fast approachin 1/2 a grand to do a refoam, and I'm not done yet!
 
What size foot do you have ? Can you get these footholds in differnet sizes, it looks so short ??


Well a couple more days after work cutting styrofoam. Its coming along nicely and basically i'm really not going to need to use urethane 2 part foam, unless I make a mistake. I may throw some in the tops of the footholds just to stiffen them up around the top of the foot area. It's taking a lot more time, but so far I'm really pleased. Footholds came in today along with other parts. I'm using Wamilton's Rickters. Ordered some turf and 9mm underpadding today also. An air grinder, hot knife and dremmel, really are needed to do this. I used cardboard for templates to get the pcs as tight as possible to the bottom and side walls.
 

Proformance1

Liquid Insanity
Site Supporter
Vendor Account
Location
New York Crew
I wear a size 9 wrestling shoe. These holds are about average size. Bigger foot, I'd look around and try it before you buy it.

I have been really busy at work so I haven't worked on this in over a week. A couple 16hr days, and I was beat.

Today I worked about 8 hrs and made some good progress. The foam is all in and I managed to dry fit the tray and footholds. I'll probably have to do a little more fitting after replacing the tray. So far I've yet to use any two part urethane foam, so i'm pretty happy about that!

I managed to fit cut the scupper back in. It took some time but hopefully this will all be worth it. Tomorrow is the exh tube install and hopefully get the scupper glued up.
 

Attachments

  • DSC03068.jpg
    DSC03068.jpg
    56.9 KB · Views: 294
  • DSC03070-01.jpg
    DSC03070-01.jpg
    56.3 KB · Views: 251
  • DSC03081-01.jpg
    DSC03081-01.jpg
    39.7 KB · Views: 258
  • DSC03080-01.jpg
    DSC03080-01.jpg
    38.6 KB · Views: 259
  • DSC03075-01.jpg
    DSC03075-01.jpg
    38.2 KB · Views: 217
  • DSC03077-01.jpg
    DSC03077-01.jpg
    73.9 KB · Views: 240
  • DSC03078-01.jpg
    DSC03078-01.jpg
    40.7 KB · Views: 321
  • DSC03076-01.jpg
    DSC03076-01.jpg
    68.4 KB · Views: 233
  • DSC03072-01.jpg
    DSC03072-01.jpg
    61 KB · Views: 217
  • DSC03071-01.jpg
    DSC03071-01.jpg
    52.8 KB · Views: 238
Last edited:

Proformance1

Liquid Insanity
Site Supporter
Vendor Account
Location
New York Crew
Installing the scupper:
First I shoved in a threadded rod, then followed it up with a toothed pc of pvc. I made the teeth with the dremmel. Use a twisting motion to push it through. The rod is used for a guide. Periodically I had to remove it and vacuum it out to get it all the way through. Last I used the hot knife to cut the square area for the scupper itself.
 

Attachments

  • DSC03082-01.jpg
    DSC03082-01.jpg
    44 KB · Views: 212
  • DSC03084-01.jpg
    DSC03084-01.jpg
    54.8 KB · Views: 189
  • DSC03085-01.jpg
    DSC03085-01.jpg
    43.7 KB · Views: 199
  • DSC03086-01.jpg
    DSC03086-01.jpg
    37.3 KB · Views: 187
  • DSC03091-01.jpg
    DSC03091-01.jpg
    33.8 KB · Views: 200
  • DSC03093-01.jpg
    DSC03093-01.jpg
    34.5 KB · Views: 206
Last edited:

Proformance1

Liquid Insanity
Site Supporter
Vendor Account
Location
New York Crew
Thanks guys, it was a PITA but hopefully will be worth it in the long run.

Another 9 hrs today. I made a little more progress. Scuppers in and mounted. I had to remove some of the foam to get it to fit properly. Same on the exhhaust. I took some of the pcs out and custom fit them. I basically did the exh the same as the scupper, except with a bigger tube and more effort.

Drain plugs were easy, you just have to make sure that you are not going to drill through the ride plate mounts. Thanks again Steve for the drains.
 

Attachments

  • DSC03095-01.jpg
    DSC03095-01.jpg
    51 KB · Views: 223
  • DSC03096-01.jpg
    DSC03096-01.jpg
    45.6 KB · Views: 178
  • DSC03098-01.jpg
    DSC03098-01.jpg
    48 KB · Views: 212
  • DSC03099-01.jpg
    DSC03099-01.jpg
    32.2 KB · Views: 184
  • DSC03100-01.jpg
    DSC03100-01.jpg
    48 KB · Views: 256
  • DSC03101-01.jpg
    DSC03101-01.jpg
    63.2 KB · Views: 234
Last edited:
Top Bottom