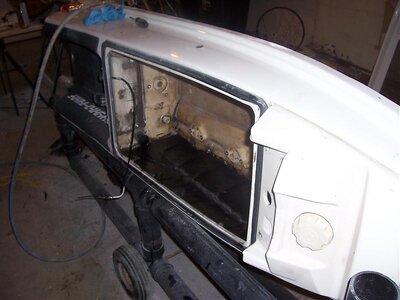
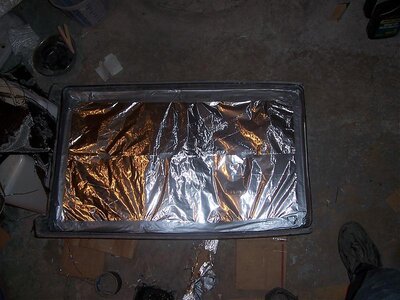
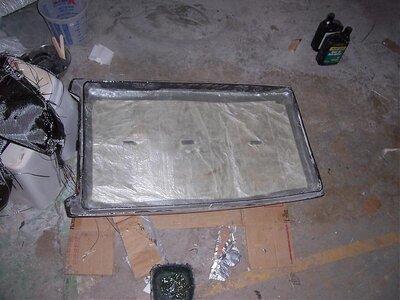
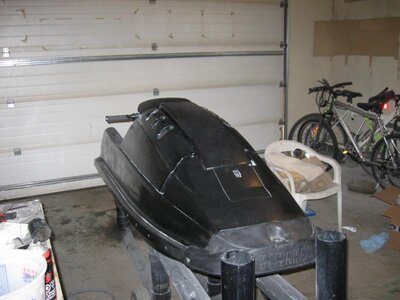
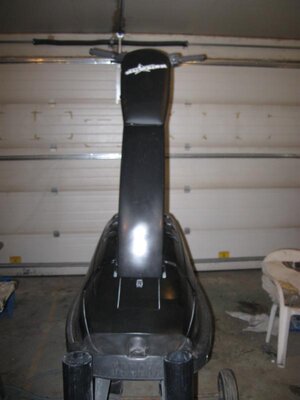
1990 SJ SN Freestyle, First Ski, First Build

Pablo

sqeez bth levrs & lean bk
Site Supporter
Location
georgia
1st ski, 1st build

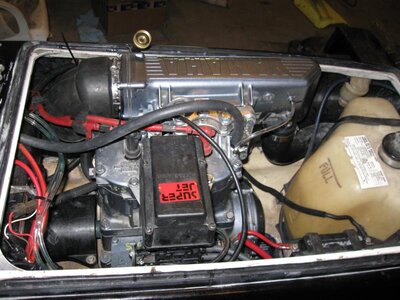
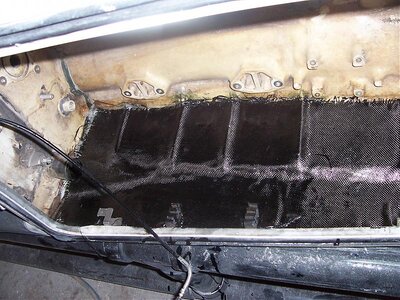
i'm doing the same thing right now on my 95 sn (minus the hood work). looking great. i need to start a build thread for my stumble through the build process. how's the bottom of the hull? does it need any gelcoat work? mines a little rough. i plan to gel coat mine this week.
 
Last edited:

Tuxie

Square Hipster
Location
Edmonton
The bottom of the hull may need some cosmetic sanding, nothing serious, was'nt going to do much to it until I seen Christians freestyle build, it turned out so damn good I think I might do a little more work on the bottom. Looks like he just sanded filled sanded filled......etc, then some sweet green paint, not sure if I would go green, not because it would'nt look bad ass, but it would be pretty much a rip off on him.

JetX, thanks for the link, will be checking that out today forsure, pretty excited about that thanks man.

As for progress not much as of late, brought my hood to work going to be working on the hood liner, atleast figureing out the shape and design I want to go with.
 

Tuxie

Square Hipster
Location
Edmonton
Ok, sealed in handhold buckets with that marine sealant 5200 something or other. Its taking longer to cure then I expected, will bump up the temp in the garage a few degrees, once cured I think I will fill in the edges with resin filler mix a bit and lay some fiberglass cloth over top.

Purchased some epoxy and fiberglass materials, pretty happy with this local store, industrial plastics & paints, very helpful and prices seem reasonable. A yard of carbon fiber by 50 inches was like 50 bucks. Started filling in upper and lower deck seem with resin / filler mix, must have not added enough silica cause mix ended up more runny then I wanted, filled it in and noticed it all ran back towards the bulkhead, wasn't overly excessive but defiantly not even like I wanted. So I blocked up the back end a lil and it started to run nice and even, but noticed by the bulkhead little pools of water were bubbling up in the resin........:261: :thinking: well I guess I will have to think about defoarming :rocketwhore: Anyways I removed the blocking resin began to pool back near the bulkhead, I soaked up the water with a sponge, and fully expected that I would have to sand the ******** out it and start over. Luckly when I checked on it after it seemed to cure up clean, but decided there that it seemed like a waste of epoxy resin, so filled in the rest with long strand filler bondo. Was much easier to even up but definatly required more sanding before I layed the cloth. Also before anyone says anything about the pics yes I left the ribs in, but I also built them up into nice wedges so it layed pretty clean. reinforced with blowsion reinforcement kit, plus some extra carbon fiber that I cut into the same patern as the cloth that came with the kit.

Here is the important part of my post need some help with the defoaming, has anyone been able to defoam and use the same turf without wrecking it, I was kinda planning next winters project to be defoam and footholds, but now not sure, also if anyone could post links to a good defoaming thread.
 

Attachments

  • 100_3029.jpg
    100_3029.jpg
    118.6 KB · Views: 68
  • 100_3030.jpg
    100_3030.jpg
    121.8 KB · Views: 64
  • 100_3031.jpg
    100_3031.jpg
    52.2 KB · Views: 47
Just ride it as is and worry about defoaming next year...a little bit of water never hurt anything. Ask your self this question...is your riding ability to the point where a few extar pounds in the rear wil make a noticeable difference, if not than leave it alone until you are ready to do footholds.
 

Kennay

Squarenose for the _____
Location
Myrtle Beach, SC
Man Tux, that's ALOT of air where those ribs are. No doubt, if I were you I'd rip it off, grind the ribs down and lay it again. All that is going to do is delaminate. It's going to start pulling off from the hull right at those big air pockets at the ribs.

I'm not knocking you, so please don't take it the wrong way.
 
Ok, sealed in handhold buckets with that marine sealant 5200 something or other. Its taking longer to cure then I expected, will bump up the temp in the garage a few degrees, once cured I think I will fill in the edges with resin filler mix a bit and lay some fiberglass cloth over top.

Purchased some epoxy and fiberglass materials, pretty happy with this local store, industrial plastics & paints, very helpful and prices seem reasonable. A yard of carbon fiber by 50 inches was like 50 bucks. Started filling in upper and lower deck seem with resin / filler mix, must have not added enough silica cause mix ended up more runny then I wanted, filled it in and noticed it all ran back towards the bulkhead, wasn't overly excessive but defiantly not even like I wanted. So I blocked up the back end a lil and it started to run nice and even, but noticed by the bulkhead little pools of water were bubbling up in the resin........:261: :thinking: well I guess I will have to think about defoarming :rocketwhore: Anyways I removed the blocking resin began to pool back near the bulkhead, I soaked up the water with a sponge, and fully expected that I would have to sand the ******** out it and start over. Luckly when I checked on it after it seemed to cure up clean, but decided there that it seemed like a waste of epoxy resin, so filled in the rest with long strand filler bondo. Was much easier to even up but definatly required more sanding before I layed the cloth. Also before anyone says anything about the pics yes I left the ribs in, but I also built them up into nice wedges so it layed pretty clean. reinforced with blowsion reinforcement kit, plus some extra carbon fiber that I cut into the same patern as the cloth that came with the kit.

Here is the important part of my post need some help with the defoaming, has anyone been able to defoam and use the same turf without wrecking it, I was kinda planning next winters project to be defoam and footholds, but now not sure, also if anyone could post links to a good defoaming thread.


I don't think they are air pockets...even though it looks like it
 

Tuxie

Square Hipster
Location
Edmonton
Ya kennay I know it looks bad but If I was smart and would have took more picks before I layed the cloth / carbon fiber you would see how they are built up, though I am not saying that there isn't air pockets in there, I wouldn't want to jinx myself, all I am saying is that it isn't as bad as it looks and if next winter you see me reinforcing again well you know something went wrong, on the other side I will post some better pre-laminating pics and you can tell me what you think, I am glad you called me on it though keeps me thinking.
 

Tuxie

Square Hipster
Location
Edmonton
Thanks Jetx for the info, at my level a couple of pounds aint going to make much of a difference, and heck it gives me somthing to plan for next winter.
 

Tuxie

Square Hipster
Location
Edmonton
I agree with you 100% now that I have done it and seen how it looks, and compared to how others have looked. If I were to do it again I would seriously consider grinding those puppies down.
 

Tuxie

Square Hipster
Location
Edmonton
Hull reinforcement is done, ended up leaving ribs in as I didn't want to get more carbon fiber, found that marine sealant I put around the hand hold buckets really was'nt setting up fast enough, I mean it defiantly was firmer but jeez how long do I have to wait, so used a resin filler mix and coated the edges and let it cure, then I sanded it a bit and layed another three layers of cloth over top. I also layed fiberglass onto the hood liner form. Will check it today maybe I can get the hood finished today, minus the paint.
 

Attachments

  • 100_3031.jpg
    100_3031.jpg
    52.2 KB · Views: 37
  • 100_3033.jpg
    100_3033.jpg
    125.8 KB · Views: 71
  • 100_3043.jpg
    100_3043.jpg
    86.9 KB · Views: 53
  • 100_3044.jpg
    100_3044.jpg
    75.6 KB · Views: 57

Tuxie

Square Hipster
Location
Edmonton
Fiberglassed liner in, still have to put intake tubes back in, will cut them in and glass them when it cures a bit better. Did some more sanding on the hull pretty pumped to get that done, will do all the prep work and then kinda give that garage a cleaning lots of dust in there right now. Then Paint. Also noticed that my handlepole is full of water, I turn it over and can hear the water pour from one end to the other, what are my options for that? It might be a next winter project.
 

Tuxie

Square Hipster
Location
Edmonton
Ok, hav'net touched this thread forever, and had'nt touched the jet ski for almost as long, but got back at it, got all my parts in, re-assembled the engine, was'nt as bad as I thought it was going to be, thanks to my tear down manual. Just finished it up today, will have to break her in and re torq head but very minimal, sounds great looks great minus the paint job, I could have spent more time on that, but my father is getting into body work / automotive painting and will have a paint both set up for next winter so....., but anywho will leave it with out any decals for now ride her this season, see how she feels, then maybe next year defoam / refoam and repaint.

So here is the jet ski as it stands,

Bored out 701cc engine, ported cylinder, head modified, intake manifold mod, lightened flywheel, rejetted carb, blowsion freestyle pump cone, new reed valves, all new gaskets, primer kit installed, choke removed, rerouted cooling water output, new solas impeller, Slutty Hood Mod, Protec rideplate, worx intake grate, new grips and new chin pad cover,

Think thats most of it, now its time to ride the ******** out of it:naughty:
 

Attachments

  • img_0016.jpg
    img_0016.jpg
    54.2 KB · Views: 84
  • img_0017.jpg
    img_0017.jpg
    54.7 KB · Views: 49
  • img_0018.jpg
    img_0018.jpg
    58.1 KB · Views: 62
  • img_0019.jpg
    img_0019.jpg
    35.8 KB · Views: 39
  • img_0021.jpg
    img_0021.jpg
    79.6 KB · Views: 71

Tuxie

Square Hipster
Location
Edmonton
Thanks, Superfun, hav'nt looked at this for months but was thinking about it again cause I have more work to do again. Have to redo a slutty hood mod, as my original hood is at the bottom of Wabamun Lake, hood latch failed while I was 3 feet underwater after I Subbed her, while I was underwater could see the hood come off I must've been inches from grabbing it, also thought it would float but..... Well either way the plan for this off season is to redo slutty hood mod with replacement hood, install hood straps and fabricate some other hood hardware as the replacement hood off ebay did not come with any. Also I have to defoarm refoarm hull. Funny you mention him being a American Bulldog, he's actually 7/8 boxer, 1/8 bull mastiff, but are neighbors just moved in, there dog is purebred American bulldog and put them side by side they dam near the same dog, same exact markings, like someone cloned my dog.
 

Tuxie

Square Hipster
Location
Edmonton
Well getting ready to get at my ski again. Last season I subbed the ski and the hood latch failed and I lost the hood, thought it would float but aparantly not. Already found a new hood, but did'nt come with any hardware. So this year I need to get a hood latch hook, make a pole damper, and the hood stops that go on the front of the hood. Also would like to refoam the hand pole and tray. New hydroturf and install 2 dakine foot straps
 
Nice looking square nose, If you ever need epoxy resin or carbon fibre here in town hit up viking plastics 45street and 68 ave... There pretty nice and help me fix the nose on my square a couple weeks ago
 

Tuxie

Square Hipster
Location
Edmonton
hey you ride a square, I thought I was the only one in alberta, where you ride at? and this winter I will need some more epoxy supplies, unless I find my black hood thats at the bottom of wabamun lake
 
Top Bottom