927 Blaster 1 Project

You moved your eng back farther than it would have been had you chosen to use the stock rear mounts , so are you gonna have to cut a clearance hole for the carbs/ FA'S also ??
 
Location
Earth
Clearance cut for filter assemblies is -DONE. I don't have the filter's yet, but I've got 2 1/2" clearance from base of adapter to my current cut. Will try to get em 2mrw ;-)
I'll post some new pix in a lil while. Waterbox & Strap, battery tray, & fuel tank straps & foam under support --> are DONE!
 
Last edited:
Location
Earth
12/28/09

Made a little progress today.

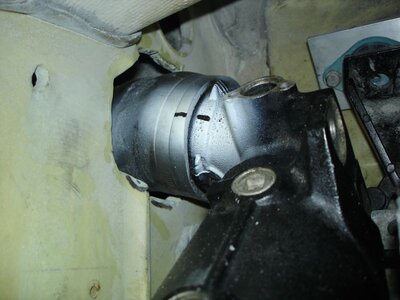
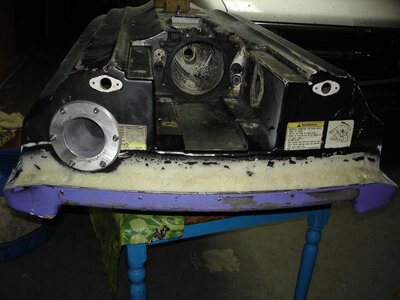
Still need to clean this hole up a little but pipe & w/b line up beautifully.
And no problem with clearance for the electrical box on the other side. SIGH...


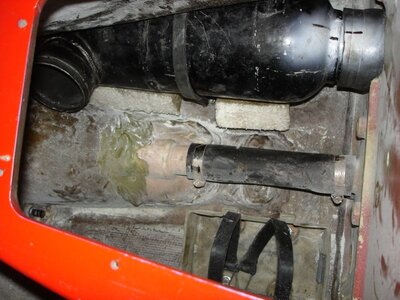
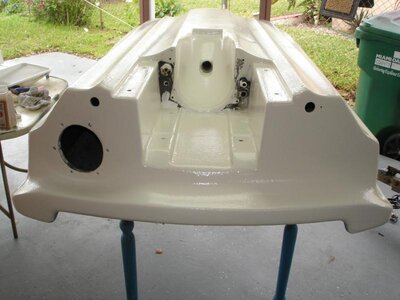
Here is the w/b STRAPPED down ;-) AND padded underneath.
And the battery box is bolted down.


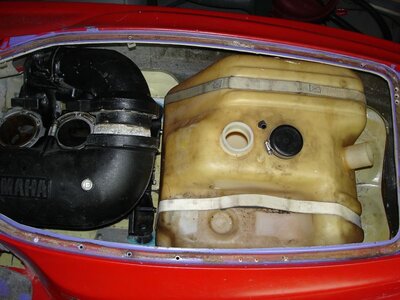
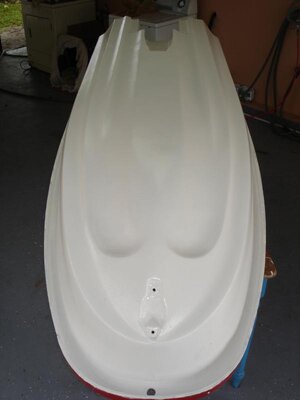
I know it ain't pretty, but the tank covers it all up & it does a great job.


As you can see.
And I even think I might just be able to use the stock filler neck for the tank.
Might give that a try today as well.
If not.... I guess I'll be opening up that hood everytime I gotta fuel up?


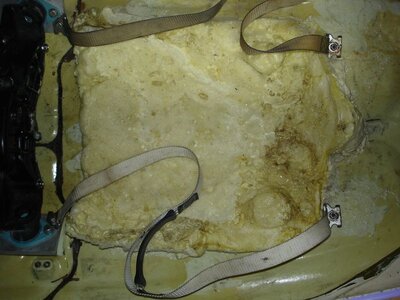
Today, I'll try to get some more of that foam out of the right rear of the ski to make room for the rear-exit exhaust.
Getting all that foam out is a real pain in the butt, )-:
 

Attachments

  • DSC04690.JPG
    DSC04690.JPG
    75.8 KB · Views: 117
  • DSC04692.JPG
    DSC04692.JPG
    102.1 KB · Views: 104
  • DSC04695.JPG
    DSC04695.JPG
    94.2 KB · Views: 94
  • DSC04696.JPG
    DSC04696.JPG
    97 KB · Views: 112
Last edited:
Location
Earth
12/31/09

As you can see in pic:
-"small" exhaust outlet installed (for mock up) -that's 3 1/2" from pipe to exit (used 1 of the 1100 Raider w/b's, fit like a charm)
Also had machinist make me a 3/8" thickness ring (bout same size as outer flange) to go on the inside, which I drilled & tapped for the 6 allen bolts to screw into.
-extra water-line fitting installed for dual cooling
-water exit fitting installed for exhaust pipe 1/2" water line
-& finally for today; filled & shaped the rear with foam, ready for f/g'n

btw, I forgot to mention, what a pain in the @$$ to remove all that foam from the right rear to allow access for rear exit exhaust. WOW
 

Attachments

  • DSC04700.jpg
    DSC04700.jpg
    63.6 KB · Views: 160
Last edited:
Location
Earth
Finally got a little more progress made. Fiberglassed & gelcoated the bottom. Hopefully tomorrow I'll be able to sand it, in order to get it ready for the AwlGrip. Then I'll flip it over & start with the top.
 

Attachments

  • DSC04869.jpg
    DSC04869.jpg
    28.5 KB · Views: 111
  • DSC04870.jpg
    DSC04870.jpg
    56.5 KB · Views: 125
Location
Earth
Haggis- I rolled 2 layers on it. I've got an orbital sander, so it should be no problem w/a 220 grit. Then I plan on priming it with the 545 Awlgrip primer, & then giving it a few layers of white Awlgrip.

Vomitspot- not sure if yours was a question, but the answer is no. These standard 66V cylinders that I'm using, were sleeved & fitted with with 87mm pistons from Wiseco. They fit right into the stock 66E cases, no problem.

Feel free to post any suggestions, guys..... or gals.
 
Location
Earth
Oh, I see what you're saying now. To tell you the truth, I haven't put the engine completely together. Just dropped the cylinder's on the cases. No piston's yet. Just a question, if I may. Why couldn't you just alter the piston, instead? Just wondering why that wouldn't work?
The main reasons I went with these cylinders, was because #1-they were GIVEN to me. #2-bigger is better &#3-they're also ported. They were bored to 86mm, but had some surface rust. So I went to 87, to clean it up, plus I had no pistons anyways.
 
Location
Earth
Yeah yeah, of course I've got the pistons, I just haven't put 'em in the motor, yet. I've only mocked up the engine without the pistons or the crank for fitting purposes. That's why I haven't run into that problem with the piston skirts "yet". Believe me, I've got so much fiberglass work left to go, that I don't even know where to begin.

But I'm still wondering why you couldn't just trim the skirts?
 
Location
Earth
Got engine completely together & absolutely no problem with piston clearances.
Just had to cut the exhaust valves back to clear the MUCH bigger pistons.

I know the project's going slow, but I'm picking up the pace.
Here's the bottom... FINISHED.
And... my mod to the top cowling to accommodate the GP800 dash.

Should be priming the top, some time this week, .....hopefully.

DSC05057.jpgDSC05049.jpgDSC05056.jpg
 
Location
Earth
Thanks Blaster800.
I sure hope it looks nicer when it's all painted.

I'm going to be starting off with a Skat Trak 14-19, I picked up from a friend for $50.
He could always pitch it for me, if need be.
But do you think I'm wasting my time & $, & should just go with a Solas? (stock pump)
 
Location
Earth
I can't believe it's finally alllll (atleast) primed.
Lord willing, it'll all get sanded & painted this week.
Then it's "assembly" time.
(engine IS assembled btw)


DSC05080.jpgDSC05081.jpgDSC05079.jpg
 
Location
Earth
GOOD point ??? Well, I guess if it doesn't get enough air thru the hole on the top for the steering stem & small drain holes @ the bottom of the hood; I'll have to install some Flo-Rite Vents (http://www.rivayamaha.com/RivaStore/product_page.asp?Category=Flo-Rite Vents). Thanks for bringing that up, I'm sure I'll brain storm over it now.
If you've got any ideas, please feel free to share. But everything's already painted, soooooo.... I'll sleep on it ;-)
Hope you like my new pics. I'm not trying to make a photo copy of yours, I guess we just have similar taste, :-D.
 
Top Bottom