BA Freak (155 conversion) & carbon circus

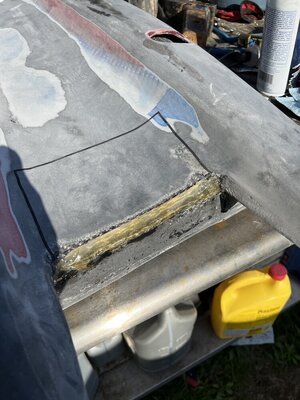
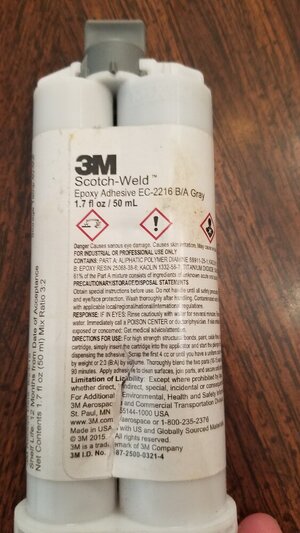
Yeah, thickened epoxy with chopped strand and then lay some small strips of S-glass over the seam. That hood liner weighs nothing, it will be perfect. When the thickened epoxy really starts to flash, you can wet the tip of your finger with some fresh resin and use it to smooth the thickened blob. Be careful though, if you use too much resin on your finger, it will make the thickened epoxy start to run. Just a tiny dab of fresh resin on your finger will keep it from sticking to the flashed resin and allow you to blend it. I can get my thickened epoxy real smooth doing that. Plus, when you lay a small strip of S-glass over it, you can shape the blob a bit and get it to look nice and smooth!
Your build looks great though! You'll be flying upside-down and forgetting about that liner in no time :cool:

1775.gif
 
I'm watching this with great interest because I have a fiberglass freak with a similarly separating hood liner. Last season I tried to peal the crack apart as much as I could and slather thickened epoxy in there but its separating again so I'll need to take more drastic measures soon.

Could you post up some more close up pictures of the joint, how the two pieces fit together isn't obvious to me looking at the complete hood
 

DylanS

Gorilla Smasher
Location
Lebanon Pa
I'm watching this with great interest because I have a fiberglass freak with a similarly separating hood liner. Last season I tried to peal the crack apart as much as I could and slather thickened epoxy in there but its separating again so I'll need to take more drastic measures soon.
Could you post up some more close up pictures of the joint, how the two pieces fit together isn't obvious to me looking at the complete hood
yessir I’ll post some more pictures
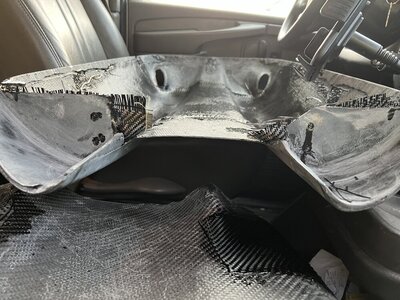
The way I separated it was not the way I intended but the carbon was sooo cracked that I really didn’t have a choice.
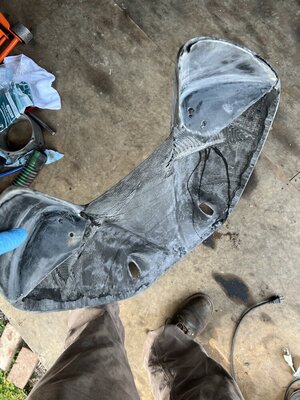
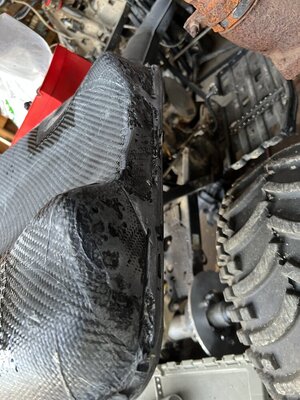
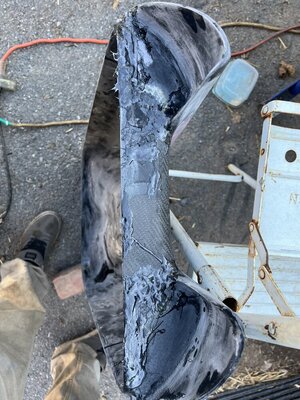
Ideally you’d want to cut around the outside where the epoxy is and when you got up to the “horns” if you were somehow able to get between the liner and shell to cut you’d have two perfect pieces. Mine cracked under the right horn so I went ham and cut it at the other side and split them. I’ll post some pictures when I’m home. If you look up Sanomans Circus thread you can see how the hood comes in pieces and it’ll help you visualize what you need to do. And you can also just bug sanoman a bunch too thags what I do at least :)
 

DylanS

Gorilla Smasher
Location
Lebanon Pa
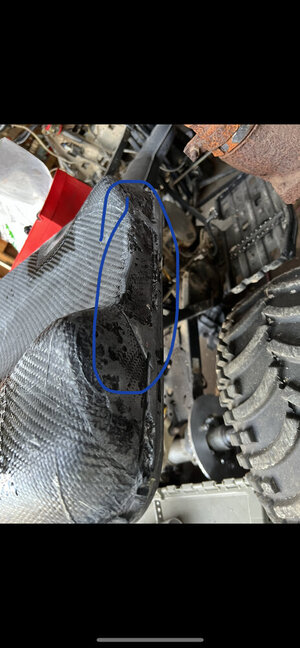
Circled In blue is the area that will give you trouble. I used a airsaw/sawzaw to make my cuts but that area is thin and has a ton of epoxy on it. You can see where mine cracked and where I made a matching cut.
 

Attachments

  • D7D5A94D-8D0D-4FBC-9398-2E5885429904.jpeg
    D7D5A94D-8D0D-4FBC-9398-2E5885429904.jpeg
    196 KB · Views: 129
  • AB175521-A46E-4108-9C94-A160C1A3054A.jpeg
    AB175521-A46E-4108-9C94-A160C1A3054A.jpeg
    171.7 KB · Views: 72
  • B14F17C1-4416-4F47-AFF0-833228068E1B.jpeg
    B14F17C1-4416-4F47-AFF0-833228068E1B.jpeg
    175.3 KB · Views: 68
  • 64E466C9-5268-401A-94D3-2A93C1C9ED20.jpeg
    64E466C9-5268-401A-94D3-2A93C1C9ED20.jpeg
    97.6 KB · Views: 67

DylanS

Gorilla Smasher
Location
Lebanon Pa
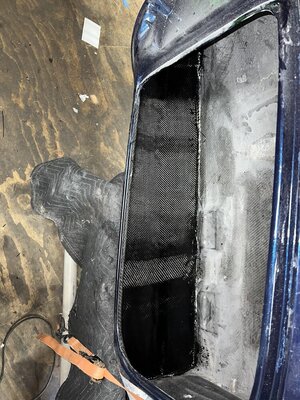
Put a single layer of 6oz on the backside of the breather holes for reinforcement and to use as material to guide my 2” holesaw.

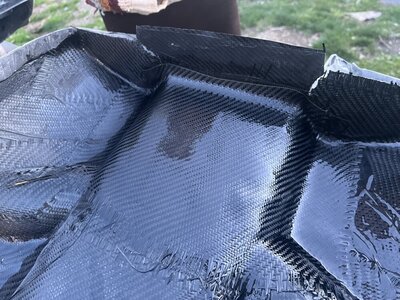
Inside the hood itself I did two layers at the corners of the “horns” and a single large layer that spanned most of the middle and up to the edges. This hood had a lot of spiderwebbing in the paint and It may have been a paint issue but I’d rather not take the risk of it being a hood flexing issue. This should help stiffen it up a little bit, maybe not enough but we will seeA54898BF-12C4-499B-B206-E58DE8CEC8A2.jpegCB344358-0D2F-4256-8FD7-4CA64FBCABC9.jpeg
 
If you haven't already, take a look at where you want the breather hoses to be, if you're running a lay down pipe you might not want them in the same place as previous owner had them with a B pipe. My opinion, for what it's worth, is you want those hoses to be long so when the ski is flopped upside down they keep the opening above water level.

With a lay down pipe that means they can't be near the front of the hood, and depending on what you are using for a tank there might be only a small area that they'll fit right in front of the motor.
 

DylanS

Gorilla Smasher
Location
Lebanon Pa
If you haven't already, take a look at where you want the breather hoses to be, if you're running a lay down pipe you might not want them in the same place as previous owner had them with a B pipe. My opinion, for what it's worth, is you want those hoses to be long so when the ski is flopped upside down they keep the opening above water level.

With a lay down pipe that means they can't be near the front of the hood, and depending on what you are using for a tank there might be only a small area that they'll fit right in front of the motor.
Yessir, I’m hoping the two at the front will sit between the 2 gal cart tank and fw cover. I saved breather toobs off a b2 for whatever reason so they’re plenty long!
The front most breather hole I’m on the fence on, might block it off and make a new third hole or make a holder to run it through so I can group it with the front two tubes!
 

long beach local

long beach local
Location
Az
I’m following your work as my hood is cracked also but hope mine doesn’t get much worse. It is really thin huh Tem really built it a little too light lol.
I drilled (2) 2” holes in the front of my liner and used something called a Frogskin it has 3M glue around the edges ,it lets air in but water runs off I got it from Blowsion they came in various sizes. Both are still on there today working good. Keep up the good work.
 

DylanS

Gorilla Smasher
Location
Lebanon Pa
Made up my general shape tonight with a single layer of 5.9oz, this will serve as a template for me to reinforce from the inside then sand into desired shape.

Pics of the hood scarfed so I can blend before paint, I took the top side angle down past the finishing cloth to bare carbon so I hopefully won’t have any delaminating
5752C7DF-0711-4A46-A371-4CB51B496850.jpeg

Then.. hotglue lol
Built myself a nice thick blob of it to fill in that big void then used a torch and spoon to form it into a rough transition.
7DF35D32-59EF-4DFB-B045-4A843D0CAC0A.jpeg
Mold release was applied to every area BUT the shell of the hood, plan is to have two pieces so when this layup sets I can split it, remove the glue, and reinforce the unsupported areas underneath the shell before bonding hood to liner.
Epoxy resin was applied to all scarfed edges etc and I laid up a oversized single piece
0E8FC1EA-4BE1-4C33-B10A-553E36F32232.jpeg
When it’s setup I will trim the excess and sand all the edges down to blend my tapered sides in. The layup isn’t perfect, far from it, but once the inside is reinforced I can sand the outside to my desired shape and fill with thickened epoxy.
This will leave me with my two halves, once the weather warms up I’ll bond the halves and do a final layer under the horns to create a smooth surface.
 

Attachments

  • C4731208-BA8F-4F3D-A61F-41DEFB7B5B6B.jpeg
    C4731208-BA8F-4F3D-A61F-41DEFB7B5B6B.jpeg
    157.6 KB · Views: 43

DylanS

Gorilla Smasher
Location
Lebanon Pa
Went with 4 layers in progressively larger sizes. You’ll see where I stopped the edge short at the bend, this is because the liner actually begins to touch the shell at that line. This will give me 5 layers at the unsupported radius to get into shape.
trench gets ground out tomorrow and I should be ready to connect my two halves.
Thickened epoxy around the outer shell, between the single flap layer you see here and shell, then a finishing layer from shell to under horns before paint. Will also be throwing a layer over the entire inside of the liner. I most likely won’t be winning the lightest hood competition but it’ll never have to come apart again!!!!F3BF0A58-BC28-48B0-946B-C3DEF65E1FCD.jpeg 5EB4471C-E548-43E7-9C20-78091A0D6CCD.jpegD01274D2-8E5D-421C-A074-8E5FDE0B82DD.jpeg
 

Attachments

  • 1C413CB9-556B-45A2-B304-333FB04DFA69.jpeg
    1C413CB9-556B-45A2-B304-333FB04DFA69.jpeg
    204.6 KB · Views: 45
Last edited:

DylanS

Gorilla Smasher
Location
Lebanon Pa
Unfortunately grinding a v channel into the existing epoxy isn’t going to work, in order to get the “channel” I have to cut through the very very thin top carbon layer and this leaves me with no backing and no guide to how the hood was shaped.
When I get the hull back I’m going to see if the shell fits nice on the ski without liner, and if that’s the case it’s a matter grinding it all out and finding a way to reepoxy to liner. If that isn’t the case I’ve gone over all of the epoxy with chisel and hammer and removed anything that wasn’t stubborn. I’d have to leave it in, to retain shell shape, and epoxy the existing epoxy back to shell. Very tricky stuff here, praying shell by itself has nice fitment on the hull.

Just checked fitment, doesn’t look terrible but there is slight overhang at the sides. Thinking I’m going to find a way to set the liner on and mock it up temporarily then fasten together
 
Last edited:

DylanS

Gorilla Smasher
Location
Lebanon Pa
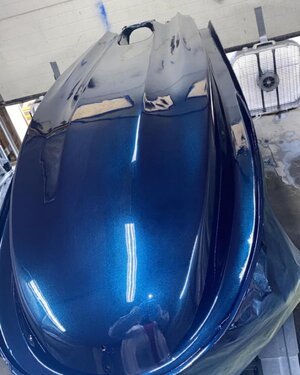
Finally back from paint, time for hood work!
Paint came out a little darker than I wanted, almost a purple/black indoors, but in direct light it has a blue purple hue. 4EA1653D-BEB2-4532-A38E-5292ACDE3BA2.jpeg
 

Attachments

  • 565AD42A-2F9C-4B86-B342-47FC99F74565.jpeg
    565AD42A-2F9C-4B86-B342-47FC99F74565.jpeg
    199.3 KB · Views: 50
  • 23835DC0-B12B-465B-BB8A-0D616E07CC54.jpeg
    23835DC0-B12B-465B-BB8A-0D616E07CC54.jpeg
    123.6 KB · Views: 61

DylanS

Gorilla Smasher
Location
Lebanon Pa
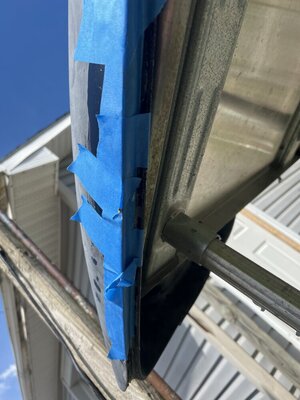
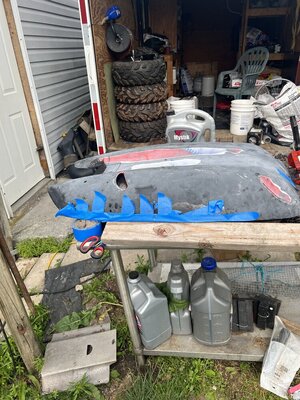
Put the hood on the ski and marked what spots needed pressure to match the body lines of the ski.
First step was to put panel bond on all the solid areas and squeez her back together.
Once that was setup I just had that huge 1 1/2” gap where there was no old epoxy, just liner and hood.
I ended up mixing up a batch of epoxy with cabosil and carbon strands to form almost a snotty paste. Used my booger hooks to pack the gap and then used tape to make flat surfaces so I could let the hood sit flat and have the epoxy settle for a good bond.

this is leaving me with a somewhat flat surface that I’ll be sanding flat and doing final pin hole filling on before wrapping the inside in a layer of 6oz.
Will post some pics once the tapes all the way off.
 

Attachments

  • 880B6C58-2E0E-43AC-9629-F97EA37560B7.jpeg
    880B6C58-2E0E-43AC-9629-F97EA37560B7.jpeg
    111.8 KB · Views: 47
  • DBECD9BE-2894-4FB9-9E5A-A47DB7E8AF7C.jpeg
    DBECD9BE-2894-4FB9-9E5A-A47DB7E8AF7C.jpeg
    217.4 KB · Views: 39
  • 411BE352-A76C-4774-83C1-746FD75107C7.jpeg
    411BE352-A76C-4774-83C1-746FD75107C7.jpeg
    257.4 KB · Views: 53

DylanS

Gorilla Smasher
Location
Lebanon Pa
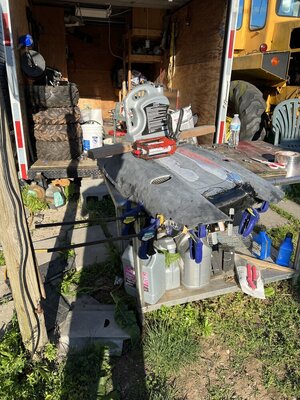
Little bit of reinforcing being done today, bondline filling came out OK, next time I’ll use more micro balloons.
Hopefully this will help keep the ski in one piece while I’m gorilla smashing it
 

Attachments

  • CDA8E2EF-6988-4D82-B9B3-EADA8E65372A.jpeg
    CDA8E2EF-6988-4D82-B9B3-EADA8E65372A.jpeg
    238.6 KB · Views: 44

DylanS

Gorilla Smasher
Location
Lebanon Pa
Pic of edge that was repacked, ready for final filling and touch up sanding.
It actually came out a lot better than I thought it would, the edge looks pretty decent minus a slightly thinner spot on the inside lip.
F36C0F68-D43F-4A15-8613-5FE8F3BBC25E.jpeg

Here’s the worst part.. lots of blending will need to be done here. The edges are tapered out and I’ll have to blend my carbon in before a final thin skim coating of epoxy to sand out.
5D88CB2B-AB03-4CAC-A3B4-89A4F5604133.jpeg

The top section actually blended very well, there’s a high spot I need to correct on the bend but the shape came out nice. 50DCEDED-C72E-4B0E-A5C7-E56DBB69AF0D.jpeg
 

DylanS

Gorilla Smasher
Location
Lebanon Pa
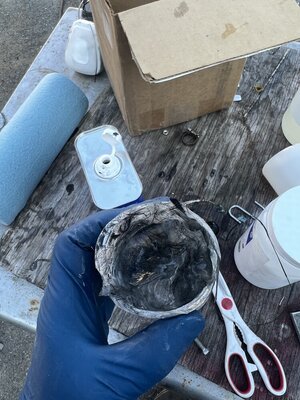
I like to mix up a batch of epoxy and cut up about 1/2 strands of carbon fiber, lots of them, and mix them In with cabosil until I get almost a peanut butter hair ball like substance. You’ll see where I packed my big voids with it, I just take my hands and press as much of it into the gaps as I can. Once it’s hardened up I’ll form it into shape.
Learned that trick from the Sanoman himself.
 

Attachments

  • 17B24663-2E7C-4C68-B626-8CAC04C46983.jpeg
    17B24663-2E7C-4C68-B626-8CAC04C46983.jpeg
    198.4 KB · Views: 32
  • AAAC3347-4502-4448-BF46-FC1FB19DF1F0.jpeg
    AAAC3347-4502-4448-BF46-FC1FB19DF1F0.jpeg
    180.2 KB · Views: 42
Top Bottom