You are using an out of date browser. It may not display this or other websites correctly.
You should upgrade or use an alternative browser.
You should upgrade or use an alternative browser.
Gabe & Steff's Krash Predator Build
- Thread starter GabeH
- Start date

- Location
- Cape May Court House, NJ
Engine back in. Water feed lines connected. Expansion chamber connected to waterbox with 2" id 4" long silicone tube.
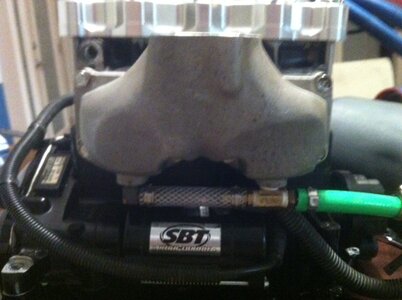
Question: the OEM Yamaha flame arrestor plastic cover doesn't fit with this girdled head. Do I just trim it to fit?View attachment 300598
Yup, gotta trim to fit around center girdle nut

- Location
- Cape May Court House, NJ
That's one way of doing it, but not my preference. It will work
- Location
- Cape May Court House, NJ
If your running 2 cooling lines off the pump, feed the ex manifold with one and the bottom of the headpipe with the other, both head lines go overboard and the top of headpipe goes to a T that goes overboard and to the fcv.
If you ride colder temps this allows you to tune engine temp without effecting pipe temp and fcv setting. This setup also self drains back through the pump.
If you ride colder temps this allows you to tune engine temp without effecting pipe temp and fcv setting. This setup also self drains back through the pump.
I already ran each pump feed line to two individual inlets on the exhaust manifold. I can tee one of the pump lines to go to both manifold inlets and send the other pump supply line to the head pipe. Sound good? Also, with this proposed set up, do you tune engine temp by restricting water flow? If so, where; before the exhaust manifold inlet or after the head overboards? Finally, I initially shied away from this arrangement because of clogging concerns. Should I run debris filters on the supply lines? I primarily ride in the surf.
- Location
- Cape May Court House, NJ
I would not T the supply line and feed the manifold and headpipe from same line. I will use a Y fitting and feed both manifold fittings from on pump feed line.
Tune temp with restrictors after the head.
As for clogging issues, I don't run filters and I regularly ride in less than 6 inches of water. I have had clogs in the restrictors when it's cold and I have the small orifices installed, but that's an easy fix, never had a clog on the inlet side. You should always be keeping an eye on your pissers.


On my SXR I run a RN AC pole with a modified Blowsion HD Kawasaki-style pole spring and a limiting rope. I like the "0" pound handlepole feel where it moves but feels weightless. It settles right where you naturally hold it and the close tolerance pole bushings keep it from bouncing around too much.
I'm going for the same here with a KP pole so...Yamaha noob question here:
Here is the underside of my pole bracket:
Do I run this RRP Yami spring tensioner (below) with a Blowsion HD Yamaha-style handlepole spring? or do I run the tensioner with a stock spring? I don't plan on tightening down my pole bolt until the pole doesn't move. Plus I need to attach my hood ratchet strap. Do I sandwich it between the bracket and the tensioner through the two countersunk hex bolts? Thoughts?
- Location
- Cape May Court House, NJ
I use a Blowsion spring with the pictures tensioner block, with a longer than usual pole. My pole has negative weight, I tighten the bolt just slightly to keep the pole from bouncing too much, and it stays at riding height and moves with very little effort. If you leave the pivot bolt loose you will actually be holding the pole down.
I also find that upon initial install the pole spring is too much, but after 2 weeks of storing the ski with the pole tied down it is perfect
I also find that upon initial install the pole spring is too much, but after 2 weeks of storing the ski with the pole tied down it is perfect
- Location
- Cape May Court House, NJ
hood straps I attach under the 2 stop blocks
Thats parallel cooling correct? I think thats what im going to do this season.If your running 2 cooling lines off the pump, feed the ex manifold with one and the bottom of the headpipe with the other, both head lines go overboard and the top of headpipe goes to a T that goes overboard and to the fcv.
If you ride colder temps this allows you to tune engine temp without effecting pipe temp and fcv setting. This setup also self drains back through the pump.
- Location
- Cape May Court House, NJ
Thats parallel cooling correct? I think thats what im going to do this season.
yup, pipe and engine can be tuned for temp independently without effecting the other.
My "Y" didn't work because it kinked the hoses. It was a PITA too so...
Engine back out! Line on left now has connector fitting for easy engine removal. Line on the right will connect to an inline filter as it's going to feed the exhaust.

Made a new fitting for the exhaust mani (copied the idea from a Kawasaki 1100 water fitting). Prepped the ex mani by drilling and retapping the hole from 1/8 to 1/4 NPT.

Screwed in street elbow that I drilled and tapped to change it from a 90 elbow to a tee.

Connected the two inlets with 3/8" id hose with 3/8" barbs. Intake from the pump is a 1/2" barb to match the green 1/2" id hose coming from the bulkhead tubes from the pump.

Bottom of head pipe with filter.

Drilled hull for RRP bilge and pissers from Thrust.


Getting there!
Engine back out! Line on left now has connector fitting for easy engine removal. Line on the right will connect to an inline filter as it's going to feed the exhaust.
Made a new fitting for the exhaust mani (copied the idea from a Kawasaki 1100 water fitting). Prepped the ex mani by drilling and retapping the hole from 1/8 to 1/4 NPT.
Screwed in street elbow that I drilled and tapped to change it from a 90 elbow to a tee.
Connected the two inlets with 3/8" id hose with 3/8" barbs. Intake from the pump is a 1/2" barb to match the green 1/2" id hose coming from the bulkhead tubes from the pump.
Bottom of head pipe with filter.
Drilled hull for RRP bilge and pissers from Thrust.
Getting there!
Attachments
- Location
- Long Island
You also could have used a pex 1/2 T between the 2 - 3/8 90* so it truly splits rather than possibly favoring one side or the other
Sent from my iPhone using Tapatalk
Sent from my iPhone using Tapatalk


