Surfriding Krash Predator Build

Big Kahuna

Administrator
Location
Tuscaloosa, AL
Jet dynamics.Seriously an expensive hunk of junk.l spent 2 hours just getting it ground down enough to fit.Super thin on the ring itself.Like it had been opened up way too much. And it’s just a 144 shoe.
I had also bought a OEM shoe that slid right in to the channel.
Dont you remember me talking about how bad my JD was on the freak........ Went with Blowsion or Worx this last time. It was better, still had to grind smooth to the hull.
 

hornedogg79

dodgin' bass boats
I don't believe you'll see a noticeable difference in an extra few feet of 2.125" hose. Adding a 8ft hose extension to my shop vac while running doesn't change the motor noise or seem to increase the load. No point in running much past your waterbox though. If they're kinked on your pole spring, that's another story. I've heard Krash hulls suck way harder than T1's so you may be okay. ;)

Sent from my SM-G930V using Tapatalk
 
But back on hose length.So l don’t intend on leaving them that long,just interested in others comments

I left one hose long on mine and the other was cut shorter to accommodate steering cable/wiring . The port side hose on mine runs back almost to the hull plate the motormount sits on and the starboard hose is cut right after the waterbox. No issue with starving my 900 of air as of yet.
 
Location
Stockton
This may be obvious, Other concern would be to tie down the long hose that does not have cables running the it so it can’t fall towards the hood when it’s upside down negating the purpose of the hose
 

Sanoman

AbouttoKrash
Location
NE Tenn
After doing some final measurements on the front foothold before bonding it all in l figured out the extra 1/2” l needed to fit the ebox upright with the wires coming out the top,it made the box too small for my feet.So the only thing different is the ebox lays horizontal now.Still out of the way.
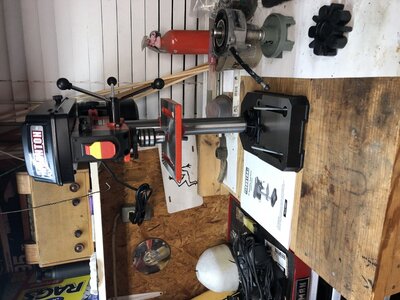
The final foothold box height turned out to 3” from the step to the top of the box.That will allow enough padding,turf and my foot enough room.Moving on to mocking up the engine so l can drill the motor mount plates.l sold my 50’s model drill press a few years ago and have missed having one.Went to Northern Tool yesterday and bought this bench one for $69.95. Not the greatest but for the use it will get,perfect.Just need to bolt it downCAA8F9FF-C1FB-45D5-9969-B6F89AD8B98F.jpeg
 

Attachments

  • 3A03F4F6-5728-49F1-B633-E2D3FCAA928B.jpeg
    3A03F4F6-5728-49F1-B633-E2D3FCAA928B.jpeg
    163.5 KB · Views: 93

Sanoman

AbouttoKrash
Location
NE Tenn
Not much got done this weekend.Got the engine pulled and most of the things out of the SF.Got one engine motor mount stripped out and have to fix it.But a lot easier to get to now.Thinking about selling it?

What do you think!?

Ground off all the nice dried carbon fibers off around the small redone FR foothold so l wouldn’t stab myself.But of course had to get stuck on my hand before finishing. Washed,cleaned and dried the engine bay
Still playing with the placement of the ebox,but have a couple good ways to mount it.
 

Sanoman

AbouttoKrash
Location
NE Tenn
Been a couple weeks since having time to work on the Predator.Have had a Rn in the shop that l removed some 24/7 footholds and replaced with Toby’s.Down to just finishing the turf on it now.

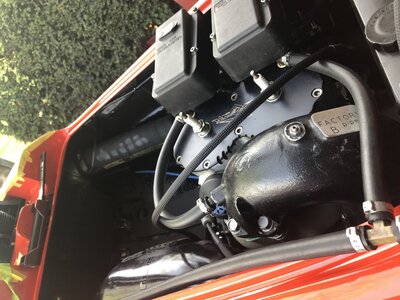
Started in the engine bay today.The motor mount plates were not pre drilled,so something else to learn.A couple posts back l had a pic where l bought a drill press for this specific purpose.Honestly l had some doubts about being able to doing this correctly.Asked a lot of questions to several friends and a phone call to Jr. helped me through.Also bought a tap guide,which turned out to be good for a repair and awesome for lining up and tapping 8 bolt holes.Most of us know how to line up a pump and midshaft (except others that learned off Fb:eek:). When I got it all lined up,put the engine down on the plates with the m/m’s bolted on.I pushed the engine back till the couplers touched (w/o the dampener) and started the alignment process.There is a lot more to it,but just to much detail to post up.And l’m lazy...
l spent a couple days (no,not entirely!) going back and checking everything.Today l marked the spots to drill and tap,then clamped the plate down to the drill press.Drilled both plates,got the tap out,lined it up with my cool new tool and taped the all the holes.Used a very small square to check the angle (of the tap) a couple ways,and
that worked great.
Got most of the hull hooks installed in the engine bay,previously had took a tap and cleaned them up,today l put some Red n’ tacky on the bolts and threads.Also tapped and cleaned the holes that bolts the foothold tracks down.
And no,l haven’t cut the tubes yet!
21ABF057-76ED-46DC-9648-E96E07584168.jpeg46AABA8A-2A3E-4B4D-993E-27F739302411.jpeg0934EC95-1A44-418E-89DE-79A7255F393C.jpeg60097D48-5C4F-4E05-9D55-1C8432C7AABD.jpeg6EF43284-A5B1-4029-912C-29F35E2AA640.jpeg
 

Sanoman

AbouttoKrash
Location
NE Tenn
Finally back on the build.l have been doing some assembly on components the last couple weeks.Removed the 62t flywheel,stator,and ebox so l could put a Zeel system on the 735 pv that will be running in the ski.Also bought a glass battery box mount to epoxy in between the engine and gas tank.A limited slip tank with a a holder would work much better,but this works too.
I dropped the engine in today so l could mock up the b/b holder and also mount the ebox on top of the foothold. Making sure the ebox was far enough over (to the carb side) for clearance of the pipe.Since l’m mounting it on top this is not such an issue,but l think we all have made the mistake of lining up (Perfectly:rolleyes:) the left side ebox bracket and nut with the headpipe.You only do that once..
Today I’ll bond the b/b holder and also mount the ebox.Also installing 2 rule 500 bilge pumps with some 5200.Pics up later.
 

Mike W

Infidel
Location
North Florida
Nice build Don. That paint came out nice. \w/

The easiest pump shoe to install with very little grinding is the Worx. I had a Blowsion shoe before and threw it in the garbage. Also, you have to crop your pictures (left/right not top/bottom) for them to not post sideways. That’s the only way I could fix that glitch.
 

Sanoman

AbouttoKrash
Location
NE Tenn
Nice build Don. That paint came out nice. \w/

The easiest pump shoe to install with very little grinding is the Worx. I had a Blowsion shoe before and threw it in the garbage. Also, you have to crop your pictures (left/right not top/bottom) for them to not post sideways. That’s the only way I could fix that glitch.
Thanks Mike! I had forgotten the trick on the phone. Yea,the whole pump shoe deal is a great lesson learned.I’ll spend the extra money next time.
Had great plans to get more done yesterday,but we made a grocery run which took too long.Got done with that and after going thru hazmat cleaning of everything we bought plus cleaning myself and the truck l was ready to get to work.
I got the b/b holder fused in with thickened epoxy after trimming and alignment.My son comes to me and says “dad,can l get the pressure washer out!?” “Sure,l said” Fast forward an hour and half later,can’t get the washer to run right....dammit.
By this time,lm over it and decide it’s 5 o’clock somewhere.Ebox and bilge pumps this week.l did put some padding on the footholds,which I’ll shape to fir my feet.696099DD-8422-4230-BE41-B639B6BC7DA9.jpegB6B4C94B-32F2-4BCF-9F6B-4F46CA7DDF0E.jpegB22C668A-8253-4417-9834-EB0D44F73ED7.jpeg
 

Sanoman

AbouttoKrash
Location
NE Tenn
Had some time yesterday afternoon to do a couple things.One was to 5200 the bilge pumps down and also place the ebox mounts to the top of the front foothold.I pulled the pump and midshaft this afternoon.lnstalled the steering cable back at the pump and put a couple 3/8” hoses on the water lines.Since we are on a “Stay at home” directive starting tonight, I’ll be reinstalling the pump and doing an alignment tomorrow and finishing up that area with ride plate and scoop grate.
Back on top,reinstall the midshaft and slide the engine back in place to align it.Rest of the week,put the pole together,wire.Hopefully this will all happen this week:)
 

Sanoman

AbouttoKrash
Location
NE Tenn
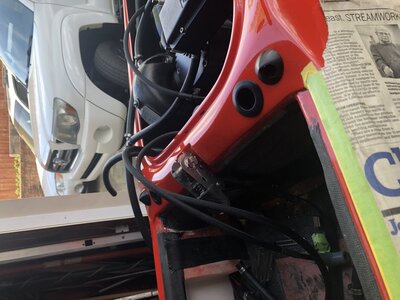
I have been working on the build but just haven’t posted up any pics.The engine is aligned and wired (yes,it does turn over..) steering cable front and rear is in place,but not lined up.The pole is together (kavinci pole),just have to adjust it. All the holes on the dash are drilled,as well as mounted with a dab of silicone around them.Exhaust system done.Water lines routed and pissers connected.The CF gas tank l have didn’t fit,so l have a LS tank coming from another member and l needed a connector for the steering cable.So it’s a turfing weekend for me.#stayhome everyone!
DD47084A-1E75-49BD-AEE3-764ACA093FDB.jpegB7CAC67B-A4F3-456D-8E07-FBF9A8CAA29E.jpeg
 

Attachments

  • DA4ECB38-2815-4D8C-871C-AE7921E3A385.jpeg
    DA4ECB38-2815-4D8C-871C-AE7921E3A385.jpeg
    145.1 KB · Views: 53
  • EE06FCC0-41AA-496F-9556-4E083C4BEF13.jpeg
    EE06FCC0-41AA-496F-9556-4E083C4BEF13.jpeg
    124.9 KB · Views: 47

hornedogg79

dodgin' bass boats
So a stock tank won't fit in a Predator? Looks like that Advance Auto exhaust hose is too low in the hull. Too rigid to squeeze a tank past also. I see where you tried.

Sent from my Moto G (5) Plus using Tapatalk
 

Sanoman

AbouttoKrash
Location
NE Tenn
Got a good day in yesterday.Had a number of different pieces to put turf on.The handlepole cover had a rubber cover to go on it,which had KV on it and also a steering pad that had the same lettering.Pulled those off,padded and turfed both with smooth black HT.Worked on the footholds that l previously glued some padding to and shaped the pads to fit my feet better.Then glued turf to them.They still need some work.Got a bump pad for the front foothold in place and the sides installed.
Today I’ll finish the sides and pad the bottom of the tray....
Plenty of time,cause we all should #stayhomeDE1D1B0B-0ED1-470E-90D3-9AACACBAB902.jpegA54E32F4-565E-48FA-9D3D-32BCE31D86B6.jpeg440CE077-02EF-481C-8783-570A6AE0B45D.jpeg
 
Top Bottom