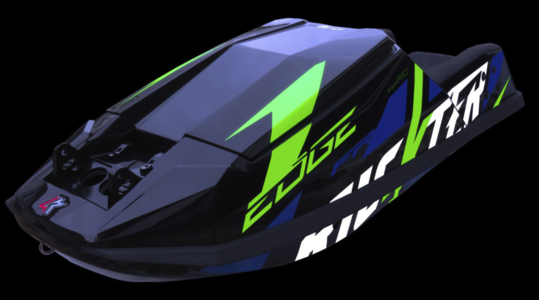
My First Stand-up - The story of a 38year old man who makes poor financial decisions.

Glad you were able to work out the placement!
One side was trimmed a bit differently on the bottom and that was the side i was messing with first which made the fitment seem even further off... I found #zeros original thread and it had some more reference pix for placement and it made it pretty clear that the rockered nose was definitely going to require me to cut the sponsons in order to place them correctly relative to the contour of the hull...technically i'm still cheating them back a bit because the front mounting hole would have to be on the radius of the rocker, but i think it will still work.
I was hoping to bolt on and go, but looks like it will need some filler work/sanding ect... in hindsight I should have probably just shaped and glassed in some from scratch, but i was hoping to be done with fiberglass work for a while lol ...I think these have warped slightly over time as well, so they will need a bit of persuasion to stay in place, but I'm about to drill a bunch of holes in my hull today and hopefully glass in some ufo mounts and fill the seams with thickened epoxy... we'll see how far I get.
Wish me luck boys, i'm going all in!
 
She's looking pretty thicc lol
IMG_20220501_123943481.jpg
IMG_20220501_123549557.jpg
IMG_20220501_123531550.jpg


Do you guys think thickened epoxy will be strong enough to hold this against the hull, or should I put foam behind it and create a fillet with epoxy to seal it up?IMG_20220501_123730676.jpg
 
ok cool, this is essentially how I planned to approach it.

Now I've just got to pick up the pace and stay motivated when I actually find time to work on it. I would have liked to have got them trimmed and the hull sanded around the bonding area yesterday, but I got distracted working on something else and ran out of time. Hopefully I can make some progress this week so I can paint this thing and start assembly.
 
Let's......GOOOOOO!
Really happy with how these are turning out.
In these pics the front of the tubbies have been trimmed and sanded flush with the front of the hull.

I just colored the front edge black with a sharpie so it shows the shape better in the pix.

Next I'm going to attach them with thickened epoxy and fill in the gaps/reshape the front

IMG_20220502_184103414.jpgIMG_20220502_183800004.jpgIMG_20220502_184303644.jpgIMG_20220502_184331320.jpg
 

E350

Site Supporter
Location
Sacramento Delta
Just a question. The "bond rail" on the 2021 Rickter Edge goes a little farther forward and around the nose a little more than your design.

Why is that?

I wonder if your shorter, straighter, not around-the-nose bond rail will not hook up as well, possibly skipping out when you try to engage the nose in a nose-carved turn?

Your work is great, so please understand that I am very interested in hull design and this is just a question. Please keep posting and definitely post a ride report.
Well thank you for the compliments, but this is actually not MY design - I am just fixing some of the aged/damaged glass-work. I believe this ski was originally modified circa 2010-2012! The nose of this ski incorporates a rocker-kit from a (former?) forum member CarterB. He offers a lot of hull modification kits for Blasters/SJ's and other hulls...

I have been warned that I'm in for some non-stop splashing to the face due to the design, so I may incorporate some-sort of (possibly 3D-printed) lip at the front, but as far as the ski's ability to carve - well, that will more likely be limited by my zero hours of tray-time as I'm a complete rookie to riding and will take some time before I'm pushing the ski anywhere near its capabilities... like honestly if it handles poorly in a turn I wouldn't know any better and would just assume I'm riding it wrong lol

I have recently seen some guys incorporate a bond-rail all the way around the nose (theres an awesome Krash re-build and some other rockered SJ builds in the My Ski section right now as examples) but I feel like If I keep trying to make this ski "perfect" before ever even riding it, i'll never actually get to riding it!!
 

E350

Site Supporter
Location
Sacramento Delta
Understood and agreed. Get it done and ride it!

BTW, just like beginning snow skiers, most newbee stand up jet skiers (like me) start up by being "heel pushers."

So, you will likely start your riding career by tipping and loading the rear inside rail of the ski (i.e., "pivoting" the tail).

It takes experience and courage to give up on the friction which burying the heel gives us and to "lean into the punch" both in snow skiing and jet skiing.

Both snow skis and jet skis initiate a carve very well off of the front inside edge of the ski.

By the end of the Summer you will likely be ready to make more performance hull modifications to your ski including maybe extending the bond rail. And you have the drive and the fiber glassing skills needed to do anything you want to do with that ski. Here is a photo of the bond rail curving around toward the tip of the ski that I am talking about:

1651594764435.png
 
Well.... this last weekend didn't go how I had hoped...

My plan was to expoxy the sponsons to the hull and have them all faired in and ready for primer.

Unfortunately, after leaving them bolted to the hull "under load" for a few days it appeared that the amount of tension they were under in order to hold them up against the hull was causing them to buckle and upon any sort of hard impact they were going to break.


IMG_20220506_165541827.jpg
On Friday evening I noticed a major stress fracture from top to bottom on one side and then saw what I thought were numerous more about to give way on both sides... At this point I was pretty bummed because I knew I had more work ahead of me than I had planned, but I had the idea that since I already had them bolted to the hull in the contour I needed, I would de-foam them and pie-cut them to relieve the tension. Then, while bolted to the hull I would re-foam them and re-fill the pie-cuts thus taking out any "stored energy" in the form of tension and change their "resting shape" to be closer to the contour of the hull... I really don't want these things fighting against an epoxy bond and constantly trying to separate themselves from the hull.

This is when i made my next interesting discovery...
IMG_20220506_180650791.jpg
As I removed the foam from one of the sponsons, I realized that it had already been pie-cut once before........ I'm not sure if this was done when they were first made in order to add some sort of fins for reinforcements or rigidity, or if most likely they had been modified previously to fit the shape of another hull using the same method I had planned to use. Either way, by bending them to fit my hull, the previous pie-cuts "stretched" and created low spots which became very visible and I mistook them for rippling/buckling. This was pretty clear on the otherside once I knew what I was looking at.
IMG_20220507_175207113.jpg

I removed all of the foam and made my piecuts by dremmeling out every other existing slit
Then I made the mistake of being impatient/lazy and used the only "tape" i had around to mask off the hull before re-foaming instead of just going to the store to get something that would remove clean...while FlexFix creates a very nice smooth finish on the back of the foam and allowed the sponsons to pop free easily... it was an absolute pita to remove from the hull because it just rips to shreds and de-laminates when you peel it off (this would result in 2 hours of tape/adhesive residue removal later on).
I made some very high-tech/high-concept braces and got to foaming with 2lb foam.
IMG_20220508_105605958.jpg
Once the foam did it's thing, I cleared the piecuts out and filled them with thickened epoxy. I also recessed the foam at the front and went ahead and re-built the area that I had previously trimmed off to fit the rocker.
IMG_20220509_062705718.jpg

It actually sort of worked. Not "perfectly' as they still had to be under slight tension when bolted during refoam/refill (unless I was going to do way more pie-cuts or even section them into three pieces)...I only did two cuts in the front so there is less of a difference there, but I still feel like they are under less tension and I will be leaving the bolts installed and epoxying over them anyway.

But here is how far off they were front and rear before compaired to now:

Before:
IMG_20220506_171555354.jpgIMG_20220506_171720625.jpg

After:
IMG_20220509_080428841.jpgIMG_20220509_080356759.jpg

I'm going to do the other side today, but will changing my approach a bit and will definitely be using something other than FlexFix as my masking layer.
 
Last edited:
well it appears that was all a waste of time unfortunately... after removing the "reshaped" sponson and all the tape residue and sanding the hull to prep for epoxy one of my pie-cuts re-filled with epoxy cracked when i bolted it back on for final mock-up... crap! I was really hoping that I had removed enough tension to where they weren't really being contorted... At this point I'm just going to epoxy and bolt them on then fix any cracks and then glass over them completely. Really regretting deciding to move forward with installing these after my initial impression was that they didn't fit my rockered hull very well. I'm in too deep now, Hopefully i'm not about to ruin my hull.
 

Quinc

Buy a Superjet
Location
California
well it appears that was all a waste of time unfortunately... after removing the "reshaped" sponson and all the tape residue and sanding the hull to prep for epoxy one of my pie-cuts re-filled with epoxy cracked when i bolted it back on for final mock-up... crap! I was really hoping that I had removed enough tension to where they weren't really being contorted... At this point I'm just going to epoxy and bolt them on then fix any cracks and then glass over them completely. Really regretting deciding to move forward with installing these after my initial impression was that they didn't fit my rockered hull very well. I'm in too deep now, Hopefully i'm not about to ruin my hull.
You almost at the end of the tunnel! Keep at it. You will get it. Just be an itchy and time consuming process. :)
 

DylanS

Gorilla Smasher
Location
Lebanon Pa
well it appears that was all a waste of time unfortunately... after removing the "reshaped" sponson and all the tape residue and sanding the hull to prep for epoxy one of my pie-cuts re-filled with epoxy cracked when i bolted it back on for final mock-up... crap! I was really hoping that I had removed enough tension to where they weren't really being contorted... At this point I'm just going to epoxy and bolt them on then fix any cracks and then glass over them completely. Really regretting deciding to move forward with installing these after my initial impression was that they didn't fit my rockered hull very well. I'm in too deep now, Hopefully i'm not about to ruin my hull.
You’ll get it figured out, there’s no such thing as a ruined hull ! (Unless it’s a Kawasaki hull they come factory ruined)
 
You almost at the end of the tunnel! Keep at it. You will get it. Just be an itchy and time consuming process. :)
Thankfully I discovered "total fair" and will no longer be using thickened epoxy as really hard to sand body filler.. I feel like one layer of cloth will be fine..it's mainly just a skin layer to reinforce the piecuts.
 
Got them both epoxied on... Gonna leave them until tomorrow and then start blending them to the hull and fill any imperfections in the pie-cuts...
IMG_20220509_160858038.jpgIMG_20220509_160909244.jpgIMG_20220509_160919880.jpg

I need to order more epoxy now, so I wont get to wrap them with fiberglass until that arrives, but I'll hopefully at least have them all bodyworked by then.
 

DylanS

Gorilla Smasher
Location
Lebanon Pa
They're not coming off now...

I decided to skin them with carbon fiber for strength... I also decided not to fill over the hardware holes and I plan to run bolts with finish washers because I really like the way it looks..

IMG_20220513_193705980.jpg
IMG_20220514_172228426.jpgIMG_20220514_172249586.jpg
 
Top Bottom