You are using an out of date browser. It may not display this or other websites correctly.
You should upgrade or use an alternative browser.
You should upgrade or use an alternative browser.
Blaster Rocker and Shorty quickie
- Thread starter YAMAPRO
- Start date
YAMAPRO
Billy Dearman
- Location
- The State of Mississippi
YAMAPRO
Billy Dearman
- Location
- The State of Mississippi


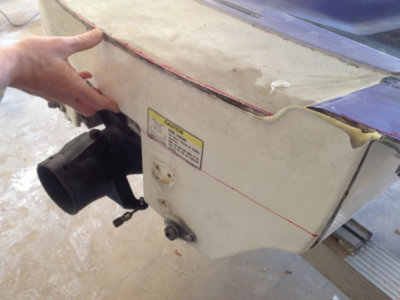
So, I used the original back to go back on the boat. For the ride plate mounts I cut and ground the OEM off and used 3/8" Aluminum flat bar that will be drilled and tapped where ever I choose the mounts to be. I have been trying to keep this very simple and easy so anyone can copy this work. After speaking with numerous people I chose not to taper the bottom. If I decide to later it should be no big deal.
Last edited:
Great idea to keep the rear piece to reform the back of the ski. The mistake I made on my build was to toss it out, ended up having to rebuild the whole rear wall.
The advanatge was that its really solid now, but it was a lot of extra work.
Looks like things are coming along great, you are going to love the way it handles!
The advanatge was that its really solid now, but it was a lot of extra work.
Looks like things are coming along great, you are going to love the way it handles!
YAMAPRO
Billy Dearman
- Location
- The State of Mississippi
Zimmy,
I actually had full intentions of building the back from scratch but after a little consideration I figured why not use the original. Of coarse I can overlay it for strength if needed but as long as I get a good strong bond on the sides it should all be good. I always like less work......
I actually had full intentions of building the back from scratch but after a little consideration I figured why not use the original. Of coarse I can overlay it for strength if needed but as long as I get a good strong bond on the sides it should all be good. I always like less work......
BlasterDisaster
Back Flips & Barrel Rolls
- Location
- Wilmington, NC
Did you have a small piece if wood on each side glassed into the bottom and back to reinforce the back? I had a piece on each side and figured it was stock but was still curious if maybe someone else added it before me?
todc207
Drama diffuser
- Location
- Metamora MI
I have the front and back completely cut off of mine right now and didn't find any wood? InterestingDid you have a small piece if wood on each side glassed into the bottom and back to reinforce the back? I had a piece on each side and figured it was stock but was still curious if maybe someone else added it before me?
BlasterDisaster
Back Flips & Barrel Rolls
- Location
- Wilmington, NC
The very back of this blaster hull I'm chopping had 1x4's on each side that had 45 degree cuts on each side and were glassed to the bottom and the back face of the ski for what I'm assuming, added strength. Seemed like a good idea and although it looked oem, It seemed odd that Yamaha would do that from the factory.
todc207
Drama diffuser
- Location
- Metamora MI
Mine had enough styrofoam to float a house boat, 5 lbs of extra epoxy and some spare bolts floating around back there but difinatly no wood. It looks like I cut mine almost exactly like this guy did. There are gonna be some sweet B1's out there this season.
KTM434
Jamie FN Hickey
- Location
- Palm Coast FL
Mine had no wood when I built mine... But once you ride a rockered/chopped B1 you'll have instant wood
BlasterDisaster
Back Flips & Barrel Rolls
- Location
- Wilmington, NC
I can't wait!
Thanks guys. Sounds like this hull has some history!
Thanks guys. Sounds like this hull has some history!
YAMAPRO
Billy Dearman
- Location
- The State of Mississippi
No, definitely no wood in any of the Blasters I have seen over the years, and thats quite a few. The assembly line is always very generous with the 2 part bonding agent used although Yamaha has gotten pretty tight on their hulls since the Nano technology.
- Location
- Leland, NC


I ended up modifing my rocker nose a little bit so it mounts under the top of the hull, i think its a much cleaner look and i dont have to fill in my gas filler area. i also chopped the rear bond rail off and filled in all unnessary holes. i also am going to add some glass to the top of the rear bond rail to make it level so when i add my turf its level all the way around. this is what ive done so far ill add more pics as progress goes on. To those of u thinking of doing a rocker kit i have to say this has been a very easy process just time consuming, the kit from carter b has made it easy to install with step by step instructions and pics. cant wait to go flip this bitch
BlasterDisaster
Back Flips & Barrel Rolls
- Location
- Wilmington, NC
Can't wait to get out there and play josh
- Location
- Cape Town, South Africa
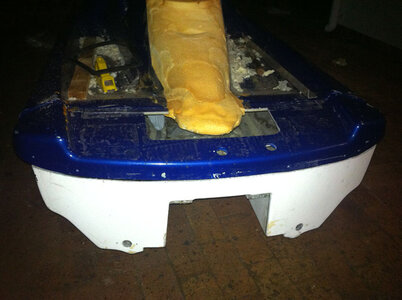
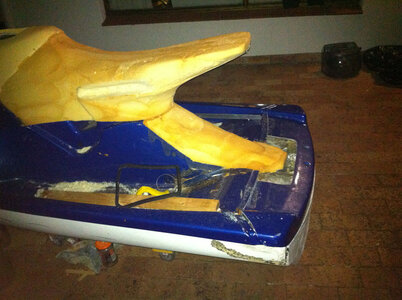
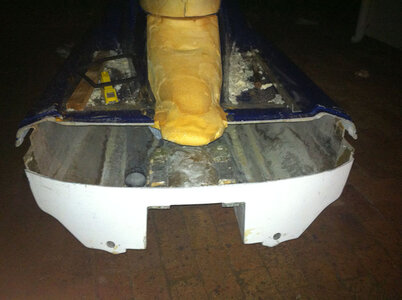
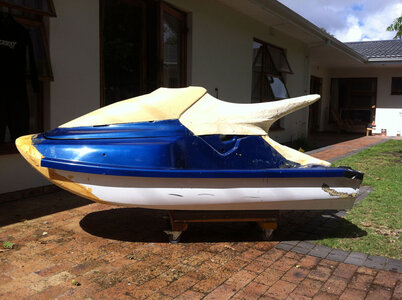
I've been cutting my Blaster, there are a couple familiar people so some will have seen it before elsewhere. Seems I didn't check in on how cutting the rear is done so I ended up doing it a little differently. I also chopped the top deck at the rear, removed the rear face and removed a strip to just behind the rear pump mounts before sticking the rear face back on. I however went a little different because I wanted to retain the lines coming off the top deck onto the rear face without having an overhanging bond line. To do this I cut the rear face lower so that it met up with the lower edge of the overhanging bond from the top deck. I can see my descriptions probably aren't painting a clear picture so I grabbed a couple phone pictures, apologies for them, its dark outside and they aren't great. I can get better if theres interest later.
The pictures show the rear face already stuck back, both with and without the top deck balancing in place as well as a side on picture to get an idea of how I intend it to look. The picture with the better light was from before I stuck the rear back on but you can see the profile a little better. The seats and rockers are all still works in progress so no need to look too closely at those. I have also chopped off the rear ride plate mounts, my plans are to make up a custom composite ride plate to fit.
The pictures show the rear face already stuck back, both with and without the top deck balancing in place as well as a side on picture to get an idea of how I intend it to look. The picture with the better light was from before I stuck the rear back on but you can see the profile a little better. The seats and rockers are all still works in progress so no need to look too closely at those. I have also chopped off the rear ride plate mounts, my plans are to make up a custom composite ride plate to fit.
Attachments
- Location
- Leland, NC
looks like a lot of work lol, looks sweet though
BlasterDisaster
Back Flips & Barrel Rolls
- Location
- Wilmington, NC
wow's that a fresh approach to it. looks killer. sometimes doing things on your own without the internet pushing you one way or another is a plus.
- Location
- sunbury ,ohio
Great Ideas on this thread ,
KTM434
Jamie FN Hickey
- Location
- Palm Coast FL
You'll hate yours after riding a shortened B1


