separating an x2

Vumad

Super Hero, with a cape!
Location
St. Pete, FL
Im going about this same thing myself , just in a different way. The first thing you need to do is take your bottom deck and put a drivetrain in it then set the topdeck on it. Thats everything including pipe and carbs. The X2 uses the longest driveshaft that kawi made. To get it to work your going to find that you need to manipulate the topdeck in more ways than just chopping the back end short because of the shorter driveshaft.

You can use the XI SS drive shaft. Moving the pump forward is the same as moving the motor back. The XI SS drive shaft is the same length as the 650sx drive shaft, except it is properly splined for the 800 prop.
 
im still trying to figure out how alignment issues are going to be a problem, when your is basicaly taking the top off of the x2 and putting it straight on the bottom deck of the q8. the only part you might have trouble with is the decks lining up perfect. if i was you i would i would put the whole bottom together motor,carbs,exhaust, yami bulkhead, and pump, then i would set the kawi top on and just cut and glass it to fit around and over what you have there.

if your wondering how to make the bulk head work then why cant you just leave enough for the midshaft to bolt to and then glass in the gaps between the top of the bulkhead and the top deck
 
You can use the XI SS drive shaft. Moving the pump forward is the same as moving the motor back. The XI SS drive shaft is the same length as the 650sx drive shaft, except it is properly splined for the 800 prop.

All Im saying is he needs to set the X2 topdeck onto the yami bottomdeck then there will be issues that he will see that need addressing , This is also depending on the bottomdeck he's using which Im beting is SJ based not XI or SS.
 
im still trying to figure out how alignment issues are going to be a problem, when your is basicaly taking the top off of the x2 and putting it straight on the bottom deck of the q8. the only part you might have trouble with is the decks lining up perfect. if i was you i would i would put the whole bottom together motor,carbs,exhaust, yami bulkhead, and pump, then i would set the kawi top on and just cut and glass it to fit around and over what you have there.

if your wondering how to make the bulk head work then why cant you just leave enough for the midshaft to bolt to and then glass in the gaps between the top of the bulkhead and the top deck

Its not alignment issues with the drivetrain itself. And the decks will be far from perfectly lineing up.
 
i am not delirious enough to think they are going to line up and just glue together lol. im fully assuming to have it done right i will have to han lay everything and then make a mold and pop out a propper piece. i just dont want a tom21 hood style fixed steer. the rasta bot fixed steer is a cool idea but i have just fallen in love with beating the crap out of my x2. i just want the jumping dynamics of my freeride ski.

first thought was to use my bob. but if u arent flipping that thing sucks to ride lol
 
Location
dfw
The easiest way to get an X2 to jump like a typical A/M hull is by simply cutting 12"-18" off the back (depending on your height/weight) and installing SJ pump and inlet. There is no room to move the engine back so make an adapter box for any short Yamaha mid shaft. The X2 has more hull area up front and gets a lot of lift from smaller waves.
 

Vumad

Super Hero, with a cape!
Location
St. Pete, FL
If this is all about the steering of the Gen 1, then just glass a bob pole to a bob hood, flatten out the back area, bolt on the X2 steering, use or dont use the X2 squirrel cage. The only benefit of the squirrel cage is a mechanical advantage for quicksteer, which can be accomplished with a longer steering arm. A Custom BoB hood is not only cheaper and easier, it's more marketable.

What makes the X2 fun to ride is not the Steering system.
 
i am not delirious enough to think they are going to line up and just glue together lol. im fully assuming to have it done right i will have to han lay everything and then make a mold and pop out a propper piece. i just dont want a tom21 hood style fixed steer. the rasta bot fixed steer is a cool idea but i have just fallen in love with beating the crap out of my x2. i just want the jumping dynamics of my freeride ski.

first thought was to use my bob. but if u arent flipping that thing sucks to ride lol
The rastabot FS is the same principal as the Tom21 FS which is the same as the X2.
 
the rasta has the advantage u can easily pull it off and put a pole on it. which is an inherent advantage. the tom21 ergonomically felt odd to me. maybe im just insane. but i like the removable hood and still having my steering in tact and in place and not getting screwed with. no pole to move or prop up or fall on my head. yes this has happened a ton lol. so feel when everything is bolted together i agree. easy of getting the ski started when its having issues, dropping the hood and starting to ride and then latching it once its running the x2 has a massive advantage. ik we will see what happens. by the sounds of it my best bet is front fill and cut like 6 inch off and see how it feels and go from there.
 
I ride with someone who had a tom21 SJ hood and another person who had the 24/7 hood. Got to ride them plenty of times back to back. The tom21 was not as similar to theX2 feeling as the 24/7 hood. Now both of those guys have FS Aquabots. One setup more like the Tom21 ergonomics and the other more like the 24/7 ergonomics.
 

Vumad

Super Hero, with a cape!
Location
St. Pete, FL
the rasta has the advantage u can easily pull it off and put a pole on it. which is an inherent advantage. the tom21 ergonomically felt odd to me. maybe im just insane. but i like the removable hood and still having my steering in tact and in place and not getting screwed with. no pole to move or prop up or fall on my head. yes this has happened a ton lol. so feel when everything is bolted together i agree. easy of getting the ski started when its having issues, dropping the hood and starting to ride and then latching it once its running the x2 has a massive advantage. ik we will see what happens. by the sounds of it my best bet is front fill and cut like 6 inch off and see how it feels and go from there.

If you feel that latching the hood after the fact like that is an advantage, you would be better off spending the extra time and money on quality motor work. I can't see how that is a benefit, much less a "massive" one, unless my motor was a piece of junk that I always have to fiddle with. Dial it in, leave it alone. I go weeks without taking the hood off my superjet. Pour gas from the outside, ride it. That's it. I really don't care how the hood goes on it if it keeps the water out.
 
I agree with ^^^.

Plus I hope I didnt take any winds out of your sails. Please carry on with the project. I like seeing the different ways people are attacking the custom work on FS jetskis.

Fixed Steer For Life.
 
no wind taken out is just fine. no point in wasting a ton of time. my original idea was something like the rasta bot. then i got sad when he did it first lol. but i will go another route. no point in grafting a lower hull on if its that much work

as per the hood thing... well yes i put my motor in and pump and went from bare hull to riding in under 3 hours..... it took a little time to get running well lol.

so i wont be splitting it now. i will just put my 750 kaw motor in it at some point and cut up and fill the stock bottom deck.
 
You need to cut it all the way up to the back pump bolts that's where mine is cut to and I love it
Oh yea and don't waste your time fabing a nice trim system because unless your going to put a big yami motor in it to where it's capable of flipping because I spent like 4 hours making brackets and setting it up and it is pretty much worthless because I don't have enough power out of a 750
 
well thats sad to know. i flipped the stock trim and ran a bike brake cable. but it currently is limitted by the hull currently
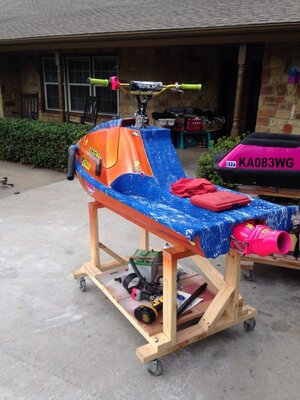
Here's a pic of mine if it helps anyimage.jpgThis is before I put on the cable
I'll post a pic of it set up the way it is now when I get a chance
 
Top Bottom