Smoofers' Super Chicken Build (Mostly Complete)

smoofers

Rockin' the SQUARE!!!!
Site Supporter
Location
Granbury, TX
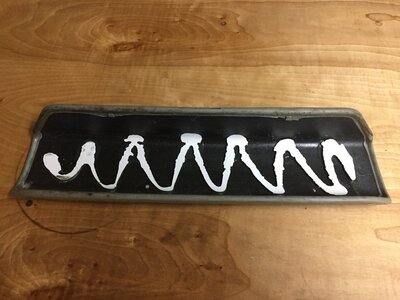
They are held down with Kawi green glue (basically epoxy). The pic of mine shows how much glue is used from the factory. The white color is actually stock paint that was pulled up with the pads. Good news is, you don't have to worry about gel coat since SCs aren't gel coated, just painted. It will pull up paint though.

Edit: To pull them off, just start prying on them gently and you hear and feel them start to let go.

IMG_5426.JPG
 
How exactly did you do your seat cover? My old cover is not form fitted to the foam and looks sloppy. I had JetTrim make a seat cover but they said to stretch the new cover over the old cover. I don't see how that is going to work and look good. When I told them my old cover wasn't tight to the foam they said I could remove the old cover but the foam could get wet. I was planning on removing the old cover but was wondering if I needed to glue the new cover to the foam to keep it tight? Any ideas?

Sent from my XT1254 using Tapatalk
 

smoofers

Rockin' the SQUARE!!!!
Site Supporter
Location
Granbury, TX
How exactly did you do your seat cover? My old cover is not form fitted to the foam and looks sloppy. I had JetTrim make a seat cover but they said to stretch the new cover over the old cover. I don't see how that is going to work and look good. When I told them my old cover wasn't tight to the foam they said I could remove the old cover but the foam could get wet. I was planning on removing the old cover but was wondering if I needed to glue the new cover to the foam to keep it tight? Any ideas?

Sent from my XT1254 using Tapatalk

My old cover was too destroyed by the elements to even consider keeping on the seat. I ripped it off and threw it in the trash. I ended up gluing the cover from where your butt would be all the way up to just before where the blue stopped on the back of the seat. Then stretched and stapled it. If i hadn't had my wife's help it would have been impossible. It is definitely a two person job. The picture below is the only one I have from the in process work of recovering.

IMG_5360.JPG
 
I know some spray glues can dissolve foam. What did you use? I picked up a spray can of 3M outdoor contact cement. I'm guessing it is the same as the liquid form of contact cement. The can said it would hold up to heat and water but it didn't say anything about material compatibility. Wasn't sure if I should use spray glue instead of contact cement.

Sent from my XT1254 using Tapatalk
 

smoofers

Rockin' the SQUARE!!!!
Site Supporter
Location
Granbury, TX
I know some spray glues can dissolve foam. What did you use? I picked up a spray can of 3M outdoor contact cement. I'm guessing it is the same as the liquid form of contact cement. The can said it would hold up to heat and water but it didn't say anything about material compatibility. Wasn't sure if I should use spray glue instead of contact cement.

Sent from my XT1254 using Tapatalk

I used DAP Weldwood in the spray can for the seat (same formulation as the red DAP for turf that comes in a paint can). It worked great and didn't dissolve the foam at all. Contact cement brushed on would probably work just as well too. I wouldn't worry about the 3M stuff dissolving the foam either.
 
So, more stupid stuff to hinder progress. The threaded pieces that the side handles on the steering column bolt into... one of them had a broken bolt in it. Tried to drill it and use an extractor and the extractor snapped off in the hole... its eff'd. Gotta order more aluminum from McMaster.
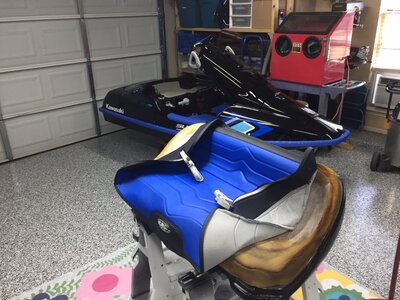
The valspar outdoor plastic furniture paint I used on the seat is garbage. Every time I touched it it flaked off. So today the wife and I sanded the whole seat base with scotch brite pads and washed then solvent wiped it. Appliance epoxy has been such amazing stuff I opted to use it on the seat. Pics of before and after shown below. Hopefully I'll cover the seat tomorrow.

View attachment 330648
View attachment 330649
Wish I would have read this post before I paint my seat base. I used Valspar color radiance paint + primer for wood metal wicker plastic and more. I am having the same problem. If I scratch lightly with my nail it comes off. It looks like the appliance epoxy only comes in black or white. I need gray paint that will perform the same any ideas?

Sent from my XT1254 using Tapatalk
 

smoofers

Rockin' the SQUARE!!!!
Site Supporter
Location
Granbury, TX
I initially only did a wash with scrubber sponge and dish soap. As for alternatives to appliance epoxy... that's a good question....
 
I initially only did a wash with scrubber sponge and dish soap. As for alternatives to appliance epoxy... that's a good question....
I ended up going to my local paint supply shop and using PPG plastic prep system. I did everything last night and it successfully bonded to the seat base. I took one extra step than PPG said on the instructions and I used a Scotch pad to remove all the mold release. It allows you to paint the plastic with any paint and bond properly. Once again thanks for always responding to my questions and helping me out.

Sent from my XT1254 using Tapatalk
 

smoofers

Rockin' the SQUARE!!!!
Site Supporter
Location
Granbury, TX
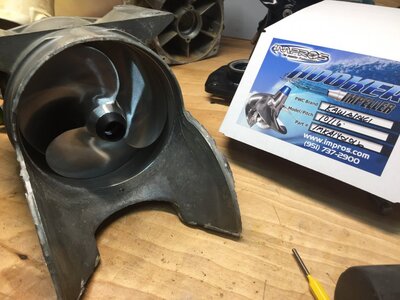
So I haven't updated in a while. With the ski in the state of the last thread update I tuned it on a tach and maxed out at 43mph. I called up Dave at Impros and he recommended a 10/16 hooker. I pulled the trigger.
62636244-8F0C-4CF4-8BCA-DE9FEDD42619.jpeg

Using a tach for tuning I hit 45mph with the hooker, but I was only at 5400 RPM. I was pretty sure that I should be getting more RPM than that and am determined to hit 50mph.

E4A757BB-0CEB-443A-9A91-0CC7CF29B8E5.png

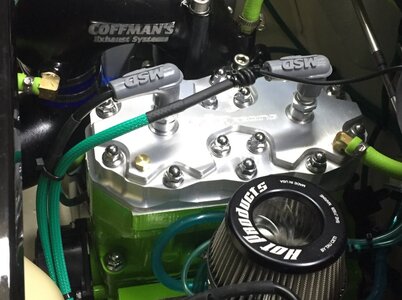
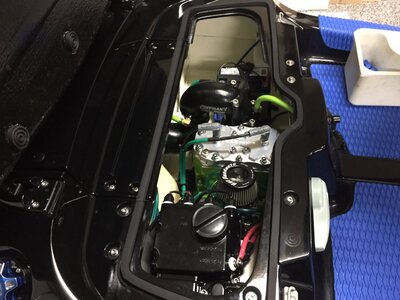
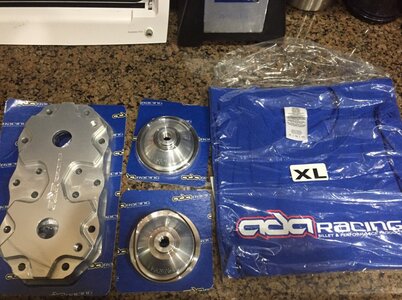
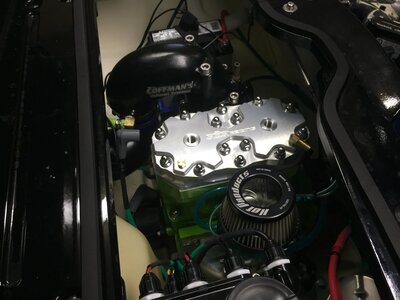
This max speed was in early November and black Friday was coming up. ADA Racing had a 20% off deal do I pulled the trigger on a new head kit (they even threw in a free t-shirt, LOVE ADA!!). Prior to installing the new head I measured compression at 150psi per hole. After installing the head with 26cc domes I measured 185psi.
5A81EA45-9478-47B8-8247-62A4FD0CD8EA.jpeg
218F4286-401C-47AC-984C-0881AA72E7E6.jpeg
F43DD125-DA44-414B-AD4B-CE7B41A3744F.jpeg

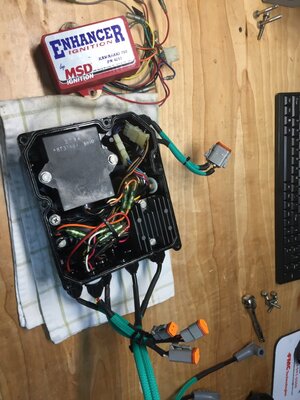
I also was able to find an MSD Enhancer that was installed a week after I installed the head.
5A7D6405-8E7A-4707-B0FB-61181879E680.jpeg

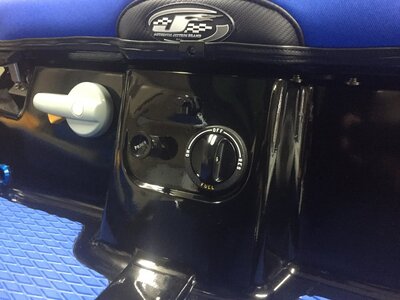
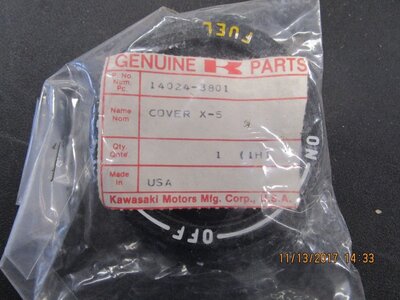
I then found an NOS fuel selector panel on eBay for $20!!!
7CF9AEB9-A9A2-4B6B-8081-E8FA728EBE77.jpeg
6DD3D64B-5158-41BB-86F5-823722F63598.jpeg

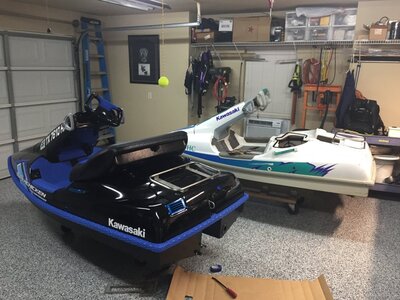
Also purchased one of the new stainless cooler racks @BKrides had made. I have yet to permanently install it, but hope to before it gets warmer. Pic was taken when I was installing the new hooker.
41E1CCB9-8AE1-4DBE-8D38-F0B0F28892EA.jpeg

As of now I'm waiting for it to get warmer so I can try her out with the head and enhancer. The fact that it hit 7F a week ago hasn't made me be in any hurry to get on the water. I'll update as soon as I do.
 

smoofers

Rockin' the SQUARE!!!!
Site Supporter
Location
Granbury, TX
Thanks again SM!

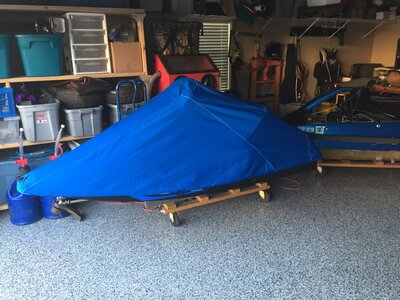
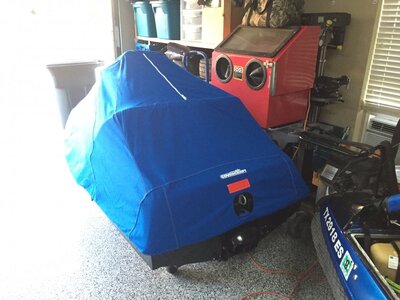
Other updates I forgot to add. I bought a cover from covercraft (through eBay, way cheaper than direct) and am really, really impressed with the fit and quality of the material. Definitely keeps the dust and bugs off. Even though the ski stays in the garage the spot it is in is always getting leaves and various crap blown on it.
B1DA5574-21D2-422C-9867-7F36EE7FF4F4.jpeg

C44BCF9E-4D6F-4DDF-BFB3-01E5B9211160.jpeg

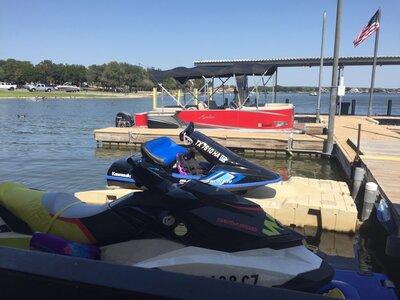
I also took my wife to lunch back in September and got a good shot of the chicken in the wild. Definitely turned heads amongst all of the brand new couches and wakeboard boats.

CDAF321C-898D-4814-8156-831FF2B53749.jpeg
 
Nice job man. I came across so sc years ago in my shop that we're show room clean. Some older retired pilot owned them. Keep it up bud, will have to meet up sometime and go ride. If you need parts I've still got some kawi stuff laying around and my old business partner at Never Satisfied Motorsports has a bunch of old poop he'd like to get rid of
 

smoofers

Rockin' the SQUARE!!!!
Site Supporter
Location
Granbury, TX
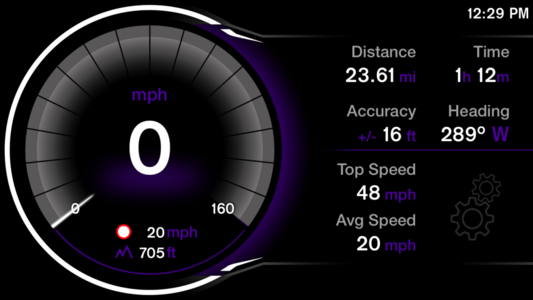
Was talking about the chicken today and realized I never updated after adding the enhancer and head. I clocked it at 48mph. Pretty sure I can get 50 with a bit more tinkering, just haven’t had the time.

3FDB5D0F-6AB9-415A-B4D7-DC4EB093A0FB.jpeg
F5538F57-01FA-40B5-89D7-755F65AB29C2.png
 
Top Bottom