You are using an out of date browser. It may not display this or other websites correctly.
You should upgrade or use an alternative browser.
You should upgrade or use an alternative browser.
Super Jet SN build, Rocker, Chopped rear, this website made me do it!
- Thread starter Sven
- Start date
- Location
- Edmonton, Alberta
How’s this coming along 

Sent from my iPhone using Tapatalk


Sent from my iPhone using Tapatalk
- Location
- In the wind
Any updates?
- Location
- Airdrie, Alberta, Canada
Well it’s getting close to a year since I posted on here, and nearly about the same amount of time since I have done much with the ski. The project is not abandoned I’m just living a very busy life and it’s not slowing down any. Anyhow this last week I finally finished blueprinting the pump stator ( grinding out the horrible castings) and ended up doing the rebuild and assembly. The pump is a 144mm with a skat trak swirl 13/17 prop, fresh WSM pump rebuild kit (bearings and seals), stubby blue pump cone and finish it all off with protect trim. Here are a few pics, I’d say it’s 99% done as of now, I’ll probably drill and tap for dual cooling later before install and maybe re powder coat the steer/ trim nozzle. Next up on this project is the motor build, I had started it a while back and didn’t finish it as I was building the motor at work and forgot a gasket at home, that was about a year ago... anyhow I just ordered two new Ada head studs for it and as soon as they show up will build it. Kinda wanted to wait on the motor and do a blue head but will probably just stick with the clear anodized Ada head I have now cause of money. Anyhow here is some pump pics! One day I’ll finish this thing.View attachment 381209View attachment 381208View attachment 381207View attachment 381206View attachment 381205View attachment 381205View attachment 381204View attachment 381203View attachment 381202View attachment 381203View attachment 381204View attachment 381205View attachment 381206View attachment 381207View attachment 381208View attachment 381209
- Location
- Airdrie, Alberta, Canada
- Location
- Redding, California
Hell yes, just logged in to check on this thread, stoked to see it’s still alive! Nice work on the pump!
- Location
- North Carolina
Makes excited to start mine but scared it'll be more than a winter project now
- Location
- Saskatchewan
Better update this thread! Heard a rumour theres updates
- Location
- Airdrie, Alberta, Canada
- Location
- Winnipeg, Canada
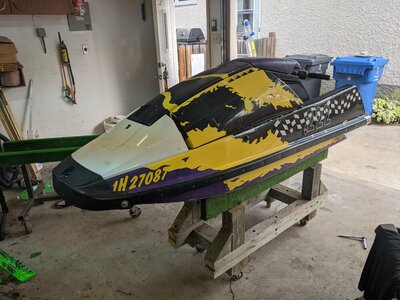
I totally currently own that hull right now... can't mistake that one of a kind paint job. I'm actually thinking of doing some rockering/shortening/footholding to it this winter. Just trying to get familiar with the process/ways of doing it. Hence why I'm reading threads like thisView attachment 319885 This was probably the ski Ian was on but with my hood. I was not at crane, I only wished I was haha. I don't currently own a running ski actually.
On a side note I got two layers of glass in the nose and will probably post photos tomorrow.
Attachments
- Location
- NH
Any updates on this build?
- Location
- Airdrie, Alberta, Canada
I will make a update when I have time. The build is still a go but it’s not done yet. I live a extremely busy life apparently. But more done on the ski than the last updates.Any updates on this build?
He also did a chin pad for me recently and its sickAny updates on this build?
- Location
- Asheville, NC
Wow this is incredibly impressive! Not sure how I missed this thread.
- Location
- Airdrie, Alberta, Canada
Sorry everyone for the lack of updates. This ski has made a lot of progress while I have been away from this forum. I’ll try to make a few update posts to get caught up to where the ski is at now. So keep checking back.
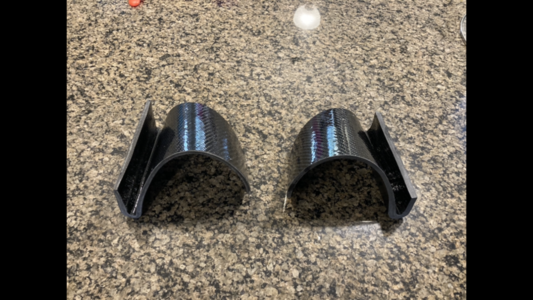
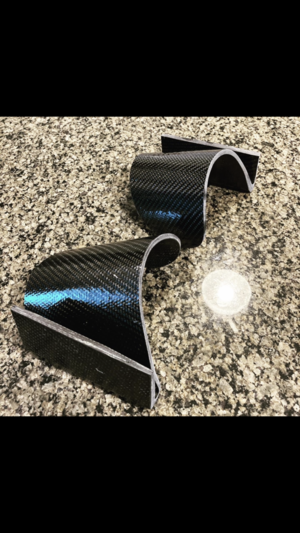
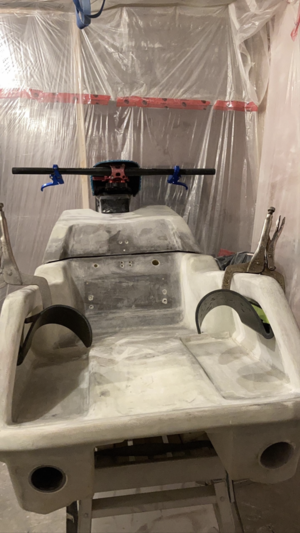
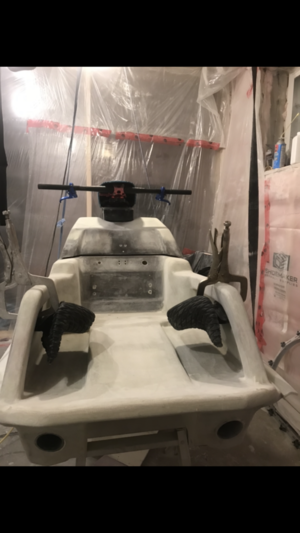
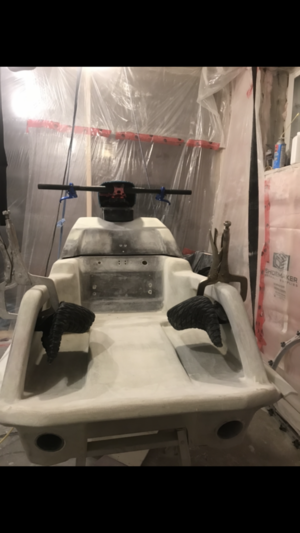
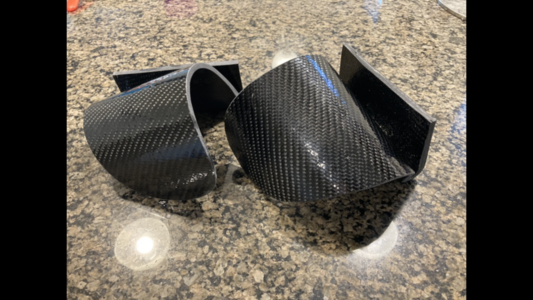
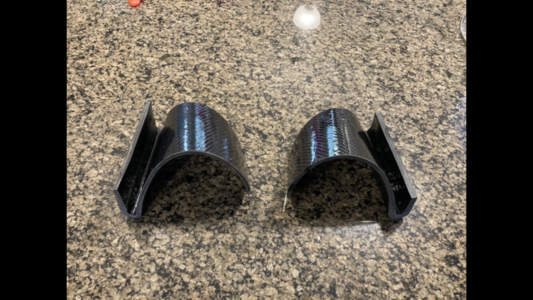
Anyhow, pretty sure I had previously posted that I had got some used rrp knock off foot holds I was planning on running. Well I can’t leave good enough alone as you all already know. I tried to get ahold of a few parts suppliers and hull manufactures to buy holds and no one would reply to me so I ended up building my own holds.
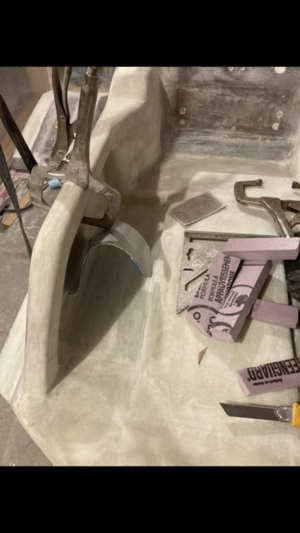
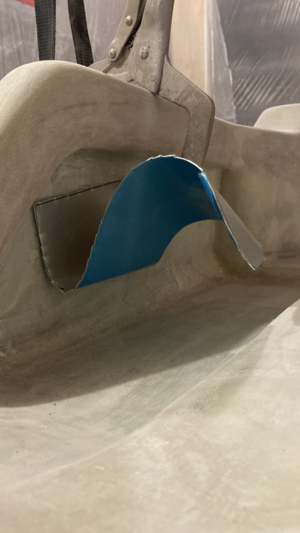
First it started out with a piece of cardboard I cut and bent to shape. Then used a thin piece of sheet metal and made a similar shape so see if it looked and felt right around my hull and shoes. Biggest thing I didn’t like about the rrp knock off holds is they were to wide and brought my feet to close together in the tray. “See photos”
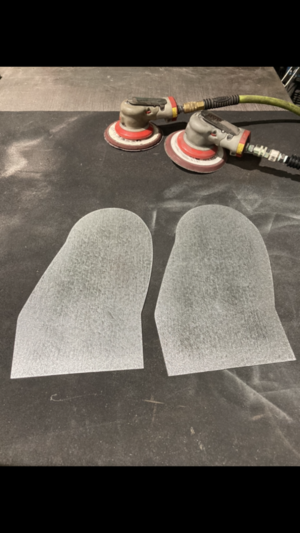
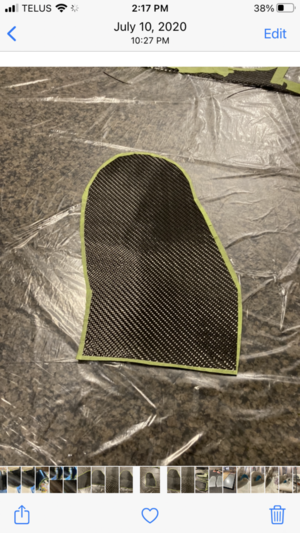
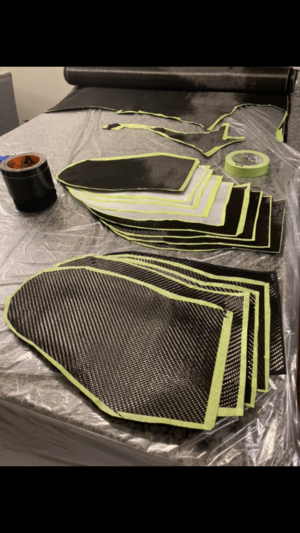
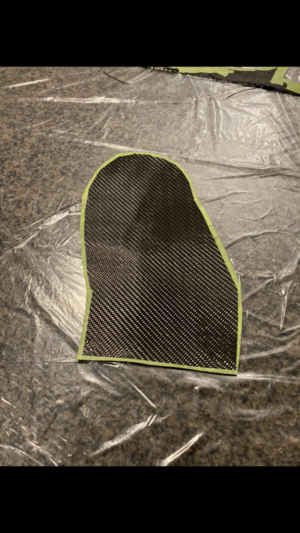
Then once I got the sheet metal shaped how I wanted it I traced it out on paper abs added 1” all around the circumference to make if for any weird mixed match overlap off the carbon cloth. Once I got the paper template I got my buddy to cut me two flat patterns on his cnc. From there I hand formed them as best as I could to perfectly match so they were symmetrical.
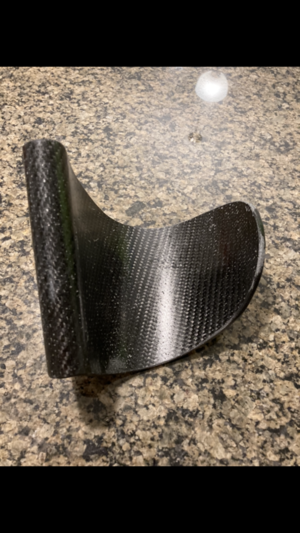
Now I had my mold.... the I cut my carbon cloth, also added a few layers of fiberglass just for the hell of it. Wet out the cloth on the counter top, wetting out each side of the cloth before going into the mold. This was a super super tricky part to get layed in the mold nicely in the u-shaped part of the mold, and only got harder as more layers went in. Once cured I popped them out of the mold and was quite amazed how good they turned out! Then I layed my template on top of the part and got to trimming.
These turned out quite well I think. Already had a few people trying to buy them from me.
Attachments
-
 318AB616-D7C4-46FE-99C9-E7C669065B37.png530.8 KB · Views: 26
 -
 AC64D5A4-93B3-49E4-B116-DD6E4C662929.png577.4 KB · Views: 23
 -
 C2EB7C54-D8CD-4A5D-A5F9-91539A21D500.png684.6 KB · Views: 19
 -
 37E477C0-2B63-4E99-A3B6-D3286DE10395.png645.2 KB · Views: 19
 -
 20D9AFAF-1481-4806-A63E-2F3E4A23020F.png933.6 KB · Views: 19
 -
 C15ADE29-C40D-4459-8E81-07D3DAB906FB.png854.3 KB · Views: 18
 -
 017628C7-98E7-41A7-A114-F13BC7E11C18.png837.7 KB · Views: 18
 -
 4D97F112-47C5-489B-8B4C-27E8EEF29076.png839.1 KB · Views: 18
 -
 5064C4D4-5553-4F13-BB94-96A08F0AA9F2.png861.7 KB · Views: 19
 -
 B5DA2B15-187C-45DD-BD6F-C6AE78FB395C.png971.4 KB · Views: 22
- Location
- Airdrie, Alberta, Canada
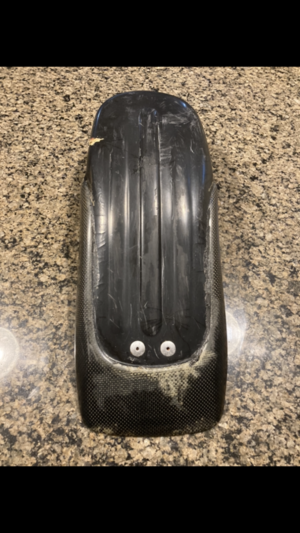
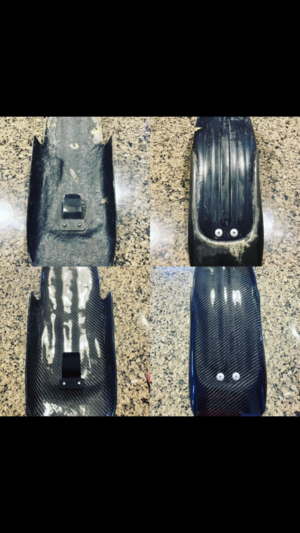
Before and after photos of the chin pad I repaird for you...He also did a chin pad for me recently and its sick
Attachments
- Location
- Airdrie, Alberta, Canada
And here is a few more foot hold photos from the rrp “clone” holds vs the ones I made.
Attachments
- Location
- Granbury, TX
Glad to see this project is still going! Excellent work on the foot holds!
- Location
- Bay Area, CA
SUPER SQUARES UNITE!!!!!!!!!!!
Footholds look awesome!
Footholds look awesome!
- Location
- Airdrie, Alberta, Canada
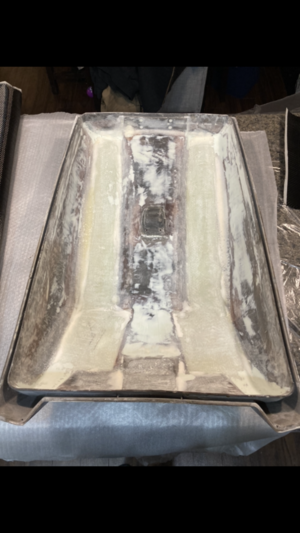
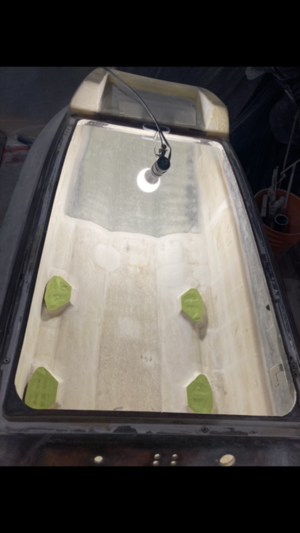
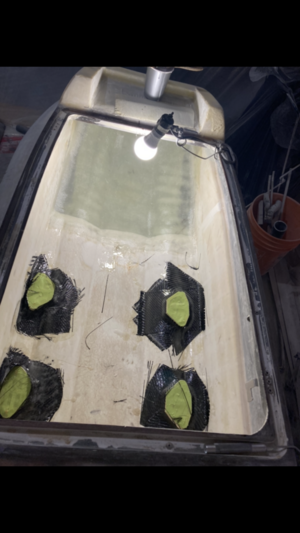
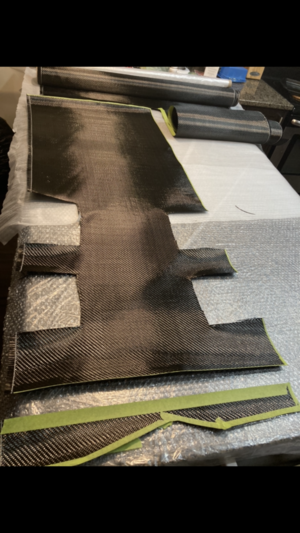
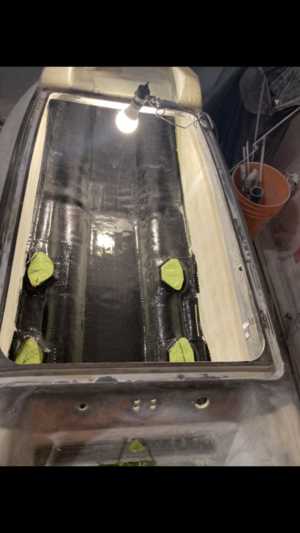
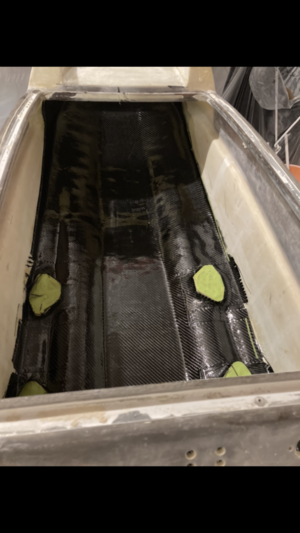
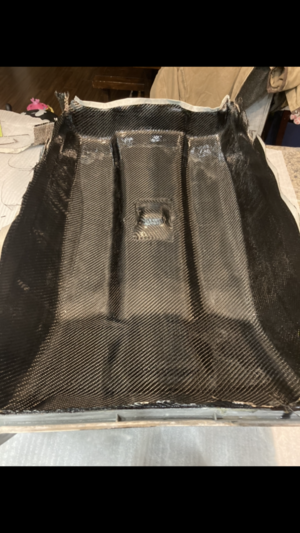
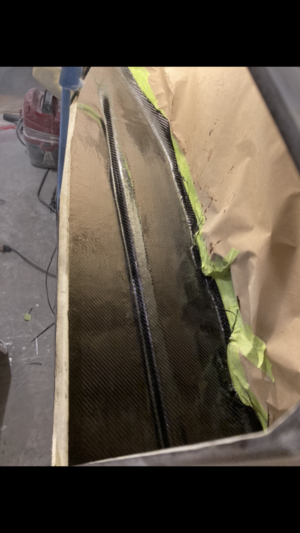
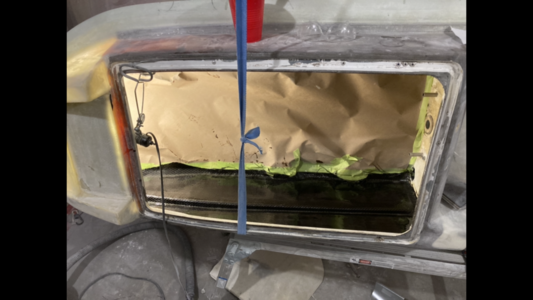
In a previous post a while back I posted I had bought a roll of carbon. Here is what I did with most of it.
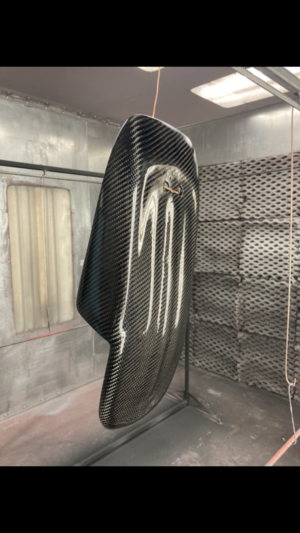
Covered the inside of the engine bay with carbon for looks and strength. Did all of the engine bay except for the bulkhead as I didn’t want to mess up anything with mid shaft alignment. Also did the inside of the hood. Now when you open the hood it will appear as a carbon hull!
Covered the inside of the engine bay with carbon for looks and strength. Did all of the engine bay except for the bulkhead as I didn’t want to mess up anything with mid shaft alignment. Also did the inside of the hood. Now when you open the hood it will appear as a carbon hull!
Attachments
-
 3515EC2D-4462-49FC-B48B-AA25A0EDB243.png618.5 KB · Views: 20
 -
 71F63DDA-C5D1-4C24-BB44-3EDB5ABE57B5.png510.8 KB · Views: 19
 -
 EAB9FA77-EDB5-4C44-AB89-81DE5E99384D.png572.8 KB · Views: 17
 -
 2EC5819A-7C07-4BDC-819D-2D6B5B82F21A.png852.2 KB · Views: 20
 -
 E4999095-E3EE-4C38-BC2B-EBC09D6DEA46.png671.2 KB · Views: 20
 -
 FB4E175B-07AC-4AF4-B1AE-6E83687D09A8.png584.7 KB · Views: 24
 -
 D0B33444-E6ED-4651-A8CA-615CB9AC82B1.png878 KB · Views: 24
 -
 60C5FEDA-C136-4B3D-8C81-B2FB9EDC511F.png619.5 KB · Views: 24
 -
 5AC275E1-5A80-47C9-B7CF-7CC358EAC07E.png598.3 KB · Views: 23


