The newly released JSTL Inc, TL ignition module...with a touch of OCD!

OCD Solutions

Original, Clean and Dependable Solutions
Location
Rentz, GA
I was lucky enough to walk away from the 2016 Daytona Freeride with one of the newly released Total Loss systems introduced by Jet Ski Total Loss Inc.

This release brings forth one of the first affordable but still very powerful programmable packages at a fraction of the cost of MSD or ATP systems.

The package includes the control unit, solenoid, stator plate, 2 triggers, 2 smaller coils suitable for surf, the software and programming lead, all for a retail price of just $650. I am told that there will be different coil options available in the very near future as well.

The system was initially designed and proven with a Jetinetics flywheel which is available new for just $255 direct from Jetinetics.
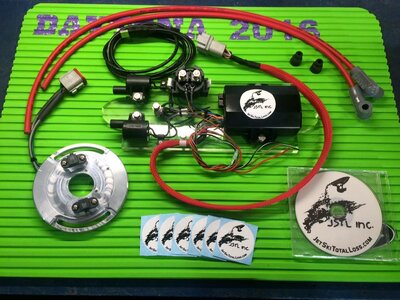
12565585_1653812314883132_5478158203466268067_n.jpg

As delivered, the system was setup with flatwater in mind so my first priority was to apply a little OCD to it and guarantee it will run day in and day out in a surf environment.

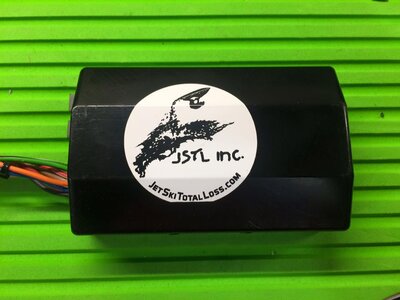
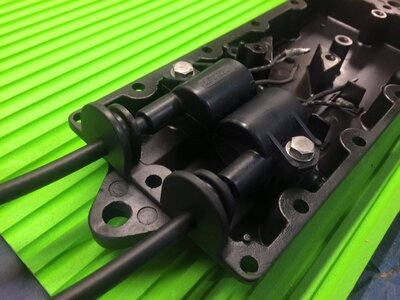
And here is the first peak of the surf ready unit installed into an OEM ebox!

12552691_1656113297986367_7408905578590955807_n.jpg

And here is the completed surf build, ready for installation and water testing;

299816fb2ac43dcd331e0db7c3e47a40.jpg
 
Last edited:

OCD Solutions

Original, Clean and Dependable Solutions
Location
Rentz, GA
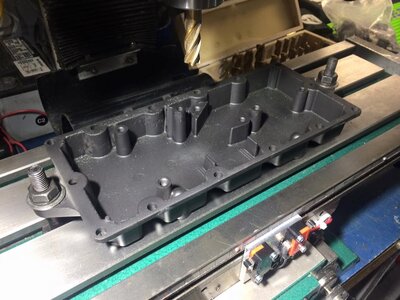
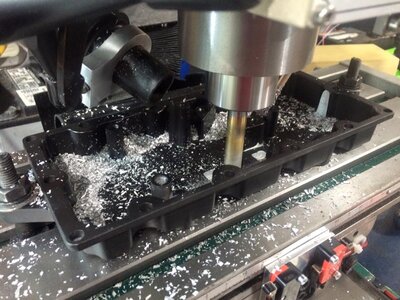
Some of the first steps involved were trimming unnecessary tabs and bosses from the OEM ebox and TL control unit.

I just happened to have a spare ebox that was recently sent out to be cerakoted so I figured it was the ideal base to start this project off right.

12540877_1656113341319696_6614911215194919949_n.jpg
12523135_1655846728013024_9015317860180919635_n.jpg
12524020_1655846744679689_5942902098192238137_n.jpg
12512317_1655846764679687_6708580601261813861_n.jpg


12573930_1656113307986366_5815416194418915193_n.jpg
12573669_1656113334653030_3655222780272764754_n.jpg
 
Last edited:

OCD Solutions

Original, Clean and Dependable Solutions
Location
Rentz, GA
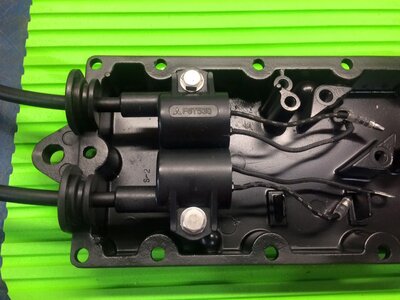
Next I mounted the two zero ohm coils to the bosses originally meant for the OEM CDI and then installed the TL control unit with Velco to hold it in place until the cover is installed.

12523925_1656113427986354_6291907190359698810_n.jpg 12642458_1656113434653020_9213064179323523303_n.jpg 12642741_1656113401319690_6856917714595542187_n.jpg 12644711_1656113474653016_85684529640440214_n.jpg

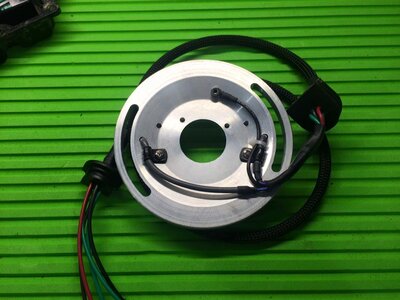
The stator plate came prewired with Deutsch connectors but it was lacking the case and ebox grommets I required so I opted to abandon it altogether and just rewire the entire thing from scratch. I also opted to ditch the quick connectors and made it a solid harness with no failure points to corrode.

2bab07550e476d27998c5308b68db1f4.jpg


8eb531e46a8196a134caa0acd9d725fa.jpg


These pics only show a single ground but I was advised that one would not be enough so I went back in today and added a second ground. I also swapped out one of trigger wires with a slightly different shade of green so I could distinguish between the triggers. Ch1 has a bright green lead and Ch2 now has a dull green lead.

12541053_1656113464653017_3276389181721121533_n.jpg 12643007_1656113451319685_6155742879739280576_n.jpg
The solenoid needed to be relocated and therefore a custom set of battery cables needed to be built.

The start/stop harness is new as well and features longer wires and oem connectors for use with full length or the shorter couch length start stop switches.

8c82ae041fdb59f4bbba8a6ce3577814.jpg
 
Last edited:

OCD Solutions

Original, Clean and Dependable Solutions
Location
Rentz, GA
Finally got around to connecting to the unit today. Software installation was simple and very straight forward. Once installed, plug in the USB cable, install the cable drivers and you are done.

Nothing fancy but really, what more do you need.?

Once connected, the unit shows "connected" in the upper left corner.

JSTL Software Connected.JPG

Once connected, you can select "read" or "program" to upload the current curve from the unit, or send a new one to it.
Factory Curve from JSTL.JPG

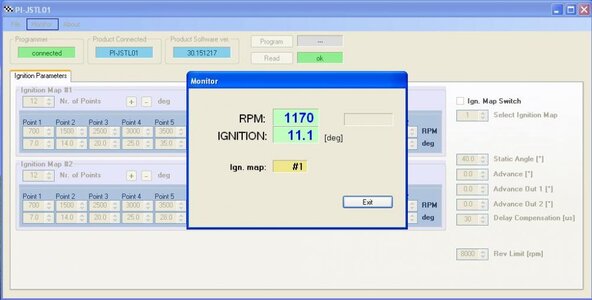
The monitor feature is pretty nice. You can actually leave the programming cable connected while you run and it shows you the actual RPM, the currently active curve, as well as the calculated timing that the unit is outputting.

JSTL Software Monitor WindowJPG.JPG
 
Last edited:

OCD Solutions

Original, Clean and Dependable Solutions
Location
Rentz, GA
Q&A section; Just a summary of any questions that get asked throughout the thread.

Q) What kind of current does the unit draw?
A) Current draw vs RPM;
1200 RPM - 0.4 Amps
2500 RPM - 0.6 Amps
5000 RPM - 1.05 Amps
8000 RPM - 1.4 Amps

Q) How low can the voltage get before the unit will stop firing?
A) I tested the unit to fire both plugs down to around 7.5 volts. Below that, cyl #1 starts cutting out but cyl #2 continues to fire till below 7 volts. Basically, as long as you have the voltage to crank the engine, the unit will fire at least one cylinder.

Q) What temperature does the unit reach during operation?
A) After running the unit at 8000 RPM for an hour and a half straight, the highest temperature I recorded was 93F. The unit was not in an enclosure at the time and the ambient temperature was 70F.

Q) What temperature do the coils reach during operation?
A) After running the unit at 8000 RPM for an hour and a half straight, the highest temperature I recorded was 135F. This testing was done with the surf coils and the cover was off the ebox enclosure at the time.

Q) How is the static timing set?
A) The stator backing plate comes with a timing mark so all you need to do is install the plate and line up the mark with the stock timing mark.

Q) What is the spark output of the coils?
A) The smaller surf coils I have in this thread are said to output 11,000 volts. The flat water use coils will have much, much more. :)

Q) How many curve sets does this unit have?
A) You can program in 2 separate curves and switch between them by grounding a single wire via an external switch.
 
Last edited:

OCD Solutions

Original, Clean and Dependable Solutions
Location
Rentz, GA
Do you think the Velcro will hold up to the severe vibrations that a ski typically sees? That is the only thing I would be a little iffy about..the rest looks great, nice work.

I'm a bit skeptical about that as well. I have a sheet of 1/8" adhesive lined neoprene that I was thinking or wrapping around the control unit to prevent any side movement. I already planned to place a piece on the underside of the cover so the keep it from moving in that direction.

Another thought I have been contemplating is to build a mold and cast a rubber sleeve that will fill all the voids between the unit and the ebox, as well as integrate a placeholder for the solenoid, all into one bulletproof piece. It wouldn't be ready in time for this release but it is something to work towards in the future should there be enough demand for these.
 
Definitely interested in this sealed product for my KDX 900R saltwater boatchaser, but I want to wait to see how initial testing/feedback goes with various riders. That jetinetics flywheel at 1.2 lbs is about 2.5 lbs lighter than stock and looks pretty well built. This setup should obviously add much quicker spool up over a lightened flywheel and enhancer and help some guys in smaller surf.
 
Boyer, another option to hold the cdi is the 3M double sided tape. It's the same stuff that comes with GoPro mounts, etc. I found some on Amazon for like 10 bucks. That stuff is really strong and I'd be shocked if the unit came loose. Great work on the project. You truly are OCD...... but in a good way!

Scottie
 

OCD Solutions

Original, Clean and Dependable Solutions
Location
Rentz, GA
Boyer, another option to hold the cdi is the 3M double sided tape. It's the same stuff that comes with GoPro mounts, etc. I found some on Amazon for like 10 bucks. That stuff is really strong and I'd be shocked if the unit came loose. Great work on the project. You truly are OCD...... but in a good way!

Scottie

I have rolls of the 3M tape here but I wanted to be able to remove the unit quickly to more easily access the programming port. The programming cable is only attached when you need to make changes and there is a rubber plug to seal and protect the terminals the rest of the time. For my current configuration, there is no room to leave the cable connected all the time, plus it's really, really long.

Ideally I would prefer the programming lead be permanently attached and sealed to the unit but that will have to be down the road, or better yet, done at the manufacturer level to avoid the open terminals all together.
 
Last edited:
Top Bottom