Other What did you fab up today? A thread for the home fabricators!

WFO Speedracer

A lifetime ban is like a lifetime warranty !
Location
Alabama
I have a tig, but you’re making me want to buy a spool gun and see how easy it really is. I suck at tig until I practice for 20 minutes every time.
I used one when I was at the welding shop a few years back, I had never even picked one up before much less welded Aluminum.

All of the same things that apply to TIG apply to using a spool gun in that the metal needs to be spotlessly clean to get good results but basically if you do the metal prep and you can mig the spool gun is easy to use.

I welded up a broken ear on a Seadoo APE pipe with it, the whole ear was missing, I rebuilt the ear and sent it out the door, I also welded the Aluminum work shell on the back of my Toyota with it , I believe the shell was for a Ranger , whatever it was for the box was deeper and I had to cut the rear frame and doors down and make them fit, it did a really nice job on something that would have taken forever and a day with a tig machine.
 
Last edited:

WFO Speedracer

A lifetime ban is like a lifetime warranty !
Location
Alabama
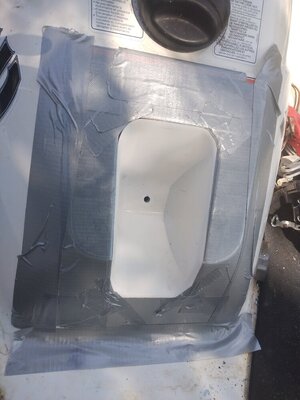
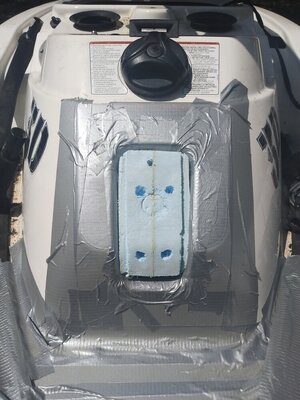
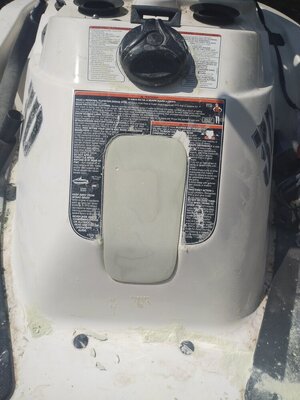
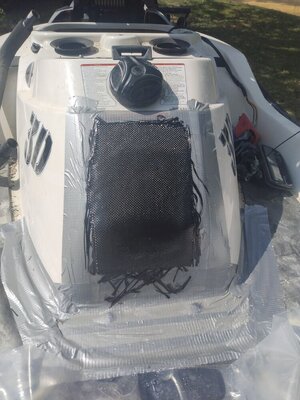
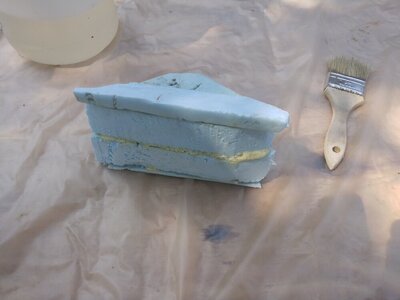
Pulled out the lock mechanism for the cart seat on the 3D, I decided to make a cover for it so I glued up blue Dow foam blocks and shaped them to fit the recess, sanded the foam plug, added holes and grooves on all four sides , put bondoon the plug, taped up the ski reinstalled the plug and laid 8 layers of carbon finer to make the lid.

It's about 100 degrees here today so I should be able to pop it off by tonight , I will have to lay up one more layer on the back side after I pull it and trim it and I will be vacuum bagging that .
 

Attachments

  • IMG_20230820_101147296_BURST001.jpg
    IMG_20230820_101147296_BURST001.jpg
    101.4 KB · Views: 46
  • IMG_20230820_134356012_BURST000_COVER.jpg
    IMG_20230820_134356012_BURST000_COVER.jpg
    147.9 KB · Views: 31
  • IMG_20230820_144149022_BURST002.jpg
    IMG_20230820_144149022_BURST002.jpg
    119.4 KB · Views: 24
  • IMG_20230820_151620672_BURST000_COVER.jpg
    IMG_20230820_151620672_BURST000_COVER.jpg
    145 KB · Views: 41
  • IMG_20230820_101134873_BURST000_COVER.jpg
    IMG_20230820_101134873_BURST000_COVER.jpg
    69.6 KB · Views: 66
Pulled out the lock mechanism for the cart seat on the 3D, I decided to make a cover for it so I glued up blue Dow foam blocks and shaped them to fit the recess, sanded the foam plug, added holes and grooves on all four sides , put bondoon the plug, taped up the ski reinstalled the plug and laid 8 layers of carbon finer to make the lid.

It's about 100 degrees here today so I should be able to pop it off by tonight , I will have to lay up one more layer on the back side after I pull it and trim it and I will be vacuum bagging that .
Mad cheap 3D near me if you need a hull for any reason


WFO Speedracer

A lifetime ban is like a lifetime warranty !
Location
Alabama
Too far for me but thanks for looking out, this hull is really in great shape, I think it has like one gelcoat chip on the whole ski..
 

Myself

manic mechanic
Location
Twin Lakes AR
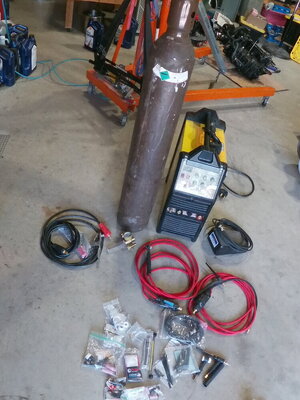
I don't know much about it yet, other than it has good reviews. Previous owner bought it new early 2020 and has tried running it for a total of maybe 4-6 hours. He just couldn't figure out how to weld.
 

WFO Speedracer

A lifetime ban is like a lifetime warranty !
Location
Alabama
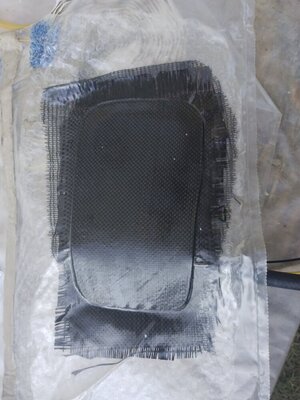
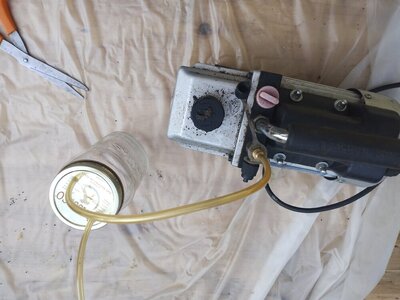
Finishing up the part in the vacuum bag, hopefully it will be smooth enough I can clear it heavily buff it and be done , if not I will keep coating it with resin till it is.

You don't need an expensive setup to bag small parts, a plastic bag, some putty tape , a mason jar , some tubing and a vacuum pump.
 

Attachments

  • IMG_20230824_170250149_BURST000_COVER.jpg
    IMG_20230824_170250149_BURST000_COVER.jpg
    109.8 KB · Views: 25
  • IMG_20230824_170307499_BURST000_COVER.jpg
    IMG_20230824_170307499_BURST000_COVER.jpg
    109.3 KB · Views: 39
Finishing up the part in the vacuum bag, hopefully it will be smooth enough I can clear it heavily buff it and be done , if not I will keep coating it with resin till it is.

You don't need an expensive setup to bag small parts, a plastic bag, some putty tape , a mason jar , some tubing and a vacuum pump.
This is something I want to learn , do ride plates and small stuff
 

WFO Speedracer

A lifetime ban is like a lifetime warranty !
Location
Alabama
Do what I did , read up on it and just try it, you will make mistakes but hopefully never the same mistake twice.

A couple of things I learned along the way are , you don't need special vac bag sealing tape, putty tape for mobile homes works just fine and its much cheaper.

I do recommend the stretchalon plastic bagging film though, regular plastic will not stretch around curves like the stretchalon does, it really depends on what you are doing, if its basically flat it doesn't matter.

I use plastic mesh from Mc,Master carr , fairy cheap and leaves a good texture for secondary bonding if needed , pretty much any kind of plastic tubing works for vacuum tubing, I had a lot of old nebulizer tubing that I used. I didn't have my catch can so I made a quick one from a mason jar , really unless you go way overboard on the resin you could probably skip it, the best catch can I ever had was the pot and lid off and old siphon feed paint gun , you can buy plastic liners for those so you never have to clean it.

A plastic dish scrubber cut into pieces makes an excellent separator to keep the vacuum bag from closing around the vacuum tube , also you can just run the tube in the bag and seal it with putty on small stuff, on bigger stuff I made a vacuum port from two fender washers, two rubber washers and a few plastic fittings for less than 5 bucks, it worked great no need for expensive vacuum ports.

Polyester batting for pillows works great as bleeder cloth, you can buy a bag at Walmart , the quilt batting is a lot easier to use than the loose stuff but it is more expensive.
 
Last edited:
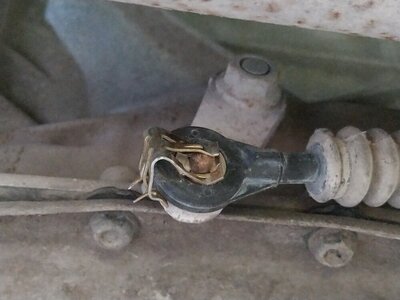
Our dump truck at work decided it was done driving for the day when we got to our first work site of the day. It just stopped shifting, felt like a linkage broke. Being the only mechanic in the company I was voluntold to try and figure it out if possible lol. I found the culprit, shift linkage on the transmission popped off. It looked like it was missing an e-clip so I had to try and figure out how to make one. The truck has these little covers for car seat seatbelt anchors. I used the spring clip from one of those, reshaped it and turned it into a temporary retaining clip. So far so good...
 

Attachments

  • IMG_20230829_085150.jpg
    IMG_20230829_085150.jpg
    160.1 KB · Views: 34
  • IMG_20230829_084101.jpg
    IMG_20230829_084101.jpg
    91.3 KB · Views: 41

SXIPro

JM781 Big Bore
Our dump truck at work decided it was done driving for the day when we got to our first work site of the day. It just stopped shifting, felt like a linkage broke. Being the only mechanic in the company I was voluntold to try and figure it out if possible lol. I found the culprit, shift linkage on the transmission popped off. It looked like it was missing an e-clip so I had to try and figure out how to make one. The truck has these little covers for car seat seatbelt anchors. I used the spring clip from one of those, reshaped it and turned it into a temporary retaining clip. So far so good...
MacGyver has nothing on you buddy. Well done!
 

WFO Speedracer

A lifetime ban is like a lifetime warranty !
Location
Alabama
Our dump truck at work decided it was done driving for the day when we got to our first work site of the day. It just stopped shifting, felt like a linkage broke. Being the only mechanic in the company I was voluntold to try and figure it out if possible lol. I found the culprit, shift linkage on the transmission popped off. It looked like it was missing an e-clip so I had to try and figure out how to make one. The truck has these little covers for car seat seatbelt anchors. I used the spring clip from one of those, reshaped it and turned it into a temporary retaining clip. So far so good...
Thats straight up redneck, I like it !
 

WFO Speedracer

A lifetime ban is like a lifetime warranty !
Location
Alabama
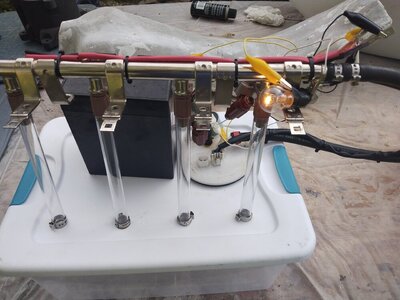
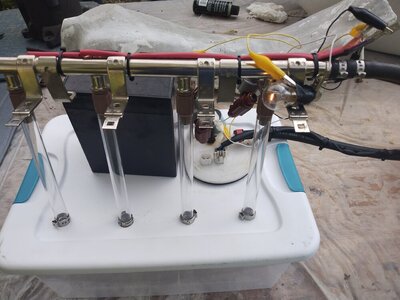
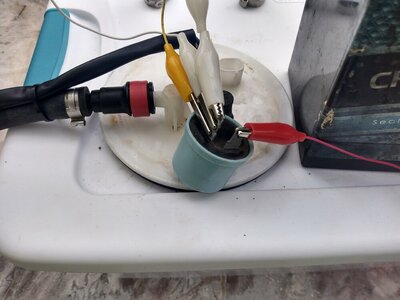
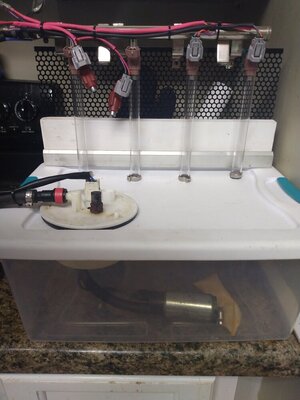
I have a bunch of Yamaha fuel injectors that need cleaning, I could send them off but cleaning 16 injectors at $20-25 a pop plus shipping both ways doesn't sound like my idea of fun so I wanted to make an injector cleaner , it is now at proof of concept stage.

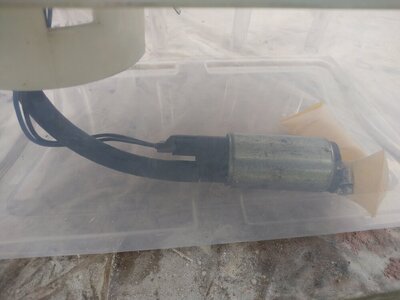
I had some used fuel pumps laying around and a filter was added to the pump, I used a beat stock Yamaha fuel canister which I cut off, I ordered PTEG tubing off of Ebay and it fit the injectors perfectly.

I also had a fuel rail and hose off of a toasted salt watered VX1100 as well as a wiring harness so I put all of this together .

I needed something to pulse the injectors and I started thinking turn signal relay, the bulb is there because the injectors themselves do not produce enough draw to make a bimetallic relay work, like I said proof of concept, I will replace the relay with an LED relay which is not draw dependent.

I had stainless steel Pex clamps that fit the tubes nicely so I put them on both sides of the lid to hold the tubes, I drilled the canister and used three large cotter pins to hold the canister on from underneath.

I do still have to make the back piece that stabilizes the tubes ,I have a nice aluminum piece and perforated metal sheet for that purpose.

I may try to find a nicer container later and add some cutoff valves so I can compare volumes , the cleaner will have to be drained after each use or it will just evaporate so the container is not super important right now .

All the wiring is pigtailed out and covered in heat shrink, the test leads are just there for testing, one switch will power the relay and the fuel pump .
 

Attachments

  • IMG_20230904_173807108_BURST000_COVER.jpg
    IMG_20230904_173807108_BURST000_COVER.jpg
    116.7 KB · Views: 21
  • IMG_20230904_173807108_BURST001.jpg
    IMG_20230904_173807108_BURST001.jpg
    116.1 KB · Views: 19
  • IMG_20230904_173854656_BURST001.jpg
    IMG_20230904_173854656_BURST001.jpg
    79.5 KB · Views: 17
  • IMG_20230904_173858703_HDR.jpg
    IMG_20230904_173858703_HDR.jpg
    90.2 KB · Views: 23

Myself

manic mechanic
Location
Twin Lakes AR
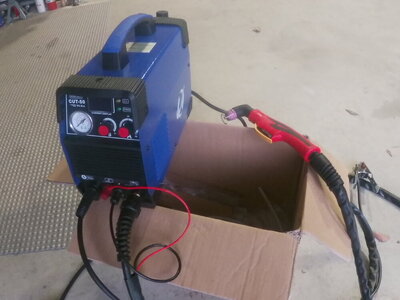
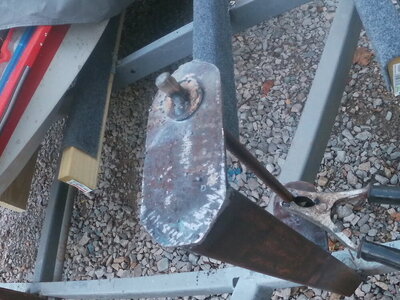
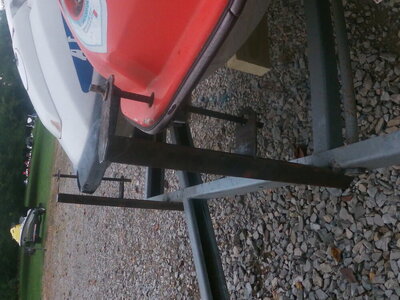
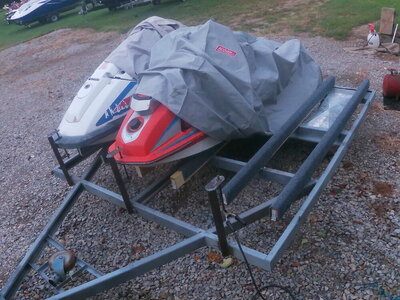
I used my new plasma cutter to make some ears........that I welded onto some angle........to make bow stops for the stand-up trailer I'm building.
 

Attachments

  • GOPR1256.JPG
    GOPR1256.JPG
    91.1 KB · Views: 20
  • GOPR1255.JPG
    GOPR1255.JPG
    173.4 KB · Views: 20
  • GOPR1254.JPG
    GOPR1254.JPG
    154 KB · Views: 18
  • GOPR1253.JPG
    GOPR1253.JPG
    197.9 KB · Views: 26

WFO Speedracer

A lifetime ban is like a lifetime warranty !
Location
Alabama
It's a lot nicer working on this inside in the air conditioning. I added some expanded PVC, painted steel perf and an aluminum C channel.

Two of those injectors , the two that are unplugged are stuck ATM, I am going to work on freeing them up today and see if we can get this thing poppin.
 

Attachments

  • IMG_20230905_120044827_BURST000_COVER.jpg
    IMG_20230905_120044827_BURST000_COVER.jpg
    108.1 KB · Views: 21
Last edited:

OCD Solutions

Original, Clean and Dependable Solutions
Location
Rentz, GA
The Father-In-Laws home made pool heater has seen better days so I had offered to build him a new frame out of aluminum so it would never rot out again.

9fd5258822fa3401b7dcee81cd3bc1bd.jpg

9344293b92b8a3c943084957a6fc2974.jpg

7ade8995bdb9bb90b5ce4284fc797ea5.jpg


After over a year of neglect, I broke out the MIG gun and whipped this up so I can deliver it this weekend when I’m in Charleston for work. Now it’s up to him to swap over the copper tubing and plexiglass lens.

5a49e978ab206d6585c2a52c01b007cb.jpg

670bb06e037a1bf33634a02163790249.jpg

e3444f06295d51b84869a672e6bcc57e.jpg

1090d4c278006ac233fd87b6b3b50f95.jpg
 
Top Bottom