550sx to 750 "All or Nothing" build

Myself

manic mechanic
Location
Twin Lakes AR
I mixed some more epoxy with fairing compound and went over all the rough areas. This thing should be ready for some primer after I block this out.
 

Attachments

  • GOPR1913.JPG
    GOPR1913.JPG
    101.3 KB · Views: 54
  • GOPR1914.JPG
    GOPR1914.JPG
    95.8 KB · Views: 40
  • GOPR1915.JPG
    GOPR1915.JPG
    89.7 KB · Views: 23

Myself

manic mechanic
Location
Twin Lakes AR
I got 4 hours of block sanding in today with 180 grit. I ended up making a curved wooden sanding block to really get down in the rails.
 

Attachments

  • GOPR1923.JPG
    GOPR1923.JPG
    65.7 KB · Views: 23
  • GOPR1924.JPG
    GOPR1924.JPG
    92.4 KB · Views: 19
  • GOPR1926.JPG
    GOPR1926.JPG
    79.6 KB · Views: 20
  • GOPR1920.JPG
    GOPR1920.JPG
    120.5 KB · Views: 18
  • GOPR1919.JPG
    GOPR1919.JPG
    87.6 KB · Views: 16
  • GOPR1922.JPG
    GOPR1922.JPG
    107.4 KB · Views: 17
  • GOPR1928.JPG
    GOPR1928.JPG
    72 KB · Views: 16
  • GOPR1927.JPG
    GOPR1927.JPG
    71.4 KB · Views: 17

Myself

manic mechanic
Location
Twin Lakes AR
I got ALL the block sanding done yesterday. Then did a scuff wash.
 

Attachments

  • GOPR1935.JPG
    GOPR1935.JPG
    165.8 KB · Views: 14
  • GOPR1933.JPG
    GOPR1933.JPG
    202.8 KB · Views: 19

Myself

manic mechanic
Location
Twin Lakes AR
Today, after a couple prep-sol wipe downs, I got 2 coats of Pettit epoxy barrier on the bottom and hood. I laid it down with foam rollers. I like this method because there's no waste fogging through the air, and you get a high build with only a couple coats. It sort of looks Rhino lined right now but will be super slick after blocking and touch ups.
 

Attachments

  • GOPR1936.JPG
    GOPR1936.JPG
    114.9 KB · Views: 23
  • GOPR1940.JPG
    GOPR1940.JPG
    101.9 KB · Views: 21
  • GOPR1937.JPG
    GOPR1937.JPG
    108.8 KB · Views: 21
  • GOPR1938.JPG
    GOPR1938.JPG
    130.1 KB · Views: 22
  • GOPR1939.JPG
    GOPR1939.JPG
    128.9 KB · Views: 22

Myself

manic mechanic
Location
Twin Lakes AR
I got the topside and pole in high build epoxy primer today, and everything topped with a guidecoat. I forgot to mention this on the last post.......anybody doing a build and mixing small batches of 2k primer.......ratios are by VOLUME and NOT WEIGHT. I weighed the cans on my scale and figured by weight that this Pettit will mix at a 5:1 ratio.
All the parts are now curing hard and will be ready for wet block sanding in a couple days.
 

Attachments

  • GOPR1942.JPG
    GOPR1942.JPG
    139.7 KB · Views: 18
  • GOPR1960.JPG
    GOPR1960.JPG
    102 KB · Views: 19
  • GOPR1961.JPG
    GOPR1961.JPG
    98.7 KB · Views: 19
  • GOPR1962.JPG
    GOPR1962.JPG
    102 KB · Views: 17
  • GOPR1951.JPG
    GOPR1951.JPG
    124.9 KB · Views: 16
  • GOPR1944.JPG
    GOPR1944.JPG
    114 KB · Views: 21

Myself

manic mechanic
Location
Twin Lakes AR
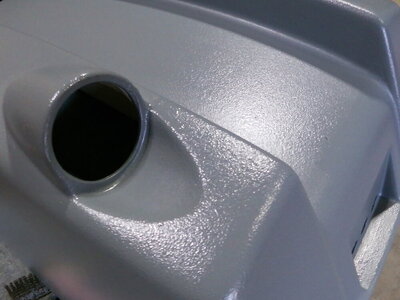
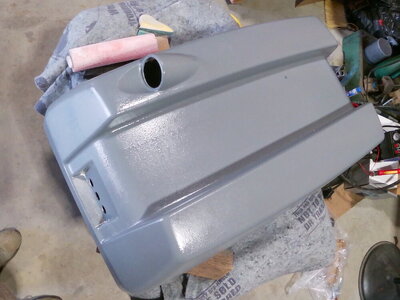
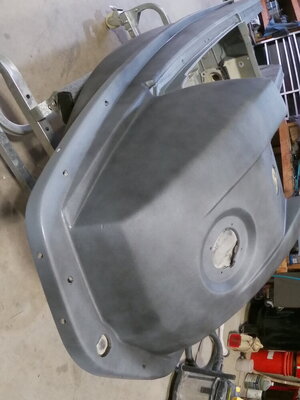
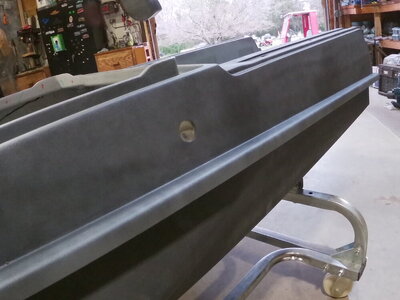
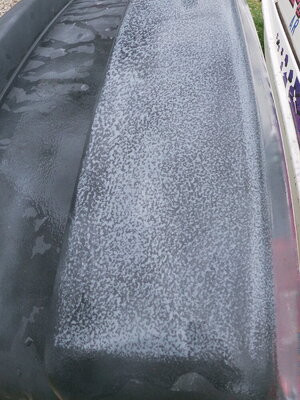
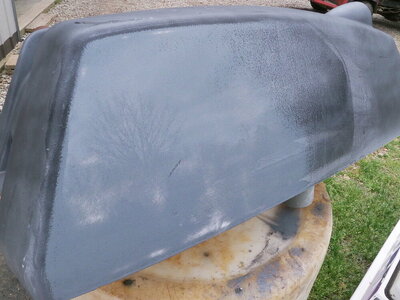
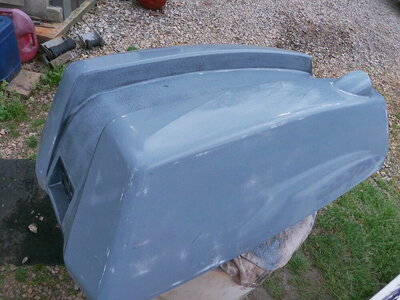
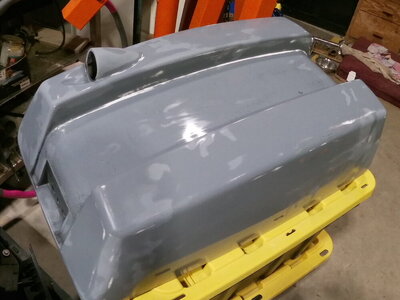
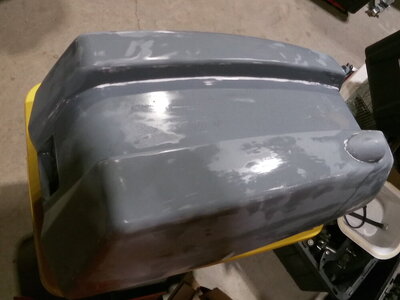
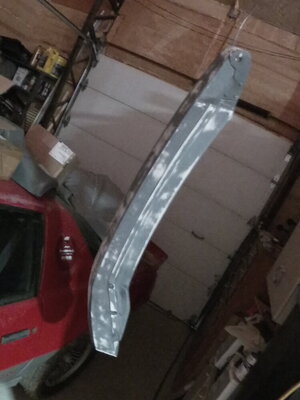
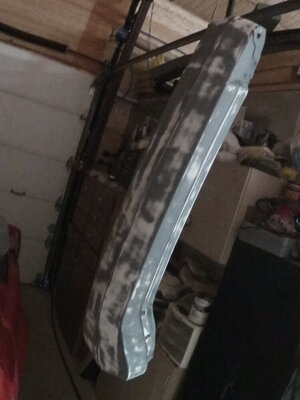
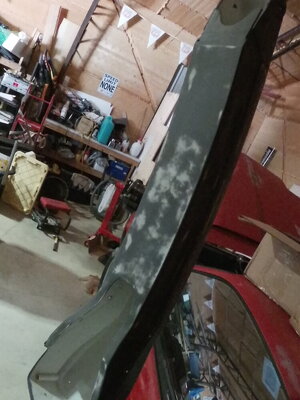
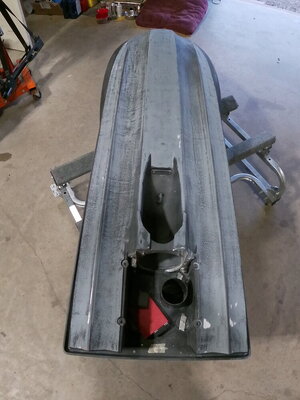
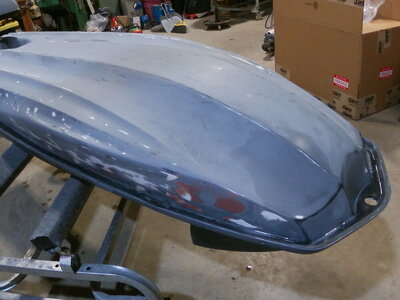
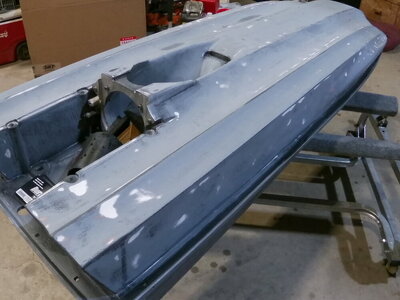
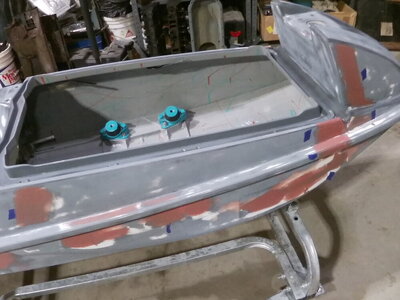
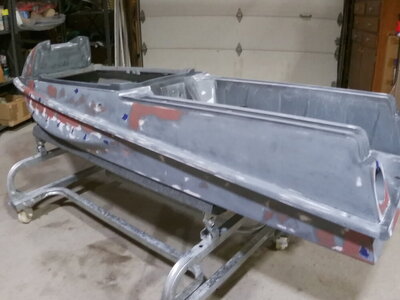
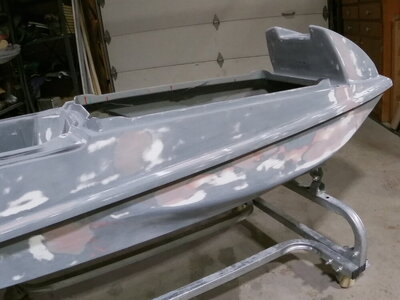
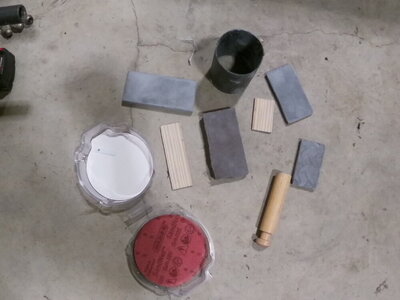
The hood sat in the sun most of the day yesterday, so I thought I'd try to wet sand.........good to go! For this step in the paint/body I'm using 220 on a stiff foam block. You can see pretty quickly how thick and rough the buildup was on that primer. The goal at this point is to block sand down to a smooth primer finish. It's ok to still see some dots of guidecoat, and even some color from UNDER the primer. The reason being, after any filler touch ups the whole thing will be primed again. Then blocked again, then of course a few coats of paint on top. There's still plenty of material going on to cover everything well. You don't have to go through all of this........if you're satisfied with "good enough". But if you want super slick show style paint.......you need to go through all these steps.
 

Attachments

  • GOPR1966.JPG
    GOPR1966.JPG
    176.7 KB · Views: 21
  • GOPR1965.JPG
    GOPR1965.JPG
    175.4 KB · Views: 20
  • GOPR1964.JPG
    GOPR1964.JPG
    158 KB · Views: 21
  • GOPR1968.JPG
    GOPR1968.JPG
    178.4 KB · Views: 26

Myself

manic mechanic
Location
Twin Lakes AR
Not much new to report except I've put about 4 hours into wet blocking out the hood and it's pretty much finished. It came out SUPER straight.
 

Attachments

  • GOPR1972.JPG
    GOPR1972.JPG
    97.9 KB · Views: 27
  • GOPR1973.JPG
    GOPR1973.JPG
    77.4 KB · Views: 32

Myself

manic mechanic
Location
Twin Lakes AR
Another big step the last 2 evenings after work. The engine is pretty much assembled!!! It will still need paint though. I really like the Boyesen 2 stage reeds so I yanked the stockers and installed these before closing up the intake side. On the exhaust side (if you use a 750 manifold) you WILL NEED 2 bolts in the upper holes INSTEAD of the long studs.........that way you can still remove the manifold inside the hull.
 

Attachments

  • GOPR1971.JPG
    GOPR1971.JPG
    151.6 KB · Views: 22
  • GOPR2050.JPG
    GOPR2050.JPG
    138.3 KB · Views: 21
  • GOPR2049.JPG
    GOPR2049.JPG
    151.1 KB · Views: 20
  • GOPR2047.JPG
    GOPR2047.JPG
    138.5 KB · Views: 20
  • GOPR2048.JPG
    GOPR2048.JPG
    93.6 KB · Views: 24

Myself

manic mechanic
Location
Twin Lakes AR
I worked the pole a little bit this evening....err.....wait........
............
........got the pole mostly blocked out. You see all those light and dark areas? Those WERE all highs and lows....peaks and valleys. But now after blocking the surfaces are FLAT. Just wetsanding SMOOTH.....IS NOT the same as being flat. This really shows how wavy and uneven the factory part really was.
 

Attachments

  • GOPR2051.JPG
    GOPR2051.JPG
    85.6 KB · Views: 19
  • GOPR2052.JPG
    GOPR2052.JPG
    79.6 KB · Views: 18
  • GOPR2053.JPG
    GOPR2053.JPG
    119.4 KB · Views: 25

Myself

manic mechanic
Location
Twin Lakes AR
I got a little time in this evening after dinner to start wet sanding the hull. Bottom side first.
 

Attachments

  • GOPR2066.JPG
    GOPR2066.JPG
    124.1 KB · Views: 22

Myself

manic mechanic
Location
Twin Lakes AR
Argh!! I've just had so much going on......... Anyway, finished up the 220 block sanding on the hull bottom today. A few little spots will need touched up but overall I'm VERY pleased with how straight it's turning out.
 

Attachments

  • GOPR2207.JPG
    GOPR2207.JPG
    107.4 KB · Views: 15
  • GOPR2208.JPG
    GOPR2208.JPG
    106.1 KB · Views: 12
  • GOPR2209.JPG
    GOPR2209.JPG
    91.4 KB · Views: 11
  • GOPR2210.JPG
    GOPR2210.JPG
    131.1 KB · Views: 15
  • GOPR2211.JPG
    GOPR2211.JPG
    104.7 KB · Views: 19

Myself

manic mechanic
Location
Twin Lakes AR
No pictures yet......it's 10:10 pm and I just came in. I got almost all the topside blocked after dinner this evening. Probably have pics tomorrow.
 

Myself

manic mechanic
Location
Twin Lakes AR
PICS!!!! You can see low areas that will need filled.
 

Attachments

  • GOPR2212.JPG
    GOPR2212.JPG
    115.4 KB · Views: 16
  • GOPR2213.JPG
    GOPR2213.JPG
    81.7 KB · Views: 16
  • GOPR2214.JPG
    GOPR2214.JPG
    78.9 KB · Views: 14
  • GOPR2215.JPG
    GOPR2215.JPG
    79.1 KB · Views: 14
  • GOPR2216.JPG
    GOPR2216.JPG
    77 KB · Views: 14
  • GOPR2217.JPG
    GOPR2217.JPG
    84.4 KB · Views: 15

Myself

manic mechanic
Location
Twin Lakes AR
I got some work in after dinner again tonight. Most or maybe all, of the low spots are faired in. You'll see little pieces of tape everywhere. If you find all these spots BEFORE you mix up the fairing epoxy, you'll be able to go around and wipe them BEFORE it starts flashing off on you. I've seen guys use chalk for marking as well. I know this looks like A LOT of fairing epoxy wiped everywhere but this MUST be done if you want your final paintjob to turn out nice. Now I'll give it some cure time and hit all those with 120 then 220 wrapped around a paint paddle. Using a hard block for this will keep from digging into any of the surrounding area. The idea is to rub down the new filled areas J U S T down level with the surrounding area. Then everything will be nice and flat. A super smooth surface with nicely laid out paint will still look like poop if the whole thing has more waving on it than a Macy's parade float!!
 

Attachments

  • GOPR2221.JPG
    GOPR2221.JPG
    121 KB · Views: 11
  • GOPR2220.JPG
    GOPR2220.JPG
    110.2 KB · Views: 12
  • GOPR2219.JPG
    GOPR2219.JPG
    107.4 KB · Views: 12
  • GOPR2218.JPG
    GOPR2218.JPG
    103.8 KB · Views: 12
  • GOPR2222.JPG
    GOPR2222.JPG
    88.9 KB · Views: 16

Myself

manic mechanic
Location
Twin Lakes AR
Very sad day for us. We had to put our put our dog Jack to sleep this morning. He was almost 16 and pretty much the picture of health. All at once he didn't want to eat or even walk around the house. Wife stayed up holding him all night. He was breathing fast but otherwise seemed alert. Took him to the vet early and they confirmed his organs were shutting down......just old age. It was a very hard thing to do. Best thing for me is to DO STUFF instead of thinking about it. So I got a good session of emotional sanding in today. I believe the top is ready for another coat of primer. I also included a pic of my sanding arsenal.
 

Attachments

  • GOPR2223.JPG
    GOPR2223.JPG
    103.2 KB · Views: 12
  • GOPR2224.JPG
    GOPR2224.JPG
    94.8 KB · Views: 10
  • GOPR2225.JPG
    GOPR2225.JPG
    114.2 KB · Views: 10
  • GOPR2226.JPG
    GOPR2226.JPG
    78.8 KB · Views: 10

bird

walking on water
Site Supporter
Very sad day for us. We had to put our put our dog Jack to sleep this morning. He was almost 16 and pretty much the picture of health. All at once he didn't want to eat or even walk around the house. Wife stayed up holding him all night. He was breathing fast but otherwise seemed alert. Took him to the vet early and they confirmed his organs were shutting down......just old age. It was a very hard thing to do. Best thing for me is to DO STUFF instead of thinking about it. So I got a good session of emotional sanding in today. I believe the top is ready for another coat of primer. I also included a pic of my sanding arsenal.
Sorry to hear about the pup.

Keep up on the build it's great to see the detail you're putting into this! I'm about to go sand some wood putty in the garage.
 

Myself

manic mechanic
Location
Twin Lakes AR
Sorry to hear about the pup.

Keep up on the build it's great to see the detail you're putting into this! I'm about to go sand some wood putty in the garage.
Thanks. I tend to do any project I take on like it's my own......and I just can't stand the rushed final product look. That's why this is the "All or Nothing" build. If you're going to spend time and money anyway...........do it ALL or just don't do anything!
 
Top Bottom